IntroductieIIIIIIIIIIIIIIIIIIIIIIIIIIIIIIIIIIIIIIIIIIIIIIIIIIIIIIIIIIIIIIIIIIIIIIIIIIIIIIIIIIIIIIIIIIIIIIIIIIIIIIIIIIIIIIIIIIIIIIIIIIIIIIIIIIIIIIIIIIIIIIIIIIIIIIIIIIIIIIIIIIIIIIIIIIIIIIIIIIIIIIIIIIIIIIIIIIIIIIIIIIIIIIII
Beste klant, gefeliciteerd met de aanschaf van deze nieuwe Philips tostirooster. We
hopen dat u veel plezier heeft van het apparaat.
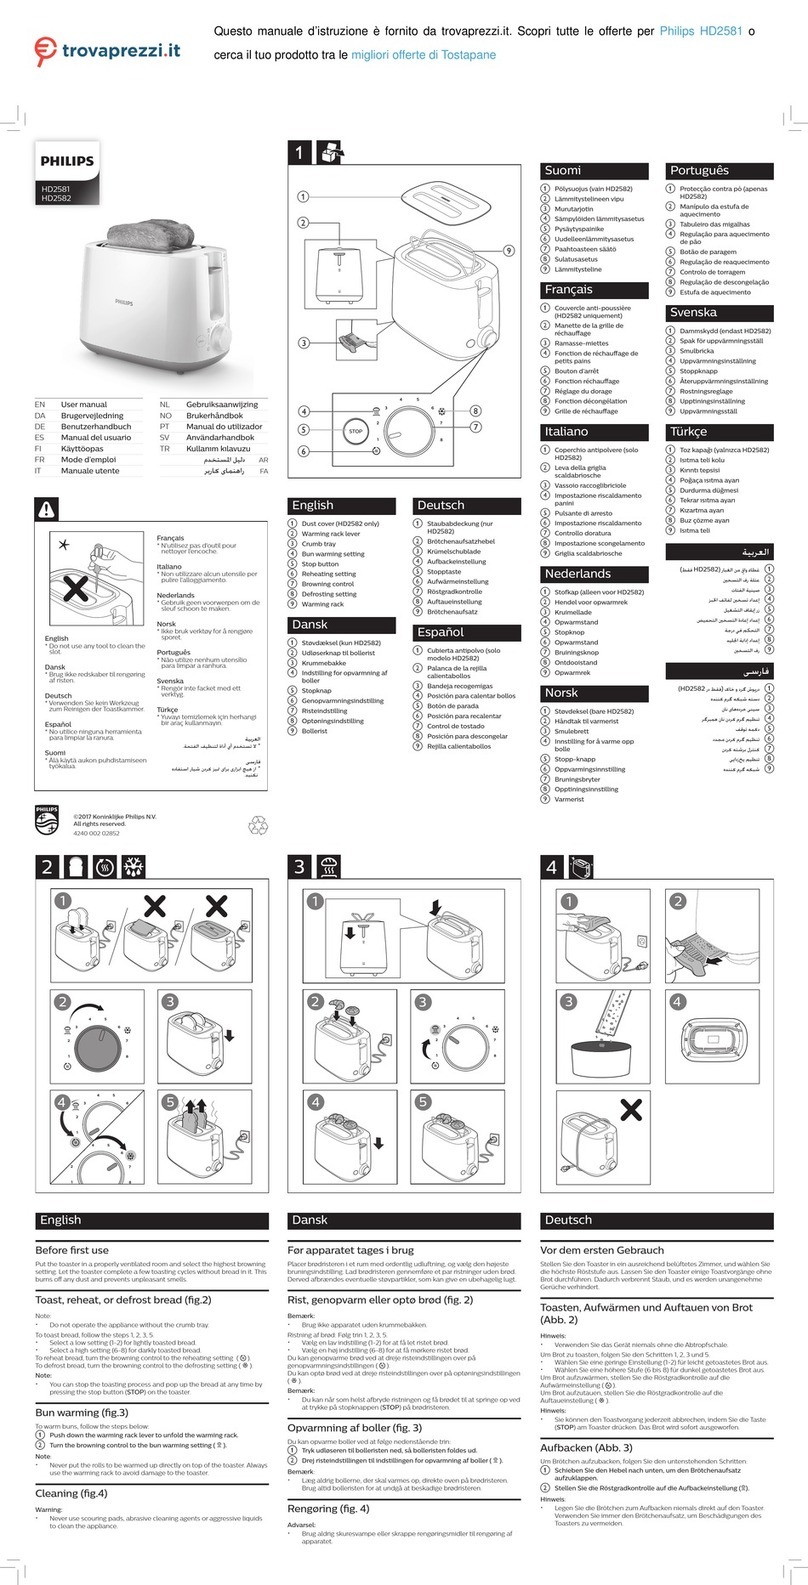
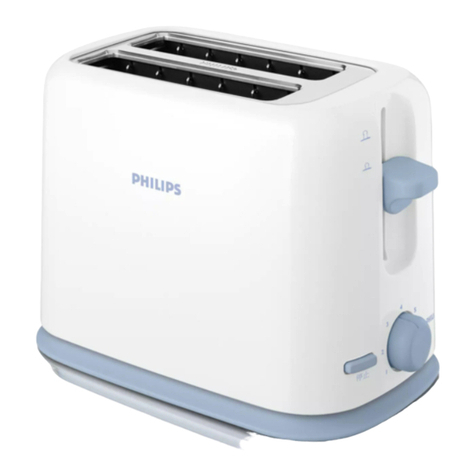
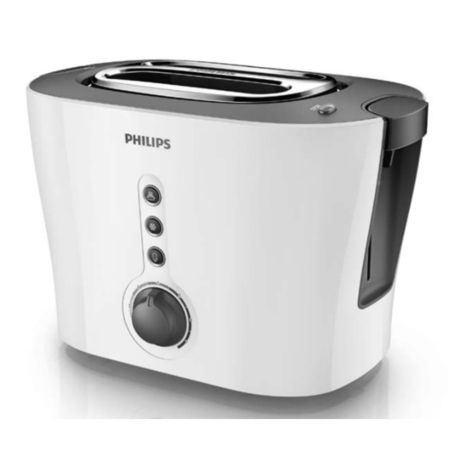
Algemene beschrijving (fig. 1)IIIIIIIIIIIIIIIIIIIIIIIIIIIIIIIIIIIIIIIIIIIIIIIIIIIIIIIIIIIIIIIIIIIIIIIIIIIIIIIIIIIIIIIIIIIIIIIIIIIIIIIIIIIIIIIIIIIIIIIIIIIIIIIIII
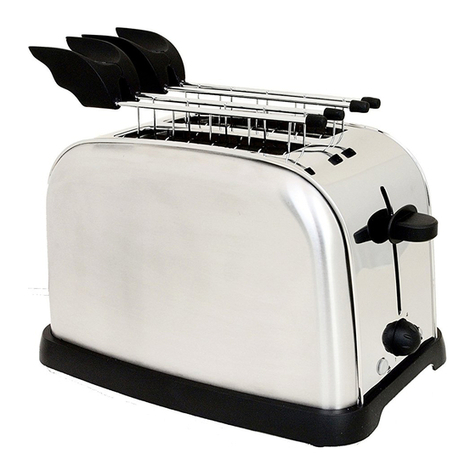
ABroodrekjes met knijphandvat en opvangplaatje
BAan/uitknop (type HD2500) of timer (type HD2502)
CKruimellade
DSnoeropbergruimte
BelangrijkIIIIIIIIIIIIIIIIIIIIIIIIIIIIIIIIIIIIIIIIIIIIIIIIIIIIIIIIIIIIIIIIIIIIIIIIIIIIIIIIIIIIIIIIIIIIIIIIIIIIIIIIIIIIIIIIIIIIIIIIIIIIIIIIIIIIIIIIIIIIIIIIIIIIIIIIIIIIIIIIIIIIIIIIIIIIIIIIIIIIIIIIIIIIIIIIIIIIIIIIIIIIIIIIIIII
Lees deze gebruiksaanwijzing zorgvuldig door voordat u het apparaat gaat gebruiken.
◗Controleer of het voltage aangegeven op de onderkant van het apparaat
overeenkomt met de plaatselijke netspanning voordat u het apparaat aansluit.
◗Laat het apparaat nooit onbeheerd werken.
◗Laat kinderen het apparaat alleen onder streng toezicht bedienen.
◗Houd verpakkingsmateriaal (zoals plastic zakken en stukken karton) buiten
het bereik van kinderen aangezien het gevaar voor hen kan opleveren.
◗Sluit het apparaat altijd aan op een geaard stopcontact.
◗Raak de metalen delen van de tostirooster niet aan wanneer het apparaat
ingeschakeld is, omdat deze tijdens het roosteren zeer heet worden. Raak
alleen de knop en de handgrepen van de broodrekjes aan en til het apparaat
op door de kunststof behuizing vast te pakken.
◗Zorg ervoor dat uw handen droog zijn wanneer u het apparaat gebruikt.
◗Gebruik het apparaat niet onder of in de nabijheid van gordijnen of andere
brandbare materialen en laat het apparaat niet werken onder hangende
keukenkastjes om brandgevaar te vermijden.Wees u ervan bewust dat brood
vlam kan vatten.
◗Plaats geen brood of andere voorwerpen rechtstreeks bovenop het apparaat,
aangezien dit schade kan veroorzaken en tot gevaarlijke situaties kan leiden
(fig. 2).
◗Dit apparaat is uitsluitend bedoeld voor huishoudelijk gebruik. Het dient niet
te worden gebruikt voor industriële of commerciële doeleinden.
Voordat u het apparaat voor de eerste keer gebruiktIIIIIIIIIIIIIIIIIIIIIIIIIIIIIIIII
1Verwijder stickers die eventueel op het apparaat aanwezig zijn en reinig de
behuizing en de bovenkant van het apparaat met een vochtige doek.
2Schuif de kruimellade in de sleuf aan de linkerzijde van het apparaat.
3Laat het apparaat één keer werken zonder dat er brood in zit, zodat het stof
dat zich door opslag eventueel op de verwarmingselementen verzameld heeft,
weggebrand is.
De nieuwe verwarmingselementen kunnen wat rook afgeven.
GebruikIIIIIIIIIIIIIIIIIIIIIIIIIIIIIIIIIIIIIIIIIIIIIIIIIIIIIIIIIIIIIIIIIIIIIIIIIIIIIIIIIIIIIIIIIIIIIIIIIIIIIIIIIIIIIIIIIIIIIIIIIIIIIIIIIIIIIIIIIIIIIIIIIIIIIIIIIIIIIIIIIIIIIIIIIIIIIIIIIIIIIIIIIIIIIIIIIIIIIIIIIIIIIIIIIIIIIIIIIIII
◗Plaats het apparaat op een stabiele en vlakke ondergrond, uit de buurt van
gordijnen en andere brandbare materialen.
◗Sluit het apparaat aan op een geaard stopcontact.
◗U kunt de lengte van het snoer aanpassen door een deel ervan rond de
haken aan de onderzijde van het apparaat te wikkelen (fig. 3).
Brood of tosti's roosteren
U kunt het apparaat gebruiken om brood te roosteren en om tosti's te maken. Een
tosti maakt u door bijvoorbeeld ham en kaas tussen twee dunne sneetjes brood te
plaatsen en de tosti dan in het broodrekje te plaatsen.
1Til de broodrekjes aan de handvatten uit het apparaat.
Raak de metalen delen niet aan wanneer het apparaat ingeschakeld is, omdat deze
tijdens het roosteren zeer heet worden.
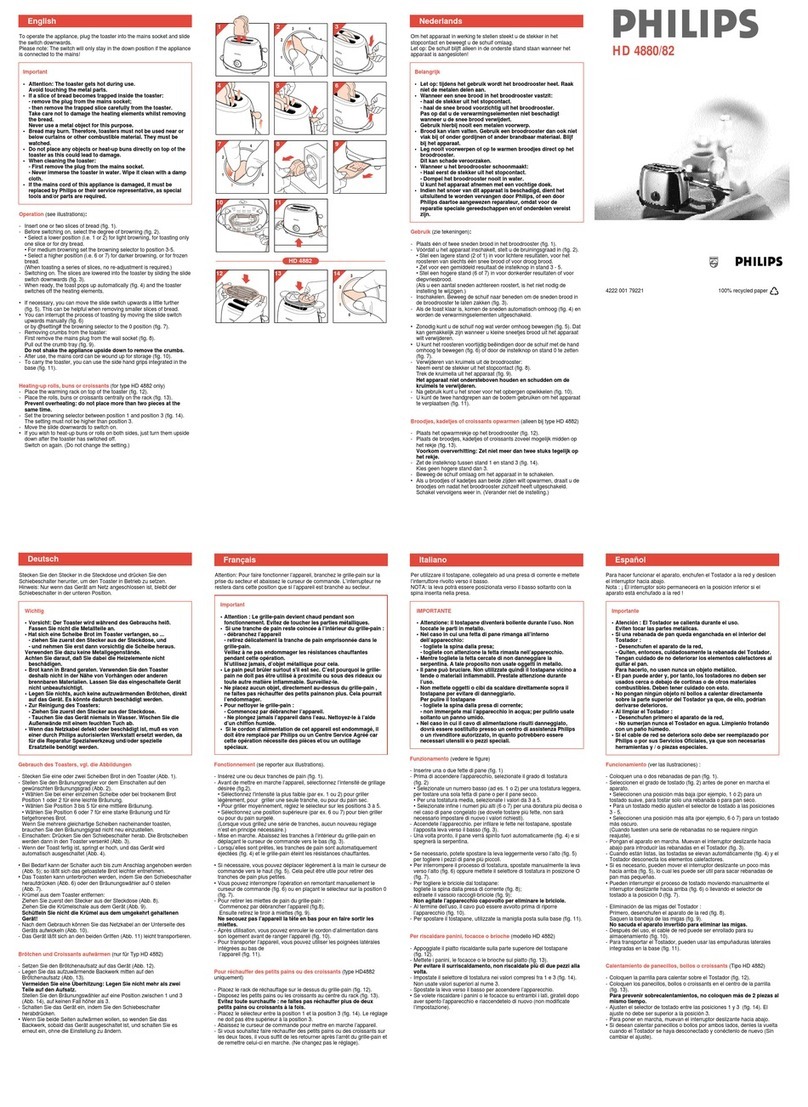
2Plaats een snee brood in ieder broodrekje (fig. 4).
Zorg ervoor dat de sneetjes brood helemaal onderin de rekjes zitten, voor een
goed en gelijkmatig bruiningsresultaat.
3Bedien het apparaat op de hieronder beschreven wijze (fig. 5).
◗Alleen HD2500: zet de aan/uitknop op stand 1.
Schakel het apparaat uit door de aan/uitknop op stand 0 te zetten wanneer het
gewenste bruiningsresultaat bereikt is en neem daarna de broodrekjes uit het
apparaat.
Aangezien dit type niet voorzien is van een timer, schakelt het zichzelf niet
automatisch uit na max. 6 minuten. Bij dit apparaat is het dan ook erg belangrijk dat
u zelf de roostertijd bijhoudt.
◗Alleen HD2502: stel de gewenste roostertijd in door de timerknop rechtsom
te draaien. U kunt de timerknop ook linksom terug naar 0 draaien om de
roostertijd opnieuw in te stellen.
Kies een korte roostertijd (1 tot 2 minuten) voor een licht bruiningsresultaat.
Kies een gemiddelde roostertijd (3 tot 4 minuten) voor een gemiddeld
bruiningsresultaat.
Kies een lange roostertijd (6 tot 6 minuten) door een donker bruiningsresultaat.
BAls het brood vochtig is of als er veel ingrediënten tussen de sneetjes zitten, zal een
langere roostertijd nodig zijn om hetzelfde bruiningsresultaat te bereiken.
BWanneer de broodrooster nog koud is, zult u een enigszins langere roostertijd
moeten instellen (ongeveer 1 minuut extra) om hetzelfde bruiningsresultaat te
bereiken.
Rooster het brood nooit langer dan 6 minuten om te voorkomen dat het verbrandt.
SchoonmakenIIIIIIIIIIIIIIIIIIIIIIIIIIIIIIIIIIIIIIIIIIIIIIIIIIIIIIIIIIIIIIIIIIIIIIIIIIIIIIIIIIIIIIIIIIIIIIIIIIIIIIIIIIIIIIIIIIIIIIIIIIIIIIIIIIIIIIIIIIIIIIIIIIIIIIIIIIIIIIIIIIIIIIIIIIIIIIIIIIIIIIIIIIIIIIIIIII
Dompel het apparaat of het snoer nooit in water of een andere vloeistof.
1Haal de stekker uit het stopcontact.
2Laat het apparaat altijd afkoelen (ongeveer 15-20 minuten) voordat u het
schoonmaakt.
3Reinig het apparaat met een vochtige doek.
4De uitneembare onderdelen (de kruimellade en de broodrekjes) kunt u apart
met een vochtige doek schoonmaken.
5Verwijder kruimels door de kruimellade uit het apparaat te trekken en boven
een vuilnisbak te legen.
6Verwijder ook de kruimels in de broodrekjes door de rekjes op de kop te
houden en de kruimels er zo uit te laten vallen.
OpbergenIIIIIIIIIIIIIIIIIIIIIIIIIIIIIIIIIIIIIIIIIIIIIIIIIIIIIIIIIIIIIIIIIIIIIIIIIIIIIIIIIIIIIIIIIIIIIIIIIIIIIIIIIIIIIIIIIIIIIIIIIIIIIIIIIIIIIIIIIIIIIIIIIIIIIIIIIIIIIIIIIIIIIIIIIIIIIIIIIIIIIIIIIIIIIIIIIIIIIIIIIIIIIIIIIIII
1Haal de stekker uit het stopcontact.
2Laat het apparaat volledig afkoelen voordat u het opbergt.
3Berg het netsnoer op door het rond de haken aan de onderzijde van het
apparaat te wikkelen (fig. 3).
VervangingIIIIIIIIIIIIIIIIIIIIIIIIIIIIIIIIIIIIIIIIIIIIIIIIIIIIIIIIIIIIIIIIIIIIIIIIIIIIIIIIIIIIIIIIIIIIIIIIIIIIIIIIIIIIIIIIIIIIIIIIIIIIIIIIIIIIIIIIIIIIIIIIIIIIIIIIIIIIIIIIIIIIIIIIIIIIIIIIIIIIIIIIIIIIIIIIIIIIIIIIIIIIIIII
Als het netsnoer van dit apparaat beschadigd is, dient het uitsluitend te worden
vervangen door Philips of een door Philips geautoriseerd servicecentrum om
gevaarlijke situaties te voorkomen.
Garantie & serviceIIIIIIIIIIIIIIIIIIIIIIIIIIIIIIIIIIIIIIIIIIIIIIIIIIIIIIIIIIIIIIIIIIIIIIIIIIIIIIIIIIIIIIIIIIIIIIIIIIIIIIIIIIIIIIIIIIIIIIIIIIIIIIIIIIIIIIIIIIIIIIIIIIIIIIIIIIIIIIIIIIIIIIIIIIIIIIII
Als u informatie nodig heeft of als u een probleem heeft, bezoek dan de Philips
Website (www.philips.com), of neem contact op met het Philips Customer Care
Centre in uw land (u vindt het telefoonnummer in het 'worldwide guarantee'
vouwblad). Als er geen Customer Care Centre in uw land is, ga dan naar uw Philips
dealer of neem contact op met de afdeling Service van Philips Domestic Appliances
and Personal Care BV.
NEDERLANDS
IntroducciónIIIIIIIIIIIIIIIIIIIIIIIIIIIIIIIIIIIIIIIIIIIIIIIIIIIIIIIIIIIIIIIIIIIIIIIIIIIIIIIIIIIIIIIIIIIIIIIIIIIIIIIIIIIIIIIIIIIIIIIIIIIIIIIIIIIIIIIIIIIIIIIIIIIIIIIIIIIIIIIIIIIIIIIIIIIIIIIIIIIIIIIIIIIIIIIIIIIIIIIII
Estimado cliente: enhorabuena por adquirir este nuevo tostador de sandwiches
Philips. Esperamos que disfrute de su compra.
Descripción general (fig. 1)IIIIIIIIIIIIIIIIIIIIIIIIIIIIIIIIIIIIIIIIIIIIIIIIIIIIIIIIIIIIIIIIIIIIIIIIIIIIIIIIIIIIIIIIIIIIIIIIIIIIIIIIIIIIIIIIIIIIIIIIIIIIIIIIIIIIIIIIIIIIII
AFunción sandwichera con asa y bandeja que evita el goteo de queso.
BBotón de marcha/parada (on/off) (modelo HD2500) o temporizador (modelo
HD2502)
CBandeja recogemigas
DRecogecable
ImportanteIIIIIIIIIIIIIIIIIIIIIIIIIIIIIIIIIIIIIIIIIIIIIIIIIIIIIIIIIIIIIIIIIIIIIIIIIIIIIIIIIIIIIIIIIIIIIIIIIIIIIIIIIIIIIIIIIIIIIIIIIIIIIIIIIIIIIIIIIIIIIIIIIIIIIIIIIIIIIIIIIIIIIIIIIIIIIIIIIIIIIIIIIIIIIIIIIIIIIIIIIIIIII
Lea atentamente estas instrucciones antes de utilizar el aparato y consérvelas por si
necesitara consultarlas en el futuro.
◗Antes de conectar el aparato, compruebe si el voltaje indicado en la parte
inferior del aparato se corresponde con el voltaje de red local.
◗No deje nunca que el aparato funcione sin vigilancia.
◗Deje que los niños manejen el aparato sólo con supervisión.
◗No deje nunca el embalaje (como las bolsas de plástico y los trozos de
cartón) al alcance de los niños, ya que pueden ser peligrosos.
◗Conecte siempre el aparato a un enchufe con toma de tierra.
◗No toque las piezas metálicas del tostador, ya que éstas se calientan mucho
mientras el aparato está en funcionamiento.Toque únicamente el botón y las
asas de la función sandwichera. Levante el aparato por la parte de plástico.
◗Asegúrese siempre que vaya a utilizar el aparato de que tiene las manos
secas.
◗No ponga a funcionar el aparato debajo o cerca de cortinas u otros
materiales inflamables, ni bajo los armarios de pared para evitar el riesgo de
incendio.Tenga en cuenta que el pan se puede quemar.
◗No coloque pan ni otros objetos directamente encima del tostador, ya que
podría provocar daños y situaciones peligrosas (fig. 2).
◗Este aparato está únicamente pensado para uso doméstico. No está destinado
para su uso comercial o industrial.
Antes del primer usoIIIIIIIIIIIIIIIIIIIIIIIIIIIIIIIIIIIIIIIIIIIIIIIIIIIIIIIIIIIIIIIIIIIIIIIIIIIIIIIIIIIIIIIIIIIIIIIIIIIIIIIIIIIIIIIIIIIIIIIIIIIIIIIIIIIIIIIIIIIIIIIIIIIIIIIIIIIIIIIIIIIII
1Quite las etiquetas y limpie el exterior, la función sandwichera y la parte
superior del tostador con un paño húmedo.
2Inserte la bandeja recogemigas por la parte izquierda del aparato.
3Primero ponga en marcha el tostador sin introducir pan para calentar las
piezas nuevas de calentamiento y quemar el posible polvo que se pueda haber
acumulado durante el almacenamiento.
Las piezas de calentamiento, al ser nuevas, pueden soltar un poco de humo.
Cómo utilizar el aparatoIIIIIIIIIIIIIIIIIIIIIIIIIIIIIIIIIIIIIIIIIIIIIIIIIIIIIIIIIIIIIIIIIIIIIIIIIIIIIIIIIIIIIIIIIIIIIIIIIIIIIIIIIIIIIIIIIIIIIIIIIIIIIIIIIIIIIIIIIIIIIIIIIIIIII
◗Ponga el tostador en una superficie estable y plana, lejos de cortinas u otros
materiales inflamables.
◗Conecte el aparato a un enchufe con toma de tierra.
◗Puede ajustar la longitud del cable enrollando éste en los soportes que se
encuentran en la base del aparato (fig. 3).
Cómo tostar pan o sándwiches
Este tostador se puede utilizar también para hacer sándwiches tostados. Por ejemplo,
ponga simplemente jamón y queso entre dos rebanadas finas de pan e introduzca el
sándwich en el accesorio.
1Ayúdese de las asas para sacar los accesorios del tostador.
No toque las piezas metálicas, ya que se calientan mucho durante el funcionamiento.
2Ponga una rebanada de pan o un sándwich en cada accesorio (fig. 4).
Asegúrese de que el pan o los sándwiches bajan hasta la base del accesorio, para
conseguir así un resultado bueno y uniforme.
3Ponga a funcionar el tostador siguiendo las instrucciones que se indican a
continuación (fig. 5).
◗Sólo para el modelo HD2500: coloque el botón de marcha/parada en la
posición 1.
Una vez que haya logrado el resultado deseado, desconecte el aparato colocando el
botón marcha/parada en la posición 0. A continuación, extraiga el/los accesorios.
Puesto que este modelo no tiene temporizador, no se desconectará
automáticamente transcurridos 6 minutos. En este caso, es muy importante que
controle el tiempo de tostado.
◗Sólo para el modelo HD2502: seleccione el tiempo de tostado deseado
girando el botón del temporizador en sentido de las agujas del reloj.También
puede girar el botón del temporizador en sentido contrario hasta 0 si quiere
volver a seleccionar el tiempo de tostado.
Seleccione un tiempo de tostado bajo (de 1 a 2 minutos) para conseguir pan poco
tostado.
Seleccione un tiempo de tostado medio (de 3 a 4 minutos) para conseguir pan
medianamente tostado.
Seleccione un tiempo de tostado alto (de 5 a 6 minutos) para conseguir pan muy
tostado.
BSi el pan está húmedo o si ha puesto demasiados ingredientes entre las rebanadas,
el aparato necesitará más tiempo para alcanzar el mismo resultado de tostado.
BCuando el tostador esté frío, necesitará más tiempo (aprox. 1 minuto extra) para
conseguir el mismo resultado.
No tueste nunca el pan durante más de 6 minutos, para evitar que se queme.
LimpiezaIIIIIIIIIIIIIIIIIIIIIIIIIIIIIIIIIIIIIIIIIIIIIIIIIIIIIIIIIIIIIIIIIIIIIIIIIIIIIIIIIIIIIIIIIIIIIIIIIIIIIIIIIIIIIIIIIIIIIIIIIIIIIIIIIIIIIIIIIIIIIIIIIIIIIIIIIIIIIIIIIIIIIIIIIIIIIIIIIIIIIIIIIIIIIIIIIIIIIIIIIIIIIIIIIIIIIIII
No sumerja el aparato ni el cable de red en agua u otro líquido.
1Desenchufe el aparato.
2Antes de limpiar el aparato, deje siempre que se enfríe (aprox. entre 15 y 20
minutos).
3Limpie el tostador con un paño húmedo.
4Las piezas extraíbles, como el recogemigas y los accesorios de función
sandwichera se pueden limpiar por separado con un paño húmedo.
5Para quitar las migas, saque el recogemigas del aparato y vacíelo sobre el
cubo de la basura.
6Para eliminar las migas de los accesorios función sandwichera, saque los
accesorios del tostador y colóquelos boca abajo. De esta forma, caerán las
migas.
Cómo guardar el aparatoIIIIIIIIIIIIIIIIIIIIIIIIIIIIIIIIIIIIIIIIIIIIIIIIIIIIIIIIIIIIIIIIIIIIIIIIIIIIIIIIIIIIIIIIIIIIIIIIIIIIIIIIIIIIIIIIIIIIIIIIIIIIIIIIIIIIIIIIIIIIIIIIIII
1Desenchufe el aparato.
2Antes de guardarlo, deje que el aparato se enfríe totalmente.
3Enrolle el cable alrededor de los soportes que se encuentran en la base del
aparato (fig. 3).
SustituciónIIIIIIIIIIIIIIIIIIIIIIIIIIIIIIIIIIIIIIIIIIIIIIIIIIIIIIIIIIIIIIIIIIIIIIIIIIIIIIIIIIIIIIIIIIIIIIIIIIIIIIIIIIIIIIIIIIIIIIIIIIIIIIIIIIIIIIIIIIIIIIIIIIIIIIIIIIIIIIIIIIIIIIIIIIIIIIIIIIIIIIIIIIIIIIIIIIIIIIIIIIIIIIII
Si el cable de red del aparato estuviera deteriorado, deberá ser siempre sustituido
por Philips o un centro de servicio autorizado por Philips, para evitar situaciones
peligrosas.
Garantía y servicioIIIIIIIIIIIIIIIIIIIIIIIIIIIIIIIIIIIIIIIIIIIIIIIIIIIIIIIIIIIIIIIIIIIIIIIIIIIIIIIIIIIIIIIIIIIIIIIIIIIIIIIIIIIIIIIIIIIIIIIIIIIIIIIIIIIIIIIIIIIIIIIIIIIIIIIIIIIIIIIIIIIIIIIIIIIIIII
Si necesita información o si tiene algún problema, visite la página web de Philips en
www.philips.com o póngase en contacto con el Servicio Philips de Atención al
Cliente de su país (encontrará el número de teléfono en el folleto de la Garantía
Mundial). Si en su país no hay Servicio Philips de Atención al Cliente, diríjase a su
distribuidor local Philips o póngase en contacto con el Service Department of Philips
Domestic Appliances and Personal Care BV.
ESPAÑOL
IntroduçãoIIIIIIIIIIIIIIIIIIIIIIIIIIIIIIIIIIIIIIIIIIIIIIIIIIIIIIIIIIIIIIIIIIIIIIIIIIIIIIIIIIIIIIIIIIIIIIIIIIIIIIIIIIIIIIIIIIIIIIIIIIIIIIIIIIIIIIIIIIIIIIIIIIIIIIIIIIIIIIIIIIIIIIIIIIIIIIIIIIIIIIIIIIIIIIIIIIIIIIIIIIIIIIII
Caro cliente, parabéns pela compra da sua nova sanduicheira Philips. Esperamos que
fique satisfeito(a) com os resultados.
Descrição geral (fig. 1) IIIIIIIIIIIIIIIIIIIIIIIIIIIIIIIIIIIIIIIIIIIIIIIIIIIIIIIIIIIIIIIIIIIIIIIIIIIIIIIIIIIIIIIIIIIIIIIIIIIIIIIIIIIIIIIIIIIIIIIIIIIIIIIIIIIIIIIIIIIIIIIIIIIIIIIIIIIIIIII
ACestos para o pão com pega de apertar e bandeja para aparar os pingos do
queijo
Bnterruptor (mod. HD2500) ou temporizador (mod. HD2502)
CBandeja para migalhas
DEnrolador do fio
ImportanteIIIIIIIIIIIIIIIIIIIIIIIIIIIIIIIIIIIIIIIIIIIIIIIIIIIIIIIIIIIIIIIIIIIIIIIIIIIIIIIIIIIIIIIIIIIIIIIIIIIIIIIIIIIIIIIIIIIIIIIIIIIIIIIIIIIIIIIIIIIIIIIIIIIIIIIIIIIIIIIIIIIIIIIIIIIIIIIIIIIIIIIIIIIIIIIIIIIIIIIIIIIIII
Antes de usar o aparelho, leia estas instruções com atenção e guarde-as para uma
eventual consulta futura.
◗Antes de ligar à corrente, verifique se a voltagem indicada na parte de baixo
da sanduicheira corresponde à voltagem do local.
◗Nunca deixe a sanduicheira ligada sem vigilância.
◗As crianças só devem trabalhar com a sanduicheira sob a sua vigilância.
◗Nunca deixe os materiais da embalagem (como os sacos de plástico e os
cartões) ao alcance das crianças porque podem tornar-se perigosos.
◗Ligue sempre a uma tomada com terra.
◗Evite tocar as partes metálicas da sanduicheira porque aquecem bastante
durante o funcionamento.Toque apenas no botão e aperte as pegas dos
cestos do pão. Levante o aparelho segurando-o pelo corpo em plástico.
◗Certifique-se sempre que tem as mãos secas quando usar o aparelho.
◗Não ligue a sanduicheira debaixo ou perto de cortinas e outros materiais
inflamáveis ou dentro de armários para evitar o risco de atear fogo.Tenha em
atenção que o pão pode arder.
◗Não coloque pão ou qualquer objecto directamente sobre a sanduicheira,
porque poderá ocasionar estragos ou situações perigosas (fig. 2).
◗Este aparelho destina-se apenas a uso doméstico. Não é próprio para uma
utilização comercial ou industrial.
Antes da primeira utilizaçãoIIIIIIIIIIIIIIIIIIIIIIIIIIIIIIIIIIIIIIIIIIIIIIIIIIIIIIIIIIIIIIIIIIIIIIIIIIIIIIIIIIIIIIIIIIIIIIIIIIIIIIIIIIIIIIIIIIIIIIIIIIIIIIIIIIIIIII
1Remova todos os autocolantes e limpe o corpo, os cestos do pão e a parte
de cima do aparelho com um pano húmido.
2Introduza a bandeja para as migalhas no lado esquerdo do aparelho.
3Deixe que se efectue um primeiro ciclo de torragem sem colocar pão para
aquecer as resistências novas e queimar alguma poeira que se possa ter
acumulado durante o armazenamento do aparelho.
As novas resistências podem deitar algum fumo.
UtilizaçãoIIIIIIIIIIIIIIIIIIIIIIIIIIIIIIIIIIIIIIIIIIIIIIIIIIIIIIIIIIIIIIIIIIIIIIIIIIIIIIIIIIIIIIIIIIIIIIIIIIIIIIIIIIIIIIIIIIIIIIIIIIIIIIIIIIIIIIIIIIIIIIIIIIIIIIIIIIIIIIIIIIIIIIIIIIIIIIIIIIIIIIIIIIIIIIIIIIIIIIIIIIIIIIIIIIII
◗Coloque o aparelho sobre uma superfície estável e plana, afastado de cortinas
e outros materiais inflamáveis.
◗Ligue o aparelho numa tomada com terra.
◗O comprimento do fio pode ser ajustado enrolando-o nos suportes à volta
da base do aparelho (fig. 3).
Torrar pão ou preparar sanduiches
Este aparelho também pode ser usado para preparar tostas. Basta colocar, por ex.,
fiambre e queijo entre duas fatias de pão finas e introduzir esta sanduiche no cesto.
1Levante os cestos do pão para fora segurando pelas pegas.
Evite tocar nas partes metálicas porque ficam quentes durante o funcionamento.
2Coloque uma fatia de pão ou uma tosta em cada cesto (fig. 4).
Certifique-se que as fatias de pão ou as tostas ficam no fundo dos cestos para obter
um bom resultado, com uma torragem uniforme.
3Ligue o aparelho seguindo as instruções abaixo (fig. 5).
◗Apenas HD2500: regule o interruptor para 1.
Uma vez obtido o resultado pretendido, desligue o aparelho posicionando o
interruptor em 0. Em seguida, retire o(s) cesto(s) do pão.
Como este modelo não tem um temporizador, não se desliga automaticamente
após 6 minutos. Por isso, é impor tante que siga o processo de per to.
◗Apenas HD2502: seleccione o tempo pretendido rodando o botão do
temporizador para a direita.Também pode rodar o botão para a esquerda,
para a posição 0, se quiser limpar o tempo seleccionado.
Seleccione um tempo curto (1 a 2 minutos) para torrar levemente.
Seleccione um tempo médio (3 a 4 minutos) se pretender uma torragem média.
Seleccione mais tempo (5 a 6 minutos) se gostar das torradas escuras.
BSe o pão estiver húmido ou se tiver colocado muitos ingredientes nas tostas, o
aparelho precisará de mais tempo para produzir os mesmos resultados.
BQuando o aparelho está frio, precisa de mais tempo para torrar o pão (aprox. mais
1 minuto) e produzir os mesmos resultados.
Nunca torre o pão por mais do que 6 minutos para evitar que ele se queime e
arda.
LimpezaIIIIIIIIIIIIIIIIIIIIIIIIIIIIIIIIIIIIIIIIIIIIIIIIIIIIIIIIIIIIIIIIIIIIIIIIIIIIIIIIIIIIIIIIIIIIIIIIIIIIIIIIIIIIIIIIIIIIIIIIIIIIIIIIIIIIIIIIIIIIIIIIIIIIIIIIIIIIIIIIIIIIIIIIIIIIIIIIIIIIIIIIIIIIIIIIIIIIIIIIIIIIIIIIIIIIIIIIII
Não mergulhe o aparelho ou o cabo de alimentação em água ou qualquer outro
líquido.
1Desligue da corrente.
2Deixe arrefecer (cerca de 15 a 20 minutos) antes de proceder à limpeza.
3Limpe o aparelho com um pano húmido.
4As peças desmontáveis, como a bandeja para as migalhas e os cestos do pão,
podem ser limpas à parte com um pano húmido.
5Limpe as migalhas do aparelho retirando a bandeja para fora e esvaziando-a
sobre o caixote do lixo.
6As migalhas dos cestos do pão devem ser limpas retirando os cestos para
fora do aparelho e virando-os ao contrário. Desta forma as migalhas caem.
ArrumaçãoIIIIIIIIIIIIIIIIIIIIIIIIIIIIIIIIIIIIIIIIIIIIIIIIIIIIIIIIIIIIIIIIIIIIIIIIIIIIIIIIIIIIIIIIIIIIIIIIIIIIIIIIIIIIIIIIIIIIIIIIIIIIIIIIIIIIIIIIIIIIIIIIIIIIIIIIIIIIIIIIIIIIIIIIIIIIIIIIIIIIIIIIIIIIIIIIIIIIIIIIIIIIII
1Desligue da corrente.
2Deixe arrefecer completamente antes de arrumar.
3Enrole o fio nos suportes à volta da base do aparelho (fig. 3).
SubstituiçãoIIIIIIIIIIIIIIIIIIIIIIIIIIIIIIIIIIIIIIIIIIIIIIIIIIIIIIIIIIIIIIIIIIIIIIIIIIIIIIIIIIIIIIIIIIIIIIIIIIIIIIIIIIIIIIIIIIIIIIIIIIIIIIIIIIIIIIIIIIIIIIIIIIIIIIIIIIIIIIIIIIIIIIIIIIIIIIIIIIIIIIIIIIIIIIIIIIIIIIIIIII
Se o cabo de alimentação estiver estragado, só deverá ser substituído pela Philips ou
por um concessionário autorizado pela Philips de modo a evitar o risco de situações
complicadas para o utilizador.
Garantia e assistênciaIIIIIIIIIIIIIIIIIIIIIIIIIIIIIIIIIIIIIIIIIIIIIIIIIIIIIIIIIIIIIIIIIIIIIIIIIIIIIIIIIIIIIIIIIIIIIIIIIIIIIIIIIIIIIIIIIIIIIIIIIIIIIIIIIIIIIIIIIIIIIIIIIIIIIIIIIIIIIIIIIII
Se necessitar de informações ou se tiver algum problema, por favor consulte a
página da Philips em www.philips.pt ou contacte o Centro de Informação ao
Consumidor Philips do seu País (os números de telefone encontram-se no folheto
da garantia mundial). Se não existir um Centro de Informação ao Consumidor no
seu país, dirija-se a um agente Philips ou contacte o Departamento de Service da
Philips Domestic Appliances and Personal Care BV.
PORTUGUÊS
IntroduktionIIIIIIIIIIIIIIIIIIIIIIIIIIIIIIIIIIIIIIIIIIIIIIIIIIIIIIIIIIIIIIIIIIIIIIIIIIIIIIIIIIIIIIIIIIIIIIIIIIIIIIIIIIIIIIIIIIIIIIIIIIIIIIIIIIIIIIIIIIIIIIIIIIIIIIIIIIIIIIIIIIIIIIIIIIIIIIIIIIIIIIIIIIIIIIIIIIIIIIIII
Vi är glada att du valde en brödrost från Philips, och vi hoppas att du kommer ha
mycket glädje av den.
Allmän beskrivning (bild 1)IIIIIIIIIIIIIIIIIIIIIIIIIIIIIIIIIIIIIIIIIIIIIIIIIIIIIIIIIIIIIIIIIIIIIIIIIIIIIIIIIIIIIIIIIIIIIIIIIIIIIIIIIIIIIIIIIIIIIIIIIIIIIIIIIIIIIIIIIIIII
ABrödkorg med klämhandtag och uppsamlingsbricka för smält ost
BStart-/stoppknapp (modell HD2500) eller timer (modell HD2502)
CUppsamlingsbricka för brödsmulor
DSladdförvaring
ViktigtIIIIIIIIIIIIIIIIIIIIIIIIIIIIIIIIIIIIIIIIIIIIIIIIIIIIIIIIIIIIIIIIIIIIIIIIIIIIIIIIIIIIIIIIIIIIIIIIIIIIIIIIIIIIIIIIIIIIIIIIIIIIIIIIIIIIIIIIIIIIIIIIIIIIIIIIIIIIIIIIIIIIIIIIIIIIIIIIIIIIIIIIIIIIIIIIIIIIIIIIIIIIIIIIIIIIIIIIIIIIIIIIII
Läs dessa bruksanvisningar noga innan du använder brödrosten och spara dem för
framtida bruk.
◗Kontrollera att den angivna voltstyrkan på apparatens undersida
överensstämmer med voltstyrkan i vägguttaget innan du ansluter den.
◗Använd aldrig brödrosten utan tillsyn.
◗Övervaka rosten noga när den används av barn.
◗Lämna inga förpackningsmaterial (plastpåsar eller kartongbitar) inom räckhåll
för barn eftersom det kan vara farligt.
◗Anslut endast apparaten till jordade uttag.
◗Vidrör inte apparatens metalldelar eftersom de blir heta under användning.
Rör endast knappen och brödkorgens klämhandtag. Lyft apparaten i dess
plastdelar.
◗Se alltid till att ha torra händer när du använder apparaten.
◗För att undvika brandrisk bör du aldrig använda apparaten under skåp eller
nära gardiner eller andra material som lätt fattar eld. Observera att bröd kan
börja binna.
◗Lägg inte bröd eller annat direkt ovanpå brödrosten, eftersom detta kan ge
skador eller leda till farliga situationer (fig. 2).
◗Den här brödrosten är endast avsedd för hushållsbruk, och är inte tänkt att
användas i affärssyfte eller för industriellt bruk.
Innan du använder brödrosten för första gångenIIIIIIIIIIIIIIIIIIIIIIIIIIIIIIIIIIIIIIIIIIIIIIIIIIII
1Avlägsna eventuella klistermärken och torka av brödkorgen samt brödrostens
sidor och överdel med en fuktig trasa.
2För in smuluppsamlingsbrickan i apparatens vänstra sida.
3Starta brödrosten första gången utan bröd för att förvärma de nya
värmeelementen samt bränna bort eventuellt damm som kan ha samlats
under förvaringen.
De nya värmeelementen kan ryka lite i början.
AnvändningIIIIIIIIIIIIIIIIIIIIIIIIIIIIIIIIIIIIIIIIIIIIIIIIIIIIIIIIIIIIIIIIIIIIIIIIIIIIIIIIIIIIIIIIIIIIIIIIIIIIIIIIIIIIIIIIIIIIIIIIIIIIIIIIIIIIIIIIIIIIIIIIIIIIIIIIIIIIIIIIIIIIIIIIIIIIIIIIIIIIIIIIIIIIIIIIIIIIIIIIIIIII
◗Placera brödrosten på en stabil och platt yta, på tillräckligt avstånd från
gardiner och andra material som lätt fattar eld.
◗Anslut rosten till ett jordat vägguttag.
◗Sladdens längd kan anpassas genom att delar av den lindas upp runt krokarna
under apparaten (fig. 3).
Rosta bröd eller bredda smörgåsar
Den här brödrosten kan användas för att rosta bredda smörgåsar. Lägg till exempel
skinka och ost mellan två tunna skivor bröd och lägg smörgåsen i korgen.
1Lyft brödkorgarna ur brödrosten med hjälp av handtagen.
Undvik att röra några metalldelar, eftersom de blir heta under rostning.
2Lägg en skiva bröd eller en smörgås i varje brödkorg (fig. 4).
Se till att brödskivorna eller smörgåsarna hamnar längst ned i varje brödkorg för
bästa resultat.
3Följ instruktionerna nedan när du använder brödrosten (fig. 5).
◗Endast HD2500: ställ start-/stoppknappen i läge 1.
Så snart du rostat klart stänger du av apparaten genom att vrida knappen till läge 0.
Lyft sedan ur brödkorgarna.
Eftersom den här modellen saknar timer kommer den inte att slås av automatiskt
efter 6 minuter. Därför är det väldigt viktigt att du håller ett noggrannt öga på
rostningstiden.
◗Endast HD2502: välj önskad rostningstid genom att vrida timern till medsols.
Du kan också vrida timern motsols till noll för att nollställa rostningstiden.
Välj en kort rostningstid (en till två minuter) för en ljus rostning.
Välj en mellanlång rostningstid (tre till fyra minuter) för medelrostning.
Välj en lång rostningstid (fem till sex minuter) för mörk rostning.
BOm brödet är fuktigt eller om du har lagt många ingredienser mellan skivorna,
behövs mer tid för att åstadkomma samma resultat.
BNär brödrosten är kall tar rostningen något längre tid (omkring en minut längre).
Rosta aldrig bröd i mer än sex minuter så undviker du att bränna brödet.
RengöringIIIIIIIIIIIIIIIIIIIIIIIIIIIIIIIIIIIIIIIIIIIIIIIIIIIIIIIIIIIIIIIIIIIIIIIIIIIIIIIIIIIIIIIIIIIIIIIIIIIIIIIIIIIIIIIIIIIIIIIIIIIIIIIIIIIIIIIIIIIIIIIIIIIIIIIIIIIIIIIIIIIIIIIIIIIIIIIIIIIIIIIIIIIIIIIIIIIIIIIIIIIIIIIIIII
Doppa inte brödrosten eller sladden i vatten eller i någon annan vätska.
1Dra ut stickkontakten ur vägguttaget.
2Låt alltid brödrosten svalna (i omkring 15 till 20 minuter) innan du rengör
den.
3Gör ren utsidan med en fuktad trasa.
4De löstagbara delarna, som till exempel smulbricka och brödkorgar, kan
rengöras separat med en fuktad trasa.
5Avlägsna alla smulor från apparaten genom att dra ut smulbrickamn och
tömma den i ett avfallskärl.
6Ta också bort alla smulor från brödkorgarna genom att lyfta ur brödkorgarna
ur brödrosten och vända dem upp och ned för att tömma dem från smulor.
FörvaringIIIIIIIIIIIIIIIIIIIIIIIIIIIIIIIIIIIIIIIIIIIIIIIIIIIIIIIIIIIIIIIIIIIIIIIIIIIIIIIIIIIIIIIIIIIIIIIIIIIIIIIIIIIIIIIIIIIIIIIIIIIIIIIIIIIIIIIIIIIIIIIIIIIIIIIIIIIIIIIIIIIIIIIIIIIIIIIIIIIIIIIIIIIIIIIIIIIIIIIIIIIIIIIIIIIIII
1Dra ut stickkontakten ur vägguttaget.
2Låt apparaten svalna helt innan du ställer undan den.
3Förvara sladden genom att linda den kring krokarna på apparatens nederdel
(fig. 3).
ByteIIIIIIIIIIIIIIIIIIIIIIIIIIIIIIIIIIIIIIIIIIIIIIIIIIIIIIIIIIIIIIIIIIIIIIIIIIIIIIIIIIIIIIIIIIIIIIIIIIIIIIIIIIIIIIIIIIIIIIIIIIIIIIIIIIIIIIIIIIIIIIIIIIIIIIIIIIIIIIIIIIIIIIIIIIIIIIIIIIIIIIIIIIIIIIIIIIIIIIIIIIIIIIIIIIIIIIIIIIIIIIIIIIIIIIIIIII
Om nätsladden till apparaten har blivit skadad måste den bytas ut av ett Philips-
serviceombud för att undvika att farliga situationer uppstår.
Garanti och serviceIIIIIIIIIIIIIIIIIIIIIIIIIIIIIIIIIIIIIIIIIIIIIIIIIIIIIIIIIIIIIIIIIIIIIIIIIIIIIIIIIIIIIIIIIIIIIIIIIIIIIIIIIIIIIIIIIIIIIIIIIIIIIIIIIIIIIIIIIIIIIIIIIIIIIIIIIIIIIIIIIIIIIIIIIIII
Om du behöver service eller information eller om du har ett problem ska du söka
upp Philips webbsida på adressen www.philips.com eller kontakta Philips kundtjänst i
ditt land (rätt telefonnummer finner du i världsgarantibroschyren). Om det inte finns
någon kundtjänst i ditt land ska du vända dig till din lokala återförsäljare eller
kontakta serviceavdelningen på Philips Domestic Appliances and Personal Care BV.
SVENSKA
2 3 4

