Phoenix Mecano RK Rose+Krieger Compact-e-3-EU User manual

Bestell-Nr. 99425 Ausgabe 11.2014 Version 1-0
Compact-e-3-EU für Multilift II und
Multilift Teleskop
1. Anschließen der Multilifte
Es können bis zu zwei Multilifte an den markierten Steckpl tzen
(Steckpl tze 1 und 2) an der Compact-e-3-EU eingesteckt
und synchron verfahren werden.
Bei den Sondervarianten können bis zu 3 Multilifte
(Steckpl tze 1, 2 und 3) angeschlossen werden.
Je nach Sondervarianten können die Multilifte synchron, „2+1“
oder „1+1“ verfahren werden.
1
2
3
2. Handschalter
Alle Handschalter besitzen Taste Auf (Pfeil nach oben) und Taste Ab (Pfeil nach unten).
Handschalter mit einem Display besitzen zudem Tasten 1 2 3 4 und S.
3. Inbetriebnahme
Im Auslieferzustand sind die Steuerungen initialisiert, somit können Sie die Multilifte sofort anschließen und
verfahren.
Falls dies nicht möglich ist, ist eine Initialisierungsfahrt erforderlich.
Um eine Initialisierungsfahrt durchzuführen, fahren Sie die Multilifte durch Drücken der Taste Ab bis in die
unterste Position. Lassen Sie die Taste Ab los. Zum Initialisieren muss die Taste Ab für min. 2-3 Sekunden wieder
gedrückt und w hrend der ganzen Initialisierungsfahrt gehalten werden.
W hrend der Initialisierungsfahrt werden die Multilifte mit halber Geschwindigkeit und nicht synchron in die
tiefste Position eingefahren. Ein Relaisklack ertönt in der tiefsten Position 1-mal, dann werden die Antriebe
synchron in die „untere Softwareendlage“– Position ausgefahren. Das System ist initialisiert und kann
verwendet werden.
4. Steuerung auf die Werkseinstellungen zurücksetzen
Bei Änderung der Antrieb- oder Systemkonfiguration (z.B. Kaskadierung mehrerer Steuerungen) ist die
Zurücksetzung auf Werkseinstellungen erforderlich:
Hierzu drücken Sie gleichzeitig die Tasten 1 2 und die Taste Auf. Halten Sie diese Tastenkombination ca. 3
Sekunden gedrückt. Am Display wird S und eine Nummer, z.B. S 5 angezeigt. Drücken Sie die Taste Auf oder Ab
solange, bis am Display S 0 angezeigt wird. Drücken Sie nun die Taste S. Die Steuerung klackt 2-mal und am
Display blinkt die 000 Anzeige. Die Steuerung befindet sich jetzt im Erstinbetriebnahme – Zustand. Führen Sie
nun die Initialisierungsfahrt durch (siehe Kapitel 3).
HSU-OD-2
(Zwei Tasten Folie)
HSU-MDF-4M22
(Sechs Tasten Folie Memory)
TOUCHbasic UD
(Zwei Tasten TOUCH)
TOUCH UD
(Sechs Tasten Memory TOUCH
einschiebbar)

Bestell-Nr. 99425 Ausgabe 11.2014 Version 1-0
5. Fehlermeldungen durch Klick-Code
Sobald die Steuerung mit Strom versorgt wird, erh lt der Benutzer durch ein akustisches Signal (Klick) der
Steuerung eine Status-Information über das System. Die folgende Tabelle zeigt die Abh ngigkeiten zwischen
den Status-Informationen und den Klicks.
Anzahl der
Klicks
Status-Information
2x Normalbetrieb Das System arbeitet ohne Probleme
1x Notbetrieb
Das System ist im Notbetrieb, die Antriebe können
nicht genutzt werden. Überprüfen Sie die LEDs
und/ oder den Fehlercode am Display des
Handschalters.
3x – 6x Letzte Abschaltung
fehlehrhaft
Überprüfen Sie die LEDs und/ oder den Fehlercode
am Display des Handschalters.
6.
Anzeige von Fehlermeldungen durch LEDs
Bei Verwendung eines Handschalters ohne Display werden die Fehler anhand von LEDs auf der Steuerung
angezeigt.
Die LEDs befinden sich auf der Oberseite des Geh uses über der Handschalterbuchse und den Motorbuchsen.
Fehlermeldung Beschreibung Behebung
Steuerungs-LED blinkt
Interner Fehler
•Ziehen Sie das Stromversorgungskabel ab und stecken
es nach einigen Sekunden wieder ein. Führen Sie eine
Initialisierungsfahrt durch.
•Wird der Fehler nach der Initialisierungsfahrt weiterhin
angezeigt, ziehen Sie das Stromversorgungskabel ab
und wenden Sie sich an den Kundendienst.
Steuerungs-LED leuchtet
Initialisierungsfahrt nötig
•Führen Sie eine Initialisierungsfahrt durch.
Hinweis: Die LED leuchtet während die
Initialisierungsfahrt durchgeführt wird oder wenn die
Initialisierungsfahrt nicht vollständig durchgeführt
wurde. Die LED erlischt sobald die Initialisierungsfahrt
vollständig durchgeführt wurde.
Eine Motorkanal-LED
blinkt
Kurzschluss im
Motorkanal
(die LED über dem
betroffenen Kanal blinkt)
•Schalten Sie die Motorsteuerung aus.
•Beheben Sie den externen Kurzschluss.
•Nehmen Sie die Motorsteuerung wieder in Betrieb.
Eine Motorkanal-LED
leuchtet
Motor fehlt
(die LED über dem
betroffenen Kanal
leuchtet)
•Schließen Sie an der betroffenen Buchse den korrekten
Motor an.
•Führen Sie eine Initialisierungsfahrt durch.
Steuerungs-LED Motorkanal-LEDs

Bestell-Nr. 99425 Ausgabe 11.2014 Version 1-0
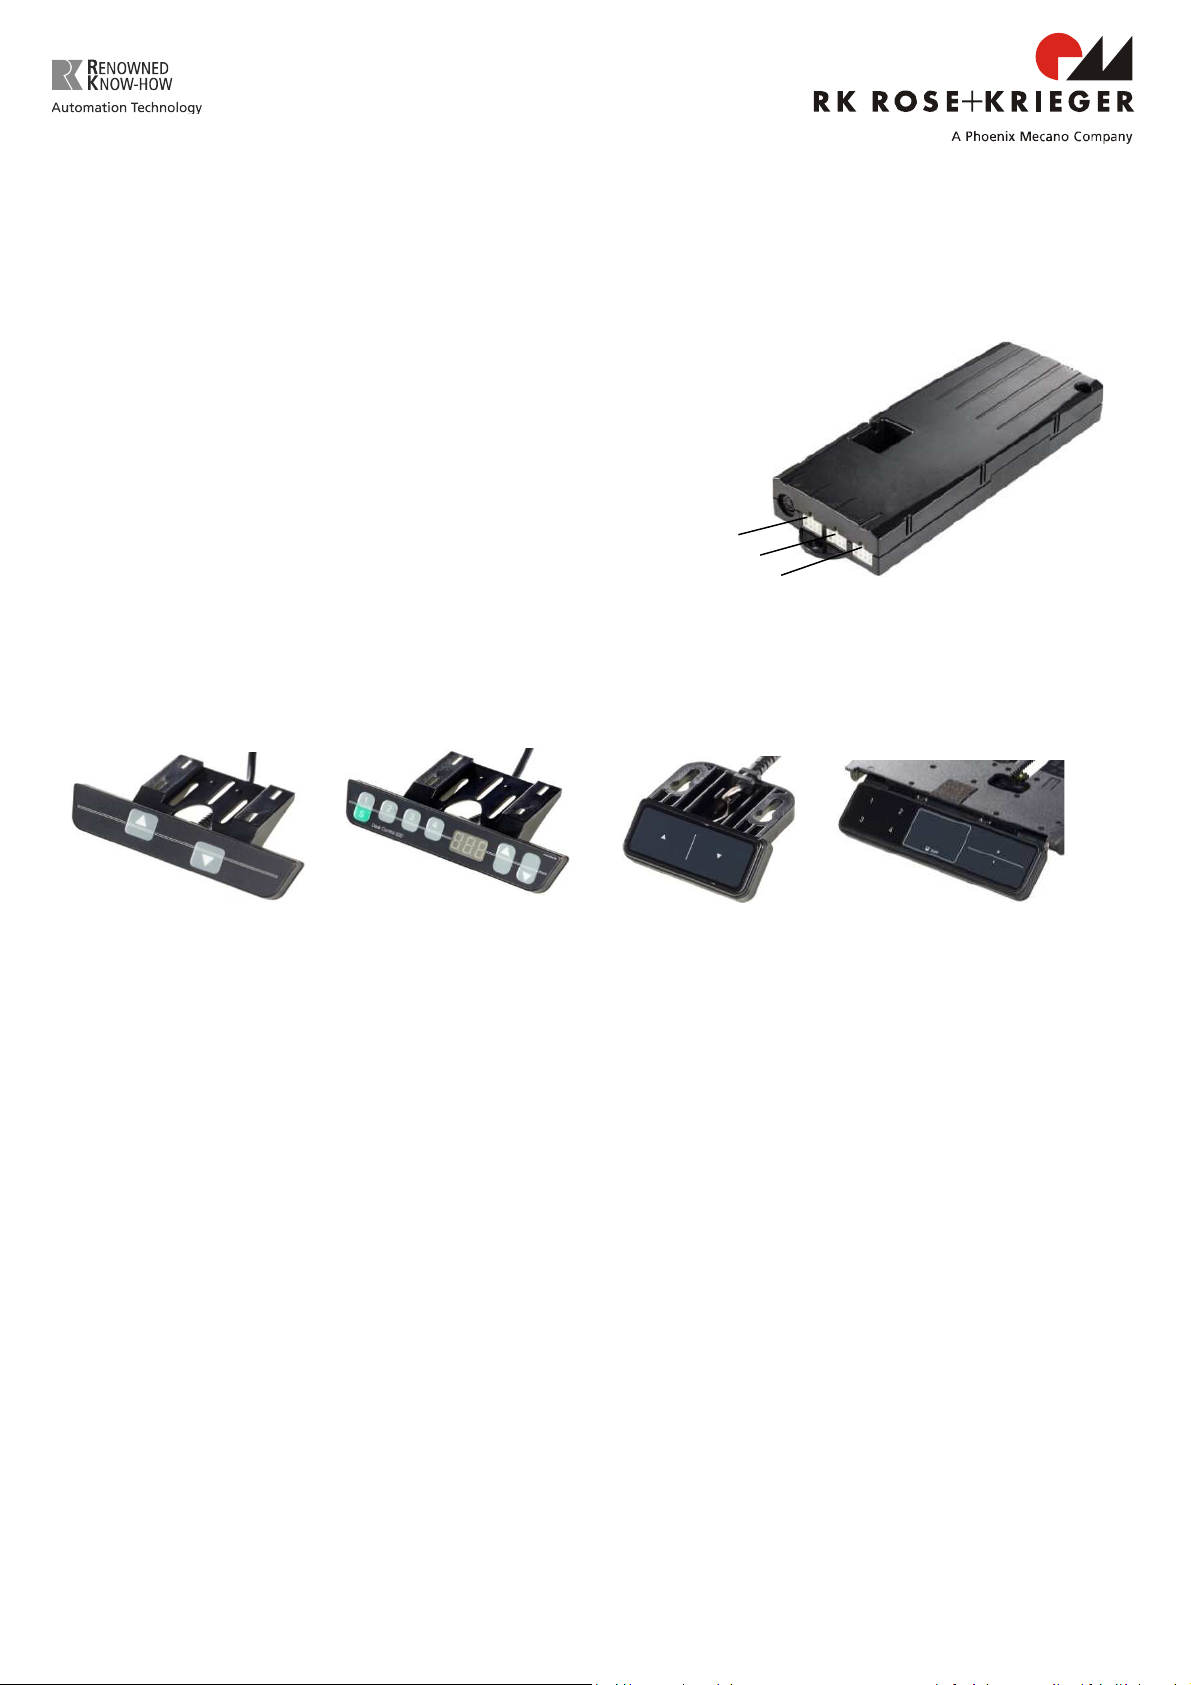
7. Fehlermeldungen am Display der Handschalter
Nummer Beschreibung Behebung
HOT Aufgrund von Überhitzung wurde der
Überhitzungsschutz aktiviert. •Warten Sie bis die Motorsteuerung abgekühlt
ist und die Meldung HOT am Display erlischt.
00 Interner Fehler Kanal 1 •Schalten Sie die Motorsteuerung aus. Wenden
Sie sich an Ihren RK-Ansprechpartner.
01 Interner Fehler Kanal 2
02 Interner Fehler Kanal 3
12 Defekt Kanal 1 •Schalten Sie die Motorsteuerung aus.
•Beheben Sie den externen Kurzschluss
oder schließen Sie an der betroffenen Buchse
den korrekten Motor an.
•Nehmen Sie die Motorsteuerung wieder in
Betrieb.
13 Defekt Kanal 2
14 Defekt Kanal 3
24 Überstrom Motor M1
•Entfernen Sie die eingeklemmten Objekte aus
dem Fahrbereich.
•System überladen => Entfernen Sie die Last.
•Wenden Sie sich an Ihren RK-Ansprechpartner.
25 Überstrom Motor M2
26 Überstrom Motor M3
48 Überstrom Motorgruppe 1
49 Überstrom Motorgruppe 2
60 Kollisionsschutz
62 Überstrom Steuerung
36 Plug Detection an Motorbuchse M1 •Schließen Sie an die betroffene Buchse den
korrekten Motor an.
•Führen Sie eine Initialisierungsfahrt durch.
37 Plug Detection an Motorbuchse M2
38 Plug Detection an Motorbuchse M3
61 Motor getauscht
55 Synchronisierung der Motorgruppe 1
nicht möglich
•Entfernen Sie die Last von dem System.
•Führen Sie eine Initialisierungsfahrt durch.
•Wird der Fehler nach der Initialisierungsfahrt
weiterhin angezeigt, wenden Sie sich an Ihren
RK-Ansprechpartner.
56 Synchronisierung der Motorgruppe 2
nicht möglich
67 Zu hohe Spannung •Ziehen Sie das Stromversorgungskabel ab.
Wenden Sie sich an Ihren RK-Ansprechpartner.
70 Änderung der Antriebskonfiguration •Siehe Kapitel 4
71 Änderung der Anti-Pinch-
Konfiguration
•Siehe Bedienungsanleitung der Steuerung
Compact-e-EU auf Homepage des Herstellers:
http://www.logicdata.at/
81 Interner Fehler
•Führen Sie eine Initialisierungsfahrt durch.
•Ziehen Sie das Stromversorgungskabel ab und
stecken es nach einigen Sekunden wieder ein.
•Tritt dieser Fehler regelm ßig auf, ziehen Sie
das Stromversorgungskabel ab und wenden Sie
sich an Ihren RK-Ansprechpartner.
93
Verbindungsfehler im kaskadierten
Verbund.
Der Fehler wird für 15 Sekunden am
Display angezeigt, danach wechselt die
Steuerung ggf. ebenfalls in den
Erstinbetriebnahme – Zustand mit der
blinkenden Anzeige 000.
•Überprüfen Sie alle Kabelverbindungen und
versuchen Sie eine Initialisierungsfahrt
durchzuführen.
•Ist die Initialisierungsfahrt nicht möglich,
trennen Sie die Stromversorgung aller
Steuerungen. Warten Sie für mind. 5 Sek. und
verbinden Sie alle Steuerungen erneut mit der
Stromversorgung. Versuchen Sie erneut eine
Initialisierungsfahrt durchzuführen.
•Ist die Initialisierungsfahrt weiterhin nicht
möglich, wenden Sie sich an Ihren RK-
Ansprechpartner.
Die Original-Bedienungsanleitung der Steuerung Compact-e-EU finden Sie auf der Homepage des Herstellers:
http://www.logicdata.at/

Bestell-Nr. 99425 Ausgabe 11.2014 Version 1-0
Compact-e-3-EU for Multilift II and
Multilift Teleskop
1. Connecting the multilifts
Up to two Multilifts can be connected to the slots (slots 1 and 2)
marked on the Compact-e-3-EU and moved synchronously.
With the special versions, up to 3 Multilifts (slots 1, 2 and 3)
can be connected.
Dependin on the special version, the Multilifts can be moved
synchronously, "2+1"
or "1+1".
1
2
3
2.
Manual control switch
All manual control switches have an Up button (arrow upwards) and a Down button (arrow
downwards).
Manual control switches with a display also have buttons 1, 2, 3, 4 and S.
3. Commissioning
When supplied, the controllers are initialised, allowing you to connect and move the Multilifts
immediately.
If this is not possible, an initialisation run must be performed.
To perform an initialisation run, move the Multilifts to the lowest position by pressing the Down button.
Let go of the Down button. For initialising, the Down button must be pressed again for at least 2-3
seconds and be kept pressed during the entire initialisation run.
During the initialisation run, the Multilifts are moved to the lowest position at half speed and not
synchronously. A relay click sounds once at the lowest position, then the drives are extended to the
"bottom software end position" synchronously. The system is initialised and can be used.
4. Resetting the controller to the factory settings
When changing the drive or system configuration (e.g., cascading several controllers), it is necessary to reset
to the factory settings:
For this purpose, press the buttons 1, 2 and the Up button simultaneously. Keep this button combination
pressed for approx. 3 seconds. On the display, S and a number, e.g, S 5, are shown. Keep pressing the Up or
Down button until S 0 is shown on the display. Now press the S button. The controller clicks twice and the 000
indicator flashes on the display. The controller is now in the commissioning status. Now perform the
initialisation run (see section 3).
HSU-OD-2
(Two buttons
membrane key)
HSU-MDF-4M22
(Six buttons membrane
key memory)
TOUCHbasic UD
(Two buttons TOUCH)
TOUCH UD
(Six buttons memory TOUCH retractable)

Bestell-Nr. 99425 Ausgabe 11.2014 Version 1-0
5. Error indication with Click codes
When the control unit is switched on the user gets an acoustic signal (click) sent by the control unit which gives a
state-information about the system.
The table below shows which number of clicks corresponds to certain information.
Number of
clicks
State information
2x Normal operation
No problems detected
1x Emergency operation
The system is in Safe-State, movement is not possible.
Check LED indication and/or error codes on the display of
the handswitch.
3x – 6x Last shutdown incomplete/
forced reset
Check LED indication and/or error codes on the display of
the handswitch.
6. Error indication with LEDs
Depending on the version, the COMPACT-e-EU is equipped with LEDs to indicate errors even if a handswitch
without display is used. These LEDs are placed on the housing top over the handswitch socket and each motor
socket.
Error code
Description
Remedy
A Motor channel LED is
blinking
Internal Error
•Unplug power cord and plug it in again after a few
seconds. Make a manual reset.
•If the error is still indicated unplug power cord and
contact the customer service.
Control box LED is on
Reset necessary
•Make a manual reset
Note: The LED is still on while the reset movement or if
reset is not completed. It is deactivated when the reset
is finished.
A Motor channel LED is
blinking
Kurzschluss im
Motorkanal
(die LED über dem
betroffenen Kanal blinkt)
•Unplug the control unit
•Fix the external short circuit
•Start the control unit again
A Motor channel LED is
on
Motor is missing
(the LED over the
affected channel is on)
•Plug in the correct motor to the motor socket that
shows the error
•Reset all motors
Control box LED Motor channel LEDs

Bestell-Nr. 99425 Ausgabe 11.2014 Version 1-0
7. Error messages on the handswitch display
Code Description
Remedy
HOT
Overheating has caused it to stop the
control unit
•Wait until the control unit has cooled down
and HOT is no longer displayed
00 Internal Error Channel 1 •Unplug the power cord and contact your RK
contact person
01 Internal Error Channel 2
02 Internal Error Channel 3
12 Defect Channel 1 •Unplug the control unit.
•Fix the external short circuit or plug in the
correct motor to the motor socket that shows
the error.
•Start the control unit again.
13 Defect Channel 2
14 Defect Channel 3
24 Overcurrent Motor M1 •Remove jammed objects from the driving area.
•Desk might be overloaded Q Remove load from
desk.
•Contact your RK contact person
25 Overcurrent Motor M2
26 Overcurrent Motor M3
48 Overcurrent Motor Group 1
49 Overcurrent Motor Group 2
60 Collision protection
62 Overcurrent Control Unit
36 Plug detection in Motor socket M1 •Plug in the correct motor to the motor socket
that shows the error.
•Reset all motors.
37 Plug detection in Motor socket M2
38 Plug detection in Motor socket M3
61 Actuator changed
55 Synchronization lost motor group 1
•Remove load from desktop.
•Reset all motors.
•If error occurs after reset again, contact your
RK contact person
56 Synchronization lost motor group 2
67 High voltage
•Unplug the power cord and contact the
customer service
70 Motor configuration changed
•See chapter 4
71 Anti-Pinch configuration changed
•See the operation manual of the control unit
Compact-e-EU on the producers homepage:
http://www.logicdata.at/
81 Internal error
•Make a manual reset
•Unplug the power cord and plug it in again
after a few seconds.
•If this error occurs frequently, unplug the
power cord and contact your RK contact
person.
93
Connection error in the cascaded
network
(The error appears on the display for
15 seconds and then the control unit
goes into reset mode with the display
flashing 000)
•Check all the cable connections and try to reset
the motors.
•If you cannot reset the motors, disconnect all
the control units from the power supply. Wait
for at least 5 seconds and then reconnect all
the control units to the power supply. Try to
reset the motors again.
•If you still cannot reset the motors, please
contact your RK contact person
You can find the original operation manual of the control unit Compact-e-EU on the producers homepage:
http://www.logicdata.at/
Table of contents
Languages:
Other Phoenix Mecano Lifting System manuals
Popular Lifting System manuals by other brands

Bend-Pak
Bend-Pak HD-12SS-B Installation and operation manual

Bend-Pak
Bend-Pak Clearfloor 10APX Service manual

Black Hawk Automotive
Black Hawk Automotive BH5066 Operating instructions & parts manual

SilverStar
SilverStar Backpacker MV Specifications

Hillrom
Hillrom Liko Multirall 200 Instructions for use

Midwest
Midwest SHORESTATION owner's manual