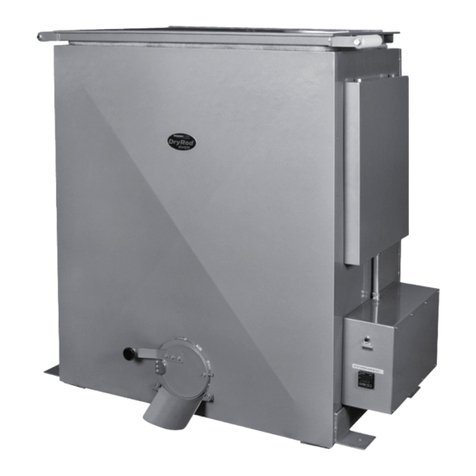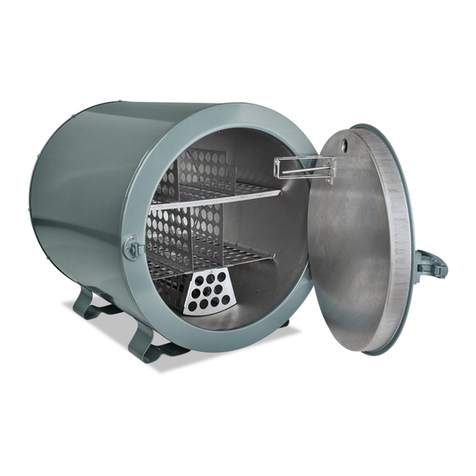
Type 40HT Series Electrode Rebaking Ovens Operating Instructions Operating Instructions
2
Phoenix
International
8711
W
est
Port
Av
enue
Milwaukee,
WI
53
224
+1
414.97
3.3400
[email protected] dryrod.comProduct Description
Installation
This oven was crated and packaged for long-distance shipment. Exercise care in
removing the oven from the wooden crate.
Lifting hooks are supplied for ease of movement into desired location.
After oven is in final location, anchor as required, open the oven door and remove
packing material, manuals and loose parts.
Wiring
Check type and voltage on nameplate.
40HT (3/480V)
40HT (1/240V)
For Wiring
1. Remove side electrical panel and remove knock-out in lower left corner.
2. Attach conduit or heavy gauge electrical cord and strain relief capable of
handling the load of the oven.
3. From incoming power supply: For 240V attach ground to green terminal
block. Attach neutral to terminal block. Attach power to terminal block. (See
wiring diagram on page 6) For 480V, attach ground to green terminal block.
Attach each phase to terminal blocks.
Make sure all wiring connections are tight. Attach side electrical panel removed in
Step 1.
Amp Draw
Ovens operating on 240 AC voltage draw 19 amps. Those operating on 480 AC
voltage draw 10 amps.
Grounding
The 40HT ovens have a grounding terminal block in the side control panel. The
oven operates with electrical components where grounding is required for safe
operation. The grounding connection should be made at the ground terminal in
the oven and should be run separately to a positive ground.
Inspection
It is essential that a general inspection of the oven be conducted at this time.
Check all components, wiring for terminal for proper tightness and door for proper
adjustment.
This unit was wired and tested at the factory and need only be connected to the
proper line voltage. It is strongly recommended that a fused safety disconnect
switch be installed in close proximity to the oven.
Operation
1. Start-up (switch in “OFF” position)
2. Turn on power to the oven.
3. Set temperature controller at desired temperature by pressing the UP/DOWN
keys and then pressing ENTER.
Power Supply
DryRod®ovens are designed to run on AC voltage and accept either 120 or 240
volts +/-10%. When power is supplied, the indicator light will illuminate.
DryRod ovens are supplied with a voltage selector switch to operate on either 120
or 240 AC voltage. Please be sure to set the switch to the proper voltage being
used. Operation outside these voltages will impact oven temperature.
Temperature Setting
Excess Heat: At maximum setting, the actual temperature in portions of the oven
near the heating elements may reach approximately 660°F (349°C). Temperatures
over 550°F (288°C) are not recommended. They may cause oven damage and/or
unacceptably high exterior surface temperatures.
Description of Controls
A. The controller in this oven is a full-indicating, PID (proportional, integral,
derivative) controller using a Type J thermocouple sensor. The controller is
factory set for optimum performance accuracy with a 400 lb load at maximum
temperature.
B. The high-limit control is a mechanical device with on-off control action. The
high-limit control will shut down the oven heat when the oven temperature reaches
the high-limit set point. In order to regain power to the heating elements, the oven
must cool down below the high-limit set temperature.
Controller
If any adjustments are required, they should be done by a qualified person with
the aid of the instructions contained in this manual or the Original Factory Setting
Guide (available upon request from Phoenix International). All instruments are
fully tested and adjusted for optimum performance prior to shipping the oven.
If the settings are lost for some reason, contact Phoenix International for the PID
Controller Original Factory Setting Guide.
Fan
A fan and filter are included to assist with cooling of electrical components and the
controller. This fan has an expected lifespan of 2-3 years depending on ambient
usage conditions. It is suggested that the fan operation is checked every six
months. If fan is not operating, replace immediately.
CAUTION
• Disconnect power and make sure oven is cooled before opening or
servicing unit.
• Hot Surfaces! Use extreme care to avoid possible burns or personal injury.
Protective gloves and personal protective equipment are recommended.


