Phylink Cube HD User manual

USER MANUAL
VERSION 1.3
Cube

Table of Contents
Table of Contents
PHYLINK Cube HD User Manual 2
1.0 Product Overview 5.......................................................................................
1.1 Package Contents ....................................................................................................... 5
1.2 System Requirements ............................................................................................... 5
1.3 Introduction ................................................................................................................. 6
1.4 Hardware Overview ................................................................................................... 8
2.0 Installation . 9....................................................................................................
2.1 Hardware Installation ................................................................................................ 9
2.4 Wireless Installation Considerations................................................................... 12
2.3 Wireless Installation with WPS function............................................................ 11
2.7 Camera installation on PC ..................................................................................... 32
2.7.1 Camera Live installation on PC ................................................................ 32
2.7.2 Play, Delete and Modify cameras ............................................................ 34
2.7.3 Muliti-viewing on one screen ..................................................................... 36
2.7.4 Video recording, Storage and Viewing ................................................... 37
2.7.5 Snapshots, Storage and Viewing .............................................................. 38
2.5 Installation for iOS device ......................................................................... .............13
2.5.1 Camera installation on iOS device ............................................................ 13
2.5.2 Wireless Setup on iOS device ..................................................................... 16
2.5.3 Advanced settings on iOS device ............................................................. 19
2.6 Installation for Android device ............................................................................. 23
2.6.1 Camera installation on Android device .................................................. 23
2.6.2 Wireless Setup on Android device ............................................................ 26
2.6.3 Advanced settings on Android device ................................................... 28
2.8 Installation via Web Browser ................................................................................ 39
2.8.1 Viewing Camera via Web Browser ........................................................... 39
2.8.2 Wireless Setup on PC via Web Browser ................................................ 40
3.0 Advanced Setting 43......................................................................................
3.1 Network Camera Setting Interface ................................................................... 43
3.2 Camera........................................................................................................................ 45
3.2.1 Camera Setup.................................................................................................. 45
2.2 Restore Camera back to factory settings.......................................................... 10
3.2.2 Stream Setup .................................................................................................. 46
3.2.3 OSD Setup ........................................................................................................ 49
3.2.4 Night Vision Setup ......................................................................................... 50

Table of Contents
PHYLINK Cube HD User Manual 3
3.3 Network....................................................................................................................... 51
3.3.1 Wireless Setup............................................................................................... 51
3.3.2 TCP/IP Setup................................................................................................ 53
3.3.3 DDNS Setup.................................................................................................. 54
3.3.4 UPNP Setup................................................................................................. 57
.3.4 Storage ....................................................................................................................... 59
3.4.1 Storage Setup ............................................................................................. 59
3.4.2 Browse Storage .......................................................................................... 60
3.4.3 Format SD Card .......................................................................................... 60
3.5 Task .............................................................................................................................. 64
3.5.1 Motion Detection ....................................................................................... 64
3.5.2 Schedule Setup ........................................................................................... 66
3.5.3 Task Management ...................................................................................... 67
3.5.3.5 HTTP alarm sending ....................................................................... 74
3.5.3.6 HTTP periodic sending .................................................................. 75
3.5.3.7 Snapshot to storage on alarm .................................................... 76
3.5.3.8 Snapshot to storage periodically .............................................. 77
3.5.3.9 Record to storage on alarm ......................................................... 78
3.5.3.10 Record to storage continuously ................................................ 79
3.5.3.11 Send files in storage to FTP server ............................................ 80
3.5.3.1 Email alarm sending ....................................................................... 68
3.5.3.2 Email periodic sending .................................................................. 70
3.5.3.3 FTP alarm sending .......................................................................... 71
3.5.3.4 FTP periodic sending ..................................................................... 73
3.6 Tools ............................................................................................................................ 81
3.6.1 System Identity ........................................................................................... 81
3.6.2 User Management ..................................................................................... 82
3.6.3 Date & Time .................................................................................................. 83
3.6.4 Backup or Reset .......................................................................................... 84
3.6.5 Firmware Upgrade ..................................................................................... 84
3.4.4 Recording to NAS ...................................................................................... 61
3.7 Advanced functions............................................................................................. 86
3.7.1 Wizard............................................................................................................. 86
3.7.2 System............................................................................................................ 87

Table of Contents
PHYLINK Cube HD User Manual 4
5.0 Technical Specifications 91.........................................................................
6.0 Glossary of Terms 92......................................................................................
4.0 Troubleshooting 89........................................................................................
7.0 Technical Support 94.....................................................................................

PHYLINK Cube HD User Manual
Section 1 - Product Overview
Minimum Mac System Requirements
Operating system-Mac OSX 10.4 (Tiger)
Processor-800MHz-Power PC G4 or Intel
Memory-128Mb RAM (256Mb recommended)
Minimum PC System Requirements
Operating system-Windows 2000/XP/Vista
/Windows 7/Mac/Linux
Processor-Intel Pentium III, 1GHz
Memory-256Mb RAM
Viewing System Requirements
Web Browser Setup/Viewing- IE Version 5.5 or later, Firefox,
Google Chrome, Safari & most other browsers
Real Player QuickTime and most other VLC players.
Verify the package contents against the list below.
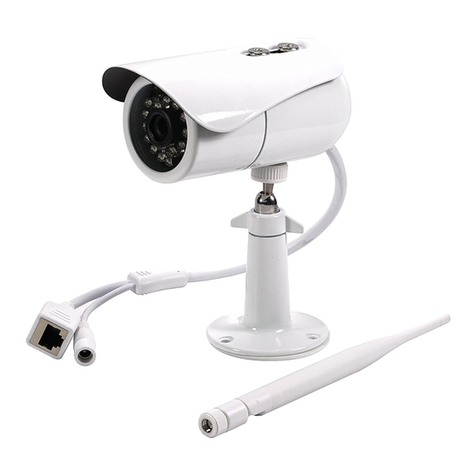
PLC-223W/PLC-233W Network Camera
Camera Stand
Manual and Software on CD-ROM
CAT5 Ethernet Cable
Power Adapter
Quick Install Guide
5
1.1 Package Contents
1.2 System Requirements

Thank you for your interest and support in our product and purchasing this
wireless IP security camera.
The PHYLINK Cube records video clips when there any motion events detected.
It has a Built-in Micro card slot with remote playback from anywhere. You can also
remotely view live video from Smart Phones, Mac, and PC.
The Motion Sensor of PHYLINK Cube has Multi-zone and Adjustable sensitivity.
If any motion detected, PHYLINK Cube will Alerts through email or push
notifications(iOS and Android) to keep you notified.
Utilizing advanced H.264 technology, the PHYLINK Cube uses minimal bandwidth
and storage requirements. With smooth real-time video and audio streaming.
Professional High Quality Video Camera
With Megapixel optical lens, Surveillance CMOS Sensor, DSP processor,
you can experience outstanding HD video at full resolution.
Built-in IR LED lamps for Night vision that gives you ability to view clearly even in
the dark environments. Enhanced by automatic IR cut-filter operation, it provides
sharp and clear picture quality, day or night.
Fast and easy setup
View your camera online Within minutes. No software installation or router setup
needed. With the P2P Technology, PHYLINK Cube smart connect to internet without
any complicated port mapping or DDNS settings.
You just enter or scan the QR Code which printed on each camera. It's very simple
and smoothly.
Connections for your smart life
Section 1 - Product Overview
PHYLINK Cube HD User Manual 6
1.3 Introduction

Section 1 - Product Overview
Approval Information
All our products meet the requirements of approval FCC or CE, and are granted the
FCC or CE certification. They are authorized to bear FCC or CE mark.
This device complies with Part 15 of the FCC Rules. Operation is subject to the following
two conditions:
(1) This device may not cause harmful interference, and
(2) this device must accept any interference received, including interference that may
cause undesired operation Changes and modification not expressly approved by the
manufacturer or registrant of this equipment can void your authority to operate this
equipment under Federal Communications Commissions rules.
FCC
This product complies with standards including Low Voltage Device Directive
73/23/EEC; EMC Directive 89/336/EEC and R&TTE Directive 1999/5/EC. It passed the
subject tests by the authority concerned and is authorized to bear CE mark.
CE
This equipment has been tested and found to comply with the limits for a Class B
digital device, pursuant to Part 15 of the FCC rules. These limits are designed to
provide reasonable protection against harmful interference in a residential
installation. This equipment generates, uses and can radiate radio frequency energy
and, if not installed and used in accordance with the instructions, may cause harmful
interference to radio communications.
However, there is no guarantee that interference will not occur in a particular
installation. If this equipment does cause harmful interference to radio or television
reception, which can be determined by turning the equipment off and on, the user is
encouraged to try to correct the interference by one or more of the following
measures: -Reorient or relocate the receiving antenna. -Increase the separation
between the equipment and the receiver. -Connect the equipment into an outlet on
a circuit different from that to which the receiver is connected. -Consult the dealer or
an experienced radio/TV technician for help.
PHYLINK Cube HD User Manual 7

Section 1 - Product Overview
7
8
910
6
5
1
2
3
2. WPS status indicator LED
3. WPS Button
4. Reset pin hole
5. Audio Out
6. Power Jack
7. Light Sensor
8. Infrared LED
9. Microphone
10. Power/Status indicator LED
11. Micro SD Card slot
Short press this button to reset the camera back to Factory Settings.
Reset pin hole
4
1. Ethernet RJ45 connector
11
After the camera is powered on, system is going to start, the indicator LED shows
yellow light and quickly off which means the system is being started.
When the indicator LED shows yellow again, it means the system has started
successfully.
Red light is for wired connection, yellow light for wireless connection.
The indicator LED flashes during data transfer.
Power/Status indicator LED
Connects to the included DC 12V
power adapter.
Power Jack
Monitors lighting conditions and switches
between color and infrared accordingly.
Light sensor
Local storage for storing recorded image
and video.
Micro SD Card slot
Press this button to setup a wireless
connection automatically.
WPS Button
12
12. Screw of Stand
PHYLINK Cube HD User Manual 8
1.4 Hardware Overview

Section 2 - Installation
Connect the camera to your switch or router using the provided network cable.
Connect the AC adapter cable from the camera to a power outlet.
IMPORTANT! - The PHYLINK Cube HD is not approved for outdoor use - the
product may only be installed in indoor environments.
Mount the camera
Connect network cable and power
For some angles you may need to loosen main mounting ring by turning the
big flat screw on the back of the stand with a coin, so that the notch in the mounting
ring allows the pin to point in the desired direction. You can then tighten it again
with the coin.
Should any mounting position require the image to be rotated 180 degrees (inverted),
there is a setting for that in the "camera setup" menu.
PHYLINK Cube HD User Manual 9
2.1 Hardware Installation
The supplied stand provides flexible installation solutions.
It makes the camera either wall-mounted or ceiling-mounted or placed on a desk.
Note: DHCP sever and UDP port must be enabled on your router (which is default
setting on most router) to assign an IP address to the network camera. If needed,
please refer to your router's user manual on how to enable DHCP server and UDP.

Section 2 - Installation
If you ever forget your admin password or have any other reason to reset the camera
to its factory settings, please use the following procedure:
Make sure the camera is powered up.
Insert the tip of a paper clip in the to press the reset switch.Reset pin hole
You’ll feel the click when the switch engages.
A few seconds later the camera will restart and is now at factory settings. Of course,
after reset the user name and password will both be“admin” again.
It is easier to use the software reset function in the “Backup or Reset” menu.
If hardware reset is needed, find the at the rear of camera.Reset pin hole
Please see the figure in section.Hardware Overview
PHYLINK Cube HD User Manual 10
2.2 Restore Camera back to factory settings

Section 2 - Installation
2.3 Wireless Installation with WPS function
You may create a Wi-Fi connect using the on the .Reset/WPS Button Camera Cable
Step 2
Press the on your router within 60 seconds.WPS button
Step 1
After the camera is powered on, press the on the back of the camera.WPS button
The blue above the button will blink.WPS status LED
PHYLINK Cube HD User Manual 11
The camera will automatically create a wireless connection to your router.
While connecting, the will always on and your camera will reboot.WPS status LED
Note: WPS also called QSS (Quick Secure Setup) on some brands of router.
On some routers, you may need to login to the web interface and then click
on an onscreen button to activate the WPS feature. If you are not sure where the
WPS button is on your router, please refer to your router’s User Manual.

Section 2 - Installation
The PHYLINK wireless IP security camera lets you access your network using a wireless
connection from anywhere within the operating range of your wireless network.
However, the number, thickness and location of walls, ceilings, or other objects that the
wireless signals must pass through, may limit the range. Typical ranges vary depending
on the types of materials and background RF (radio frequency) noise in your home or
business. The key to maximizing wireless range is to follow these basic guidelines:
1. Minimize the number of walls and ceilings between your adapter and other network
devices (such as your Network Camera) - each wall or ceiling can reduce your adapter’s
range from 3-90 feet (1-30 meters).
2. Be aware of the direct line between network devices. A wall that is 1.5 feet thick
(.5 meters), at a 45-degree angle appears to be almost 3 feet (1 meter) thick.
At a 2-degree angle, it looks over 42 feet (14 meters) thick. Position your devices so that
the signal will travel straight through a wall or ceiling (instead of at an angle)
for better reception.
3. Building Materials make a difference. A solid metal door or aluminum studs may
weaken the wireless signal. Try to position your access points, wireless routers, and other
networking devices where the signal passes through drywall or open doorways.
Materials and objects such as glass, steel, metal, walls with insulation, water (fish tanks),
mirrors, file cabinets, brick, and concrete will degrade your wireless signal.
4. Keep your product at least 3-6 feet or 1-2 meters away from electrical devices or
appliances that generate RF noise.
5. If you are using 2.4GHz cordless phones or other radio frequency sources (such
as microwave ovens), your wireless connection may degrade dramatically or drop
completely. Make sure your 2.4GHz phone base is as far away from your wireless
devices as possible. The base transmits a signal even if the phone in not in use.
PHYLINK Cube HD User Manual 12
2.4 Wireless Installation Considerations

Section 2 - Installation
PHYLINK Cube HD User Manual 13
2.5 Installation for iOS device
2.5.1 Camera installation on iOS device
There are three ways to add a camera on an iOS device.
Start the App and then the " " screen will appear.Add Camera
Option 1
Automatically search in Local Area Network
Event Playback Add Camera Info
Camera
Add Camera
iPad 17:50 63%
Camera Found! (2)
Camera Found! (2)
Add QRCode
VNW5V15K6RY7J4VWC7W1
192.168.168.102
THG5T55K2RY7K1VWC7XJ
192.168.168.103
Add Camera
iPad 17:50 63%
Cancel
Name
THG5T55K2RY7K1VWC7XJ
Save
Camera
UID
Account admin
PasswordPassword
Enter the "Password". ( The default password is "admin". )
Assign a "Name" to the camera to help identify this camera if more than one camera
is in use. ( The default name is "Camera". )
Press " " button and your camera will show up under“ ”.Save Camera List
If your camera is in the same Local Area Network with your smartphone, the App can
search the cameras automatically. If the camera UID shows up on list then press the
UID for the camera you are setting up.
Search "PHYCAM" App from App Store, download and install it.

Section 2 - Installation
PHYLINK Cube HD User Manual 14
Press " " button to scan the camera UID from the sticker on the product.QRCode
Scan the camera UID using smart phone
Manually type UID
If your camera is not in the same Local Area Network with your smartphone,
the App can NOT search cameras for Local Network.
Press " " button and manually type "UID" according to the UID sticker on theAdd
product.
Event Playback Add Camera Info
Camera
Add Camera
iPad 17:50 63%
Camera Found! (2)
Camera Found! (2)
Add QRCode
VNW5V15K6RY7J4VWC7W1
192.168.168.102
THG5T55K2RY7K1VWC7XJ
192.168.168.103
iPad 17:50 63%
Place a barcode inside the
viewfinder rectangle to scan it.
Cancel Light
Enter the "Password". ( The default password is "admin". )
Assign a "Name" to the camera to help identify this camera if more than one camera
is in use. ( The default name is "Camera". )
Press " " button and your camera will show up under“ ”.Save Camera List
Enter the "Password". ( The default password is "admin". )
Assign a "Name" to the camera to help identify this camera if more than one camera
is in use. ( The default name is "Camera". )
Press " " button and your camera will show up under“ ”.Save Camera List
Option 2
Option 3

Section 2 - Installation
PHYLINK Cube HD User Manual 15
Press on the Camera name from“ ” for "Live View" with a wired connection.Camera List
Press the " " button to go back to the “ ”.Back Camera List
Press to View saved pictures.
Press to take a snapshot.
Press to start listening or stop listening.
Live View
iPad 17:50 63%
Back
Camera
Online / LAN
768x432 / FPS: 16 / BPS: 154 Kbps
Press to start speaking or stop speaking.

Section 2 - Installation
PHYLINK Cube HD User Manual 16
2.5.2 Wireless Setup on on iOS device
Event Playback Add Camera Info
Camera
Camera List
iPad 17:50 63%
VNW5V15K6RY7J4VWC7W1
Edit
Connected
Camera
V5G5SX5U2TE71JBWC7W1
Connected
Camera
Go to > .Advanced Setting Network Setup
Edit Camera
iPad 17:50 63%
Back
Name Camera
Account admin
Password
Reconnect Connected
Security Code
Advanced Setting
Advanced Setting
iPad 17:50 63%
Back
Motion Detection
Video Quality
Alarm Recording
Microphone
Speaker Not available
Network Setup
Alarm Actions
Login Account
There are two ways to setup the wireless connection.
Option 1
Quick setup with Smartphone
Press on from the and go to the .Camera List Edit Camera

Section 2 - Installation
PHYLINK Cube HD User Manual 17
Network Setup
iPad 17:52 62%
Back
WiFi Networks
Data & Time
WiFi Networks
iPad 17:52 62%
Back
CHOOSE A NETWORK...
D-Link_DIR-612
TP-Link_245416
FAST_11DA2E
phr-002
Enter Password
iPad 17:52 62%
Cancel Join
Password
After a successful wireless setup, you can remove the network cable and the camera
should work through the wireless network after a short delay.
Press , then the App will search for available wireless networks,WiFi Networks
select your network among this list.
Type your Wi-Fi password and press the ”button to complete the Wi-Fi setup.“Join

PHYLINK Cube HD Quick Install Guide
10
Quick installation for iOS device
18
Option 2
You may create a WiFi connect using the WPS Button on the back of the camera.
The camera will automatically create a wireless connection to your router.
While connecting, the will always on and your camera will reboot.WPS status LED
Step 2
Press the on your router within 60 seconds.WPS button
Step 1
After the camera is powered on, press the on the back of the camera.WPS button
The blue above the WPS button will blink.WPS status LED
Quick setup with WPS function
Note: WPS also called QSS (Quick Secure Setup) on some brands of router.
On some routers, you may need to login to the web interface and then click
on an onscreen button to activate the WPS feature. If you are not sure where the
WPS button is on your router, please refer to your router’s User Manual.

Section 2 - Installation
PHYLINK Cube HD User Manual
Video Quality
iPad 17:52 62%
Back
Primary Stream
Secondary Stream
Environment Mode 50Hz
Horizontal Flip
Vertical Flip
On-Screen-Display Disable
Stream Setup
iPad 17:52 62%
Back
Image Size
Frame Per Second
Bitrate (Kbps)
Confirm
PoorMediumBest Good
640x480
15
512
Pre-Recording (sec) 0
The settings for these can be adjusted. Press on for the settings of stream profiles.
There are two pre-programmed stream profiles: primary stream and secondary stream.
These streams profiles help for quick setup.
Two options: 50Hz & 60Hz. Set according to the mains[]Environment Mode
frequency in the country of use.
For UK this would be 50Hz. For US this would be 50Hz.
There are four quality level of video can be set quickly.
You can also make further changes to the details of quality.
Please note that the higher the video quality, the more network bandwidth
you will need to support it.
The Pre-Recording Time control how long the video is recorded[Pre-Recording]
before motion detection is detected by a camera.
You can fill a value of seconds to adjust this times.(The Max value is 10 seconds)
Video pre-recording allows the camera to record up to 10 seconds of video leading
up to a related trigger event. It will allows users to review the moments before the
camera was triggered.
Moving objects triggered motion detection recording function, but the delay
problems caused the loss of data images in the beginning of the event, in some
situations, these are very important. Video pre-recording will help you catch
everything.
19
2.5.3 Advanced settings on iOS device
Video Quality

Section 2 - Installation
PHYLINK Cube HD User Manual
Alarm Recording
iPad 17:52 62%
Back
Alarm Recording
Record Stream
Post-Recording (sec)
File Split (sec)
Confirm
1st 2nd
60
30
Alarm Actions
62%
iPad 17:52
Back
Alarm Recording
Alarm Email
The camera refers to motion detection as an“alarm”. If any alarm occurs, the
camera can trigger a recording and send an email.
Press on to enter the Alarm Recording settings or Alarm Email settings.
In the Alarm Recording settings, you can turn on or off the Alarm Recording
feature.
The number of seconds that the camera should[Post-recording]
keep recording video after motion stops. If there is any motion within
this time the camera will keep recording until there is no motion for
the duration of this parameter. It can be from 5 seconds to 24 hours.
This specifies the maximum duration of one file. If the recording goes[File Split]
on for longer than this parameter the camera will split the video into a number
of files.
You can select which
stream profile to record.
20
Alarm Actions
Alarm Recording
This manual suits for next models
2
Table of contents
Other Phylink Security Camera manuals

Phylink
Phylink PLC-223W User manual

Phylink
Phylink PLC-128 Series User manual

Phylink
Phylink PLC-325PW Bullet HD User manual

Phylink
Phylink Bullet Pro PLC-336PW User manual

Phylink
Phylink PLC-128 Series User manual

Phylink
Phylink PLC-128 Series User manual

Phylink
Phylink PLC-128PW User manual

Phylink
Phylink PLC-325PW Bullet HD User manual