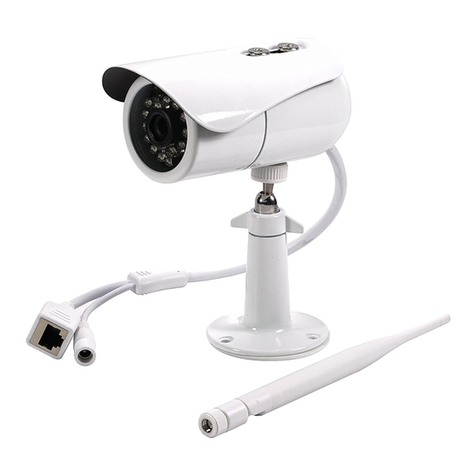
Phylink Bullet Pro PLC-336PW User manual

Quick Install Guide
Quick Install Guide
For Outdoor Network Camera
VERSION 2.0

This installation guide provides basic instructions for installing the PLC-336PW
Outdoor Waterproof IP camera on your network.
By following these instructions, you can quickly complete the camera installation
on Android, iOS and computer (Windows or Mac OS).
Verify the package contents
- PLC-336PW Network Camera
- Camera Mount Bracket
- External Antenna
- Manual and Software on CD-ROM
- CAT5 Ethernet Cable
- Power Adapter
- Quick Install Guide
- Waterproof box and mounting accessories
- Screw, plastic wall plug and hex wrench for wall mount
Verify the package contents against the list below.

Contents
1. Hardware Overview ................................................................................ 2
2. Hardware Installation ............................................................................ 6
3. Quick installation for iOS device ......................................................... 14
4. Setting up Wi-Fi via iOS device ............................................................ 17
5. Quick installation for Android device ................................................. 19
6. Setting up Wi-Fi via Android device ................................................... 24
7. Camera installation on PC or Mac ...................................................... 26
8. Access camera via Web Browser ........................................................ 34
Get Support
- For technical questions, please email us at [email protected]
You can also access related technical articles on our support website
- For the latest documentation and updates, please visit www.phylink.com
Scan QR Code to get support

2
1. Hardware Overview
Camera Cable
Extension Box
Wi-Fi Antenna
Sun Shield
Front Shell
Mount Bracket
Lens Light Sensor
Infrared LED
Used to illuminate the camera's field of view at night.
Infrared LED
Camera’s UID Sticker
The light sensor monitors ambient lighting conditions and switches between color
and infrared accordingly.
Light Sensor

Power Connector
Power indicator LED
Ethernet RJ45 connector
General I/O Terminal
Audio line out
3.5mm Jack, connects to the amplified speaker.
Audio line out
Power indicator LED
After camera is powered on, the indicator LED shows green light.
General I/O Terminal
Used to connect external wired alarm devices like PIR sensor, gas detector, siren
and etc.
Connects to the included DC 12V power adapter.
Power Connector
Used to connect the camera to the power, network, amplified speaker and
wired alarm devices.
Extension box
UID:VNW5V15K6RY7J4VWC7W1
Password: admin
The UID of the camera cable is the unique identifier for the camera.
You can scan the QR code on the sticker using the App to add a camera.
UID Sticker on Camera Cable

4
Reset Button
Micro SD
Card Slot
Reset Button
Local storage for storing recorded images and
videos. Adding a Micro SD to your camera will
allow you to record footage and motion alerts
directly to memory card for future review.
Micro SD Card Slot
If you wish to mount the Extension Box outdoors, you must put it inside the
waterproof box. It's not necessary to use Waterproof Box when you mount the
Extension Box indoors.
Waterproof Box
Waterproof Box
Extension Box
Camera Cable Connector
Mounting Accessories
Waterproof Rubber
Camera Cable
Make sure the camera is powered on.
Press and hold this button for second or more1
to reset the camera. Note that all settings will be
restored to factory default.
Press this button to reset the camera back to
Factory Settings.

5
Extension box can be separated from the camera cable and connected to the
camera with a waterproof connector. This is a good idea when you need to put
the camera cable through a building's wall. You only need to drill a small hole to
run the camera cable extending from the rear of camera to an indoor power
source and network.
Camera Cable Connector
Used to fix the Waterproof Box on the wall.
Mounting Accessories
The cable extending from the rear of camera is 90cm, which is long enough to
route through a building's wall. It would make the installation flexible and easy.
Camera Cable

2. Hardware Installation
6
2.1 Connect camera to power and network
Extension Box
Router
Connect the camera to your router or switch using the network cable.
Using the included power adaptor, plug one end into the Power Connector and
plug the other end into a power outlet.
Please note that for initial setup, you need to connect the camera directly to your
router or switch with a network cable. You cannot connect wirelessly to the
camera without first setting it up via a network cable.
NOTICE
Power adaptor
2.2 Connect using the PoE (Optional)
The Bullet Pro camera can be either connected with the included power adapter
and network cable, or optionally with an Ethernet cable that is connected to an
802.3af compatible PoE Switch or PoE Injector. With a PoE setup, the Ethernet
cable will transmit both power and data over a single cable eliminating the need
for the power adapter.
You can set up the wireless via the App or web browser quickly.
Instructions for wireless setup are included later, within this guide.

7
2.3 Mount the antenna (Optional)
If using a Wi-Fi network connection, the provided external antenna must be
mounted to the RP-SMA connector at the rear of camera main body.
Protective cap
RP-SMA
connector
Remove the protective cap on the
RP-SMA connector and screw on the
Wi-Fi antenna in it’s place (clockwise).
Please keep the antenna vertical for better signal strength. A minimum signal
strength of 3 bars is required for 1080P video transmission. Please ensure the
required signal strength is available at the place of installation, prior to installing
the camera.
Extension Box
Router
PoE Injector
PoE injector connection diagram
Power adaptor

8
2.4 Micro SD card installation
Inserting a micro SD card into the camera requires you to put the camera indoors
in a low humidity environment – before exposing internal electronics.
Micro SD Card Slot
The camera must be powered off before inserting the Micro SD card. The camera
will only recognize the card if inserted before startup.
Every time the card is re-inserted, you will need to turn the power off and then
turn the power on again to let the SD card be recognized.
This package dose not included a Micro SD card. Adding a Micro SD card to your
camera will allow you to record footage and motion alerts directly to the Micro SD
card for future review. The recorded files may be reviewed remotely on your
phone / computer when using Phylink App / software.
NOTICE
For a new SD card which has never been used or formatted, you can use the
camera’s format tool to format it. To learn how to format the SD card, please refer
to the user manual or related technical articles on the Phylink support website.
The camera only supports the FAT32 file system; other formats will not be
recognized. It is recommended to format the Micro SD card via the format tools.
You can download the format tools for FAT32 via the follows links:
www.phylink.com/downloads/download_file/tools/guiformat.zip
Or www.sdcard.org/downloads/index.html
1. Power off the camera as applicable.
5. Avoid catching internal wires, tighten the front shell by hand only.
2. Remove the sun shield.
3. Unscrew the front shell from the camera’s main
body by turning counter-clockwise.
4. Hold the MicroSD card with the printed side facing
upward and the golden pins facing toward the
MicroSD slot. Press the MicroSD card into the slot until you hear a click.
Be careful do not touch the lens.
To insert the micro SD card, follow the below steps:
9
2.5 Mount the camera
Before mounting, please ensure wireless settings are completed and operational
– to set wireless up, you need to connect the camera directly to your router with
an Ethernet cable.
If you plan to use Wi-Fi transmission, the Wi-Fi must be setup before the camera
is disconnected from the Ethernet cable of the local network. Minimum signal
strength of 3 bars is required for 1080P video transmission. Please ensure the
required signal strength is available at the place of installation, prior to mounting
the camera.
2.5.1 Mount the bracket
2.5.2 Adjust the angle of the bracket
The supplied L-type hex wrench is exclusively
designed to match hex screw on mount bracket.
In case you will need to adjust the lens later,
do not discard the wrench.
2.5.3 Drop ceiling mounting
Mounting nut
Sun shield
mounting screw
Mount bracket
Drill three holes into the wall or ceiling.
Then hammer the supplied plastic
wall plug into the holes. Mount the
bracket and camera with supplied screws.
Adjust the angle of the mount bracket to aim at
the shooting area and then screw the hex screw
on mount bracket with the included hex wrench.
The camera can be mounted under the
eaves or ceiling.
You can replace one of the Sun Shield
mounting screws with the included
special mounting nut to mount the
camera bracket from above.

10
The Extension Box is used to connect the camera to the power, network,
amplified speaker and wired alarm devices.
The Extension Box can be separated from the camera cable. This is a good idea
when you need to put the camera cable through a building's wall.
The Camera Cable Connector has a metal locking ring to fix the cable to the
Extension Box, you must unscrew the locking ring before you unplug the
Camera Cable from Extension Box. You cannot force it to unplug or unscrew it
otherwise it may cause some damage on the connector both on the cable and
the Extension box.
Building wall
Extension Box
Outdoor Indoor
DC Power Cable
Network Cable
A roughly 25mm diameter hole
will be required for camera cable
to pass through.
The Extension Box can be mounted indoors and outdoors, it depends on your
installation environment.
Mount the extension box indoors
Locking Ring Extension Box
Camera Cable
NOTICE
2.5.4 Mount the Extension Box

11
The Sun Shield can be mounted in several positions depending on your needs.
If you extend the Sun Shield forward, it can reduce glare from the sun as well as
keep the lens glass dry in light rain or snow. On the other hand, reflections of
IR light from the underside of the Sun Shield would make the entire picture foggy.
So to get maximum night vision range, you should either move the Sun Shield
all the way back or remove it entirely.
Power cord
Waterproof Box
Building wall
Outdoor Indoor
A roughly 1/4 inch diameter hole
will be required for either a network
cable or the DC plug at the end of
the power cord to pass through
Network cable
If you wish to mount the Extension Box outdoors, you must put it inside the
Waterproof Box.
Mount the extension box outdoors
2.5.5 Adjust the Sun Shield (Optional)

12
2.6 Reset the camera back to factory settings
A few seconds later the camera will restart and is now at factory settings.
Of course, after reset the user name and password will both be “admin” again
(Without quotes).
If you forget your admin password or have any other reason to reset the camera
to its factory settings, please use the following procedure:
1. Make sure the camera is powered on.
2. It is easier to use the software reset function in the “Backup or Reset” menu.
If hardware reset is needed, unscrew the entire front part of the camera.
It is easiest to do it if you take the sun shield off first.
3. Press and hold the Reset Button for one second or more, then release it.
You'll see the Status indicator LED go off for a few seconds. This indicates that
reset is in progress.
Reset Button
Status Indicator LED

General I/O terminal is used to connect external wired alarm devices like PIR
sensor, gas detector, siren and etc. The Bullet Pro Camera has one Digital Input
and one Digital Output for external sensor and alarm.
General I/O Terminal
Pin NO. Name
1
2
3
4
Specification
POWER
DI
DO
GND
12VDC ± 5%, max. 0.5A (For external device)
Digital output , Max. 40VDC, max. 400mA
Digital input, OPEN/Short-to-GND
Ground
POWER
DI
DO
GND
For more details about how to use , please read the User General I/O terminal
Manual on the included installation CD or download it from the Phylink
support website.
2.7 Connect the alarm devices (Optional)
13

3. Quick installation for iOS device
Ensure the camera is connected to your router with the Ethernet cable and
powered on. Start the App and the "My Camera" screen will appear.
STEP1
14
Get the free PHYCAM App from App Store.
Option 2 Scan the camera’s UID
To add a camera to App, you can click the “QRCode” button to scan the camera’s
UID from the sticker on the camera cable.
Manually type the UID (Add the camera remotely)
If the camera is not located on the same local network as your iPhone, the App
will NOT find it. To add a camera to the App remotely, click the “ ” button toAdd
type the "UID" manually according to the UID sticker on the camera cable.
Option 3
Press the button to add a new camera. “Add”
Click on camera’s UID to go to the next step.
If the camera is located on the same local network as your iPhone/iPad, the
camera’s UID will show up on the "Add Camera" screen.

15
STEP2
Assign a "Name" to the camera to help identify this camera if more than one
camera is in use. ( The default name is "Camera". )
Enter the "Password". ( The default Password is "admin". )
Select your network from the list. Type the network’s password and press “Join”.
After a successful wireless setup, you can remove the network cable and the
camera should work through the wireless network after a short delay.
Press "Connect" and the App will connect to the camera.
Press "Setup WiFi" to setup the camera to work over wireless.
The camera will search for available Wi-Fi networks around it.
Note: You can skip the “setup Wi-Fi” step and set the wireless later.
Press the "Save" button and the camera will show up on the “My Camera” screen.
Go back to the “Add camera” screen and press the "Save" button. Your camera
will show up on the “My Camera” screen.

STEP3
1. Add camera
2. View the app version
3. Sliding menu
4. Detect camera
5. Edit Camera, change settings and password
6. Audio mode
7. Video mode
16
2
1
3
4
4
5
6
7
Tap symbol on the right side of the camera, the sliding menu will be displayed.

17
4. Setting up Wi-Fi via iOS device
And then go to Advanced Setting > Network Setup .
Tap the Edit Camera icon from the sliding menu.
Tap symbol on the right side of the camera, the sliding menu will be displayed.

After a successful wireless setup, you can remove the network cable and the
camera should work through the wireless network after a short delay.
Press “WiFi Networks” , then the camera will search for available Wi-Fi networks
around it. Select your network from the list.
18
Type your Wi-Fi password and press the “Join” button to complete the Wi-Fi setup.
Other manuals for Bullet Pro PLC-336PW
1
Table of contents
Other Phylink Security Camera manuals

Phylink
Phylink PLC-128 Series User manual

Phylink
Phylink Cube HD User manual

Phylink
Phylink PLC-128 Series User manual

Phylink
Phylink PLC-128 Series User manual

Phylink
Phylink PLC-128PW User manual

Phylink
Phylink PLC-325PW Bullet HD User manual

Phylink
Phylink PLC-325PW Bullet HD User manual

Phylink
Phylink PLC-223W User manual