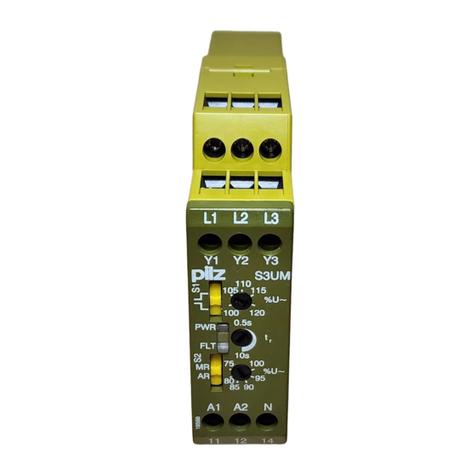
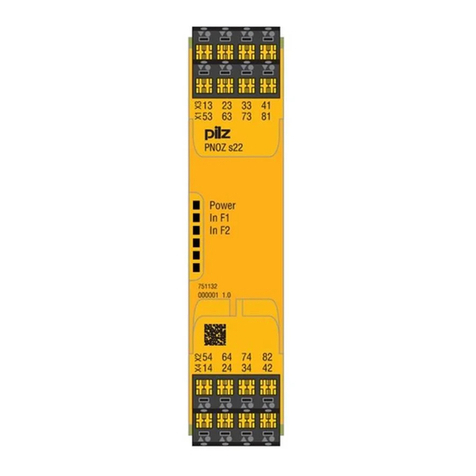
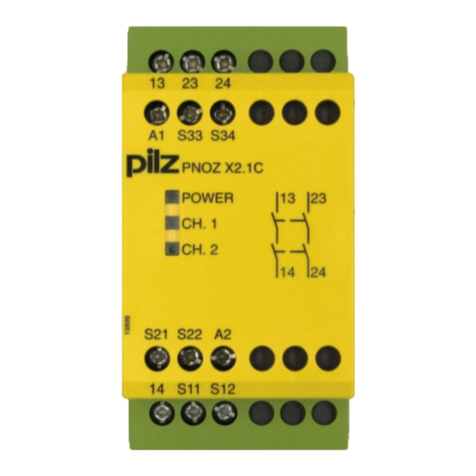
Pilz PNOZ V User manual

- 1 -
Sicherheitsbestimmungen
• Das Gerät darf nur von Personen
installiert und in Betrieb genommen
werden, die mit dieser Betriebsanleitung
und den geltenden Vorschriften über
Arbeitssicherheit und Unfallverhütung
vertraut sind. Beachten Sie die VDE-
sowie die örtlichen Vorschriften, insbe-
sondere hinsichtlich der Schutzmaßnah-
men.
• Beim Transport, der Lagerung und im
Betrieb die Bedingungen nach EN 60068-
2-6 einhalten (s. technische Daten).
• Durch Öffnen des Gehäuses oder
eigenmächtige Umbauten erlischt die
Gewährleistung.
• Montieren Sie das Gerät in einen
Schaltschrank; Staub und Feuchtigkeit
können sonst zu Beeinträchtigungen der
Funktionen führen.
• Sorgen Sie an allen Ausgangskontakten
bei kapazitiven und induktiven Lasten für
eine ausreichende Schutzbeschaltung.
BestimmungsgemäßeVerwendung
Das Sicherheitsschaltgerät dient dem
sicherheitsgerichteten Unterbrechen eines
Sicherheitsstromkreises. Das Sicherheits-
schaltgerät erfüllt Forderungen der
EN 60947-5-1, EN 60204-1 und VDE 0113-
1 und darf eingesetzt werden in Anwendun-
gen mit
• NOT-AUS-Tastern
• Schutztüren
Das Gerät ist nicht für die Absicherung von
berührungslosen Verdeckungen geeignet,
da kein dynamischer Start möglich ist.
Gerätebeschreibung
Das NOT-AUS-Schaltgerät ist in einem
P-75-Gehäuse untergebracht. Die
Versorgungsspannung beträgt 24 V DC.
Merkmale:
• Relaisausgänge, unverzögert:
3 Sicherheitskontakte (S), zwangsgeführt
1 Hilfskontakt (Ö), zwangsgeführt
• Relaisausgänge, rückfallverzögert:
1 Sicherheitskontakt (S), zwangsgeführt,
mit einstellbarer oder fester Rückfallver-
zögerung (geräteabhängig)
• LED als Versorgungsspannungsanzeige
• LEDs als Schaltzustandsanzeige für alle
Ausgangsrelais
• Anschluss für NOT-AUS-Taster oder
Sicherheitsendschalter u. für externen
Starttaster
• redundante Ausgangsschaltung
• ein- oder zweikanaliger Betrieb
• Rückführkreis zur Überwachung
externer Schütze
SafetyRegulations
• The unit may only be installed and
operated by personnel who are familiar
with both these instructions and the
current regulations for safety at work and
accident prevention. Follow local
regulations especially as regards
preventative measures.
• Transport, storage and operating
conditions should all conform to
EN 60068-2-6.
• Any guarantee is void following opening of
the housing or unauthorised
modifications.
• The unit should be panel mounted,
otherwise dampness or dust could lead to
functional impairment.
• Adequate protection must be provided on
all output contacts with capacitive and
inductive loads.
Conseilspréliminaires
• La mise en oeuvre de l'appareil doit être
effectuée par une personne spécialisée
en installations électriques, en tenant
compte des prescriptions des différentes
normes applicables (NF, EN, VDE..),
notamment au niveau des risques
encourus en cas de défaillance de
l'équipement électrique.
• Respecter les exigences de la norme
EN 60068-2-6 lors du transport, du
stockage et de l'utilisation de l'appareil.
• Toutes interventions sur le boîtier
(ouverture du relais, échange ou
modification de composants, soudure
etc..) faites par l'utilisateur annulent la
garantie.
• Montez l'appareil dans une armoire
électrique à l'abri de l'humidité et de la
poussière.
• Assurez-vous du pouvoir de coupure des
contacts de sortie en cas de charges
inductives ou capacitives.
Domainesd'utilisation
Le bloc logique de sécurité sert à
interrompre en toute sécurité un circuit de
sécurité. Le bloc logique de sécurité satisfait
aux exigences des normes
EN 60947-5-1, EN 60204-1 et VDE 0113-1
et peut être utilisé dans des applications
avec des
• poussoirs d'arrêt d'urgence
• protecteurs mobiles
L'appareil n'est pas adapté à la surveillance
de barrières immatérielles, car une
validation dynamique n'est pas possible.
Description de l'appareil
Inséré dans un boîtier P-75, le bloc logique
de sécurité PNOZ V est alimenté en 24 V
DC.
Caractéristiques :
• Contact de sortie :
3 contacts à fermeture de sécurité (F).
1 contact de signalisation (O).
• Contact de sortie temporisé :
1 contact à fermeture de sécurité (F),
temporisé à la retombée ou temporisation
réglable ou fixe (suivant appareil)
• LED d'indication présence tension.
• LEDs de visualisation des relais internes
• Bornes de raccordement pour poussoirs
d'AU ou fins de course et poussoir de
validation externe.
• Sorties redondantes.
• Commande par un ou deux canaux.
• Boucle de retour pour l'auto-contrôle de
contacteurs externes.
TypicalApplications
The safety relay provides a safety-related
interruption of a safety circuit. The safety
relay meets the requirements of EN 60947-
5-1, EN 60204-1 and VDE 0113-1 and may
be used in applications with
• E-STOP pushbuttons
• Safety gates
The unit is not suitable for use with non-
contact guards, as a dynamic start is not
possible.
Description
The Emergency Stop Relay is enclosed in a
P-75 housing. The version available is for
24 V DC operation only.
Features:
• Relay outputs:
3 safety contacts (n/o), positive-guided
1 auxilliary contact (n/c), positive-guided
• Relay outputs, delay-on de-energised:
1 safety contact (n/o), positive-guided
with adjustable or fixed delay-on de-
energisation (dependent on unit)
• LED for Operating Voltage
• LED's for switching positions of all output
relays
• Connection for Safety limit switches or
Emergency stop buttons and for external
reset buttons
• Output circuit is redundant
• Single or two channel operation
• Feedback control loop for monitoring
external contactors/relays
18 731-01
PNOZ V
4D Betriebsanleitung
4GB Operating instructions
4F Manuel d'utilisation
4E Instrucciones de uso
4I Istruzioni per l`uso
4NL Gebruiksaan ijzing

- 2 -
Das Schaltgerät erfüllt folgende Sicherheits-
anforderungen:
• Die Sicherheitseinrichtung bleibt auch in
folgenden Fällen wirksam:
- Spannungsausfall
- Ausfall eines Bauteils
- Spulendefekt
- Leiterbruch
- Erdschluss
• Überprüfung bei jedem Ein-Aus-Zyklus,
ob die Ausgangsrelais des Sicherheits-
gerätes richtig öffnen und schließen
Funktionsbeschreibung
Das Schaltgerät PNOZ V dient dem sicher-
heitsgerichteten Unterbrechen eines Sicher-
heitsstromkreises. Das Gerät reagiert auf
eine Unterbrechung in einem der Eingangs-
kreise 1 oder 2 (Kanal 1 bzw. Kanal 2). Das
PNOZ V kann ein- oder zweikanalig
betrieben werden.
Sobald die Versorgungsspannung UBanliegt
und die Eingangskreise 1 und 2 geschlos-
sen sind, ist das PNOZ V startbereit.
Wird der Startkreis S33-S34 geschlossen,
gehen die Ausgangsrelais K1, K4 und K2,
K5 in Arbeitsstellung und die Sicherheits-
kontakte 13-14, 23-24, 33-34 und 57-58
schließen. Der Hilfskontakt 41-42 öffnet.
Alle vier LEDs für "Ch. 1" und "Ch. 2"
leuchten.
Wird ein NOT-AUS-Kontakt im Eingangs-
kreis betätigt, fallen beide Relais K1 und K2
ab. Die zwangsgeführten Sicherheits-
kontakte 13-14, 23-24 und 33-34 öffnen.
Der Hilfskontakt 41-42 schließt und die
LEDs "Ch. 1" und "Ch. 2" (oben) gehen aus.
Nach Ablauf der Rückfallverzögerung fallen
die Relais K4 und K5 ab, der Sicherheits-
kontakt 57-58 öffnet und die LEDs "Ch. 1"
und "Ch. 2" (unten) gehen aus. Bevor das
Gerät erneut gestartet werden kann, muss
die Rückfallzeit abgelaufen und alle NOT-
AUS- und Sicherheitskontakte müssen
wieder geschlossen sein.
The relay complies with the following safety
requirements:
• The Emergency Stop Relay prevents
machine operation in the following cases:
- Power supply failure
- Component failure
- Coil defect in a relay
- Cable break
- Earth fault
• The correct opening and closing of the
Safety Gate limit switches and the safety
function output relays is tested
automatically in each on-off cycle
Le relais répond aux exigences suivantes :
• La sécurité est garantie, même dans les
cas suivants :
- Défaillance tension
- Défaillance d'un composant
- Défaillance bobine
- Défaut soudure
- Défaut de masse
• Vérification à chaque cycle d'ouverture/
fermeture, si les interrupteurs de position
et les relais de sortie de sécurité
s'ouvrent et se ferment correctement.
Descriptiondu fonctionnement
Le bloc logique PNOZ V assure de façon
sûre l'ouverture d'un circuit de sécurité. Le
relais réagit à l'ouverture d'un des canaux
d'entrée (canal 1 et canal 2). Le PNOZ V
peut être commandé par un canal ou par 2
canaux. Dès que la tension d'alimentation
UBest présente et les canaux d'entrée
sont fermés, le PNOZ V est prêt à
fonctionner.
Si le circuit de réarmement S33-S34 est
fermé, les relais K1,K4 et K2, K5 passent en
position travail et les contacts de sécurité
13-14, 23-24, 33-34 et 57-58 se ferment. le
contact d'information 41-42 s'ouvre. Les 4
LEDs de visualisation "Ch. 1" et "Ch. 2" sont
allumées.
Si un des canaux d'entrée est ouvert (AU
actionné par ex.), les relais K1 et K2
retombent et les contacts de sécurité 13-14,
23-24, 33-34 s'ouvrent. Le contact d'info.
41-42 se ferme et les LEDs "Ch. 1" et "Ch.
2" (du haut) s'éteingnent. Au bout de la
temporisation, les relais K4 et K5 retombent,
le contact de sécurité 57-58 s'ouvre et les
LEDs "Ch. 1" et "Ch. 2" (du bas)
s'éteingnent.
Les canaux d'entrée doivent être fermés et
la temporisation écoulée avant de pouvoir
réarmer à nouveau le relais.
Sicherheitsfunktionen
Das Relais K3 prüft vor jedem Wiederein-
schalten, ob die Ausgangsrelais zuvor
vollständig abgefallen sind bzw. wieder
anziehen. Bei Kontaktverschweißung oder
Drahtbruch ist ein Wiedereinschalten nicht
möglich.
Safety Functions
Each time the unit is switched on, relay K3
first checks if the output relays are fully de-
energised. In the case of a welding of
contacts or cable break, the unit cannot be
activated.
Fonctions de sécurité
Le relais K3 teste avant chaque remise
sous tension si les relais de sortie sont bien
retombés. En cas de soudage d'un contact
ou d'une coupure de fil, une remise sous
tension n'est plus possible.
FunctionDescription
The relay PNOZ V provides a safety-
oriented interruption of a safety circuit. The
unit reacts to an interruption in input circuit 1
or input circuit 2 (channel 1/channel 2). The
PNOZ V is suitable for single or two channel
operation.
The PNOZ V is ready for operation as soon
as the operating voltage UBis supplied and
the input circuits 1 and 2 are closed.
If the reset circuit S33-S34 is closed, the
output relays K1, K4 and K2, K5 energise
and the safety contacts 13-14, 23-24, 33-34
and 57-58 close. The auxilliary contact 41-
42 opens. All four LEDs for "Ch. 1" and "Ch.
2" illuminate.
If an E-Stop contact is activated in the input
circuit, relays K1 and K2 de-energise.
The positive-guided safety contacts 13-14,
23-24 and 33-34 open. The auxilliary
contact 41-42 closes and the LEDs "Ch. 1"
and "Ch. 2" (upper) extinguish. Following
the delay-on de-energisation period, relays
K4 and K5 de-energise, the safety contact
57-58 opens and the LEDs "Ch. 1" and "Ch.
2" (lower) extinguish. The unit may only be
reset once the delay-on de-energisation
period has lapsed and all E-Stop and safety
contacts are closed.
K3
S11 13 23 33 41
14 24 34 42
K2
K1
K3
Y2
Y1
PNOZ V
S34
S33
K1
S12
S12
A2
A1 57
58
K4 K3
K1
K2
K4
K5 K5
K4
F1
K1
K3 K2
S22
K5
K2
Rückführkreis
Feedback Control Loop
Boucle de retour
B
U
Eingangskreis 1
Input circuit 1
Canal d'entrée 1
Eingangskreis
Input circuit
Canal d'entrée
Startkreis
Reset circuit
Circuit de réarmement
Fig. 1: Schematisches Schaltbild/Wiring diagram/Schéma interne

- 3 -
Wird nach EN 60204-1 Abs.: 9.4.3.1 die
Phase Li(-) der Versorgungsspannung auf
Erdpotenzial gelegt, werden Erdschlüsse er-
kannt. Bei Erdschlüssen im Eingangs-, Start-
oder Rückführkreis löst der Fehlerstrom
(IFi>i1,2iA) die interne elektronische Siche-
rung aus und die Ausgangsrelais fallen ab.
Betriebsarten
• Einkanaliger Betrieb
- ein Eingangskreis wirkt auf beide Kanäle
- keine Redundanz (Ausfallsicherheit) im
Eingangskreis
• Zweikanaliger Betrieb
- zwei redundante (d. h. identische) Ein-
gangskreise wirken auf Kanal 1 und
Kanal 2
- Überwachung der Kontakte im Ein-
gangskreis (Ausfallsicherheit gegen
Kurzschluss)
• Manueller Start
- Ansteuerung des Startkreises mit
Starttaster oder Startkontakt
• Automatischer Start
- die Ausgangsrelais ziehen an, sobald
die Eingangskreise geschlossen sind
- für NOT-AUS-Stromkreise ist diese Be-
triebsart nicht zulässig, da die Anlage
nach Spannungsausfall und -wiederkehr
selbsttätig anläuft.
Montage
Das Gerät muss in einen Schaltschrank mit
einer Schutzart von mind. IP 54 eingebaut
werden. Zur Befestigung auf einer Norm-
schiene hat das Gerät ein Rastelement auf
der Rückseite.
Sichern Sie das Gerät bei Montage auf einer
senkrechten Tragschiene (35 mm) durch ein
Halteelement wie z. B. Endhalter oder
Endwinkel.
Inbetriebnahme
Beachten Sie bei der Inbetriebnahme:
•Vor die Ausgangskontakte eine
Sicherung (10 A flink oder 6 A träge)
schalten, um das Verschweißen der
Kontakte zu verhindern.
• Keine kleinen Ströme (z. B. 30 mA) mit
Kontakten schalten, über die zuvor große
Ströme geführt wurden.
• Hilfskontakt 41-42 nicht für Sicherheits-
stromkreise verwenden!
• max. zulässige Leitungslängen:
Eingangskreis zweikanalig
max. Leitungslänge DC: 3,5 km
max. Leitungswiderstand DC: 100 Ω
Eingangskreis einkanalig
max. Leitungslänge DC: 1,75 km
max. Leitungswiderstand DC: 50 Ω
Voraussetzungen:
Leiterquerschnitt 2 x 1,5 mm²
Kapazität 150 nF/km
Widerstand 28 Ω/km
Temperatur max. 25 °C
• Leitungsmaterial aus Kupferdraht mit einer
Temperaturbeständigkeit von 60/75 °C
verwenden.
• Das Anzugsdrehmoment der Schrauben
auf den Anschlussklemmen darf max.
1,2 Nm betragen.
• Angaben im Kapitel "Technische Daten"
unbedingt einhalten.
If phase L(-) of the operating voltage is
connected to the earth potential according
to EN 60204-1 par. 9.4.3.1, earth faults are
detected. In the case of an earth fault in the
input circuit, reset circuit or feedback
control loop, the fault current (IFi>i1,2iA)
triggers the internal electronic fuse F1 and
the output relays de-energise.
Operating modes
• Single channel operation
- one input circuit operates both
channels
- no redundancy (fail-safe) in the input
circuit
• Two channel operation
- two redundant (i.e. identical) input
circuits operate channel 1 and channel 2
- monitoring of the contacts in the input
circuit (fail-safety in the event of short
circuit)
• Manual reset
- Control of a reset circuit with a reset
button or a reset contact
• Automatic reset
- the output contacts energise as soon
as the input circuit is closed
- this mode of operation is not
permissable for Emergency Stop
circuits as the installation is activated
independently following a loss/return of
supply voltage
Installation
The unit must be panel mounted (min. IP
54). There is a notch on the rear of the unit
for DIN-Rail attachment.
If the unit is installed on a vertical mounting
rail (35 mm), ensure it is secured using a
fixing bracket such as end bracket.
Operation
Please note for operation:
• To prevent a welding together of the
contacts, a fuse (10 A quick or 6 A
slow acting) must be connected
before the output contacts.
• Low currents (e.g. 30 mA) should not be
switched across contacts across which
high currents have previously been
switched.
• Auxilliary contact 41-42 are not to be
used for safety circuits.
• max. cable runs:
Input circuit two channel
Max. cable run DC: 3.5 km
Max. resistance DC: 100 Ω
Input circuit single channel
Max. cable run DC: 1.75 km
Max. resistance DC: 50 Ω
Requirements:
Cable 2 x 1.5 mm²
Capacitance 150 nF/km
Resistance 28 Ω/km
Temperature max. 25 °C
• Use copper wiring that will withstand
60/75 °C
• Tighten terminals to 1.2 Nm.
• Important details in the section „Technical
Data“ should be noted and adhered to.
Lorsque la phase (L-) de la tension
d'alimentation est mise à la masse d'après
EN 60204-1 § 9.4.3.1, un défaut de masse
est détecté. Lorsqu'il y a des défauts de
masse dans les canaux d'entrée, de
validation ou dans la boucle de retour, le
fusible électronique F1 interne se déclenche
(IF>1,2iA) et les relais de sortie retombent.
Mode de fonctionnement
• Commande par un canal
- Le circuit d'entrée agit sur les deux
canaux.
- Pas de redondance dans les canaux
d'entrée .
• Commande par deux canaux
- deux circuits d'entrée redondants (c.à.d
identiques) agissent sur les canaux 1 et
2.
- Surveillance des contacts dans les
circuits d'entrée (détection de la
défaillance d'un contact de l'AU)
• Réarmement manuel
- réarmement par bouton poussoir ou
contact externe .
• Réarmement automatique
- les relais de sortie montent dès que les
canaux d'entrée sont fermés.
-Attention ! En cas de réarmement
automatique, la montée du relais ne doit
pas remettre votre installation sous
tension.
Montage
Le relais doit être installé dans une armoire
équipée d'une protection IP 54. Sa face
arrière permet un montage sur rail DIN.
Immobilisez l'appareil monté sur un rail DIN
vertical (35 mm) à l'aide d'un élément de
maintien comme par ex. un support ou une
équerre terminale.
Mise en oeuvre
Remarques préliminaires :
• Protection des contacts de sortie par
des fusibles 10 A rapides ou 6 A
normaux pour éviter leur soudage.
• Ne pas commuter de petites intensités
(par ex. 30 mA) avec des contacts qui
ont précédemment coupé de fortes
intensités.
• Ne pas utiliser le contact de signalisation
41-42 pour les circuits de sécurité.
• Longueurs de câble max. admissibles :
Circuit d'entrée commandé par 2
canaux
Longueur de câble max. DC : 3,5 km
Résistivité max. DC : 100 Ω
Circuit d'entrée commandé par 1 canal
Longueur de câble max. DC : 1,75 km
Résistivité max. DC : 50 Ω
Préalable :
Câble 2 x 1,5 mm2
Capacité 150 nF/km
Résistivité 28 Ω/km
Température max. 25°C
• Utiliser uniquement des fils de cablâge en
cuivre 60/75 °C.
• Le couple de serrage sur les bornes de
raccordement ne doît pas dépasser
1,2 Nm.
• Respecter les données indiquées dans le
chapitre "Caractéristiques techniques".

- 4 -
Anschluss
• PNOZ V mit einstellbarer Rückfallverzö-
gerung: Verzögerungszeit für
Sicherheitskontakt 57-58 mit Hilfe eines
Schraubendrehers festlegen.
• Versorgungsspannung an Klemmen A1
(+) und A2 (-) anschließen.
• Eingangskreis: NOT-AUS-Taster oder
Sicherheitsendschalter anschließen:
- Einkanaliger Betrieb: Eingangskreis an
S11 und S12 anschließen; Brücke
zwischen S12-S22 einlegen.
- Zweikanaliger Betrieb: Eingangskreise
an S11, S12 und an S11, S22 an-
schließen.
• Startkreis
- Manueller Start: Startkontakt zwischen
S33 und S34 anschließen.
- Automatischer Start: Brücke an S33-
S34
• Rückführkreis
Öffnerkontakte der zu überwachenden
Schütze am Rückführkreis Y1-Y2
anschließen oder - wenn nicht benötigt -
Brücke Y1-Y2 einlegen.
Ablauf
Das Gerät ist eingeschaltet, wenn
• die Versorgungsspannung anliegt (LED
"Power" leuchtet)
• die Eingangskreise geschlossen sind
• der Startkreis für mind. 150 ms geschlos-
sen wird
Die Sicherheitskontakte 13-14, 23-24,
33-34 und 57-58 sind geschlossen und alle
vier LEDs für "Ch. 1" und "Ch. 2" leuchten.
Der Hilfskontakt 41-42 ist geöffnet. Wird der
Eingangskreis geöffnet, öffnen die
Sicherheitskontakte 13-14, 23-24, 33-34.
Der Hilfskontakt 41-42 schließt wieder. Die
LEDs "Ch.i1" und "Ch. 2" (oben) gehen aus.
Nach Ablauf der Rückfallverzögerung öffnet
der Sicherheitskontakt 57-58 und die LEDs
"Ch.i1" und "Ch. 2" (unten) gehen aus.
Wieder aktivieren
• Eingangskreis schließen.
• Startkreis für mindestens 150 ms
schließen.
Anwendung
In allen Beispielen werden Erdschlüsse
erkannt. Fig. 2 u. 3 sind Beispiele für NOT-
AUS-Stromkreise.
Schutztürsteuerungen (Fig. 4 - 7):
• Schutztürsteuerung 1 (Fig. 4)
- manueller Start mit S2
- einkanaliger Betrieb
- geeignet für Schutztüren, die nur zu
Wartungszwecken geöffnet werden
• Schutztürsteuerung 2 (Fig. 5)
- manueller Start mit S3
- zweikanaliger Betrieb
- geeignet für Schutztüren mit erhöhten
Sicherheitsanforderungen
• Schutztürsteuerung 3 (Fig. 6)
- mit automatischem Start nach dem
Schließen der Schutztüre
- Überwachung der zeitlichen Abfolge
der Grenztaster S1 u. S2 (Differenz tg
der Schaltpunkte ca. 75 ms)
- zweikanaliger Betrieb
- geeignet für Schutztüren mit hohen
Sicherheitsanforderungen
Der Rückführkreis dient zur Überwachung
externer Schütze, die zur Kontakt-
verstärkung oder Vervielfältigung verwen-
det werden (Fig. 7). Eine Kombination mit
den Schaltungen nach Fig. 2 - 6 ist möglich.
Branchement
• PNOZ V avec temporisation réglable:
régler la temporisation du contact 57-58 à
l'aide d'un tournevis
• Ramener la tension d'alimentation (A1/A2)
• Canaux d'entrée :
Câblage de l'interrupteur de position ou
d'Au :
- Commande par un canal : câbler le
circuit d'entrée aux bornes S11 et S12;
ponter les bornes S12-S22.
- Commande par deux canaux : câbler
les canaux d'entrée aux bornes S11,
S12 et aux bornes S11, S22.
• Réarmement :
- Réarmement manuel : câbler le BP de
validation entre les bornes S33 et S34.
- Réarmement automatique : relier les
bornes S33-S34.
• Boucle de retour :
Câbler les contacts à ouverture des
contacteurs à surveiller dans la boucle de
retour Y1-Y2 ou - quand ce n'est pas
nécessaire - relier les bornes Y1-Y2.
Mise en oeuvre
L'appareil est activé lorsque :
• La tension d'alimentation est présente (la
LED "Power" s'allume).
• Le canal d'entrée est fermé.
• Le canal de validation est fermé au moins
150 ms.
Les contacts de sécurité 13-14, 23-24,
33-34 et 57-58 se ferment et les 4 LEDs de
visualisation "Ch. 1" und "Ch. 2" sont allu-
mées. Le contact d'info. 41-42 est ouvert.
Si un des canaux d'entrée est ouvert, les
contacts de sécurité 13-14, 23-24, 33-34
s'ouvrent. Le contact d'info. 41-42 se ferme
et les LEDs "Ch. 1" et "Ch. 2" (du haut)
s'étein-gnent. Au bout de la temporisation, le
contact de sécurité 57-58 s'ouvre et les
LEDs "Ch. 1" et "Ch. 2" (du bas)
s'éteingnent.
Réarmement
• Fermer les canaux d'entrée.
• Fermer le canal de validation au moins
150ims.
Utilisation
Dans tous les exemples, les défauts de
masse sont détectés. Les figures 2 et 3
sont des exemples pour les circuits d'AU.
Dispositifs de verrouillage (fig. 4-7)
• Dispositif de verrouillage 1 (fig. 4)
- Mise en marche manuelle avec S2.
- Commande par un canal.
- Surveillance de protecteurs avec
accès occasionnels à la zone
dangereuse.
• Dispositif de verrouillage 2 (fig. 5)
- Mise en marche manuelle avec S3.
- Commande par deux canaux.
- Surveillance de protecteurs avec un
haut niveau de sécurité.
• Dispositif de verrouillage 3 (fig. 6)
- Réarmement automatique après une
fermeture des capots mobiles.
- Surveillance du désynchronisme entre
les 2 interrupteurs de position S1 et S2
(désynchronisme max. tgenv. 75 ms)
- Commande par deux canaux.
- Surveillance de protecteurs avec un
haut niveau de sécurité.
La boucle de retour sert au contrôle de
contacteurs externes, qui sont utilisés pour
augmenter le pouvoir de coupure ou le
nombre de contacts (fig. 7).
Une combinaison avec les figures 2-6 est
possible.
Connection
• PNOZ V with adjustable delay-on-de-
energisation: Adjust the desired delay
time of contact 57-58, using a
screwdriver
• Connect the operating voltage between
A1i(+) and A2 (-).
• Input circuit
Connect the E-Stop button or safety limit
switch:
- Single channel operation: Connect
input circuit to S11 and S12; bridge
S12-S22.
- Two channel operation: Connect input
circuit to S11, S12 and to S11, S22.
• Reset circuit
- Manual reset: Connect the reset
contact between S33 and S34.
- Automatic reset: Bridge S33-S34.
• Feedback control loop
Connect the N/C contact of the relay to
be monitored to the feedback control loop
Y1-Y2 or - if not needed - bridge Y1-Y2.
To operate
The unit is activated when:
• The operating voltage is supplied (LED
„Power“ is illuminated)
• the input circuits are closed
• the reset contact is closed for a minimum
of 150 ms
The safety contacts 13-14, 23-24, 33-34
and 57-58 are closed and all four LEDs for
"Ch. 1" and "Ch. 2" illuminate. The auxilliary
contact 41-42 is open. If the input circuit is
opened, the safety contacts 13-14, 23-24,
33-34 open. The auxilliary contact 41-42
closes again. The LEDs "Ch. 1" and "Ch. 2"
(upper) extinguish. After the delay-on de-
energisation period has lapsed, the safety
contact 57-58 opens and the LEDs "Ch. 1"
and "Ch. 2" (lower) extinguish.
Reactivation
• Close the input circuits
• Close the reset circuit for a minimum of
150 ms.
Application
Earth faults are detected in all examples.
Fig. 2 and 3 are examples for Emergency
Stop circuits.
Safety gate control (Fig. 4 - 7):
• Safety gate control 1 (Fig. 4)
- manual reset with S2
- single channel operation
- suitable for safety gates only opened
during maintenance
• Safety gate control 2 (Fig. 5)
- manual reset with S3
- two channel operation
- suitable for safety gates with high level
safety requirements
• Safety gate control 3 (Fig. 6)
- automatic reset following closure of the
safety gate
- monitoring of the time sequence of the
limit switches S1 and S2 (delay tgof the
switching points appx. 75 ms)
- two channel operation
- suitable for safety gates with high level
safety requirements
The Feedback control loop is for the
monitoring of external relays to increase the
number of available contacts (Fig. 7). A
combination with the wiring as in Fig. 2 - 6 is
possible.
- 5 -
S11 S22 Y1
S12 Y2S12
S33
S34
S1 S2
S11
S12 S34 Y2S22
Y1S33
S1 S2
Fig. 2: Einkanaliger NOT-AUS (S1) Fig. 3: Zweikanaliger NOT-AUS (S1) Fig. 4: Schutztürsteuerung 1
Single Channel E-Stop (S1) Two channel E-Stop (S1) Safety Gate control 1
Arrêt d'urgence avec un canal (S1)
Arrêt d'urgence avec deux canaux (S1)
Dispositif de verrouillage 1
Das Gerät nur wie in den folgenden Only connect the unit as shown in the Câbler l'appareil uniquement comme
Abbildungen anschließen! following examples! l'indiquent les schémas suivants!
S34 Y2
Y1S33S11
S12S12
S22
S2
S1
K6
57 13
58 14
K9 K7
Y1 Y2
K8
K9 K7
K8
K6
1L1
(1L+)
1L2
(1L-)
Fig. 5: Schutztürsteuerung 2 Fig. 6: Schutztürsteuerung 3 Fig. 7: Anschlussbeispiel für externe Schütze
Safety Gate control 2 Safety Gate control 3 Connection example for external relays
Dispositif de verrouillage 2 Dispositif de verrouillage 3 Commande de contacteurs externes
S34 Y2
Y1
S11
S22
S1
S2
S12 S33
S34 Y2
Y1
S33
S12
S22
S11
S3
S1
S2
S1/S2: NOT-AUS-bzw.Schutztürschalter/Emergency Stop Button, Safety Gate Limit Switch/Poussoir AU, détecteurs de position
S3: Starttaster/Reset button/Poussoir de réarmement
betätigtes Element/Switch
activated/élément actionné Tür nicht geschlossen/Gate
open/porte ouverte
Tür geschlossen/Gate
closed/porte fermée
Überprüfung- Fehlerursachen
Durch Unterbrechen des Eingangskreises
kann überprüft werden, ob das Gerät
ordnungsgemäß auslöst bzw. sich wieder
aktivieren lässt.
Das Gerät kann aus Sicherheitsgründen bei
folgenden Fehlern nicht gestartet werden:
• Fehlfunktion der Kontakte:
Bei verschweißten Kontakten ist nach
Öffnen des Eingangskreises keine neue
Aktivierung möglich.
• Leitungsunterbrechung, Kurz- oder
Erdschluss (z. B. im Eingangskreis)
Testing - Fault causes
By interrupting the input circuit, the correct
de-energisation of the unit can be tested.
For safety reasons, the unit cannot be
activated if the following faults are present:
• Faulty contact functions:
In the case of welded contacts, no further
activation is possible following an opening
of the input circuit.
• Cable break, short-circuit or earth fault
(e.g. in the input circuit).
Vérification - Sources d'erreur
On vérifie, par l'interruption des canaux
d'entrée, si le relais est retombé et s'il se
laisse réarmer.
Pour garantir la fonction de sécurité, le
relais n'est pas réarmé en cas des défauts
suivants:
• Défaut de fonctionnement des contacts
de sortie : en cas de soudage d'un
contact lors de l'ouverture du circuit
d'entrée, un nouveau réarmement est
impossible.
• Coupure d'un canal d'entrée, court-circuit
ou défaut de masse dans les canaux
d'entrée sont détectés.

- 6 -
TechnischeDaten/TechnicalData/Caractéristiquestechniques
Elektrische Anforderungen/Electrical Data/Caractéristiques électriques
Versorgungsspannung UB /Operating Voltage UB /Tension d'alimentation UB24 V DC
Spannungstoleranz UB /Voltage Tolerance UB /Plage de la tension d'alimentation UB85-110 %
Restwelligkeit UB /Residual Ripple UB /Ondulation résiduelle UBmax. 160 %
Leistungsaufnahme bei UB /Power Consumption at UB /Consommation UBca./appx./env. 5 W
Kontakte/Contacts/Contacts
Ausgangskontakte/Output Contacts/Contacts de sortie
Sicherheitskontakte (S) nach/
safety contacts
(N/O) to
/contacts de sécurité
(F) d'après
EN 954-1, Kategorie/category/catégorie 3
3
Hilfskontakte (Ö)/
auxiliary contacts (N/C)/contacts d'info (O) 1
Ausgangskontakte mit Rückfallverzögerung/Output Contacts with Delay-on De-energisation/
Contacts de sortie temporisation à la retombée
Sicherheitskontakte (S) nach/safety contacts (N/O) to/contacts de sécurité (F) d'après
EN 954-1, Kategorie/category/catégorie 3 1
Kontaktwerkstoff/Contact Material/Matériau des contacts AgSnO2
Schaltvermögen nach/Switching Capability to/Caractéristiques de commutation
EN 60947-4-1, Kontakte/Contacts/Contacts 13-14, 23-24, 33-34, 41-42
AC1: 240 V/0,01 ... 8 A/2000 VA
400 V/0,01 ... 5 A/2000 VA
DC1:24 V/0,01 ... 8 A/200 W
AC15: 230 V/5 A; DC13: 24 V/7 A
Kontakt 57-58 (mit Rückfallverzögerung)/Contact 57-58 (with Delay-on De-energisation)/
AC1: 240 V/0,01 ... 4 A/1000 VA
Contact 57-58 (temporisation à la retombée) DC1:24 V/0,01 ... 4 A/100 W
EN 60947-5-1 (DC13: 6 Schaltspiele/Min, 6 cycles/min, 6 manoeuvres/min) AC15: 230 V/4 A; DC13: 24 V/4 A
Summe aller Ströme IΣ/Sum of all currents IΣ/Intensité totale (IΣ) max. 22 A
Mechanische Lebensdauer/Mechanical Life/Durée de vie mécanique 1 x 10⁷ Schaltspiele/cycles/période
Elektrische Lebensdauer/Electrical Life/Durée de vie électrique (1A/230V AC, cos.ϕ.=.1) 1 x 10⁵Schaltspiele/cycles/période
Eigenschaften/Features/Particularités
Anzugsverzögerung/Delay-on Energisation/Temps de réaction à la mise sous tension ca./appx./env. 150 ms
Rückfallverzögerung/Delay-on-De-Energisation/Temps de retombée K1/K2 ca./appx./env. 50 ms
Rückfallverzögerung/Delay-on-De-Energisation/Temps de retombée K4/K5
einstellbar/adjustable/réglable ca./appx./env. 0,1-3 s, 0,5-30 s, 5-300 s
fest/fixed/fixe 3 s oder/or/ou 10 s
Toleranz bei Umgebungstemperatur 20 °C/Repetition Accuracy at Ambient ±15 % +50 ms des eingestellten Werts
Temperature 20 °C/Précision pour une température ambiante de 20°C ± 15 % +50 ms of set value
±15% +50 ms de la valeur réglée
Gleichzeitigkeitsbedingung (max. Zeitdifferenz tgzwischen beiden Eingangskreisen bei auto-
matischem Start)/Simultaneity Requirements (Simultaneity conditions (max. time difference
between both input circuits closing during automatic reset)/Désynchronisme (écart de tps
max. entre les 2 canaux d’entrée en cas de réarmement automatique) ca./appx./env. 75 ms
Spannung und Strom an den Eingängen S11-S12, S11-S22, S33-S34 und Y1-Y2
Voltage and Current at inputs S11-S12, S11-S22, S33-S34 and Y1-Y2
Tension et courant aux entrées S11-S12, S11-S22, S33-S34 et Y1-Y2 24 V DC, 50 mA
Grenzbelastbarkeit/Loading capacity limit/Caractéristiques de commutation
Max. zulässiger Einschaltstrom/Max. permitted start-up current/Pouvoir de coupure admissible max.
10 A AC
EMV/EMC/CEM EN 50081-1, EN 50081-2, EN 61000-6-2,
EN 60947-5-1
Luft- und Kriechstrecken nach/Airgap Creepage to/Cheminement et claquage d'aprés DIN VDE 0110-1
Kontaktabsicherung/Contact Fuse Protection/Protection des contacts de sortie max. 10 A flink/quick/rapide oder/or/ou
(EN 60947-5-1) max. 6 A träge/slow acting/normal
Geräteabsicherung
min. 1 A; max. abhängig v.
Leitungsquerschnitt
Unit Fuse Protection min. 1 A; max. dependent on cable diameter
Protection du relais
min. 1 A; max. dépend du diamêtre du
câblage
Umgebungsbedingungen/Environment Conditions/Environnement
Umgebungstemperatur/Operating Temperature/Température d'utilisation -10 ... +55 °C
Lagertemperatur/Storage Temperature/Température de stockage -40 ... +85 °C
Klimabeanspruchung/Climate Suitability/Conditions climatiques EN 60068-2-78
Schwingungen nach/Vibrations to/Vibrations d'aprés EN 60068-2-6 Frequenz/Frequency/Frequence: 10 ... 55 Hz
Amplitude/Amplitude/Amplitude: 0,35 mm
Allgemeine Angaben zum Gerät/General Information - Unit/Caractéristiques du boîtier
Max. Anschlussquerschnitt (Einzelleiter und mehrdrähtiger Leiter mit Aderendhülsen) 2 x 2,5 mm²
Max. cable cross section (single-core or multicore with crimpconnectors)
Max. raccordement (conducteur unique ou multiple avec embout)
Anzugsdrehmoment für Anschlussklemmen (Schrauben)/Torque setting for connection 1,2 Nm
terminal screw/couple de serrage (bornier)

- 7 -
Schutzarten/Protection/Indice de protection:
Einbauraum (z. B. Schaltschrank)/Mounting (e.g. Panel)/Lieu d'implantation (ex. armoire) IP 54
Gehäuse/Housing/Boîtier IP 40
Klemmenbereich/Terminals/Bornes IP 20
Gehäusematerial (Kunststoff)/Housing material (synthetic)/Matériau du boîtier
(matiére artificielle) Noryl SE 100
Abmessungen H x B x T/Dimensions H x W x D/Dimensions H x P x L 75 x 90 x 110 mm
Gewicht/Weight/Poids 465 g
Es gelten die 02/05 aktuellen Ausgaben der
Normen
The version of the standards current at
02/05 shall apply
Se référer à la version des normes en
vigeur au 02/05.
Konventioneller thermischer Strom bei gleichzeitiger Belastung mehrerer Kontakte/Conventional thermal current while
loading several contacts/Courant thermique conventionnel en cas de charge sur plusieurs contacts (AC1, DC1)
Anzahl der unverzögerten Kontakte/number of instantaneous contacts/nombre des instantés contacts 3 2 1
Ith (A) 6,0 7,4 8,0
Abmessungen in mm ('')/Dimensions in mm ('')/Dimensions en mm ('')
75 (2.95")
110 (4.33")
90 (3.54")

- 8 -
A Pilz Ges.m.b.H., ✆01 7986263-0, Fax: 01 7986264, E-Mail: [email protected] AUS Pilz Australia, ✆03 95446300, Fax: 03 95446311, E-Mail:
[email protected] B L Pilz Belgium, ✆09 3217570, Fax: 09 3217571, E-Mail: [email protected] BR Pilz do Brasil, ✆11 4337-1241, Fax: 11 4337-1242,
E-Mail: pilz@pilzbr.com.br CH Pilz lndustrieelektronik GmbH, ✆062 88979-30, Fax: 062 88979-40, E-Mail: [email protected] DK Pilz Skandinavien K/S,
✆74436332, Fax: 74436342, E-Mail: [email protected] E Pilz lndustrieelektronik S.L., ✆938497433, Fax: 938497544, E-Mail: [email protected] F Pilz France
Electronic, ✆03 88104000, Fax: 03 88108000, E-Mail: [email protected] FIN Pilz Skandinavien K/S, ✆09 27093700, Fax: 09 27093709, E-Mail:
pilz.f[email protected] GB Pilz Automation Technology, ✆01536 460766, Fax: 01536 460866, E-Mail: [email protected] I Pilz ltalia Srl, ✆031 789511,
Fax: 031 789555, E-Mail: [email protected] IRL Pilz Ireland Industrial Automation, ✆021 4346535, Fax: 021 4804994, E-Mail: [email protected] J Pilz Japan Co.,
Ltd., ✆045 471-2281, Fax: 045 471-2283, E-Mail: [email protected] MEX Pilz de Mexico, S. de R.L. de C.V., ✆55 5572 1300, Fax: 55 5572 4194, E-Mail:
[email protected] NL Pilz Nederland, ✆0347 320477, Fax: 0347 320485, E-Mail: [email protected] NZ Pilz New Zealand, ✆09- 6345-350, Fax: 09-6345-
352, E-Mail: [email protected] P Pilz Industrieelektronik S.L., ✆229407594, Fax: 229407595, E-Mail: [email protected] PRC Pilz China Representative
Office, ✆021 62494658, Fax: 021 62491300,
ROK Pilz Korea, ✆031 8159541, Fax: 031 8159542, E-Mail: info@pilzkorea.co.kr
SE Pilz Skandinavien K/S, ✆0300 13990, Fax: 0300 30740, E-Mail: [email protected] TR Pilz Elektronik Güvenlik Ürünleri ve Hizmetleri Tic. Ltd. ¸Sti.,
✆0224 2360180, Fax: 0224 2360184, E-Mail: [email protected] USA Pilz Automation Safety L.P., ✆734 354-0272, Fax: 734 354-3355, E-Mail:
www www.pilz.com
D Pilz GmbH & Co. KG, Sichere Automation, Felix-Wankel-Straße 2, 73760 Ostfildern, Deutschland, ✆+49 711 3409-0, Fax: +49 711 3409-133,
E-Mail: [email protected]
18 731-01-2007-12 Printed in Germany

- 9 -
Prescripciones de seguridad
• El dispositivo debe ser instalado y
puesto en funcionamiento
exclusivamente por personas que estén
familiarizadas tanto con estas instruc-
ciones de uso como con las prescripcio-
nes vigentes relativas a la seguridad en
el trabajo y a la prevención de
accidentes. Observar tanto las
prescripciones VDE como las
prescripciones locales, especialmente
en lo que se refiere a las medidas de
protección.
• Durante el transporte, el almacenaje y el
funcionamiento, atenerse a la norma
EN 60068-2-6 (ver datos técnicos).
• Toda garantía se pierde en caso de que
se abra la carcasa o se lleven a cabo
remodelaciones por cuenta propia.
• Montar el dispositivo dentro de un
armario de distribución; de lo contrario
polvo y suciedad pueden afectar el fun-
cionamiento.
• Cuidar de que haya un conexionado de
seguridad suficiente en todos los contac-
tos de salida con cargas capacitivas e
inductivas.
Norme di sicurezza
• Il dispositivo può venire installato e
messo in funzione solo da persone che
conoscono bene le presenti istruzioni per
l’uso e le disposizioni vigenti relative alla
sicurezza di lavoro e all’antinfortunistica.
Osservare le disposizioni della VDE
(Associazione tedesca degli Ingegneri)
nonché le norme locali, soprattutto per
quanto riguarda le misure preventive di
protezione.
• Per il trasporto, l’immagazzinamento e
l’esercizio attenersi alle condizioni a
norma EN 60068-2-6 (v. Dati tecnici).
• Se viene aperto l’alloggiamento oppure se
vengono apportate delle modifiche in
proprio decade qualsiasi diritto di
garanzia.
• Montare il dispositivo in un armadio
elettrico; altrimenti la polvere e l’umidità
possono pregiudicare le funzioni.
• Occorre dotare tutti i contatti di uscita dei
carichi capacitivi e induttivi con un
cablaggio protettivo sufficiente.
Veiligheidsvoorschriften
• Het apparaat mag uitsluitend worden
geïnstalleerd en in bedrijf genomen door
personen die vertrouwd zijn met deze
gebruiksaanwijzing en met de geldende
voorschriften op het gebied van arbeids-
veiligheid en ongevallenpreventie. Neem
de VDE-voorschriften alsmede de
plaatselijke voorschriften in acht, in het
bijzonder m.b.t. de veiligheidsregels.
• Neem bij transport, opslag en in bedrijf
de richtlijnen volgens EN 60068-2-6 in
acht (zie technische gegevens).
• Het openen van de behuizing of het ei-
genmachtig aanpassen heeft verlies van
de garantie tot gevolg.
• Monteer het apparaat in een schakelkast.
Stof en vocht kunnen anders de werking
nadelig beïnvloeden.
• Zorg bij alle uitgangscontacten bij
capacitieve en inductieve belastingen
voor voldoende beschermbedrading.
Usoprevisto
Il modulo di sicurezza consente
l'interruzione sicura di un circuito di
sicurezza. Il modulo di sicurezza risponde
ai requisiti secondo EN 60947-5-1,
EN 60204-1 e VDE 0113-1 e può essere
utilizzato in applicazioni con
•
pulsanti di arresto d'emergenza
•
ripari mobili
L’unità non è adatta a garantire la
protezione di barriere senza contatto,
poiché non è possibile nessun avvio
dinamico.
Toegelatenapplicaties
Het veiligheidsrelais dient om een
veiligheidscircuit veilig te onderbreken. Het
veiligheidselais voldoet aan de eisen van
EN 60947-5-1, EN 60204-1 en VDE 0113-1
en mag worden gebruikt in toepassingen
met
• noodstopknoppen
• hekken
Het apparaat is niet geschikt voor het be-
veiligen van contactloze afdekkingen, aan-
gezien geen dynamische start mogelijk is.
Apparaatbeschrijving
Het NOODSTOP-relais is ondergebracht in
een P-75-behuizing. De voedingsspanning
bedraagt 24 V DC.
Kenmerken:
• Relaisuitgangen, niet vertraagd:
3 veiligheidscontacten (M), mechanisch
gedwongen
1 hulpcontact (V), mechanisch
gedwongen
• Relaisuitgangen, afvalvertraagd:
1 veiligheidscontact (M), mechanisch ge-
dwongen, met instelbare of vaste afval-
vertraging (afhankelijk v.h. apparaat)
• LED als voedingsspanningsindicatie
• LED’s voor weergave van de schakel-
toestand voor alle uitgangsrelais
Campo de aplicación adecuado
El dispositivo sirve para la interrupción
orientada a la seguridad de un circuito de
corriente de seguridad. El dispositivo de
seguridad cumple los requisitos de las
normas EN 60947-5-1, EN 60204-1 y
VDE 0113-1 y puede utilizarse en
aplicaciones con
• pulsadores de parada de emergencia
• puertas protectoras
El dispositivo no es adecuado para el
aseguramiento de coberturas sin
contacto, ya que no es posible ningún un
arranque dinámico.
Descripción del dispositivo
El dispositivo de parada de emergencia se
encuentra montado dentro de una carcasa
P-75. La tensión de alimentación es de
24 V DC.
Características:
• Salidas de relé, sin retardo: 3 contactos
de seguridad (N.A.), con guía forzada
1 contacto aux. (norm. cerrado), con
guía forzada
• Salidas de relé, con retardo a la desco-
nexión: 1 contacto de seguridad (norm.
abierto), con guía forzada, con retardo a
la desconexión ajustable o fijo (en de-
pendencia del dispositivo)
• LED de indicación tensión de alimenta-
ción
• LEDs como indicadores del estado de
conmutación para todos los relés de
salida
Descrizione
Il relè per arresto di emergenza è inserito in
un alloggiamento P-75. La tensione di ali-
mentazione è di 24 V DC.
Caratteristiche:
• Uscite relè, senza ritardo:
3 contatti di sicurezza (NA), a guida
positiva
1 contatto ausiliario (NC), a guida
positiva
• Uscite relè, con ritardo tempo di scatto:
1 contatto di sicurezza (NA), a guida
positiva con ritardo del tempo di scatto
registrabile regolabile o fisso (in base
all’unità)
• LED per indicazione della tensione di ali-
mentazione
• LED per l’indicazione dello stato per i relè
di uscita
18 731-01
PNOZ V
4E Instrucciones de uso
4I Istruzioni per l`uso
4NL Gebruiksaanwijzing

- 10 -
• Conexión para pulsador de parada de
emergencia o interruptor final de seguri-
dad y para pulsador de rearme externo
• Conexión redundante de salida
• Modo monocanal o bicanal
• Circuito de realimentación para la super-
visión de contactores externos
El dispositivo cumple los requerimientos de
seguridad siguientes:
• La instalación de seguridad permanece
activa también en los siguientes casos :
- Corte de la tensión
- Fallo de un elemento constructivo
- Defecto de bobina
- Rotura de línea
- Contacto a tierra
• Comprobación en cada ciclo de conexión/des-
conexión si los relés de salida del dis-
positivo de seguridad abren y cierran
correctamente
Si se acciona un contacto de parada de
emergencia en el circuito de entrada, se
desexcitan los dos relés K1 y K2. Los con-
tactos de seguridad con guía forzada
13-14, 23-24 y 33-34 abren. El contacto
auxiliar 41-42 cierra y se apagan los LEDs
“Ch. 1” y “Ch. 2” (arriba). Una vez trans-
currido el retardo a la desconexión se
desexcitan los relés K4 y K5, el contacto de
seguridad 57-58 abre y se apagan los LEDs
“Ch. 1” y “Ch. 2” (abajo). Antes de que sea
posible reiniciar de nuevo el dispositivo, el
tiempo de desconexión tiene que haber
transcurrido y todos los contactos de
parada de emergencia y de seguridad
tienen que estar cerrados de nuevo.
K3
S11 13 23 33 41
14 24 34 42
K2
K1
K3
Y2
Y1
PNOZ V
S34
S33
K1
S12
S12
A2
A1 57
58
K4 K3
K1
K2
K4
K5 K5
K4
F1
K1
K3 K2
S22
K5
K2
Circuito de realimentación /
Circuito di retroazione /
Terugkoppelcircuit
B
U
Circuito de entrada 1 /
Circuito di entrata 1 /
Ingangscircuit 1
Circuito de entrada 2 /
Circuito di entrata 2 /
Ingangscircuit 2
Circuito de rearme /
Circuito di Start /
Startcircuit
Fig. 1: Plano de conexiones esquemático / Schema elettrico / Schematisch schakelschema
• Collegamento per pulsante di arresto di
emergenza interruttore di fine corsa tasti
di start esterni
• Circuito d’uscita ridondante
• Azionamento ad uno o due canali
• circuito di retroazione per il controllo di
relè esterni
Il relè risponde ai seguenti requisiti di
sicurezza:
• La funzione di sicurezza rimane attiva
anche nei casi seguenti:
- caduta di tensione
- guasto di un componente
- difetto della bobina
- rottura di cavi
- dispersione a terra
• Per ciascun ciclo di accensione/
spegnimento viene eseguita la verifica
della corretta apertura dei relè di uscita
del dispositivo di sicurezza
Se nel circuito di entrata viene attivato un
contatto per arresto di emergenza,
entrambi i relè K1 e K2 si diseccitano. I
contatti di sicurezza a guida positiva 13-14,
23-24 e 33-34 si aprono.
Il contatto ausiliario 41-42 si chiude ed i
LED “Ch. 1" e “Ch. 2” (sopra) si spengono.
Dopo il ritardo del tempo di scatto i relè K4
e K5 si diseccitano, il contatto di sicurezza
57-58 si apre ed i LED “Ch. 1" e “Ch. 2”
(sotto) si spengono. Prima che l’unità
venga nuovamente avviata deve essere
trascorso il tempo di scatto e tutti i contatti
per l’arresto di emergenza e di sicurezza
devono nuovamente essere chiusi.
• Aansluiting voor Noodstop-knop of veilig-
heidseindschakelaar en voor extern
startknop
• Redundante uitgangschakeling
• Één- of tweekanalig bedrijf
• Terugkoppelcircuit ter bewaking van
externe relais
Het relais voldoet aan de volgende
veiligheidseisen:
• De veiligheidsschakeling blijft ook in de
volgende gevallen functioneren:
- spanningsuitval
- uitval van een component
- spoeldefect
- geleiderbreuk
- aardcontact
• Bij elke aan-uit-cyclus wordt
gecontroleerd, of de uitgangrelais van het
veiligheidstoestel op de juiste wijze
openen en sluiten.
Wanneer een Noodstop-contact in het
ingangscircuit wordt geactiveerd, vallen
beide relais K1 en K2 af. De mechanisch
gedwongen veiligheidscontacten 13-14,
23-24 en 33-34 gaan open. Het
hulpcontact 41-42 sluit en de LED’s “Ch. 1”
en “Ch. 2” (boven) gaan uit. Na afloop van
de afvalvertraging vallen de relais K4 en K5
af, het veiligheidscontact 57-58 gaat open
en de LED’s “Ch. 1” en “Ch. 2” (onder)
gaan uit. Voordat het apparaat opnieuw
wordt opgestart, moet de afvaltijd afgelopen
en moeten alle Noodstop- en veiligheids-
contacten weer gesloten zijn.
Descripcióndelfuncionamiento
El dispositivo PNOZ V sirve para
interrumpir por razones de seguridad un
circuito de seguridad. El dispositivo
reacciona a una interrupción en uno de los
circuitos de entrada 1 o 2 (canal 1 o canal
2). El PNOZ V puede funcionar en modo
monocanal y en modo bicanal. PNOZ V se
encuentra listo para el servicio en cuanto
que se aplica la tensión de alimentación UB
y los circuitos de entrada 1 y 2 se encuen-
tran cerrados.
Si se cierra en circuito de rearme S33-S34,
los relés de salida K1, K4 y K2, K5 se
ponen en posición de trabajo y los con-
tactos de seguridad 13-14, 23-24, 33-34 y
57-58 cierran. El contacto auxiliar 41-42
abre. Se iluminan todos los cuatro LEDs
para “CH.1” y “CH.2”.
Descrizione del funzionamento
Il PNOZ V serve per interrompere per
motivi di sicurezza un circuito elettrico di
sicurezza. Il dispositivo reagisce ad una
interruzione nel circuito di entrata 1 o 1
(canale 1 o canale 1). Il PNOZ V può
essere azionato a canale singolo o doppio.
In presenza della tensione di alimentazione
UBe con i circuiti di entrata 1 e 2 chiusi, il
PNOZ V è pronto per l’utilizzo.
Se il circuito di Start S33-S34 viene chiuso,
i relè di uscita K1, K4 e K2, K5 passano in
posizione di lavoro e i contatti di sicurezza
13-14, 23-24, 33-34 e 57-58 si chiudono. Il
contatto ausiliario 41-42 si apre. Tutti e 4 i
LED per “Ch. 1” e “Ch. 2” si accendono.
Functiebeschrijving
Het relais PNOZ V dient voor het veilig on-
derbreken van een veiligheidsstroom-
circuit. Het apparaat reageert op een
onderbreking in een van de ingangcircuits
1 of 2 (kanaal 1 resp. kanaal 2). Het PNOZ
V kan één- of tweekanalig functioneren.
Zodra er voedingsspanning UBis en de
ingangscircuits 1 en 2 gesloten zijn, is het
PNOZ V startklaar.
Wanneer het startcircuit S33-S34 wordt ge-
sloten, komen de uitgangsrelais K1, K4 en
K2, K5 op en de veiligheidscontacten 13-
14, 23-24, 33-34 en 57-58 sluiten. Het
hulpcontact 41-42 gaat open. Alle vier
LED’s voor “Ch. 1” en “Ch. 2” branden.

- 11 -
Funciones de seguridad
El relé K3 comprueba antes de cada
reconexión si los relés de salida se han
desexcitado antes completamente o si se
excitan de nuevo. En caso de fusión de
contactos o de rotura de conductor deja de
ser posible una reconexión.
Si, en conformidad con EN 60204-1 par.:
9.4.3.1 se pone a potencial de tierra la fase
Li(-) de la tensión de alimentación, se
detectan contactos a tierra. En caso de
contactos a tierra en el circuito de entrada,
de rearme o de realimentación, la corriente
de defecto (IFi>i1,2iA) dispara el fusible
electrónico interno y los relés de salida se
relajan.
Modos de funcionamiento
• Funcionamiento monocanal
- Un circuito de entrada actúa sobre am-
bos canales
- Sin redundancia (seguridad contra inte-
rrupción por cortocircuito) en el circ. de
entrada
• Funcionamiento bicanal
- Dos circuitos de entrada redundantes
(es decir idénticos) actúan sobre can.
1 y can. 2
- Supervisión de los contactos en el
circuito de entrada (seguridad contra
interrupción por cortocircuito)
• Rearme manual
- Excitación del circuito de rearme con
pulsador de rearme o contacto de
rearme
• Rearme automático
- Los relés de salida se excitan en cuanto
que los circuitos de entrada están
cerrados
- Para circuitos de parada de emergencia
no está permitido este modo de
servicio, ya que la instalación se pone
en marcha por sí misma cuando se
restablece el suministro eléctrico des-
pués de un corte de la tensión.
Montaje
El dispositivo tiene que ser montado dentro
de un armario de distribución con un grado
de protección de IP 54 como mínimo. El
dispositivo dispone en su lado trasero de un
elemento de encaje elementos de encaje
para la fijación a una guía normalizada.
Al montarlo en una guía portadora vertical
(35 mm) hay que asegurar el dispositivo por
medio de un elemento de soporte, tal como un
soporte o un ángulo final.
Funzioni di sicurezza
Ad ogni attivazione il relè K3 verifica se i
relè di uscita sono completamente
diseccitati. In caso di saldatura dei contatti
o di rottura di cavi non è possibile una
nuova attivazione.
Se secondo la norma EN 60204-1, par.:
9.4.3.1, la fase L i(-) della tensione di
alimentazione è collegata a un potenziale
verso terra, le dispersioni vero terra
verranno rilevate. In caso di dispersioni
verso terra nel circuito di entrata, Start o
retroazione il fusibile elettronico scatta
(IFi>i1,2iA) e i relè di uscita si diseccitano.
Modi operativi
• Funzionamento a canale singolo
- un circuito di entrata agisce su entrambi
i canali
- nessuna ridondanza (fail-safe) nel
circuito di entrata
• Funzionamento a due canali
- due circuiti di entrata ridondanti (cioè
identici) sono collegati al canale 1 e al
canale 2
- Controllo dei contatti nel circuito di
entrata (fail-safe in caso di cortocircuiti)
• Start manuale
- Comando del circuito di Start con tasto
di Start o contatto di Start
• Start automatico
- i relè di uscita si eccitano appena i
circuiti di entrata sono chiusi
- per i circuiti per arresto di emergenza
questo tipo di funzionamento non è
consentito in quanto l’impianto è
attivato indipendentemente in base ad
una caduta o ad un ritorno della
tensione.
Veiligheidsfuncties
Elke keer voordat de installatie wordt inge-
schakeld, controleert het relais K3 of de
uitgangsrelais van tevoren volledig zijn
afgevallen resp. weer opkomen. Bij
contactverkleving of draadbreuk is opnieuw
inschakelen niet mogelijk.
Wanneer volgens EN 60204-1 hoofdst.:
9.4.3.1 de fase Li(-) van de
voedingsspanning op aardpotentiaal wordt
gelegd, dan worden aardcontacten herkend.
Bij aardcontacten in het ingangs-, start-, of
terugkoppelcircuit activeert de lekstroom
(IFi>i1,2iA) de interne elektronische zekering
en de uitgangsrelais vallen af.
Bedrijfsmodi
• Éénkanalig bedrijf
- Een ingangscircuit werkt op beide
kanalen
- Geen redundantie (uitvalbeveiliging) in
het ingangscircuit
• Tweekanalig bedrijf:
- Twee redundante (d.w.z. identieke)
ingangcircuits werken op kanaal 1 en ka-
naal 2
- Bewaking van de contacten in het
ingangscircuit (uitvalbeveiliging tegen
kortsluiting)
• Handmatige start
- Aansturing van het startcircuit met start-
knop of startcontact
• Automatische start
- De uitgangsrelais komen op, zodra de
ingangscircuit gesloten zijn
- Voor Noodstop-stroomcircuits is deze
bedrijfsmodus niet toegelaten, aange-
zien de installatie na uitval en terugkeer
van de spannings zelfstandig aanloopt.
Montaggio
L’unità deve venire montata in un armadio
elettrico con un grado di protezione di
almeno IP 54. Per il fissaggio su di una
barra DIN l’unità è dotata di un rilievo sul
retro.
Al montaggio fissare il dispositivo su una guida
verticale (35 mm) a mezzo di supporti quali p.
es. staffe di fissaggio o angoli terminali.
Montage
Het apparaat moet in een schakelkast met
een veiligheidsklasse van minstens IP 54
worden ingebouwd. Voor de bevestiging op
een DIN-rail heeft het apparaat aan de
achterzijde een inklikelement.
Bij montage op een verticale draagrail (35 mm)
moet het apparaat worden vastgezet met een
eindsteun zoals bijv. eindhouder of eindhoek.
Ingebruikname
Neem bij ingebruikname het volgende in
acht:
•Sluit voor de uitgangscontacten een
zekering (10 A snel of 6 A traag) aan
om het verkleven van de contacten te
verhinderen.
• Sluit geen kleine stromen (bijv. 30 mA)
op contacten aan die eerst voor het
geleiden van grote stromen werden
gebruikt.
• Gebruik geen hulpcontacten 41-42 voor
veiligheidsstroomcircuits!
• Max. toegelaten kabellengten:
Tweekanalig ingangscircuit
Max. kabellengte: DC: 3,5 km
Max. leidingweerstand DC: 100 Ω
Éénkanalig ingangscircuit:
Max. kabellengte DC: 1,75 km
Max. leidingweerstand DC: 50 Ω
Puesta en marcha
Al poner en marcha hay que tener en
cuenta:
•Conectar un fusible antes de los
contactos de salida (10 A de acción
rápida o 6 A de acción lenta) con
objeto de evitar la soldadura de los
contactos.
• No conectar corrientes pequeñas (p.ej. 30
mA) con contactos a través de los cuales
se han conducido anteriormente grandes
corrientes.
•¡No utilizar contacto auxiliar 41-42 para
circuitos de seguridad!
• Longitudes máx. de línea permitidas:
Circuito de entrada bicanal
Longitudes máx. de línea DC: 3,5 km
Resistencia máx. de línea: DC: 100 Ω
Circuito de entrada monocanal
Longitudes máx. de línea DC: 1,75 km
Resistencia máx. de línea: DC: 50 Ω
Messa in funzione
Alla messa in funzione occorre conside-
rare quanto segue:
•Per evitare la saldatura dei contatti,
collegare un fusibile (10 A rapido o 6
A ad azione ritardata) prima dei
contatti di uscita.
• Non commutare piccole potenze (p. es.
30 mA) con contatti attraverso i quali
sono state commutate in precedenza alte
potenze.
•Non utilizzare il contatto ausiliario 41-42
per circuiti di sicurezza!
• Max. lunghezze conduttore consentite:
Circuito di entrata a due canali
Max. lunghezza conduttore DC: 3,5 km
Max. resistenza DC: 100 Ω
Circuito di entrata ad un canale
Max. lunghezza conduttore DC: 1,75 km
max. resistenza DC: 50 Ω

- 12 -
Requisitos:
Sección del cable 2 x 1,5 mm²
Capacidad 150 nF/km
Resistencia 28 Ω/km
Temperatura máx. 25 °C
• Utilizar para las líneas material de
alambre de cobre con una resistencia a
la temperatura de 60/75 °C.
• El par de apriete de los tornillos en los
bornes de conexión puede ser de
1,2 Nm máx.
• Respetar sin falta las indicaciones del
capítulo “Datos técnicos”.
Conexión
• PNOZ V con retardo a la desconexión
ajustable: Fijar el tiempo de retardo para
contacto de seguridad 57-58 con ayuda
de un destornillador.
• Conectar tensión de alimentación en los
bornes A1 (+) y A2 (-).
• Circuito de entrada: Conectar pulsador
de parada de emergencia o interruptor fi-
nal de seguridad:
- Funcionamiento monocanal: Conectar
circuito de entrada a S11 y S12;
colocar puente entre S12-S22.
-
Funcionamiento bicanal: Conectar
circuitos de entrada en
S11, S12 y en
S11, S22.
• Circuito de rearme
- Rearme manual: Conectar contacto de
rearme entre S33 y S34.
-
Rearme automático: Puente en S33-S34
• Circuito de realimentación
Conectar contactos normalmente
cerrados de los contactores que se han
de supervisar en el circuito de
realimentación Y1-Y2 o bien - si no se
necesita - puentear Y1-Y2.
Secuencia
El dispositivo está conectado cuando
• Hay tensión de alimentación (LED
“Power” se ilumina)
• Los circuitos de entrada están cerrados
• El circuito de rearme se cierra durante
150 ms como mínimo
Los contactos de seguridad 13-14, 23-24,
33-34 y 57-58 están cerrados y se iluminan
todos los cuatro LEDs para “Ch. 1” y “Ch.
2”. El contacto auxiliar 41-42 está abierto.
Si se abre el circuito de entrada, se abren
los contactos de seguridad 13-14, 23-24,
33-34. El contacto auxiliar 41-42 cierra de
nuevo. Los LEDs “Ch. 1” y “Ch. 2” (arriba)
se apagan. Una vez transcurrido el retardo
a la desconexión abre el contacto de
seguridad 57-58 abre y se apagan los
LEDs “Ch.i1” y “Ch. 2” (abajo).
Activar de nuevo
• Cerrar circuito de entrada.
• Cerrar el circuito de rearme durante
150 ms como mínimo.
Aplicación
En todos los ejemplos se detectan con-
tactos a tierra. Las figs. 2 y 3 son ejemplos
de circuitos de parada de emergencia.
Controles de puerta de protección (Fig.
4 - 7):
• Control de puerta de protección 1 (Fig. 4)
- Rearme manual con S2
- Funcionamiento monocanal
- Apropiado para puertas protectoras que
se abren sólo por razones de
mantenimiento
Condizioni preliminari:
Sezione trasversale cavo 2 x 1,5 mm²
Capacità 150 nF/km
Resistenza 28 Ω/km
Temperatura mass. 25 °C
• Per i cavi utilizzare materiale in filo di
rame con una resistenza termica intorno
ai 60/75 °C .
• La coppia di serraggio massima delle viti
sui morsetti deve essere 1,2 Nm.
• Attenersi assolutamente alle indicazioni
riportate al capitolo “Dati tecnici”.
Collegamento
• PNOZ V con ritardo del tempo di scatto
registrabile: Fissare il tempo di ritardo per
il contatto di sicurezza 57-58 con l’ausilio
di un cacciavite.
• Collegare la tensione di alimentazione ai
morsetti A1 (+) e A2 (-).
• Circuito di entrata: collegare il tasto di
Arresto di emergenza oppure l’interruttore
di fine corsa:
- Funzionamento a canale singolo:
collegare il circuito di entrata a S11 e
S22; cavallottare S12-S22.
-
Funzionamento a due canali: collegare il
circuito di entrata ad S11- S12 e ad
S12-S22.
• Circuito di Start
- Start manuale: collegare il contatto di
Start tra S33 ed S34.
- Start automatico: cavallottare S33-S34.
• Circuito di retroazione
Collegare i contatti NC del contattore da
controllare al circuito di retroazione Y1-
Y2 oppure se non è necessario,
cavallottare Y1-Y2.
Procedura
Il dispositivo è attivato quando:
• è presente la tensione di alimentazione (il
LED “POWER” è acceso).
• o circuiti di entrata sono chiusi
• il circuito di Start è chiuso da almeno
150 ms
I contatti di sicurezza 13-14, 23-24, 33-34
e 57-58 sono chiusi e tutti e quattro i LED
per “Ch. 1” e “Ch. 2” si accendono. Il
contatto ausiliario 41-42 è aperto. Se il
circuito di entrata viene aperto, i contatti di
sicurezza 13-14, 23-24, 33-34 si aprono. Il
contatto ausiliario 41-42 si chiude
nuovamente. I LEDs “Ch.i1” e “Ch. 2” (so-
pra) si spengono. Dopo il ritardo del tempo
di scatto il contatto di sicurezza 57-58 si
apre e i LED “Ch.i1” e “Ch. 2” (sotto) si
spengono.
Riattivazione
• Chiudere circuito di entrata
• Chiudere il circuito di Start per un minimo
di 150 ms
Utilizzo
Voorwaarden:
Dwarsdoorsnede geleider 2 x 1,5 mm²
Capaciteit 150 nF/km
Weerstand 28 Ω/km
Temperatuur max. 25 °C
• Leidingmateriaal van koperdraad met een
temperatuurbestendigheid van 60/75 °C
gebruiken.
• Het aanhaalmoment van de schroeven
op de aansluitklemmen mag max.1,2 Nm
bedragen.
• Houdt u zich aan de gegevens in het
hoofdstuk “Technische gegevens”.
Aansluiting
• PNOZ V met instelbare afvalvertraging:
Vertragingstijd voor veiligheidscontact
57-58 met behulp van een
schroevendraaier vastzetten.
• Voedingsspanning op de klemmen A1 (+)
en A2 (-) aansluiten.
• Ingangscircuit: Noodstop-knop of
veiligheidseindschakelaar aansluiten:
- Éénkanalig bedrijf: ingangscircuit op
S11 en S12 aansluiten; brug tussen
S12-S22 nvoegen.
- Tweekanalig bedrijf: ingangscircuits op
S11, S12 en op S11, S22 aansluiten.
• Startcircuit
- Handmatige start: startcontact tussen
S33 en S34 aansluiten.
- Automatische start: brug op S33-S34
• Terugkoppelcircuit
Verbreekcontacten van de te bewaken
relais op het terugkoppelcircuit Y1-Y2
aansluiten of - indien niet noodzakelijk -
brug Y1-Y2 tussenvoegen.
Verloop:
Het apparaat is ingeschakeld als
• er voedingsspanning is (LED “POWER”
brandt)
• de ingangscircuits gesloten zijn
• het startcircuit voor min. 150 ms wordt
gesloten
De veiligheidscontacten 13-14, 23-24,
33-34 en 57-58 zijn gesloten en alle vier
LED’s voor “Ch. 1” en “Ch. 2” branden. Het
hulpcontact
41-42 is open. Wanneer het ingangscircuit
wordt geopend, dan gaan de veiligheids-
contacten 13-14, 23-24, 33-34 open. Het
hulpcontact 41-42 sluit weer. De LED’s
“Ch.i1” en “Ch. 2” (boven) gaan uit. Na
afloop van de afvalvertraging gaat het
veiligheidscontact 57-58 open en de LED’s
“Ch.i1” en “Ch. 2” (beneden) gaan uit.
Weer activeren
• Ingangscircuit sluiten.
• Startcircuit voor minstens 150 ms sluiten.
In tutti gli esempi vengono rilevate dis-
persioni a terra. Le fig. 2 e 3 sono esempi
per circuiti di arresto di emergenza.
Comandi per porta di protezione (fig. 4-7)
• Comando per porta di protezione 1
(fig. 4)
- Start manuale con S2:
- funzionamento a canale singolo
- adatto per porte di protezione, che
vengono aperte solo per ragioni di
manutenzione
Toepassing
In alle voorbeelden worden aardcontacten
herkend. Afb. 2 en 3 zijn voorbeelden voor
Noodstop-stroomcircuits.
Heksturingen (afb. 4 - 7):
• Heksturing 1 (afb. 4)
- handmatige start met S2
- éénkanalig bedrijf
- geschikt voor hekken die uitsluitend
voor onderhoudsdoeleinden worden
geopend

- 13 -
S11 S22 Y1
S12 Y2S12
S33
S34
S1 S2
S11
S12 S34 Y2S22
Y1S33
S1 S2
Fig. 2: Parada emergencia monocanal (S1)/ Fig. 3: Parada de emergencia bicanal (S1) / Fig. 4: Control de puerta de protección 1/
Arresto di emergenza a canale Arresto di emergenza a canale Comando porta di protezione 1/
singolo (S1) / doppio (S1) / Hekbesturing 1
Éénkanalige Noodstop (S1) Tweekanalige Noodstop (S1)
¡Conectar el aparato sólo como en las
figuras siguientes!
S34 Y2
Y1S33S11
S12S12
S22
S2
S1
K6
57 13
58 14
K9 K7
Y1 Y2
K8
K9 K7
K8
K6
1L1
(1L+)
1L2
(1L-)
Fig. 5: Control de puerta de protección 2 / Fig. 6: Control de puerta de protección 3 / Fig. 7: Ej. de conexión para contactores
Comando porta di protezione 2 / Comando porta di protezione 3 / externos / Esempio di collegamento
Hekbesturing 2 Hekbesturing 3 per contattori esterni / Aansluit-
voorbeeld voor externe relais
S34 Y2
Y1
S11
S22
S1
S2
S12 S33
S34 Y2
Y1
S33
S12
S22
S11
S3
S1
S2
S1/S2: Parada de emergencia o bien final de carrera de seguridad para puertas /
Interruttore arresto di emergenza o porta di protezione / Noodstop- resp. hekschakelaar
S3: Pulsador de rearme / Tasto di Start / Startknop
Elemento accionado / Elemento
non azionato / Geactiveerd
element
Puerta no cerrada / Porta non chiusa /
Hek niet gesloten
Puerta cerrada / Porta chiusa /
Hek gesloten
Collegare l’unità solo come indicato nelle
figure seguenti!
Het apparaat alleen zoals in onderstaande
afbeeldingen aansluiten!
• Control de puerta de protección 2 (Fig.
5)
- Rearme manual con S3
- Funcionamiento bicanal
- Apropiado para puertas protectoras con
elevados requerimientos de seguridad
• Control de puerta de protección 3 (Fig. 6)
- Con rearme automático después de
cerrar las puertas protectoras
- Supervisión de la secuencia temporal
del interruptor límite S1 y S2 (diferencia
tgde los puntos de conmutación aprox.
75 ms)
- Funcionamiento bicanal
- Apropiado para puertas protectoras con
altos requerimientos de seguridad
El circuito de realimentación sirve para la
supervisión de contactores externos que se
uti-lizan para el reforzamiento de contactos
o para la multiplicación (fig. 7). Es posible
una combinación con las conexiones según
fig. 2 - 6.
•
Comando per porta di protezione 2 (fig.
5)
- Start manuale con S3
- funzionamento a due canali
- adatto per porte di protezione con
elevati requisiti di sicurezza
• Comando per porta di protezione 3 (fig.
6)
- con Start automatico dopo la chiusura
delle porte di sicurezza
- controllo della sequenza temporale
degli interruttori di fine corsa S1 ed S2
(differenza tgdei punti di commutazione
ca. 75 ms).
- funzionamento a due canali
- adatto per porte di protezione con
elevati requisiti di sicurezza
Il circuito di retroazione serve al controllo
di relè esterni, che vengono utilizzati per
rafforzare o aumentare il numero di contatti
(fig. 7). È possibile una combinazione come
illustrato alle figure 2 -6.
• Heksturing 2 (afb. 5)
- handmatige start met S3
- tweekanalig bedrijf
- geschikt voor hekken met verhoogde
veiligheidseisen
• Heksturing 3 (afb. 6)
- met automatische start na het sluiten
van de hekken
- Bewaking van de chronologische
volgorde van de eindschakelaars S1 en
S2 (verschil tgvan de schakelpunten
ca. 75 ms.)
- tweekanalig bedrijf
- geschikt voor hekken met verhoogde
veiligheidseisen
Het terugkoppelcircuit is voor het
bewaken van de externe relais die voor de
contactversterking of vermeerdering
worden gebruikt
(afb. 7). Een combinatie met de
schakelingen volgens afb. 2 - 6 is mogelijk.

- 14 -
Requisitos eléctricos / Requisiti elettrici / Elektrische eisen
Tensión de alimentación UB/Tensione di alimentazione UB/Voedingsspanning UB
Tolerancia de tensión de alimentación UB/Tolleranza di tensione UB/Spanningstolerantie UB
Ondulación residual UB/Ondulazione residua UB/Restrimpel UB
Consumo de energía con UB/Potenza assorbita UB/Opgenomen vermogen bij UB
Contactos/Contatti/Contacten
Contactos de salida/Contatti di uscita/Uitgangscontacten
Cont. seguridad (N.A.) según/Contatti sicurezza (NA) secondo/Veiligheidscontacten (M)
volgens EN 954-1, categoría/categoria/categorie 3
Contactos auxiliares (normalmente cerrados)/Contatti ausiliari (NC)/Hulpcontacten (V)
Contactos de salida con retardo a la desconexión/Contatti di uscita con ritardo del tempo di
scatto/Uitgangscontact met afvalvertraging
Cont. seguridad (N.A.) según/Contatti sicurezza (NA) secondo/Veiligheidscontacten (M)
volgens EN 954-1, categoría/categoria/categorie 3
Material de los contactos/Materiale di contatto/Contactmateriaal
Poder de corte según/Caratteristiche di commutazione secondo norma/Schakelvermogen
volgens EN 60947-4-1, contactos/contatti/contacten 13-14, 23-24, 33-34, 41-42
Contacto/Contatto/Contact 57-58 (con retardo a desconexión) /
(con ritardo del tempo di scatto)/(met afvalvertraging)
EN 60947-5-1 (DC13: 6 ciclos/min./cicli al minuto/schakelingen/min)
Suma de todas las corrientes/Somma di tutte le correnti/Totaal van alle stromen
Vida útil mecánica/Durata meccanica/Mechanische levensduur
Vida útil eléctrica/Durata elettrica/Elektrische levensduur
Propiedades/Caratteristiche/Eigenschappen
Retardo a la conexión/Ritardo di attrazione/Opkomvertraging
Retardo a la desconexión/Ritardo del tempo di scatto/Afvalvertraging K1/K2
Retardo a la desconexión/Ritardo del tempo di scatto/Afvalvertraging K4/K5
ajustable/regolabile/instelbaar
fijo/fisso/vast
Tolerancia a temperatura ambiente de/Tolleranza temperatura ambiente/Tolerantie bij
omgevingstemperatuur 20 °C
Condición de simultaneidad (máx. dif. temporal tgentre ambos circuitos de entrada y rearme
automático)/Requisiti sincronizzati (differenza mass. di tempo tgtra entrambi i circuiti di entrata
in caso di Start automatico)/Gelijktijdigheidsvoorwaarde (max. tijdsverschil tgtussen beide
ingangscircuits bij automatische start)
Tensión y corriente en las entradas/Tensione e corrente sulle entrate/Spanning en stroom
bij de ingangen S11-S12, S11-S22, S33-S34 y/e/en Y1-Y2
Capacidad de carga límite/Carico limite/Grensbelastbaarheid
Corriente máx. de conexión permitida/Corrente d’inserzione max. consentita/
Max. toelaatbare inschakelstroom
CEM/Compatibilità elettromagnetica/EMC
Dist. de fuga y dispersión superficial según/Intraferri d’aria e vie di dispersione secondo/
Lucht- en kruipwegen volgens
Protección de los contactos externa según/Protezione dei contatti di uscita secondo/
Contactbeveiliging extern volgens EN 60947-5-1
24 V DC
85-110 %
máx./max. 160 %
aprox./ca. 5 W
3
1
1
AgSnO2
AC1: 240 V/0,01 ... 8 A/2000 VA
400 V/0,01 ... 5 A/2000 VA
DC1: 24 V/0,01 ... 8 A/200 W
AC15: 230 V/5 A; DC13: 24 V/7 A
AC1: 240 V/0,01 ... 4 A/1000 VA
DC1: 24 V/0,01 ... 4 A/100 W
AC15: 230 V/4 A; DC13: 24 V/4 A
máx./max. 22 A
1 x 10⁷ciclos/cicli/schakelingen
1 x 10⁵ciclos/cicli/schakelingen
aprox./ca. 150 ms
aprox./ca. 50 ms
aprox./ca. 0,1-3 s, 0,5-30 s, 5-300 s
3 s o bien/oppure/of 10 s
±15 % +50 ms del valor ajustado/del valore
registrato/van de ingestelde waarde
aprox./ca. 75 ms
24 V DC, 50 mA
10 A AC
EN 50081-1, EN 50081-2, EN 61000-6-2,
EN 60947-5-1
DIN VDE 0110-1
máx./max. 10 A rápido o/veloce o/snel of
máx./max. 6 A de acción lenta/ad azione
ritardata/traag
Datostécnicos/Dati tecnici/Technischegegevens
Comprobación - Causas de
errores
Interrumpiendo los circuitos de entrada
puede comprobarse si el dispositivo dispara
o se deja activar de nuevo como es debido.
Por motivos de seguridad, el dispositivo no
puede arrancarse cuando se presentan los
errores siguientes:
• Funcionamiento defectuoso de los
contactos:
En caso de contactos fundidos, después
de abrir el circuito de entrada no es
posible ninguna nueva activación.
• Interrupción de línea, cortocircuito o
contacto a tierra (p.ej. en el circuito de
entrada)
Verifica - Origine degli errori
Con l’interruzione del circuito di entrata è
possibile verificare la corretta eccitazione/
diseccitazione dell’unità.
Per ragioni di sicurezza l’unità non può
essere attivata in presenza dei problemi
seguenti:
• Mancato funzionamento dei contatti:
in caso di saldatura dei contatti, dopo
l’apertura dei circuiti di entrata non è
possibile nessuna nuova attivazione.
• Rottura di cavi, cortocircuito o
dispersione a terra (p. es. nel circuito di
entrata)
Controle-Foutoorzaken
Door het onderbreken van het
ingangscircuit kan worden gecontroleerd, of
het apparaat volgens de voorschriften
geactiveerd wordt resp. zich opnieuw laat
activeren.
Om veiligheidsredenen kan het apparaat bij
de volgende fouten niet worden gestart:
• Storing van de contacten:
Wanneer contacten met elkaar zijn
verkleefd, is na het openen van het
ingangscircuit geen activering mogelijk.
• Leidingsonderbreking, kortsluiting of
aardcontact (bijv. in het ingangscircuit)

- 15 -
Protección de dispositivo/Descrizione dell’unità/Relaisbescherming
Condiciones ambientales/Condizioni ambientali/Omgevingscondities
Temperatura ambiente/Temperatura ambiente/Omgevingstemperatuur
Temperatura de almacenaje/Temperatura di magazzinaggio/Opslagtemperatuur
Condiciones climáticas/Sollecitazione climatica/Klimaatcondities
Oscilaciones según/Vibrazioni secondo norma/Trillingen volgens
EN 60068-2-6
Datos generales/Informazioni generali/Algemene gegevens
Sección de conexión máx. (cond. monofilar y cond. multifilar con terminal)/Max. sez.
trasversale cavo (cond. unico o multiplo con graffa)/Max. doorsnede aansluiting (geleider
met enkele en meerdere draden met adereindhuls)
Par de apriete para bornes de conexión (tornillos)/Coppia di serraggio per i morsetti (viti)/
Aanhaalmoment voor aansluitklemmen (schroeven)
Grados de protección/Tipi di protezione/Veiligheidsklassen
Lugar de montaje/Spazio necessario per il montaggio/Inbouwruimte
Carcasa/Alloggiamento/Kast
Zona de bornes/Terminali/Aansluitklemmen
Material de la carcasa/Materiale impiegato per l’alloggiamento/Behuizingsmateriaal
Dimensiones Al x An x La/Misure altezza x larghezza x profondità/Afmetingen H x B x D
Peso/Peso/Gewicht
mín./min 1 A;
máx. según sección de cable/in base alla
sezione trasversale del cavo/max.
afhankelijk van de kabeldoorsnede
-10 ... +55 °C
-40 ... +85 °C
EN 60068-2-78
Frecuencia/Frequenza/Frequentie:
10...55Hz
Amplitud/Ampiezza/Amplitude: 0,35 mm
2 x 2,5 mm²
1,2 Nm
IP54
IP40
IP20
Plástico/Resina termoplastica/Kunststof
Noryl SE 100
75 x 90 x 110 mm
465 g
Dimensiones en mm (")/Dimensioni in mm (")/Afmetingen in mm (")
75 (2.95")
110 (4.33")
90 (3.54")
Van toepassing zijn de in 02/05 actuele
versies van de normen.
Per le norme citate, sono applicate le versioni
in vigore a 02/05.
Son válidas las versiones actuales de las
normas 02/05.
Corriente térmica convencional en caso de carga simultánea de varios contactos/Corrente termica
convenzionale con carico contemporaneo dei contatti/Conventionele thermische stroom bij gelijktijdige
belasting van meerdere contacten (AC1, DC1)
Cantidad de contactos
sin retardo
/Numero dei contatti
istantanei
/ Aantal
niet vertraagde
contacten 3 2 1
Ith (A)
6,0 7,4 8,0

- 16 -
A Pilz Ges.m.b.H., ✆01 7986263-0, Fax: 01 7986264, E-Mail: [email protected] AUS Pilz Australia, ✆03 95446300, Fax: 03 95446311, E-Mail:
[email protected] B L Pilz Belgium, ✆09 3217570, Fax: 09 3217571, E-Mail: [email protected] BR Pilz do Brasil, ✆11 4337-1241, Fax: 11 4337-1242,
E-Mail: pilz@pilzbr.com.br CH Pilz lndustrieelektronik GmbH, ✆062 88979-30, Fax: 062 88979-40, E-Mail: [email protected] DK Pilz Skandinavien K/S,
✆74436332, Fax: 74436342, E-Mail: [email protected] E Pilz lndustrieelektronik S.L., ✆938497433, Fax: 938497544, E-Mail: [email protected] F Pilz France
Electronic, ✆03 88104000, Fax: 03 88108000, E-Mail: [email protected] FIN Pilz Skandinavien K/S, ✆09 27093700, Fax: 09 27093709, E-Mail:
pilz.f[email protected] GB Pilz Automation Technology, ✆01536 460766, Fax: 01536 460866, E-Mail: [email protected] I Pilz ltalia Srl, ✆031 789511,
Fax: 031 789555, E-Mail: [email protected] IRL Pilz Ireland Industrial Automation, ✆021 4346535, Fax: 021 4804994, E-Mail: [email protected] J Pilz Japan Co.,
Ltd., ✆045 471-2281, Fax: 045 471-2283, E-Mail: [email protected] MEX Pilz de Mexico, S. de R.L. de C.V., ✆55 5572 1300, Fax: 55 5572 4194, E-Mail:
[email protected] NL Pilz Nederland, ✆0347 320477, Fax: 0347 320485, E-Mail: [email protected] NZ Pilz New Zealand, ✆09- 6345-350, Fax: 09-6345-
352, E-Mail: [email protected] P Pilz Industrieelektronik S.L., ✆229407594, Fax: 229407595, E-Mail: [email protected] PRC Pilz China Representative
Office, ✆021 62494658, Fax: 021 62491300,
ROK Pilz Korea, ✆031 8159541, Fax: 031 8159542, E-Mail: info@pilzkorea.co.kr
SE Pilz Skandinavien K/S, ✆0300 13990, Fax: 0300 30740, E-Mail: [email protected] TR Pilz Elektronik Güvenlik Ürünleri ve Hizmetleri Tic. Ltd. ¸Sti.,
✆0224 2360180, Fax: 0224 2360184, E-Mail: [email protected] USA Pilz Automation Safety L.P., ✆734 354-0272, Fax: 734 354-3355, E-Mail:
www www.pilz.com
D Pilz GmbH & Co. KG, Sichere Automation, Felix-Wankel-Straße 2, 73760 Ostfildern, Deutschland, ✆+49 711 3409-0, Fax: +49 711 3409-133,
E-Mail: [email protected]
18 731-01-2007-12 Printed in Germany
Other manuals for PNOZ V
1
Table of contents
Other Pilz Relay manuals

Pilz
Pilz PNOZ XV3.1P User manual

Pilz
Pilz PNOZ X2.5P Series User manual

Pilz
Pilz PNOZ X2.1VP User manual

Pilz
Pilz PNOZ XV3.1P User manual

Pilz
Pilz 21 396-04 User manual

Pilz
Pilz PZE x4p User manual

Pilz
Pilz PNOZ X1P User manual

Pilz
Pilz PNOZSIGMA Series User manual

Pilz
Pilz PNOZ e5.13p User manual

Pilz
Pilz PNOZ X3 Owner's manual