manuals.online logo
Brands
  1. Home
  2. •
  3. Brands
  4. •
  5. Pioneer
  6. •
  7. Turntable
  8. •
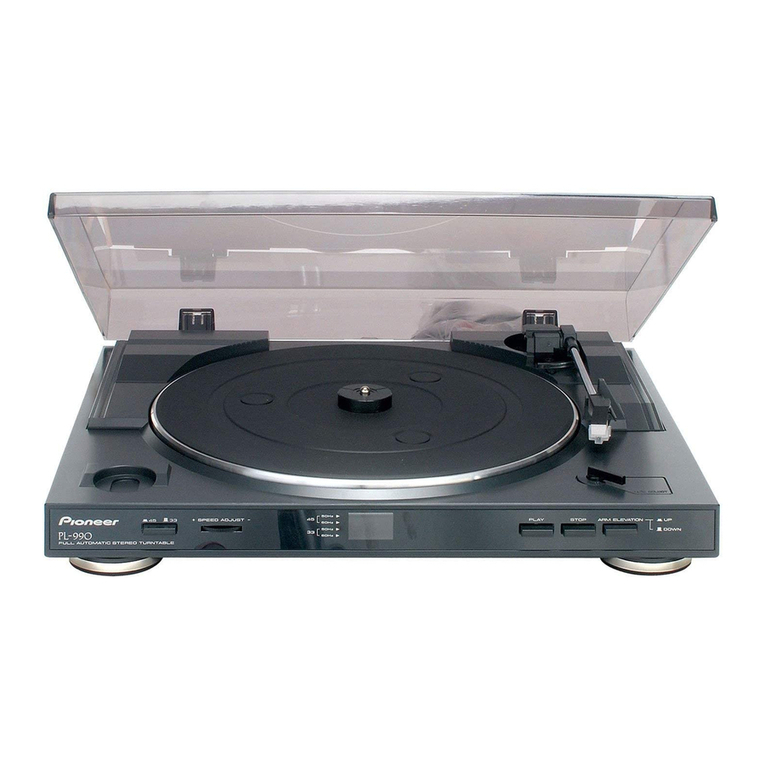
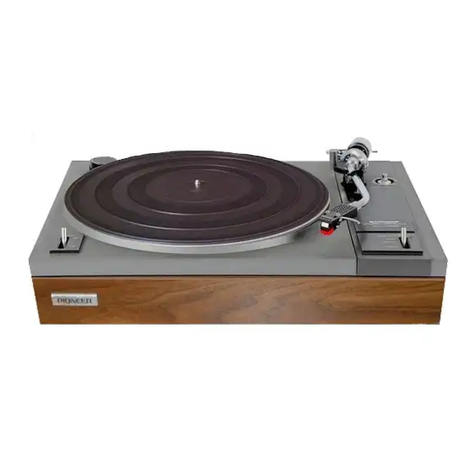
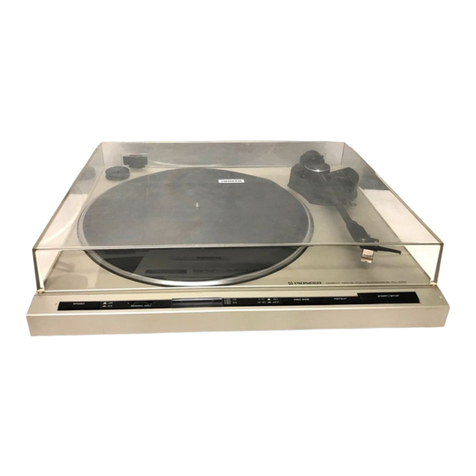
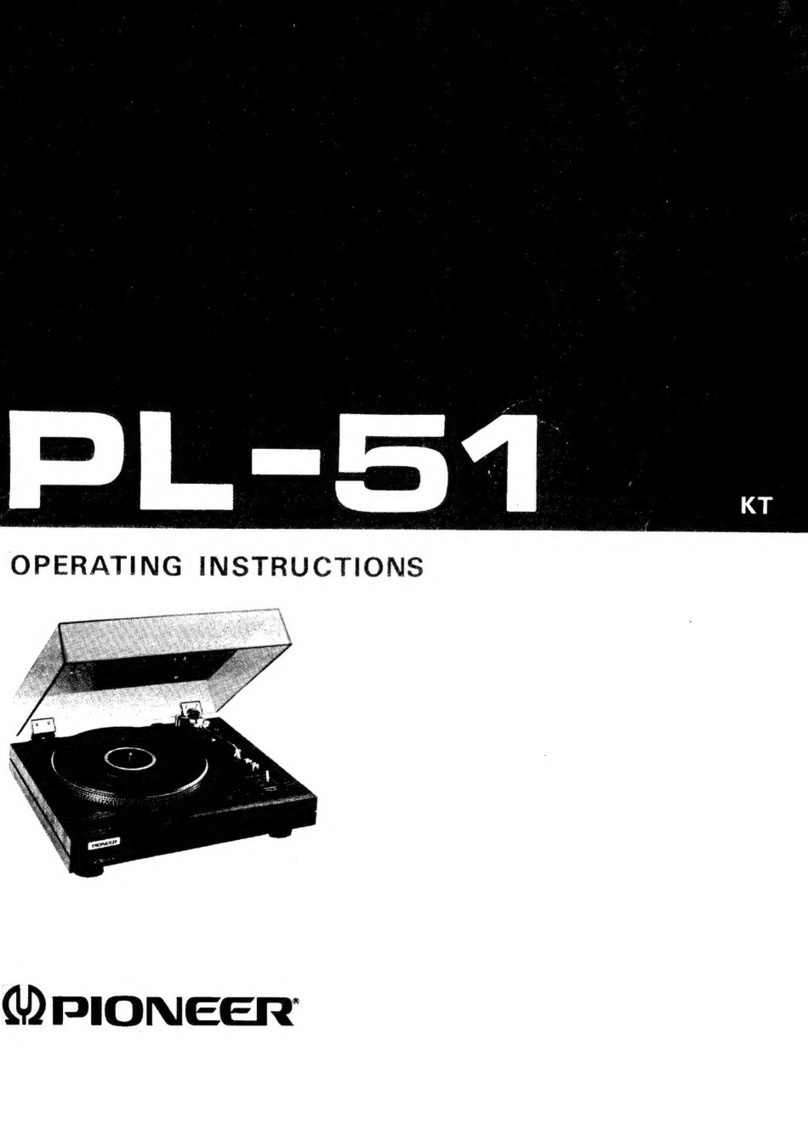
  9. Pioneer PL-600 User manual

Pioneer PL-600 User manual

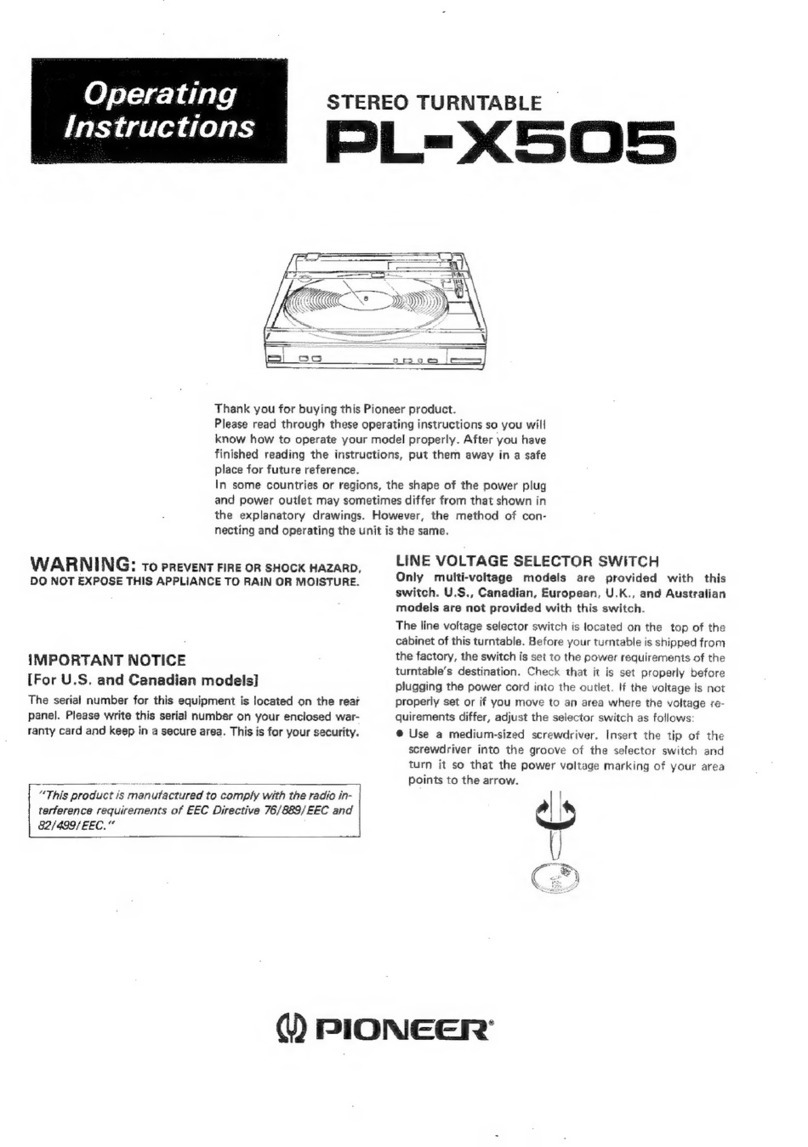
Operating
Instructions
STEREO
TURNTABLE
PL-335
PL-335A
PL-600
lilustration
shows
PL-335.
Thank
you
for
buying
this
Pioneer
product.
Please
read
through
these
operating
instructions
so
you
will
know
how
to
operate
your
unit
properly.
After
you
have
finished
reading
the
instructions,
keep
the
manual
in
a
safe
place
for
future
reference.
In
some
countries
or
regions,
the
shape
of
the
power
plug
and
power
outlet
may
sometimes
differ
from
that
shown
in
the
drawings.
However,
the
method
of
connecting
and
operating
the
unit
is
the
same.
WARNING:
To
prREVENT
FIRE
OR
SHOCK
HAZARD,
DO
NOT
EXPOSE
THIS
APPLIANCE
TO
RAIN
OR
MOISTURE.
IMPORTANT
NOTICE
{For
U.S.
and
Canadian
models]
The
serial
number
for
this
equipment
is
located
on
the
rear
panel.
Please
write
this
serial
number
on
your
enclosed
warranty
card
and
keep
in
a
secure
area.
This
is
for
your
security.
{For
Canadian
model
with
the
polarized
plug]
CAUTION:
10
PREVENT
ELECTRIC
SHOCK
DO
NOT
USE
THIS
(POLARIZED)
PLUG
WITH
AN
EXTENSION
CORD,
RECEPTACLE
OR
OTHER
OUTLET
UNLESS
THE
BLADES
CAN
BE
FULLY
INSERTED
TO
PREVENT
BLADE
EXPOSURE.
ATTENTION:
pour
pREVENIR
LES
CHOCS
ELECTRIQUES
NE
PAS
UTILISER
CETTE
FICHE
POLARISEE
AVEC
UN
PROLONGATEUR,
UNE
PRISE
OE
COURANT
OU
UNE
AUTRE
SORTIE
DE
COURANT,
SAUF
SI
LES
LAMES
PEUVENT
ETRE
INSEREES
A
FOND
SANS
EN
LAISSER
AUCUNE
PARTIE
A
DECOUVERT,
Features.
Handling
Precautions
.
|
Before
Operating
Turntable
-
OW
WwW
Connections.............cc
CONTENTS
—S
=
LINE
VOLTAGE
SELECTOR
SWITCH
Only
multi-voltage
models
are
provided
with
this
switch.
U.S.,
Canadian,
European,
U.K.,
and
Australian
models
are
not
provided
with
this
switch.
Mains
voltages
in
Saudi
Arabia
are
127V
and
220V
only.
The
line
voltage
selector
switch
is
located
on
the
top
of
the
cabinet
of
this
turntable.
Before
your
turntable
is
shipped
from
the
factory,
the
switch
is
set
to
the
power
requirements
of
the
turntable’s
destination.
Check
that
it
is
set
properly
before
plugging
the
power
cord
into
the
outlet.
lf
the
voliage
is
not
properly
set
or
if
you
move
to
an
area
where
the
voltage
require-
ments
differ,
adjust
the
selector
switch
as
follows:
©
Use
a
medium-sized
screwdriver.
Insert
the
tip
of
the
screw-
driver
into
the
groove
of
the
selector
switch
and
turn
it
so
that
the
power
voltage
marking
of
your
area
points
to
the
arrow.
ments
of
the
EC
(European
Community)
Directive
87/308/EE
Names
and
Uses
of
Parts.
How
to
Play
Records
....
Troubleshooting
Specifications...
eearncas
n=
YQ
PIONEER’
The
Art
of
Entertainment
The
lightr
equilater:
presence
of
uninsulated
“dangerous
voltage”
w
product's
enclosure
thet
may
be
of
suffic
IIMIPORTANT
1
CAUTION
RISK
OF
ELECTRIC
SHOCK
OO
NOT
OPEN
CAUTION
10
PREVENT
THE
RISK
GF
ELECTRIC
SHOCK,
DO
NOT
REMOVE
COVER
1OR
BACK)
AIO
USER
S
PARTS
INSIDE
REFER
SERVICING
10
SERVICE
PERSONNEL
ve
tol
sie
etegn
al
the
Haichoe:
a
satguacylty
Une
sapien
IMPORTANT
2
If
the
apparatus
is
fitted
with
AC
mains
power
out-
let(s),
see
REAR
PANEL
FACILITIES
for
convenient
connection
of
additional
Hi-Fi
component(s)..Make
all
connections
to
the
AC
autlet(s)
and
the
signal
terminals
first.
Connect
the
plug
to
the
wall
socket
last,
make
sure
that
the
power
switch
is
off
The
power
switch
is
secondary
connected
and
there-
fore
does
not
separate
the
unit
from
mains
power
in
STANDBY
(tonearm
is
on
the
rest}
position.
Ls
FOR
USE
IN
THE
UNITED
KINGDOM
WARNING.
This
plug
must
only
be
connected
to
electronte
apparatus
equipped
with
suitable
ut
off
the
plug
and
fit
an
appropriate
type
in
accordance
with
the
instructions
below.
The
cut-off
plug
must
be
disposed
of
as
an
electrical
shock
hazard
could
exist
if
connected
ta
a
socket
outlet.
dance
with
the
tollawing
code:
Blane
Neutral
Rrown:
Live
As
the
colours
oi
the
wires
in
the
mains
fe
apparatus
May
not
corespand
with
the
marking
identifying
the
terminals
in
your
plus
y
as
follows:
The
wire
which
is
coloured
lie
must
b+
conr
the
terminal
which
is
marked
with
the
lav
eoloured
black.
The
we
to
the
alotinesd
cad
READ
INSTRUCTIONS
—
All
the
safety
and
operating
instructions
should
be
read
before
the
appliance
is
operated,
RETAIN
INSTRUCTIONS
—
The
operating
instrucions
should
be
retained
for
future
reference.
HEED
WARNING
—
All
warnings
on
the
appliance
and
in
the
operating
instructions
should
be
adhered
to.
FOLLOW
INSTRUCTIONS
—
All
operating
and
use
in-
structions
should
be
followed.
WATER
AND
MOISTURE
—
The
appliance
shouid
not
be
used
near
water
—
for
example,
neer
a
bathtub,
washbowdl,
kitchen
sink,
laundry
tub,
in
a
wet
base-
ment,
or
near
8
swimming
pool,
ete.
LOCATION
-
The
eppliance
should
6¢
installed
in
a
stable
location.
WALL
OR
CEILING
MOUNTING
—
The
appliance
should
not
be
mounted
to
a
wall
or
ceiling,
VENTILATION
—
The
appliance
should
be
situated
so
that
its
location
or
position
does
not interfere
with
its
proper
ventilation.
For
example,
the
appliance
should
not
be
situated
on
a
bed,
sofa,
rug,
or
similar
surface
that
may
block
the
ventilation
openings;
or,
placed
in
a
built-in
instatlation,
such
as
a
bookcase
or
cabinet
that
may
impede
the
flow
of
air
through
the
ventilation
openings.
HEAT
—
The
appliance
should
be
situated
away
from
heat
sources
such
as
radiators,
heat
registers,
stoves,
or
other
appliances
(including
amplifiers)
that
produce
heat.
POWER
SOURCES
—
The
appliance
should
be
con-
nected
to
@
power
supply
only
of
the
type
de-
scribed
in
the
operating
instructions
or as
marked
‘on
the
appliance.
POWER-CORD
PROTECTION
—
Power-supply
cords
should
be
routed
so
that
they
are
not
likely
to
be
walked
on
or
pinched
by
items
placed
upon
or
against
them,
paying
particular
attention
to
cords
at
plugs,
convenience
receptacles,
and
the
point
where
they
exit
from
the
appliance
POLARIZATION
—
If
your
purchased
product
is
pro-
vided
with
8
polarized
power
plug,
please
read
the
following
instructions.
This
product
is
equipped
with
a
polarized
alternating
current
line
plug
(a
plug
having
one
blade
wider
than
the
other).
This
plug
will
fit
into
the
power
outlet
only
ene
way.
This
is
2
safety
feature.
if
you
are
unable
to
insert
the
plug
fully
into
the
outlet,
ty
reversing
the
plug.
If
the
1
plug
shouid
still
fail
to
fit,
contact
your
electrician
to
replace
your
obsolete
outlet.
Do
not
defeat
the
safety
purpose
of
the
polarized
plug.
CLEANING
—
The
appliance
should
be
cleaned
only
with
a
polishing
cloth
or
a
soft
dry
cloth.
Never
clean
with
furniture
wax,
benzine,
insecticides
or
other
volatile
liquids
since
they
may
corrode
the
cabinet,
POWER
LINES
~
An
outdoor
antenna
should
be
located
away
from
power
lines.
NONUSE
PERIODS
—
The
power
cord
of
the
appliance
should
be
unplugged
from
the
outlet
when
jeft
un-
used
for
a
OBJECT
ANO
LIQUID
ENTRY
—
Care
should
be
taken
So
that
abjects
do
not
fall
and
liquids
are
not
spilled
into
the
enclosure
through
openings.
DAMAGE
REQUIRING
SERVICE
—
The
applience
ould
be
serviced
by
a
Pioneer
authorized
service
valified
service
personnel
when:
The
power-supply
cord
or
the
plug
has
been
dam-
or
Objects
have
fallen,
or
liquid
has
been
spilled
into
the
appliance;
or
The
appliance
has
been
exposed
to
rain;
or
The
appliance
does
not
appear
to
operate
normally
oF
exhibits
@
marked
change
in
performance:
or
®
The
appliance
has
been
dropped;
on
the
enclosure
damaged.
SERVICING
—
The
user
should
not
attempt
to
service
the
apptiance
beyond
that
described
in
the
opera-
ting
instructions.
For
all
other
servicing,
contact
the
nearest
Pioneer
authorized
service
center.
ELECTRIC
SERVICE
EQUIPMENT
ae
SAFETY
INSTRUCTIONS
OUTDOOR
ANTENNA
GROUNDING
©
Ii
ar
outsid
tena
18
G
dito
the
antenna
terminal.
be
sure
grounder
as
to
prowde
Je
sorges
and
buile
810
of
the
Nahonal
Electrical
A
No
79-1984,
provides
informe
er
grounding
of
the
mast
ing
stracture,
grounding
of
the
leadan
wire
to an
antenna
discharge
vart,
size
af
grounding
sanductors,
location
of
antenna
diacharge
unit
connection
6
groundeg
wectrodes,
and
require
munts
for
the
yrounging
electrode,
See
Fig.
A
CART
-
An
apphance
and
cart
combination
should
he
moved
with
sare
Quick
stops,
excessive
force,
and
uneven
surfaces
ray
cause
the
apphancs
and
cart
ombination
to
avertarn
NAL
ELECTRIC
fx
9008
ANTENNA
LEAD
IN
WIRE
ANTENNA
DISCHARGE
UNIT
(NEC
SECTION
810
~
20)
GROUNDING
CONDUCTORS,
(NEC
SECTION
810
-
21)
ROUND
CLAMPS
-+———
POWER
SERVICE
GROUNDING
FiG.A
ELECTRODE
SYSTEM
(NEC
ART
250,
PART
H}
2
<PRB1099>
FEATURES
Fully-automatic
operation
with
low
mass
tonearm.
DC
servo
moter
for
low
rumble
and
wow
and
flutter.
High-performance
cartridge
supplied.
HANDLING
PRECAUTIONS
CONDENSATION
When
the
turntable
is
brought
into
a
warm
room
from
prewously
surroundings
or
when
the
room
temperature
1s
suddenly
increased
condensation
may
form
inside
and
the
turntable
may
not
be
able
wo
aitain
its
full
performance.
In
cases
like
this,
us
the
turntable
after
allowing
«
to
stand
for
about
an
hour
or
after
raising
the
room
temper
ature
gradually
Install
on
a
solid,
flat
surface
—
but
not
on
top
of
a
speaker.
2.
install
away
from
high
heat,
moisture,
or
direct
sunlight.
Avoid
dust.
dirt,
smoke
and
steam.
3,
Install
away
from
TV
sets
and
tuners.
To
avoid
interferenc
an
outdoor
antenna
or
turn
off
the
TV
sets
and
tuners.
4.
Moisture
may
condense
on
the
turntable
if
it
is
brought
from
a
cold
area
to
a
warm
room,
or
if
room
temperature
increases
rapidly.
if
so,
do
not
use
until
moisture
evaporates.
5.
To
clean
records,
use
an
antistatic
spray
or
cleaning
fluid
and
soft
cloth.
Wiping
with
a
dry
cloth
or
brush
may
cause
static
nois
POWER-CORD
CAUTION
Handle
the
power
cord
by
the
plug.
Dc
not
pull
out
the
plug
by
tugging
the
cord
and
never
touch
the
power
cord
when
your hand
this
could
cay
short
circuit
or
electric
shack.
Do
not
place
the
unit,
a
piece
of
furniture,
etc.,
on
the
power
cord,
or
pinch
the
cord,
Never
make
a
knot
in
the
cord
or
tie
it
with
other
cords,
The
power
cards
should
be
routed
hy
that
they
are
not
likely
to
be
stepped
on.
A
darmaged
power
cord
can
cause
fire
or
give
you
an
electrical
shock
Check
the
power
cord
once
in
a
while.
When
you
find
it
damaged,
ask
your
nearest
PIONEER
authorized
service
center
or
your
dealer
for
a
replacement
sare
wet
as
BEFORE
OPERATING
TURNTABLE
CONFIRM
SUPPLIED
ACCESSORIES
Platter
Platter
mat
EP
adaptor
{You
will
fnd
this
taped
to
the
center
of
the
cabinet.)
Counterweight
{A
counterweight
is
already
mounted
on
the
tonearm
of
the
PL-335A.}
INFORMATION
TO
USER
[FOR
U.S.
MODEL]
This
eauinment
generates
and
vses
radio
frequency
ff
energy
and
if
rt
installed
and
used
properly,
thatis,
in
teleyrsiort
re
strict
accordance
with
the
manufacturer's
instructions,
may
cause
interference
to
radio
and
television
cecep-
tion,
It
has
been
type
tested
and
found
te
comply
with
the
limits
for
a
Class
8
computing
device
in
accordance
with
the
specifications
in
Subpart
J
of
Part
15
of
FCC
Rules,
which
are
designed
to
provide
reasonable
protec-
rncesy
tion
against
such
interference
sri
a
residential
installa-
.
tion.
However,
there
is
no
guarantee
that
interference
.
will
not
occur
in
a
partioular
instaltation
nis
equipment
daes
cause
interference
to
radio
or
can
be
determined
by
turn-
nce
by
one
or
more
of
the
helptui
antenna
p:
comaonent
with
respect
to
the
ent
away
from
the
receiver
vit
into
a
different
Cutiet
so that
caceiver
are
on
different
branch
cir-
It
necessary,
the
user
should
consult
me
dealer
or
an
ex
rienced
radio
television
technician
tor
additional
sug
The
user
may
find
the
following
booklet
prepared
by
the
Fede
Communications
Commission
the
user
is
encouraged
to
on
«
to
Identity
3nd
Resolve
Radto-TV
incerference
blems"
This
booklet
is
availatite
Fr
ing
Olfice,
Washington,
004-000-00345-4
The
above
instructans
apply
only
te
units
which
wilt
be
opecsizg
%
the
United
States.
3
<PRB1099°
BEFORE
OPERATING
TURNTABLE
ASSEMBLY
ATTACHING
PLATTER
BELT
1,
Pull
dust
cover
up
and
off
of
rear
hinges.
2.
Turn
over
platter.
3.
Pinch
belt
on
inner
rim
between
thumb
and
forefinger.
eee
.
Slip
belt
over
thumb
and
pull
out,
inserting
thumb
in
hole.
.
Insert
forefinger
from
top
of
platter
and
transfer
belt
to
forefinger.
.
Lower
platter
onto
spindle.
4
5
6
7.
Release
belt
onto
pulley.
Incorrect
‘orrect
8.
Place
platter
mat
on
platter
(with
“PIONEER”
side
up).
ADJUSTING
TRACKING
FORCE
1.
Fit
counterweight
onto
rear
end
of
tonearm.
2.
Remove
plastic
band
and
release
tonearm
from
armrest.
3.
Set
ARM-ELEVATION
to
DOWN.
4.
Rotate
counterweight
to
find
the
point
where
the
tonearm
floats
freely,
not
dropping
downward
or
rising
upward.
4
<PRB1099>
5.
Hold
rear
part
of
counterweight
and
set
front
part
so
that
"0"
position
is
aligned
with
center
tine
on
shaft
6.
Rotate
counterweight
counterclockwise
(as
viewed
from
front)
so
that
recommended
tracking
force
(2.0g
for
supplied
cartridge)
is
aligned
with
center
line
7.
Set
antiskating
contro!
to
same
number
as
tracking
force
Set
so
that
the
number
lines
up
with
the
small
groove
in
the
rim
8.
Remove
plastic
cover
from
cartridge
stylus
9.
Replace
tonearm
in
armrest
clasp.
10.
Replace
dust
cover
on
rear
hinges.
If
your
amplifier
or
the
MM
jacks.
Be
er
has
both
MM
and
MC
phano
jacks.
use
2
plug
©
pushed
fully
into
jacks
Attach
ground
lead
to
amplifier
or
receiver
ground
(GNO)
terminal.
Connect
red
plug
to
amplifier
or
receiver
PHONO
R
jack.
Connect
white
plug
to
amplifier
or
receiver
PHONO
L
jack.
Plug
power
cord
into
AC
wall
socket
(or
amplifier
or
receiver
AC
outlet)
PONS
Stereo
arnplifier
@
Dust
Cover
(2)
EP
Adaptor
Place
over
spindle
to
play
45
rpm
singles.
3)
Spindle
@)
Platter
Mat
©)
Platter
(©)
SPEED
Selector
Set
to
45
for
45
rpm
records.
Set
to
33
for
33-1/3
rpm
records.
@
Cabinet
@
©
ARM-ELEVATION
Control
Moves
tonearm
up
and
down.
“<The
PL:
335A
is
not
equipped
with
the
dust
cover
shown
in
the
illustration.
iNustration
shows
PL-335.
©
Counterweight
40)
Antiskating
Control
a)
Armrest
42
Tonearm
®)
Headshell/Cartridge/Stylus
)
PLAY/STOP
Button
Press
to
start
automatic
play
and
to
stop
olay.
SIZE
Selector
Set
to
30
for
30-cm
records.
Set
to
17
for
17-cm
records.
HOW
TO
PLAY
RECORDS
Use
AUTO
PLAY
to
hear
an
entire
record.
Use
MANUAL
PLAY
to
play
STOPPING
PLAY
non-standard
size
records
or
to
hear
part
of
a
record.
1.
Press
PLAY/STOP
button.
BEFORE
PLAYING
.
Gpen
dust
cover.
.
Put
record
on
platter.
Set
SPEED
selector.
Set
SIZE
selector.
Release
tonearm
and
set
on
armrest.
AR
WN
The
tonearm
will
rise
and
return
to
the
armrest
and
the
platter
will
stop
rotating.
This
occurs
automatically
at
the
end
of
the
record.
TEMPORARILY
INTERRUPTING
PLAY
1.
Set
ARM-ELEVATION
to
UP.
2.
To
resume,
set
ARM-ELEVATION
to
DOWN.
6.
Close
dust
cover.
7.
Set
amplifier
or
receiver
source
to
PHONO.
AUTO
PLAY
1,
Set
ARM-ELEVATION
to
DOWN.
2.
Press
PLAY/STOP
button.
LEAD-IN
POSITION
ADJUSTMENT
if
the
tonearm
does
not
set
down
at
the
correct
point
when
you
use
the
AUTO
PLAY
procedure,
then
adjust
it
as
below.
1.
Put
on
a
30-cm
record.
2.
Press
PLAY/STOP.
i
3.
Watch
whether
the
tonearm
sets
down
too
far
in
or
too
far
out.
|
4.
Press
PLAY/STOP.
i
5.
Set
ARM-ELEVATION
to
UP.
ha
3.
Adjust
volume
and
tone
controls
on
amplifier
or
receiver.
6.
Move
tonearm
over
outer
edge
of
record
so
that
adjustment
screw
<
appears
in
hole
near
tonearm
pivot.
MANUAL
PLAY
7.
insert
a
small
standard
type
screwdriver.
1.
Leave
dust
cover
open.
8.
Turn
screwdriver
clockwise
to
make
tonearm
set
down
further
2.
Set
ARM-ELEVATION
to
UP.
inward.
Or,
turn
screwdriver
counterclockwise
to
make
tonearm
3.
Move
tonearm
so
it
is
above
desired
track.
set
down
further
outward.
4.
Set
ARM-ELEVATION
to
DOWN,
5.
Adjust
volume
and
tone
controls
on
amplifier
or
receiver.
9.
Return
tonearm
to
armrest.
10.
Set
ARM-ELEVATION
to
DOWN.
11.
Press
PLAY/STOP
to
confirm
that
the
tonearm
sets
down
at
the
correct
position.
6
<PRB1099>
HOW
TO
PLAY
RECORDS
CARTRIDGE
REPLACEMENT
8.
Tighten
screws.
Replacement
1s
not
necessary
unless
you
wish
to
try
a
different
9.
Plug
headsheill
into
tonearm
and
tighten
thumbscrew
cartridge.
10.
Adjust
tracking
force
and
antiskating,
as
listed
under
ADJUSTING
TRACKING
FORCE
section
of
this
manual
7.
Unscrew
thumbscrew
that
holds
headsheli
to
tonearm.
REPLACING
THE
STYLUS
4.
To
avoid
record
darnage,
repiace
the
stylus
after
about
800
hours
of
use
(after
about
one
year
if
you
play
records
about
two
hours
every
day}.
2.
Use
the
Pioneer
PN-240
replacement
stylus
3.
To
replace,
pull
off
the
old
stylus
holder
and
carefully
push
in
the
new
one,
Refer
to
iHustration
Pull
out
headshell
Unscrew
two
screws
that
hold
cartridge
to
headshell.
,
Unptug
headshell
wires
from
cartridge
pins.
Loosely
screw
on
new
cartridge.
OewN
6.
Plug
headshell
wires
onto
cartridge
pins,
matching
the
wire
color,
as
shown
in
illustration,
-Red
Blue
- / \
nna
Greeih
STYLUS
CARE
1.
Remove
dust
by
wiping
stylus
with
a
soft
brush.
Wipe
forward
2.
If
you
use
stylus
cleaning
fluid,
avoid
spilling
onto
rubber
or
plastic
"
.
te
rts
of
th
rtridge.
7.
Adjust
cartridge
position
as
shown
in
ilustrations.
Behe
eg
ere
a
Parallel
Correct
position
of
stylus
tip.
Correct
angle
of
cart
headshell
Sf
<PRE1099->
TROUBLESHOOTING
Most
problems
can
be
easily
solved,
as
described
in
this
chart.
If
trouble
persists,
consult
your
PIONEER
authorized
service
center
or
dealer
Symptom
Probable
Cause
Remedy
|
Platter
does
not
rotate
*
Power
plug
is
disconnected.
¢
Turntable
is
plugged
into
switched
AC
outlet
on
amplifier
or
receiver
but
main
power
is
off.
*
Platter
belt
is
not
on
pulley.
*
Plug
power
cord
into
¢
Turn
on
amplifier
or
receiver
power
switch,
C
outlet.
¢
Hook
belt
over
pulley
|
|
No
sound
©
Poor
connections
to
amplifier
or
receiver.
*
Cartridge
or
stylus
is
not
installed
correctly.
*
Amplifier
or
receiver
settings
are
not
correct.
*
Connect
to
correct
jacks
on
amplifier
or
receiver.
°
{Install
cartridge
or
stylus
correctly.
«
Change
settings
on
amplifier
or
receiver.
Music
sounds
noisy.
Tonearm
skips.
®
Record
is
dusty
or
dirty.
|
*
Record
is
warped
or
scratched.
®
Tracking
force
is
not
correct.
®
Dirt
on
plugs
or
jacks.
¢
Dust
or
dirt
on
stylus.
©
Stylus
is
worn.
*
Clean
record,
using
cleaning
fluid
and
soft
cloth.
|
©
Use
a
good
record
|
¢
Adjust
tracking
force
and
antiskating.
|
¢
Clean
plugs
and
jacks,
using
a
wire
brush.
°
Use
a
stylus
brush
to
clean
stylus
®
Replace
stylus
or
cartridge
Feedback
or
“howling’’
noise
*
Tonearm
cartridge
is
being
excited
by
speaker
vibrations.
speakers
Humming
or
buzzing
noise
}
®
Poor
connections
to
amplifier
or
receiver.
@
Cartridge
or
stylus
is
not
installed
correctly.
®
Interference
from
amplifier
or
receiver
transformer,
TY
set,
electric
motor,
or
other
appliance.
*
Place
turntable
on
a
sol
*
Connect
to
cor
©
Install
cartridge
or
stylus
correctly
¢
Move
away
from
source
of
iiterierence.
upport
away
from
the
cks
on
amplifier
or
receiver,
Abnormal
tempo
or
pitch
¢
Speed
selector
setting
does
not
match
record
speed.
®
Belt
is
not
in
center
of
pulley.
|
Tonearm
does
not
set
down
at
correct
position
when
using
AUTO
*
Record
size
is
not
standard.
*
Size
selector
settings
does
not
match
record
size.
®
Tonearm
lead-in
position
needs
adjustment.
©
Set
speed
selector
to
match
record
speed.
*
Hook
belt
on
center
of
pu
°
Use
MANUAL
PLAY
procedure.
*
Set
size
selector
to
match
recerd
size.
©
Adjust
lead-in
position
PLAY
procedure.
SPECIFICATIONS
PHONOGRAPH
MOTOR
AND
PLATTER
MOtok.
type
s.czccscucet
conpeitee
resis
Drive
system
..
sagstgeterss
Belt
drive
system
Speed
of
rotation
2
speeds:
33-1/3,
45
rpm
Wow
and
Flutter...
cece
eeeees
No
more
than
0.06%
WRMS
No
more
than
0.09%
WTD
Peak
(DIN)
....
More
than
68
dB
(DIN-B)
Diameter
0295
mm,
aluminium
die-cast
pete
sees
eetweee
DC
servo
motor
SIN
ratio.
Platter.
TONE
ARM
...
Static
balance
straight
pipe
arm
4g
(min)
to
8 g
(max)
Usable
cartridge
weight...
SUPPLIED
CARTRIDGE
MM
type
.
PN-240
-..0.6
mil
diamond
.2,5
mV
(1
kHz,
5.0
cm/s,
LAT.
Peak}
esoaneus
18-259
-
10
Hz
—
30,000
Hz
«47
kQ
Universal
type
Output
voltage
Suitable
stylus
pressure.
Frequency
respons:
Load
resistance..
Installment...
Cartridge
weight
POWER
SUPPLY,
OTHERS
Power
requirements
European,
U.K.,
Australian
models
..........
a.c,
220
—
240
Volts
~
,
50/60
Hz
ULS.,
Canadian
models
vo...
cccccesseessetseeeeeees
~
AC
120
V,
60 Hz
Other
destination
models
.
AC
110
~
127
V/220
-
240
V
(switchable)
50/60
Hz
Power
consumption
External
dimensions
16-9/16
(W)
*
3-3/4
{H)
*
14
(D)
in
+
2.8
kg
(6
Ib
3
oz)
Netweight....
{The
height,
dimensions
and
weight
specificatior
PL-335A.}
do
not
apply
to
the
SUPPLIED
ACCESSORIES
EP
adaptor
Operating
instructions
NOTE:
Specifications
and
design
subject
to
possible
modification
without
notice,
due
to
improvements.
Published
by
Pioneer
Ele
Copyright
©
1989
Pioneer
E
All
rights
reserved.
1¢
Corporation.
tonic
Corporation.
PIONEER
ELECTRONIC
CORPORATION
PIONEER
ELECTRONICS
[USA]
INC.
4-1,
Meguro
1-Chome,
Meguro-ku,
Tokyo
153,
Japan
2265
East
220th
Street,
Long
Beach,
California
90810,
U.S.A.
P.O.
BOX
1720,
Long
Beach,
California
90801,
U.S.A.
PIONEER
ELECTRONICS
OF
CANADA,
INC.
PIONEER
ELECTRONIC
[EUROPE]
N.V.
PIONEER
ELECTRONICS
AUSTRALIA
PTY.
LTD.
<S4B03FF4S57>
300
Alistate
Parkway
Markham,
Ontario
L3R
OP2,
Canada
Haven
1087
Keetberglaan
1,
9120
Melsele,
Belgium,
TEL:
03/750.05.11
178-184
Boundary
Road,
Braeside,
Victoria
3195,
Australia,
TEL:
[03]
580-9911
Printed
in
Japan
<PRB1099-E>

Other manuals for PL-600

1

This manual suits for next models

2

Other Pioneer Turntable manuals

Pioneer PL-51 User manual

Pioneer

Pioneer PL-51 User manual

Pioneer AVH-P6500DVD User manual

Pioneer

Pioneer AVH-P6500DVD User manual

Pioneer PL-518 KUT User manual

Pioneer

Pioneer PL-518 KUT User manual

Pioneer PL-670 User manual

Pioneer

Pioneer PL-670 User manual

Pioneer PL-450 User manual

Pioneer

Pioneer PL-450 User manual

Pioneer BDP-170 User manual

Pioneer

Pioneer BDP-170 User manual

Pioneer PL-112D User manual

Pioneer

Pioneer PL-112D User manual

Pioneer PL-570 User manual

Pioneer

Pioneer PL-570 User manual

Pioneer PL-510 User manual

Pioneer

Pioneer PL-510 User manual

Pioneer PLX-1000 User manual

Pioneer

Pioneer PLX-1000 User manual

Pioneer PL-630 User manual

Pioneer

Pioneer PL-630 User manual

Pioneer LD-1100 User manual

Pioneer

Pioneer LD-1100 User manual

Pioneer CDJ-2000NXS User manual

Pioneer

Pioneer CDJ-2000NXS User manual

Pioneer PL-V70 User manual

Pioneer

Pioneer PL-V70 User manual

Pioneer PL-55DX User manual

Pioneer

Pioneer PL-55DX User manual

Pioneer PL-Z93 User manual

Pioneer

Pioneer PL-Z93 User manual

Pioneer PL-514 User manual

Pioneer

Pioneer PL-514 User manual

Pioneer PL-200 User manual

Pioneer

Pioneer PL-200 User manual

Pioneer PL-7 User manual

Pioneer

Pioneer PL-7 User manual

Pioneer PL-L70 User manual

Pioneer

Pioneer PL-L70 User manual

Pioneer PL-560 User manual

Pioneer

Pioneer PL-560 User manual

Pioneer PL-55X User manual

Pioneer

Pioneer PL-55X User manual

Pioneer CDJ-2000NXS2 User manual

Pioneer

Pioneer CDJ-2000NXS2 User manual

Pioneer PL-44F User manual

Pioneer

Pioneer PL-44F User manual

Popular Turntable manuals by other brands

ION CLASSIC LP quick start guide

ION

ION CLASSIC LP quick start guide

iLive ITTB2022 user guide

iLive

iLive ITTB2022 user guide

Teac TTD107D manual

Teac

Teac TTD107D manual

Audio Technica AT-LP5 Installation and operation

Audio Technica

Audio Technica AT-LP5 Installation and operation

Pro-Ject Audio Systems 1 Xpression Carbon Classic Instructions for use

Pro-Ject Audio Systems

Pro-Ject Audio Systems 1 Xpression Carbon Classic Instructions for use

Denon DP-200USB owner's manual

Denon

Denon DP-200USB owner's manual

PRIXTON TE-001 instruction manual

PRIXTON

PRIXTON TE-001 instruction manual

Pyle PUNP32BT owner's manual

Pyle

Pyle PUNP32BT owner's manual

PYLE Audio PTCDS7UI user manual

PYLE Audio

PYLE Audio PTCDS7UI user manual

LENCO L-90 user manual

LENCO

LENCO L-90 user manual

Timex Sinclair 1510 operating instructions

Timex Sinclair

Timex Sinclair 1510 operating instructions

Dual CS 418 instruction manual

Dual

Dual CS 418 instruction manual

Technics SL-J11D Service manual

Technics

Technics SL-J11D Service manual

PIONEER DJ rekordbox XDJ-1000MK2 Service manual

PIONEER DJ

PIONEER DJ rekordbox XDJ-1000MK2 Service manual

Toshiba SR-F330 Service data

Toshiba

Toshiba SR-F330 Service data

Denver VPL-120 instruction manual

Denver

Denver VPL-120 instruction manual

Clearaudio Charisma V2.1 MM user manual

Clearaudio

Clearaudio Charisma V2.1 MM user manual

Crosley Crosley CD Console CR44CD instruction manual

Crosley

Crosley Crosley CD Console CR44CD instruction manual

manuals.online logo
manuals.online logoBrands
  • About & Mission
  • Contact us
  • Privacy Policy
  • Terms and Conditions

Copyright 2025 Manuals.Online. All Rights Reserved.