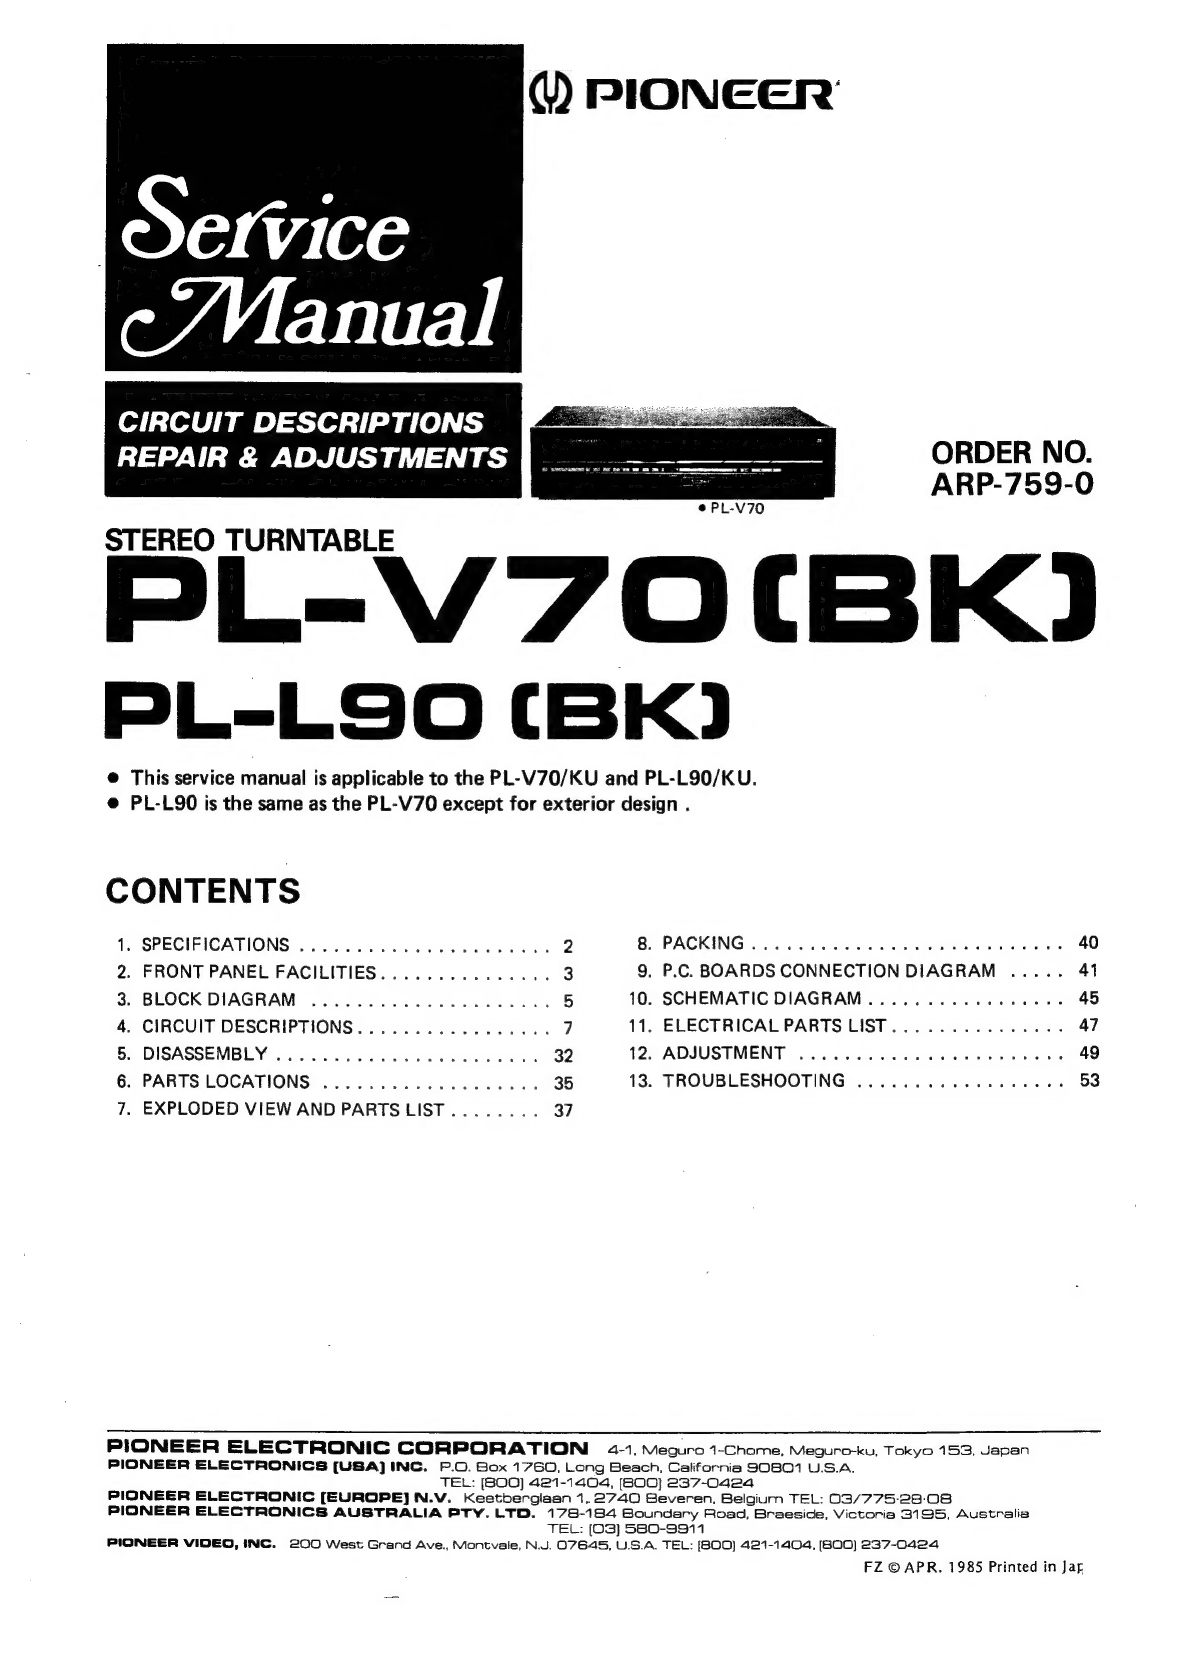
Pioneer PL-V70 User manual

VY)
PIONEER’
Service
CIRCUIT
DESCRIPTIONS
REPAIR
&
ADJUSTMENTS
ORDER
NO.
ARP-759-0
STEREO
TURNTABLE
L-V'70
(BK)
PL-LSO
(BK)
@
This
service
manual
is
applicable
to
the
PL-V70/KU
and
PL-L90/KU.
@
PL-L90
is
the
same
as
the
PL-V70
except
for
exterior
design
.
CONTENTS
1.
SPECIFICATIONS
...............0000
0a
2
B.
PACKING
5.
scsi
e
eee
ea
ea
40
2.
FRONT
PANEL
FACILITIES...............
3
9,
P.C.
BOARDS
CONNECTION
DIAGRAM
.....
41
3.
BLOCK
DIAGRAM
............00c
ce
eeee
5
10.
SCHEMATIC
DIAGRAM.............000005
45
4.
CIRCUIT
DESCRIPTIONS...............5.
7
11,
ELECTRICAL
PARTS
LIST...
........004-
47
5.
DISASSEMBLY
..........
0.00000
eee
32
12.
ADJUSTMENT
.........
ce
eee
eee
eens
49
6.
PARTS
LOCATIONS
..............0000
35
13.
TROUBLESHOOTING
............000
cee
53
7.
EXPLODED
VIEW
AND
PARTS
LIST........
37
PIONEER
ELECTRONIC
CORPORATION
34-1,
Meguro
1-Chome,
Meguro-ku,
Tokyo
153,
Japan
PIONEER
ELECTRONICS
[USA]
ING.
P.O.
Sox
1760,
Long
Beach,
California
90801
U.S.A.
TEL:
(B00)
421-1404,
(B00}
237-0424
PIONEER
ELECTRONIC
(EUROPE)
N.V.
Keetberglasn
1,2740
Beveren,
Belgium
TEL:
03/775-28:08
PIONEER
ELECTRONICS
AUSTRALIA
PTY.
LTD.
178-184
Soundary
Road,
Braeside,
Victoria
3195,
Australia
TEL:
(03)
580-9911
PIONEER
VIDEO,
INC.
200
West
Grand
Ave.,
Montvale,
N.J.
07645,
U.S.A.
TEL:
(B00)
421-1404,
(B00)
237-0424
FZ
©
APR.
1985
Printed
in
Jar

PL-V70,PL-LSO
1.
SPECIFICATIONS
Motor
and
Turntable
Drive
SYSteM
.......c.ccesceceeseeecneeseseneraeeeseererseenes
Belt-drive
MOtOP
suskeioccitdevasesssacecvasrepeees
vie
eeeresetene
DC
servo
motor
Turntable
Platter
...........:cceseseeeeeues
aluminum
alloy
die-cast
SPECS
ieee
veer
edces
dendessecisbastedidancssnes
nas
33-1/3
and
45
rpm
Wow
and
Flutter
..............0ee
eee
e
ee
Less
than
0.05%
(WRMS)
+
0.065%
WTD
Peak
(DIN)
Signal-to-Noise-Ratio
.........cccseee
More
than
70
dB
(DIN-B)
(with
Pioneer
cartridge
model
PC-291)
Tonearm
TY
DO)
iseiccvssannstusvssedessioisecessece
Integrated
straight
pipe
arm
TYPO
costs
ceiehscetnaladiedanceccccceasseatenpateceunvestepaoedetes
IM
type
Stylus
sc.csssacteasecvivewseheiteecsssvestes
0.5
mil
diamond
(PN-291)
Output
Voltage
........eccecceseseneeereeeneeeeeeeeeeeeeen
ene
2.5mV
(1
kHz,
5cm/s
LAT.
Peak)
Tracking
Force
........ccceeceeeeeeeee
ee
1g
to
1.5
g
(proper
1.25
g)
Frequency
RESponse
........:ccseeeeeeseeseseeeeeees
10
to
30,000
Hz
Recommended
Load
.......ccccceceseseeeeneeeneeanaeeeeeseenes
50
k&
WEIGH
.......:cccesesccecscrscnsccsccecncnceecsea
seer
rsssaseneeeeenes
4g
Subfunctions
Auto
lead-in,
auto
return,
auto
cut,
repeat
Arm
elevation,
program
search
play,
manual
play,
Skip,
auto
disc
size
selector,
record
detection,
Auto
speed
selector,
Miscellaneous
Power
Requirements
.......ccsssssesssesssesenens
AC
120
V,
60
Hz
Power
Consumption
.........ccssscesssssscereesceresseveceeeaeeserens
11W
Dimensions
............0se0eeeeees
420
(W)
x
104
(H)
x
350
(D)
mm
16-1/2
(W)
x
4-1/8
(H)
x
13-3/4
(D)
in.
Wight
223
cc.
idesseedescdades
avibanccnideddeseensaced
7.5
kg/16
lb
8
oz
Accessories
EP(Adapter’
ei
eisescosteohe
dneeecasacseutsgaacee
diac
Veadavbecewisindses
1
Remote
control
COrd
.........ccccsceceeescuteceseeseecneeeneseenceaees
1
Remote
control
plate
...........cccscscececceeeceneeeeeeeseeneeertenaes
1
Operating
INStructions
...........cccccsecececeneseeceeeeeeeenneseenee
1
NOTE:
Specifications
and
design
subject
to
possible
modification
without
notice,
due
to
improvements.

QUESTIONNAIRE
MODEL
One
Model
per
questionnaire
Dear
Servicer,
Thank
you
for
your
cooperation
in
the
post-sale
service
of
Pioneer
products.
This
questionnaire
is
used
as
a
tool
to
improve
the
serviceability
of
our
products
and
service
manuals.
Please
evaluate
this
model
and
service
manual
by
answering
the
following
questions.
Your
ideas
may
be
realized
in
our
future
products.
Your
answers
will
be
appreciated.
Thank
you.
PIONEER
ELECTRONIC
CORP.
T.
Nakagawa,
Manager,
Service
Section,
International
Division
1.
SERVICING
EVALUATION
Circle
applicable
number:
Good
Poor
Fair
1
2 3
*4
0
*5
b.
Circuit
Checks:
1
2 3
*4
#5
1
2
3
*4
*5
d.
Adjustment
(s):
1
D)
3
*
4
*,
*
If
(4)
or
(5)
was
circled,
please
be
specific.

e.
Your
advice,
opinion
or
ideas
related
to
servicing
this
product.
2.
SERVICE
MANUAL
EVALUATION
a.
Circuit
&
Mechanism
Description
b.
Circuit
Diagram
3.
OTHER
Please
describe
other
areas
of
servicing
which
you
may
find
difficult.
Completed
by
:
Company
Name
:
Address
:
City
/State/Zip
:
Please
send
this
form
filled
to
the
distributor
in
your
country.

2.
FRONT
PANEL
FACILITIES
@
POWER
switch/indicator
Press
this
switch
to
turn
the
power
on
and
off.
[ON]
(depressed
position)
:
Power
is
switched
ON.
[STAND-BY]
(released
position)
:
Power
is
switched
OFF.
@)
SPEED
switch
Set
this
switch
in
accordance
with
the
speed
of
the
record
to
be
played.
[AUTO]:
Automatically
sets
rotation
speed
in
accordance
with
the
size
of
the
record:
Rotates
at
33-1/3
rpm
with
30
cm
and
25
cm
records.
Rotates
at
45
rpm
with
17
cm
records.
(33):
Rotates
at
33-1/3
rpm
(45):
Rotates
at
45
rpm
@
SENSOR
switch
Depending
on
the
type
of
record
being
played,
this
switch
may
be
used
to
adjust
the
sensitivity
at
the
time
of
program-
med
play.
Normally
the
switch
should
be
left
in
[NOR]
position.
(NOR]:
For
normal
records.
[HI]
:For
records
with
very
narrow
intervals
between
tracks.
{LO}:
For
records
with
wide
sound-groove
pitch.
@
PROGRAM
switches
(1
—
8)/
indicators
e
Press
these
switches
in
the
desired
sequence
from
[1]
through
[8]
when
programming
the
order
in
which
the
tracks
are
to
be
played.
The
tracks
are
programmed
in
the
order
in
which
the
switches
are
pressed,
and
auto
play
or
repeat
play
is
performed.
e
The
numbers
[1]
through
[8]
indicate
the
order
of
the
tracks
on
the
record
(for
instance,
the
[2]
switch
cor-
responds
to
the
second
track).
During
programmed
playback,
the
program
indicator
corresponding
to
the
track
presently
being
played
will
flash.
©
CLEAR
switch
This
switch
is
pressed
in
order
to
clear
the
program.
@®
REPEAT
switch/indicator
Press
this
switch
so
that
the
indicator
lights
for
repeat
play.
PL-V70,PL-L90
@
ARM
ELEVATION
switch
(ARM
EV)/indicator
Use
the
switch
for
manual
piay.
Use
the
switch
to
suspend
record
play
temporarily.
Use
the
switch
when
changing
the
tracks
during
manual
play.
Indicator
lights:
The
tonearm
rises
(the
stylus
moves
away
from
the
record).
Indicator
flashes:
During
right
or
left
movement
of
the
tonearm
(or
during
search
for
programmed
play).
Indicator
goes
out:
The
tonearm
descends
(the
stylus
is
lowered
onto
the
record).
LOCATE/SKIP
switches
(ARM
LOCATE/PROGRAM
SKIP)
Use
these
switches
to
start
manual
playback,
or
during
playback
to
change
the
track
being
played.
When
the
switches
are
pressed,
the
tonearm
will
move
to
the
right
or
left
(the
arm
elevation
indicator
will
flash).
[<,
+]:
Tonearm
moves
to
left.
During
programmed
play,
moves
to
the
next
programmed
track.
If
pressed
multiple
times,
moves
ahead
the
number
of
tracks
corresponding
to
the
number
of
times
the
switch
is
pressed.
[>,
—
]:
Tonearm
moves
to
right.
During
programmed
play,
moves
back
to
the
beginning
of
the
track
presently
being
played.
If
pressed
multiple
times,
moves
back
the
number
of
tracks
corresponding
to
the
number
of
times
the
switch
is
pressed.
NOTE:
When
pressing
these
switches
two
or
more
times
during
program-
med
play
to
skip
over
two
or
more
tracks,
do
not
allow
more
than
about
one
second
to
elapse
between
each
press
of
the
switch.
(ia
OS
2
@—E
c
a
‘a
=|
SascSEsEs
==
=r
@
PLAY/STOP
switch
Press
this
switch
when
starting
auto
play
or
when
stop-
ping
play.
EJECT
button
Press
when
mounting
or
removing
a
record.
When
pressed,
the
slide
base
comes
out
to
the
front.
@
Platter
@2)
Platter
mat
@)
Platter
shaft
Tonearm
48)
Cartridge
(PC-291)
EP
adapter
This
is
used
when
playing
45
rpm
records
with
a
large
center
hole.
@
Cabinet
Slide
base

PL-V70,PL-LSO
3.
BLOCK
DIAGRAM
Reset
circuit
+82
(+5V)
System
control
IC
Qi
PD6037
Muting
circuit
Remote
control
decode
circuit
:
7)_
Xion
iz)
DI7
REM
OUT
pié
®
Pull
up
(5V)
Key
matrix
circuit
Phono
motor
interface
circuit
+Bl
(+12V)
PHONO
MOTOR
Ev
t
(Drawing
rod
in)
Ev
2
(Holding
rod
in)
ARM
<
appress
(32)
ARM
>
+Bi(l2v)
+82
(5v)
+Bi(t2v)
Power
supply
circuit
Q3
M54547P
S|
Sse
ere
PT
(lav)
Tonearm
=:
drive
motor
oe
(11)
(w)
i“
reverse
|
(5)
river:
(14)
7
X
eae
ZN
O
D201
AC
120V
|
e—P
=
ig
60Hz
BAND
SENSOR
CIRCUIT
Bi
(+!2v)
(+5V)
B2
;
=
sie
Al
al
feat
|
i
ES
+1av
i
‘
LS
1
al
|
A,
=
VR3
Q7(4/4)
H
Gay
2
eel
Nob
ves
ne
VR3:
Band
sensor
Record
_—»
ofaet
ADs
Center
suttace
Sut
sige
S18:
Sensor
sensitivity
‘
edge
of
LED:
NJLI{02EH
record
record
Ptr:
PCX-059
Speed
selector
+B2(5V)
Tonearm
down
sensor
Carriage
board
assembly
Guide
bar
V
sig
i
Mechanism
base
board
assembly
Q201
Tonearm
address
signal
generator
circuit
Tonearm
drive
motor
Tonearm
down
sensor
Tonearm
assembly
Shutter
|
VR201
Tracking
sensor
gain
adjustment

PL-V70,PL-L9O
4.
CIRCUIT
DESCRIPTIONS
4.1
CIRCUIT
DESCRIPTIONS
as
Q3_M54547P
4.1.1.
Address
Sensor
Circuit
Sram
rin
4
r
1
The
address
sensor
is
located
on
the
mechanism
+H2v
1
base
unit.
It
detects
the
position
of
the
tonearm
and
sends
address
pulses
to
the
control
IC
as
the
tonearm
moves.
The
address
sensor
is
make
up
of
an
internal
Schmitt
trigger
circuit
photo
interrupter
and
a
slit
wheel
which
is
synchronized
with
the
carriage.
The
slit
wheel
spins
when
the
carriage
moves
and
intermittently
cuts
off
light
to
the
photo
interrupter
(Q301)
in
pulses
which
corre-
spond
to
the
carriage
movement.
These
pulses
are
counted
by
the
control
IC,
which
detects
the
distance
the
carriage
moves,
the
tonearm
lowering
Fig.
4-2
Tracking
sensor
circuit
position
and
the
end
of
the
record.
It
also
registers
band
addresses.
The
address
pulses
from
the
photo
interrupter
work
as
follows:
When
the
light
is
cut
off,
the
output
is
‘‘L,”
and
when
the
light
is
not
cut
off
the
output
is
“‘H.”
One
address
signal
pulse
is
ap-
proximately
equivalent
to
0.114
mm
of
tonearm
movement.
Tracking
sensor
gain
ADJ
Tonearm
drive
motor
Sensor
Slit
wheel
Fig.
4-1
Address
Sensor
Circuit
4.1.2
Tracking
Sensor
Circuit
This
circuit
detects
tracking
errors
by
means
of
a
shutter
which
is
synchronized
with
the
tonearm
and
a
photo
interrupter.
The
tracking
sensor
is
made
up
of
a
shutter
synchronized
with
the
tonearm
and
a
photo
interrupter
which
is
mounted
onto
the
carriage
base
board.
When
the
tonearm
lowers
and
begins
tracing
the
record
surface
the
tonearm
tracking
errors
increase
as
the
number
of
rpms
increases.
When
tracking
errors
increase,
the
shutter,
which
is
Liv
—»f——Tracking
center
synchronized
with
the
tonearm,
also
moves
and
the
light
cut-off
rate
of
the
photo
interrupter
changes.
Subsequently,
the
output
of
the
photo
interrupter
changes
and
is
sent
to
the
tonearm
drive
unit
in
the
form
of
tracking
error
signals.
_
Tracking
error
3v
f---->
Tracking
error
Small
Large
Fig.
4-3
Detection
of
tracking
errors

L-V70,PL-L90
4.1.3
Band
Sensor
Circuit
The
band
sensor
circuit
detects
the
size
of
the
record
and
width
of
bands
by
means
of
a
band
sensor.
It
is
made
up
of
a
band
sensor,
an
amplifier,
a
differencial
amplifier,
a
zero
cross
comparator,
a
band
comparator,
a
30
cm
size
comparator,
an
AC
amplifier,
and
a
search
comparator.
The
band
sensor
itself
is
made
up
of
an
array
of
2
phototransistors
(PCX-059)
mounted
into
the
headshell
of
the
tonearm
and
an
infrared
LED
(NJL1102EH).
It
detects,
with
a
light
sensor,
the
different
rates
of
light
reflection
to
determine
the
difference
between
a
sound
groove
and
a
plain
band.
The
output
of
the
band
sensor
is
amplified
by
each
of
the
amplifiers
and
applied
to
the
differential
amplifier
to
be
transformed
into
a
waveform
like
that
of
point
C
in
figure
4-5.
From
the
differential
amplifier
output,
the
zero
cross
comparator
detects
a
band
signal
(zero
cross
point),
and
the
band
comparator
detects
signals
whose
potential
is
less
than
Q6
(3/3)
pin
8
as
band
signals.
The
output
from
the
band
sensor
is
also
applied
to
the
AC
amplifier
and
the
30
cm
size
comparator.
When
in
the
search
mode
with
the
tonearm
up,
the
band
sensor
output
is
applied
through
the
AC
amplifier
(band
pass
filter
configuration)
and
the
search
comparator
and
transformed
into
the
waveform
shown
in
F
in
figure
4-5.
This
signal
is
applied
to
the
control
IC
to
register
the
plain
bands
on
the
record.
The
30
cm
size
comparator,
on
receiving
the
amplified
output
from
the
band
sensor
and
detect-
ing
reflection
from
the
turntable
at
the
30-cm
lowering
position,
determines
that
the
record
is
not
a
30-cm
record,
and
sends
the
signal
shown
in
G
in
figure
4-5
to
the
control
IC.
$18:
Changes
sensor
sensitivity
Record
center
Record
outside
edge
5V
(Output
only
when
tracing)
(Output
only
when
searching)
Turntable
center
Turntable
outside
edge
5
oe
3y
Reflection
of
turntable
at
30cm
lowering
position
:
|
Waveform
at
B
when
there
is
no
record
Waveform
at
G
when
there
is
no
record
or
a
17cm
record
tv
Fig.
4-5
Waveform
at
Each
Point
+B2(+5v)
ae
a»!
VR3
OP
Offset
adjustment
_
VN
«—
Record
~~
Record
Record
center
outside
ed
ge
LED:
NJLII02EH
P.Tr:
PCX-059
Fig.
4-4
Band
Sensor
Circuit

4.1.4
Elevation
and
Tonearm
Circuits
The
tonearm
drive
motor
and
EV
solenoid
are
controlled
by
commands
from
the
control
IC
(Q1),
which
also
controls
the
horizontal
and
vertical
movement
of
the
tonearm.
In
addition
to
this,
the
IC
controls
tonearm
tracking
with
the
tracking
sensor
and
tracking
error
signals.
e
EV
solenoid
drive
The
EV
solenoid
drive
uses
a
large
current
at
first
to
draw
the
plunger
inside,
and
thereafter
uses
a
lower
current
for
holding
the
plunger
in.
The
signal
to
draw
the
plunger
inside
comes
from
the
control
IC
(Q1),
passes
through
the
Q2
transistor
array,
and
enters
Q3
pin
7.
This
signal
turns
on
the
Q3
Darlington
transistor,
and
ap-
proximately
170mA
of
current
runs
into
the
collector,
turning
on
the
EV
solenoid
which
draws
the
plunger
inside.
Because
of
this,
the
tonearm
will
drop
slightly.
This
“draw”
signal
from
the
control
IC
lasts
about
1
second.
Next,
the
hold
signal,
which
was
output
at
the
same
time
as
the
draw
signal,
passes
through
the
Q2
transistor
array,
enters
Q3
pin
8
and
turns
on
the
Darlington
transistor.
When
the
draw
signal
ends,
a
current
of
approximately
70mA
drawn
from
pin
9
holds
the
plunger
inside,
which
keeps
the
tonearm
elevation
down
until
the
hold
signal
ends.
Tracking
error
tlev
signal
1V-wfe—
Tracking
center
/
0/Smatl-+Large
Q3:
M54547P
PL-V70,PL-LS0.
@
Tonearm
drive
The
tonearm
drive
is
controlled
by
input
to
Q3
pin
4,
pin
5
and
pin
15.
Their
truth
values
are
shown
in
Fig.
4-6.
@
Lead-in
(iocate-in)
<<
Q3
receives
locate-in
signals
from
the
control
IC
(Q1),
and
with
an
output
of
approximately
0V
from
Q3
pin
14
(O1)
and
approximately
11V
from
pin
11
(O02),
the
tonearm
motor
begins
turning
in
the
lead-in
direction.
@
Lead-in
(locate-out)
>
Q3
receives
locate-out
signals
from
the
control
IC
(Q1),
and
with
an
output
of
approximately
11V
from
pin
14
and
approximately
OV
from
pin
11,
the
tonearm
motor
begins
turning
in
the
lead-out
direction.
@
Stop
Q3
receives
stop
signals
from
the
control
IC
(Q1),
and
with
an
output
of
approximately
0V
from
both
pin
14
and
pin
11,
stops
the
tonearm
motor.
@
Tracking
Q3
receives
tracking
signals
from
the
control
IC
(Q1),
and
between
pin
14
and
pin
11,
outputs
an
amplified
tracking
error
signal
(amplified
by
an
internal
OP
amplifier)
and
begins
turning
the
tonearm
drive
motor
in
such
a
way
as
to
correct
the
error.
—$—
:
Pull
up
resistor
@1®
Tonearm
drive
motor
EV
SW
ON
Vv
ae!
a
our
eae
Output
TREE
Tonearm
@
operation
Lead-in
<
Lead-out
>
Pepe
t
fo
Ll
L H
L.
H
tl
L
Ll
pepe
Ta
Pe Te
[tome
1
‘
{Tonearm:
Tong
rm
‘down
jtup
Stop
Fig.
4-6
Elevation
and
Tonearm
Drive
Circuit
and
1/O
Truth
Value
Chart

DL-V70,PL-L9O
4.1.5
Key
Matrix
Circuit
The
key
matrix
circuit
reads
the
digit
output
(pins
22
to
25)
of
the
control
IC
(Q1)
from
the
Key
IN
terminal
(pins
26
to
29)
and
distinguishes
different
key
input
signals
with
the
control
IC.
In
addition
to
carrying
out
key
input
operations,
it
lights
LEDs
with
output
from
pins
17
to
19.
Fig.
4-8
shows
the
output
waves
produced
by
switch
matrix
input
in
the
following
order:
REPM
SW,
Program
SW
7,
and
EV
SW.
S13
(>)
]
Si4(S/s)
oe
2
77
al
SO(CLR)
J
SIO(REP)
2
SIL(<)
JSI2(EV)
yo
yeh
yA
a
O18
te
$5
(5)
$6
(6)
$7(7)
$8(8)
yt
xt
y
3
O17
p
p
|
Si
(1)
$2(2)
)
$3(3)
$4
(4)
ee
ae
<4
xe
+61
Qi8
@)
Kb)
DIO
My
011
his
#Qis,|
¢Bro)
(yy
&)
|
06
go?
08
D9
as
2H)
ABDa)
FB
(3)
4H)
«)
Fig.
4-7
Key
Matrix
Circuit
Program
Control
SWs
all
OFF
[REP]
sw
on
C7]
sw
on
fev]
sw
on
06037
Po
-
_-0%%
—Po-
SW
matrix
ea
=
ne:
sw
=
2
6
apes
11.2
mSEC
s
4
5]
CUR
>|
2.8
mSEC
23
>+—+4
a
wn
PER,
[YP
17
a
sls pyr
|
LED
19
t
2 3
|
Display
LEDs
all
OFF
LEO
ON
(REP),
(].e0
on
{reF],(7]
[UP}ieo
on
LED
matrix
REP
@~
—_—_—
ar
OY
——qc34“r
REP
@~
a
or
=
@-
——
vw
Q@-
———
Fig.
4-8
Output
Waveforms
Produced
by
Key
input
10

4.1.6
Remote
Control
Decode
Circuit
Remote
contro!
signal
processing
feature
@
The
SA-V70
receives
an
infrared
remote
control
ras
signal
from
the
commander,
removes
the
carrier,
and
sends
the
resulting
signal
through
an
1P
remote
control
cord
to
the
REM
IN
terminal
of
the
PL-V70.
Ground
line
SA-V70
PL-V70
1P
remote
control
cord
<P
Commander
Fig.
4-9
Connection
to
REM
IN
When
a
predifined
serial
signal
is
input
to
the
REM
IN
terminal,
the
operation
dectated
by
the
key
strokes
is
performed,
and
the
mechanism
and
the
signal
lines
are
thus
controlled.
.
Input
conditions
(Input
signal
must
be
without
a
carrier)
a.
The
signal
format
must
conform
to
that
of
uPD6102G.
(See
figure
4-11.)
b.
Only
when
a
custom
code
(component
code;
A8
for
the
player)
specified
for
the
REM
IN
temrinal
is
receiyed,
shall
the
unit
respond
the
following
control
codes
(instruction
codes).
c.
Remote
control
signals
can
be
received
depending
on
the
reception
mode
(enable/
disable)
of
the
main
unit.
When
both
a
remote
control
key
and
a
main
unit
key
are
pressed
at
the
same
time,
the
main
unit
key
becomes
effective.
Custom
code
co|ci|c2z|c3}|c4a|cs
os
[7
|
(A3)
(fi
fofofof:ifo]t
|
Data
code
Oo
PL-V70,PL-LSO
2.
Input
processing
a.
The
trailing
edge
of
the
input
signal
at
the
REM
IN
terminal
is
detected.
b.
The
duration
of
the
leader
code
(‘‘L”
level)
determines
the
validity
of
the
leader
code.
(Approximately
12.3
msec)
c.
The
states
(“1”
or
“0”)
of
the
custom
and
data
codes
are
determined
by
the
width
of
the
data
pulses.
(0:
approx.
1.02
msec;
1:
approx.
2.05
msec)
.
Control
processing
a.
When
the
remote
control
signal
is
valid,
the
unit
enters
one
of
the
15
control
modes
described
in
figure
4-12.
b.
The
remote
control
operation
must
be
exactly
the
same
as
the
operation
instructed
via
the
unit’s
keys.
c.
Even
while
the
remote
operation
proceeds,
the
unit
shall
keep
checking
whether
the
signal
is
still
received
at
the
REM
IN
terminal.
If
the
signal
ceases
for
100
msec
or
more,
the
unit
shall
go
into
the
standby
mode
in
which
it
waits
for
another
remote
control
signal.
d.
If
the
first
data
in
the
remote
conirol
signal
is
invalid,
a
second
data
is
observed.
If
the
second
data
is
valid,
it
is
used
for
remote
control.
e.
If
the
second
data
is
also
invalid,
a
third
data
is
observed
...
and
so
forth.
f.
If
valid
data
are
received
successively,
control
codes
corresponding
to
the
dataare
output
successively.
Logical
format
.
The
states
(
1"
or
‘‘0"|
of
the
custom
0:
J
1h
and
data
codes
are
determ
ined
by
the
rt
SLI
width
of
the
data
pulses.
Control
mode
Notes
(HEX
code)
012
o
Fig.
4-10
Remote
Control
Signal
Codes

PL-V70,PL-L90
@
Format
ILL
EH
DATA
CODE
8
BITS
8.2mS_
|4.1mS
CUSTOM
CODE
8
BITS
CUSTOM
CODE
8
BITS
DATA
CODE
8
BITS
LEADER
CODE
wi
H
8.2mS
4.1ms
0.51mS
eae
——
ee
2.05mS
[e}
°
1 1 t
°
1
ie}
8.0yS
23.9yS
8.2mS
or
0.5imS
fe
=
tfosce/12
=
42
kHz
@
Data
structure
LEADER
CODE
CUSTOM
CODE
CUSTOM
CODE
DATA
CODE
DATA
CODE
Fig.
4-11
Format
and
Data
Structure
of
the
Remote
Control
Signal
12

PL-V70,PL-L90
The
remote
control
signal
is
received
at
the
remote
control
signal
receiver
section
of
the
SA-
V70,
and
sent
through
the
SA-V70’s
internal
wave-
form
shaping
circuit
and
buffer
to
the
REM
IN
terminal
of
the
PL-V70.
The
data
is
then
applied
via
a
protection
circuit
made
up
of
D15
through
D17,
to
pins
7
and
21
of
Q2.
The
input
signal
pattern
at
this
stage
is
as
shown
in
figure
4-11.
This
signal
is
decoded
by
Q2(PDE003)
into
the
logical
format
described
in
figure
4-12
and
output
to
Q1
(PD
6037),
the
system
control
IC.
The
signal
is
sent
for
at
least
96
msec.
If
you
keep
pressing
the
commander
key,
however,
the
signal
is
continu-
ously
sent
from
Q2
until
the
commander
key
is
released.
Commander
logic
of
PDE003
input
key
—-
10
It
12
——+
|
4.
1
Lr}
Epa
ee
ee
ee
yp
a
ep
|
pe
re
a
Oe
ce
Qe
Os
Oe
ld
Oe
Oe
Oe
eS
Check
Mode
of
the
Remote
Controller
Decoder
Section
This
mode
is
used
to
check
whether
the
decoder
Ae
Aa
Ir
section
of
the
remote
controller
operates
norma:
If
the
PL-V70
is
used
alone,
the
decoder
sectic
petoees
can
be
checked
only
in
this
mode.
1.
Remove
the
casing
from
the
PL-V70.
Fig.
4-12
9.Ground
pin
6
(REM)
of
connector
CN4,
and
turn
the
power
on.
(This
makes
the
remote
signal
receiver
unit
of
the
remote
control
com-
mander
unnecessary.)
3.
Every
time
the
REM
IN
(JK1)
terminal
or
REM
OUT
(JK2)
terminal
is
grounded,
the
LEDs
turn
on
or
off
as
follows:
Program
1
LED
turns
on
>
Program
2
LED
turns
on—>
Program
3
LED
turns
on
—~
Clear
(LED
turns
off)
Eley
cy
UTD)
Ly
SILL]
TIryr
yer
yc
ley
oye
ir
ye
rilrijr
fry
cy
cl]
cyer]
cy
cy]
ep
Tey
eye
Q1
PD6037
Remote
controller
decoder
circuit
4)
@)_
XN
Ne)
Fig.
4-13
Remote
Controller
Decoder
Circuit
13

L-V70,PL-L90
@
Functions
of
PDE003
pins
Symbol
Pin
name
Description
Individual
output
(Valid
only
when
the
component
t
Guips
code
is
A3.)
Individual
output
(Valid
onty
when
the
component
t
Outs
code
is
A3.)
“HH”
when
in
Individual
output
(Valid
only
when
the
component
standby
mode.
code
is
A3.}
Output
Individual
output
(Valid
only
when
the
component
code
is
A3.)
Clock
input,
pin
for
external
oscillator.
Ceramic
oscil-
lator,
800kHz.
REM
INI
Connected
to
pin
22
(REM
IN
II),
receives
remote
control
signals.
RESET
Initial
reset
input.
Output
DATA
LO
DATA
L1
Decode
data
output
pin.
Output
DATA
L2
“Hi”
when
in
——$—<—$————|
standby
mode.
DATA
L3
Ve
[|
|
Greundes
BE
=
3|
DATA
HO
|
Output
|
DATA
H1
Decode
data
output
pin.
eat
.
|
Output
|
DATA
H2
H”
when
in
standby
mode.
Output
DATA
H3
Output
ANS.
LED
Output
for
indicating
‘Data
being
output”.
Standby
pooh
oe
eck
Remote
control
signal
Input
COMPO
I
Pin
for
setting
component
code.
Valid
only
etiey:
tial
reset
time.
Valid
only
at
ini-
tial
reset
time.
DECODE/
|
pin
for
switching
decode/check
mode.
DECODE
|
CHECK
|
V2lid
only
atini-
CHECK
tial
reset
time.
Output
|LOCATE(F)
Individual
output
(Valid
only
when
the
component
code
OFF
|_ON
is
A3.)
Output
|LOCATE(F)
Individual
output
(Valid
only
when
the
component
code
re)
is
A3.)
fe)
tnput
REM
IN
II
Connected
to
REM
In
I,
receives
remote
control
signals.
COMPO
II
Pin
for
setting
component
code.
ma)
a)
<
x
>
a
Fi
“H"
when
in
FF
FF
ON
Output
SPEED
Individual
output
(Valid
only
when
the
component
code
FF
ON
standby
mode,
is
A3.)
FF
ON
Output
SIZE
ee
output
(Valid
only
when
the
component
code
is
A3.
Fig.
4-14
N
~
=
~
14

4.2
CONT
ROL
PANEL
EXPLANATION
®
KEY
SW
(Control
Switches)
The
control
panel
of
this
player
is
as
shown
in
figure
4-15.
It
performs
the
following
functions:
PLAY
ARM
POWER
33
AUTO4S
REPEAT
LOCATE
/STOP
EJECT
[
)S-00~68"
co
[ee]
ARM
EV
Fig.
4-15
KEY
location
4.2.1
Power
SW
(Power
Switch)
This
switch
turns
on
the
power,
resets
the
player,
and
returns
the
tonearm
to
the
rest.
(When
the
slide
base
is
opened,
the
unit
resets
and
returns
the
arm
to
the
rest.)
©
The
UP
light
is
on
All
others
are
off.
©
The
phono
motor
is
stationary.
4.2.2
Speed
SW
(Speed
Selector)
Sliding
the
speed
selector
to
either
33
or
45
sets
the
phono
motor
rpms
to
33
or
45
respectively.
If
the
slide
base
is
closed
with
this
switch
in
the
AUTO
position,
and
then
the
unit
is
set
to
fully
automatic
or
program
selection
mode,
the
player
will
select
the
motor
speed
automatically,
based
on
the
size
of
the
record.
Record
sized:
80cm
3331/3
rpm
25cm
3331/3
rpm
17cm
45
rpm
If
you
use
the
locate
switch
to
play
records
manually
(without
using
the
automatic
or
program
selection
functions),
the
turntable
will
play
all
records
at
33
1/3
rpm
while
the
speed
selector
is
in
the
AUTO
position.
If
the
slide
base
is
opened
after
the
size
has
been
set,
the
rpm
setting
will
be
reset
to
33
1/3
rpm.
(If
the
speed
selector
is
set
to
83
or
45,
however,
the
rpm
setting
will
not
change
even
when
the
slide
base
is
closed.)
4.2.3
1
—
8
SW
(Program
Selection
Switches)
@
These
are
pressed
for
program
selection.
@
Selection
repeat
(up
to
8
times)
and
program-
ming
(up
to
15
steps)
are
possible).
@
Pressing
any
of
the
buttons
1
through
8
will
cause
the
tonearm
to
begin
to
search.
It
will
move
from
the
rest
to
the
end
of
the
record.
When
it
has
finished,
the
LED
display
will
begin
to
blink,
and
the
tonearm
will
proceed
to
the
first
selection
on
the
program.
However,
if
the
tonearm
has
already
searched
after
the
slide
base
is
closed,
then
the
LED
display
will
start
blink-
PL-V70,PL-LSO
ing
without
an
additional
search
taking
place.
It
will
proceed
directly
to
the
first
selection
on
the
program.
(If
the
slide
base
is
opened,
however,
that
search
data
will
be
cleard.)
@
It
is
possible
to
add
more
selections
to
the
program
at
any
time.
(Regardless
of
whether
the
tonearm
is
leading-in
tracing
or
searching.)
Moreover,
when
the
selections
have
finished,
or
when
the
tonearm
is
returned
with
the
S/S
switch
or
the
CLR
switch,
it
is
possible
to
reprogram
selections
even
with
the
slide
base
out.
The
tonearm
will
return
to
the
rest.
And
if
the
slide
base
is
in
position,
the
unit
will
begin
to
lead
in
or
search.
@
Reprogramming
is
not
possible
during
fully
automatic
selection
playing.
4.2.4
CLR
SW
(Clear
Switch)
@
Pressing
this
button
clears
all
previously
program-
med
selections.
@
It
can
be
used
at
any
time.
Like
theS/S
switch,
the
CLR
switch
interrupts
the
program
that
is
being
played.
(The
tonearm
will
return
to
the
rest.
4.2.5
REP
SW
(Repeat
Switch)
@
This
switch
is
used
to
repeat
(or
stop
repeating)
a
selection.
@
A
selection
may
be
repeated
up
to
1
maximum
of
8
times.
(During
both
program
sedection
and
fully
automatic
selection
playing.)
The
LED
display
will
start
blinking
when
the
weight
repeat
has
been
programmed.
@
It
can can
be
used
at
any
time.
(It
turns
ON
or
OFF
with
each
press
of
the
button)
When
the
unit
receives
a
“REP
ON”
comman¢
after
it
has
finished
playing
a
selection,
or
when
thetonearm
is
returning
after
pressing
the
S/S
switch,
it
will
interpret
this
to
mean
that
it
should
repeat
starting
with
the
next
selection.
Whe
the
‘“REP
ON”
command
is
made
(except
when
the
tonearm
is
on
the
rest)
the
player
wil
first
finish
playing
the
entire
side
(when
on
automatic)
or
complete
the
entire
program
(when
on
program),
return
to
the
rest,
and
then
lead
in
again.
4.2.6
EV
SW
(Cueing
Switch)
@
This
switch
raises
and
lowers
the
tonaym.
@
The
cueing
switch
will
respond
when
th
etonearm
is
all
the
way
UP
or
tracing
(all
the
way
down,
or
moving
down).
When
it
is
all
the
way
up,
it
will
respond
to
a
down
command,
ani
when
it
is
tracing,
or
moving
down,
it
will
repond
to
an
up
command.
It
won’t
respond
to
cummands
at
any
other
time.
15

L-v70,PL-L90
4.2.7
P/S
SW
(PLAY/STOP
Switch)
@
This
switch
is
used
to
begin
automatic
playing
and
to
end
automatic
or
programmed
playing.
@
It
can
be
used
at
any
time.
When
the
slide
base
is
open:
If
the
tonearm
is
on
the
rest,
automatic
playing
will
begin.
When
the
slide
base
is
closed:
When
the
tonearm
is
not
on
the
rest,
playing
will
stop
and
any
repeat
commands
will
be
cleared.
The
tonearm
will
then
return
to
the
rest.
All
programming
and
repeat
commands
will
be
cleared.
4.2.8
<<
,
=>
SW
This
switch
has
two
separate
functions
1.
Function
1...
Locate.
During
automatic
playing
(when
the
tonearm
is
on
the
rest
and
the
player
is
started
using
the
S/S
SW)
and
during
manual
playing
(when
the
tonearm
is
on
the
rest
and
the
player
is
started
using
the
SW),
this
switch
performs
a
locate
function.
<SW
ON...
The
tonearm
will
move
toward
the
center
of
the
record.
>SW
ON
...
The
tonearm
will
move
toward
the
outside
edge
of
the
record.
2.
Function
2...
Skip
During
programmed
playing
(when
the
player
is
started
using
the
program
SW),
this
switch
performs
a
skip
function.
<
SW
(+SKIP)
..
.
Player
stops
playing
present
selection
and
goes
on
to
the
next.
It
will
skip
one
selection
for
each
time
it
is
pushed.
>SW
(—SKIP)
.
.
.
When
pressed
once
it
will
return
to
the
beginning
of
the
present
selection.
If
pressed
N
times,
then
it
will
go
back
N
—
1
selec-
tions.
oa
Example:
G]—2]—@1—E]—-@J—-&)
When
programmed
to
play
selections
1,
2,
4, 5,
7,
8
:
—
Now
playing
Record
surface
Three
times
With
+SKIP
button
pressed
Selection
8
|
Selection
7|Selection
6|Selection
5
=>
With
—SKIP
button
pressed
Three
Selection
4)Selection
3]
Selection
2|
Selection
1
Fig.
4-16
4.3
MODE
TRANSITION
4.3.1
Initial
Reset
STOP
STATUS
Power
ON
+B:
SV
generated
+B,
:12Vgenerated
Phono
motor
is
stationary
The
tonearm
returns
to
the
rest
Initial
reset
complete
Fig.
4-17
16

4.3.2
Mode
Transition
Chart
1
®@
When
using
automatic
playing
(no
standby
input)
POWER
ON
Initial
reset
REP
SW
can
be
used
at
any
time
_
__]|
Tonearm
is
__.
|
Locate
switch
or
See
P/S
switch
in
ON
center
of
record
f
SENT
AED
SS
—
—
~~
-_]
Tonearm
moves
toward
Is
record
&
Size
detection
takes
place
on
turntable?
™
(whether
there
is
a
record
or
|
not),
and
when
there
is
a
tats
a
eas
|
Weta
ete
ee
record,
the
tonearm
lowers
onto
the
record
surface
ap-
I
proximately
7mm
beyond
the
7
first
selection.
the
tonearm
come
down
on
the
record-center
side
of
the
groove?
The
tonearm
moves
toward
the
outside
edge
of
the
record.
Did
the
tonearm
come
down
in
the
proper
place?
Fig.
4-18-1
17
PL-V70,PL-L90
®
y
Oo}
@
Down
trace
mode
(c)
Playing
selection
No
Locate
SW
ON
Yes
—
as
End
of
record?
Yes
Noe“1
ocate
SW
ON
2
Locate
SW
ON
Yes
No
Yes
s
A
REP
clear
Yes
Me
ae
Ee
cg
ey
pa
is
Tonearm
Up
return
to
rest
Did
thé
tonearm
reach
the
rest?
When
the
tonearm
is
returning
and
REP
ON
is
commanded
with
the
-eoor
ee
REP
SW,
the
unit
won't
restart.
The
repeat
operation
will
end
after
a
maximum
of
8
times.
Is
the
REP
SW
ON?
Fig.
4-18-2
18

PL-V70,PL-L9O
4.3.3
Mode
Transition
Chart
2
@
Using
programmed
playing
(no
standby
input)
REP
SW
can
be
used
at
any
time
The
tonearm
is
on
the
rest
No
Locate
or
P/S
SW
ON
No
n~o@
Yes
SW
ON
——-—|-—-
—-—-——
-
Program
SW
ON
Yes
@
Fully
automatic
Manual
No
Search
alread
completed?
yp
.————-
a
ae
Se
Yes
The
tonearm
begins
searching
when
the
program
SWs
(1
through
8)
have
been
pushed.
The
search
is
completed
at
a
level
close
to
the
surface
of
the
record.
-———-———-
Record
surface
proximity
(about
¢112mm)
Close
to
the
end
of
the
record?
Yes
No
Is
there
a
record?
Yes
in
Bg
The
tonearm
moves
Se
11
et
Br
Ss
Bek
(3
a)
ee
FS
ea
toward
the
outside
edge
of
the
record
and
goes
beyond
the
specified
selection
by
about
7mm
Specified
selection
——_
=
Is
the
tone-
:
arm
beyond
the
No
je
+
7m
specified
selection?
|
The
tonearm
toward
the
center
of
the
record
to
the
specified
selec-
tion.
Specified
selection
-—>
Did
the
tone-
arm
arrive
at
the
sepeficied
selection?,
No
Fig.
4-19-1
19
<~©
|
a
Specified
No
b
Spar
selection
finished?
End
of
record?
Yes
Is
next
selection
closer
to
record
edge?
oS
a
Did
the
|
tonearm
arrive
at
the
rest?
a
maximum
of
8
times.
Fig.
4-19-2
20
Ae
ee
1
through
ts
there
_
8
clear
another
Ske
program?
a
“N
The
tonearm
lowers
and
detects
the
specified
selection
band
cen-
ter.
Muting
is
ON
Band
input
|
Zero
cross
To
+a
“
Finish
playing
~
specified
selection
“---|
and
go
to
next
selection
Or
return
When
the
tonearm
is
returning
and
REP
ON
is
commanded
with
the
REP
SW,
the
unit
won't
restart.
The
repeat
operation
will
end
after

44
OPERATION
MODE
EXPLANATIONS
4.4.1
Power
ON
When
the
power
is
turned
on
or
the
cover
is
opened,
the
PL-V70
performs
the
following
opera-
tions.
1.
It
returns
the
tonearm
to
the
rest.
2.It
turns
off
the
program
display
(1
through
8)
and
the
REP
display
LEDs
and
turns
on
the
UP
display
LED.
3.
It
stops
the
phono
motor
rotation.
4,
It
turns
the
muting
on.
Note:
In
case
of
PL-V70,
the
UP
LED
blinks
while
the
arm
is
moving.
4.4.2
Rest
Mode
With
the
PL-V70
on
and
awaiting
input,
all
of
the
functions
work
with
the
exception
of
the
EV
SW.
During
the
rest
mode,
the
buttons,
when
pushed,
perform
the
following
functions.
1.
SWs
1
through
8
Pushing
any
of
these
will
start
the
search
mode.
When
searching
has
already
been
completed
the
lead-in
mode
will
begin.
2.
REP
SW
This
turns
the
repeat
function
ON
and
OFF
alternately.
3.<<
SW
This
turns
the
turntable
and
moves
the
tonearm
toward
the
record
center.
With
manual
playing,
it
works
as
a
locate
SW.
.P/S
SW
This
starts
the
lead-in
operation
during
auto-
matic
playing.
(The
turntable
rotates
and
player
switches
to
lead-in
mode)
’
=
4.4.3
Search
Mode
fos]
ee
aR
It
does
the
following
while
moving
the
tonearm
from
the
rest
to
the
center
of
the
record.
1.
It
determines
the
size
of
the
record.
(And
the
speed
as
well)
9.
It
records
the
band
address.
3.
It
detects
programmed
selection.
PL-V70,PL-L9O0
When
the
speed
SW
is
set
to
AUTO,
the
speed
for
30cm
and
25cm
records
is
33rpm.
When
the
search
mode
detects
a
17cm
record,
then
it
sets
the
speed
to
45rpm.
However,
at
this
point,
the
turntable
is
not
yet
spinning.
When
the
tonearm
gets
to
the
17cm
size
area
and
detects
no
record,
it
then
clears
the
program
and
repeat(s)
(if
any)
and
returns
to
the
rest.
(Switches
to
return
mode.)
When
the
tonearm
comes
to
the
end
of
a
record
and
it
has
programmed
selection
number
that
is
higher
than
the
actual
number
of
record
selections,
it
clears
those
numbers
from
its
memory
and
begins
the
lead-out
operation.
(Switches
to
lead-out’
mode)
For
example,
if
the
number
of
actual
selections
are
programmed,
then
the
numbers
above
6
are
cleared
from
the
memory.
In
the
search
mode,
all
functions
work
with
the
exception
of
EV,
<<
,
—>SWs.
1.
SWs
1
through
8
Repeat
input
is
possible,
and
up
to
15
steps
can
be
programmed
into
the
PL-V70.
2.
CLR
SW
It
clears
everything
in
the
memory
and
the
search
operation
will
continue.
38.
REP
SW
It
turns
the
repeat
ON
and
OFF
alternately.
4.P/SSW
It
clears
programmed
selections
and/or
repeats
and
starts
the
return
operation.
(Switches
to
return
mode.)
4.4.4
Lead-Out
Mode
@
During
automatic
playing
This
moves
the
tonearm
toward
the
outside
edge
of
the
record
until
it
addresses
the
first
selection.
Then
it
stops
moving
the
tonearm,
and
starts
to
move
it
DOWN.
(Switches
to
down
trace
mode.)

PL-V70,PL-L90
@
During
programmed
selection
playing
If
the
EV
is
DOWN,
then
it
brings
the
tonearm
UP
and
moves
it
toward
the
outside
edge
of
the
record.
However,
depending
on
whether
it
is
pushed
during
the
first
selection
of
a
program
or
after
that,
the
operations
change.
1.
When
pushed
during
the
first
selection
of
a
program.
It
moves
the
tonearm
to
the
address
of
the
first
selection,
and
thereafter
operates
as
with
automatic
selection
playing.
2.
When
pushed
during
subsequent
selections
of
a
program.
It
moves
the
tonearm
back
64
address
units
from
the
selection
address
(approximately
7.8mm
toward
the
outside
edge
of
the
record)
where
it
changes
direction
and
begins
the
lead-in
operation.
(Switches
to
lead-in
mode.)
In
the
lead-out
mode
the
REP
and
S/S
SWs
work,
but
the
other
functions,
program
SWs
(1
through
8)
and
the
CLR
only
work
during
program-
med
selection
playing.
1.[REP|Sw
This
turns
the
repeat
ON
and
OFF
alternately.
2.[P/S|Sw
This
clears
any
programming
and/or
repeat(s)
and
starts
the
retung
operation.
(Switches
to
the
return
mode.)
3.
SWs[1|through[8]
These
permit
repeating
the
same
selection
and
the
addition
of
more
programming
(up
to
15
steps)
during
programmed
selection
playing.
4.[CLR|SW
This
clears
programming.
After
that,
it
switches
to
automatic
playing.
(It
starts
leading
out
to
the
first
selection)
4.4.5
Lead-In
Mode
G——
Sk
®
During
fully
automatic
playing
If
the
size
of
the
record
has
not
yet
been
deter-
mined,
the
tonearm
does
this
while
moving
to
the
address
of
the
first
selection
+64
address
units,
(approximately
7.3mm
closer
to
the
center
of
the
record).
These
is
changes
direction
and
begins
to
lead
out.
(Switches
to
lead-out
mode.)
®@
During
programmed
selection
playjng
This
mode
moves
the
tonearm
toward
the
center
of
the
record.
Depending
on
whether
the
button
is
pushed
during
the
first
selection
of
a
program
or
duing
subsequent
selections,
the
operations
change
as
follows.
22
1.
When
pushed
during
the
first
selection
of
a
program.
It
moves
the
tonearm
to
the
address
of
the
first
selection
+64
address
units
(approxi-
mately
7.8mm
toward
the
center
of
the
record),
changes
direction,
and
starts
to
lead
out.
(Switch-
es
to
lead-out
mode.)
2.
When
pushed
during
subsequent
selections
of
a
program.
It
moves
the
tonearm
toward
the
center
of
the
record,
to
the
programmed
selection
address
—16
address
units
(approximately
1.8mm
toward
the
outside
edge
of
the
record),
where
it
begins
detecting
the
band.
While
moving
the
tonearm
toward
the
center
of
the
record
it
detects
a
trailing
signal
(
Y_
)as
shown
in
figure
4-20,
The
tonearm
stops
when
it
has
detected
the
signal,
and
then
lowers.
(Switch-
es
to
pre-down
mode.)
When
the
tonearm
doesn’t
detect
a
band
even
after
going
to
the
programmed
selection
address
+16
address
units
(about
1.8mm
closer
to
the
center
than
the
band)
then
it
begins
leading
out.
(Switches
to
lead-out
mode.)
When
the
tonearm
has
not
detected
the
selection
band
after
repeating
the
lead-in/lead-out
sequence
4
times
it
goes on
to
the
next
programmed
selection.
Tonearm
=a
Lead
in
Band
signal
Band
differential
output
‘
t
'
Record
:
:
QWIVPLLPPLT
VP
IVI
IS
suface
Band
Fig.
4-20
In
the
lead
in
mode,
as
with
the
lead
out
mode,
the
REP
and
P/S
switches
work,
but
the
ohher
functions,
program
switches
(Gi)
through
(8)
and
the
CLR
only
work
during
programmed
selecion
playing.
The
operations
performed
after
the
commands
are
received
are
the
same
as
with
the
lead
out
mode.
This manual suits for next models
3
Other Pioneer Turntable manuals

Pioneer
Pioneer PL-550 User manual

Pioneer
Pioneer PL-470 User manual

Pioneer
Pioneer PL-550 User manual

Pioneer
Pioneer PL-71 User manual

Pioneer
Pioneer PL-50 User manual

Pioneer
Pioneer PL-530 User manual

Pioneer
Pioneer XDJ-1000 User manual

Pioneer
Pioneer PL-990 User manual

Pioneer
Pioneer PL-707 User manual

Pioneer
Pioneer PL-44F User manual

Pioneer
Pioneer PL-A35 User manual

Pioneer
Pioneer PL-110 User manual

Pioneer
Pioneer PL-200Z User manual

Pioneer
Pioneer LD-V4300D User manual

Pioneer
Pioneer PL-530 User manual

Pioneer
Pioneer PL-560 User manual

Pioneer
Pioneer C-5600DFV User manual

Pioneer
Pioneer PL-30-K User manual

Pioneer
Pioneer PL-15D-II User manual

Pioneer
Pioneer PL-L70 User manual