manuals.online logo
Brands
  1. Home
  2. •
  3. Brands
  4. •
  5. Planet
  6. •
  7. Power Supply
  8. •
  9. Planet XGS3-PWR150-48 User manual

Planet XGS3-PWR150-48 User manual

– 1 – – 2 –
– 3 – – 4 –
1. Overview
Thank you for purchasing PLANET 150-watt DC -48V power
supply.
Power Supply Unit Input Range
XGS3-PWR150-48 -40 to -60V DC
Open the box of the Redundant Power Supply unit and
carefully unpack it. The box should contain the following
items:
The -48V DC Power Supply unit x 1
User’s Manual x 1
If any item is found missing or damaged, please contact
your local reseller for replacement.
2. Introduction
Before installation, please be sure to read this user’s
manual carefully to complete machine installation. This
manual shows how to quickly install the power from the
XGS3-24042, unless specied as “redundant power” that
will be used for these four models.
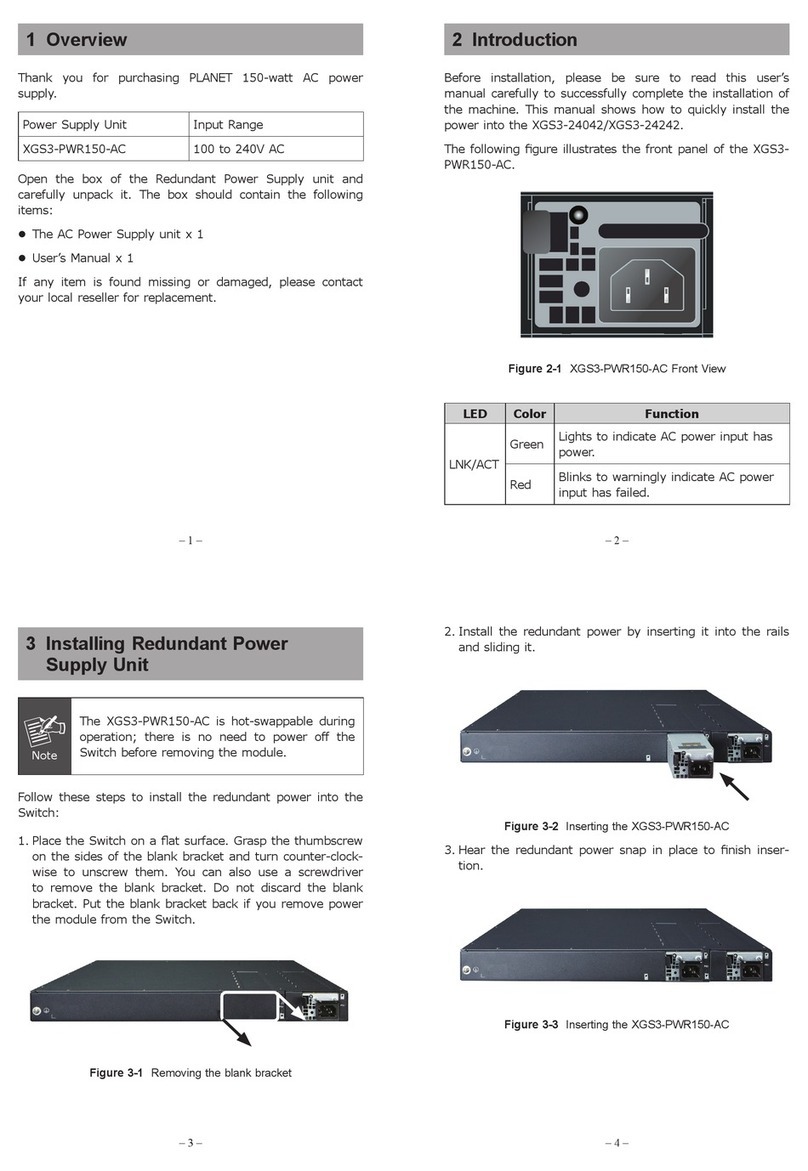
The following gure illustrates the front panel of the
XGS3-PWR150-48.
4.7
-
2.8A
-40
-
-60V
Figure 2-1 XGS3-PWR150-48 Front View
LED Color Function
LNK/ACT
Green Lights to indicate DC power input has
power.
Red Blinks to indicate DC power input has
failed or warning.
3. Installing Redundant Power Supply
Unit
Note
The XGS3-PWR150-48 is hot-swappable during
operation; there is no need to power off the
Switch before sliding or removing the module.
Follow these steps to install the redundant power into the
Switch:
1. Place the Switch on a at surface. Grasp the thumbscrew
on the sides of the blank bracket and turn counter-clock-
wise to unscrew them. You can also use a screwdriver
to remove the blank bracket. Do not discard the blank
bracket. Put the blank bracket back if you remove the
module out of the Switch.
Figure 3-1 Removing the blank bracket
2. Install the redundant power by inserting it into the rails
and sliding it.
Figure 3-2 Inserting the XGS3-PWR150-48
3. Hear the redundant power snap in place to nish inser-
tion.
Figure 3-3 Inserting the XGS3-PWR150-48
4. Wiring the DC Power Input
The 3-pin terminal block connector on the redundant power
uses DC power input. Please follow the steps below to
insert the power wire.
Note
1.Before connecting the DC power wires, please
check whether your local DC power source is
stable.
2. The wire gauge for the power cable should be in
the range of 12 ~ 24 AWG.
3. The DC power input range is -40 ~ -60V DC.
– 5 – – 6 –
1. Insert the positive DC power wire into the positive(+)
contact (right pin) and tighten the wire-clamp for
preventing the DC power wire from loosening.
2. Insert the negative DC power wire into the negative(-)
contact (middle pin) and tighten the wire-clamp for
preventing the DC power wire from loosening.
3. Insert the grounding power wire into the grounding(G)
contact (left pin) and tighten the wire-clamp for
preventing the power wire from loosening.
Figure 4-1 Power pin design of XGS3-PWR150-48
5. Removing Redundant Power
Supply Unit
Follow these steps to install the redundant power into the
Switch:
1. Remove all DC power wires from terminal block of the
XGS3-PWR150-48.
2. To remove the redundant power from the XGS3-24042,
move the lever to the right and pull it out.



Figure 5-1 Removing the XGS3-PWR150-48

Other Planet Power Supply manuals

Planet NAS-78RPS User manual

Planet

Planet NAS-78RPS User manual

Planet MC-1610MR User manual

Planet

Planet MC-1610MR User manual

Planet XGS-PWR350 Series User manual

Planet

Planet XGS-PWR350 Series User manual

Planet XGS3-PWR150-AC User manual

Planet

Planet XGS3-PWR150-AC User manual

Planet XGS3-PWR-AC User manual

Planet

Planet XGS3-PWR-AC User manual

Planet 8-Port IP Power Manager IPM-8001 User manual

Planet

Planet 8-Port IP Power Manager IPM-8001 User manual

Planet XGS3-PWR-AC User manual

Planet

Planet XGS3-PWR-AC User manual

Planet MC-15RPS90 User manual

Planet

Planet MC-15RPS90 User manual

Popular Power Supply manuals by other brands

Pulsar HPSB 11A12C manual

Pulsar

Pulsar HPSB 11A12C manual

Altronix ALTV1224DC installation guide

Altronix

Altronix ALTV1224DC installation guide

Elvox Vimar 0831 Installer's guide

Elvox

Elvox Vimar 0831 Installer's guide

Elettrotest HPS/T user manual

Elettrotest

Elettrotest HPS/T user manual

SJS + Smart Jump Start Charger SJS3000 PRO... user manual

SJS

SJS + Smart Jump Start Charger SJS3000 PRO... user manual

Visionary Solutions PSA200 user manual

Visionary Solutions

Visionary Solutions PSA200 user manual

FiveFish PSU-1848 Assembly guide

FiveFish

FiveFish PSU-1848 Assembly guide

ETC Unison Echo E-SPM-WM installation guide

ETC

ETC Unison Echo E-SPM-WM installation guide

StarTech.com PS2POWER230 installation manual

StarTech.com

StarTech.com PS2POWER230 installation manual

OCZ SXS datasheet

OCZ

OCZ SXS datasheet

ZALMAN LEII Series user manual

ZALMAN

ZALMAN LEII Series user manual

Amada MD-A8000B-05 Series Operation manual

Amada

Amada MD-A8000B-05 Series Operation manual

EVGA Supernova 1000 P2 user manual

EVGA

EVGA Supernova 1000 P2 user manual

ZALMAN ZM460-APS user manual

ZALMAN

ZALMAN ZM460-APS user manual

Valcom VP-624D quick guide

Valcom

Valcom VP-624D quick guide

LionTec MPS-2300300 Operating	 instruction

LionTec

LionTec MPS-2300300 Operating instruction

Alvarion OPS-AC release note

Alvarion

Alvarion OPS-AC release note

Fluke PM2811 user manual

Fluke

Fluke PM2811 user manual

manuals.online logo
manuals.online logoBrands
  • About & Mission
  • Contact us
  • Privacy Policy
  • Terms and Conditions

Copyright 2025 Manuals.Online. All Rights Reserved.