5/15
www.planet.com.tw
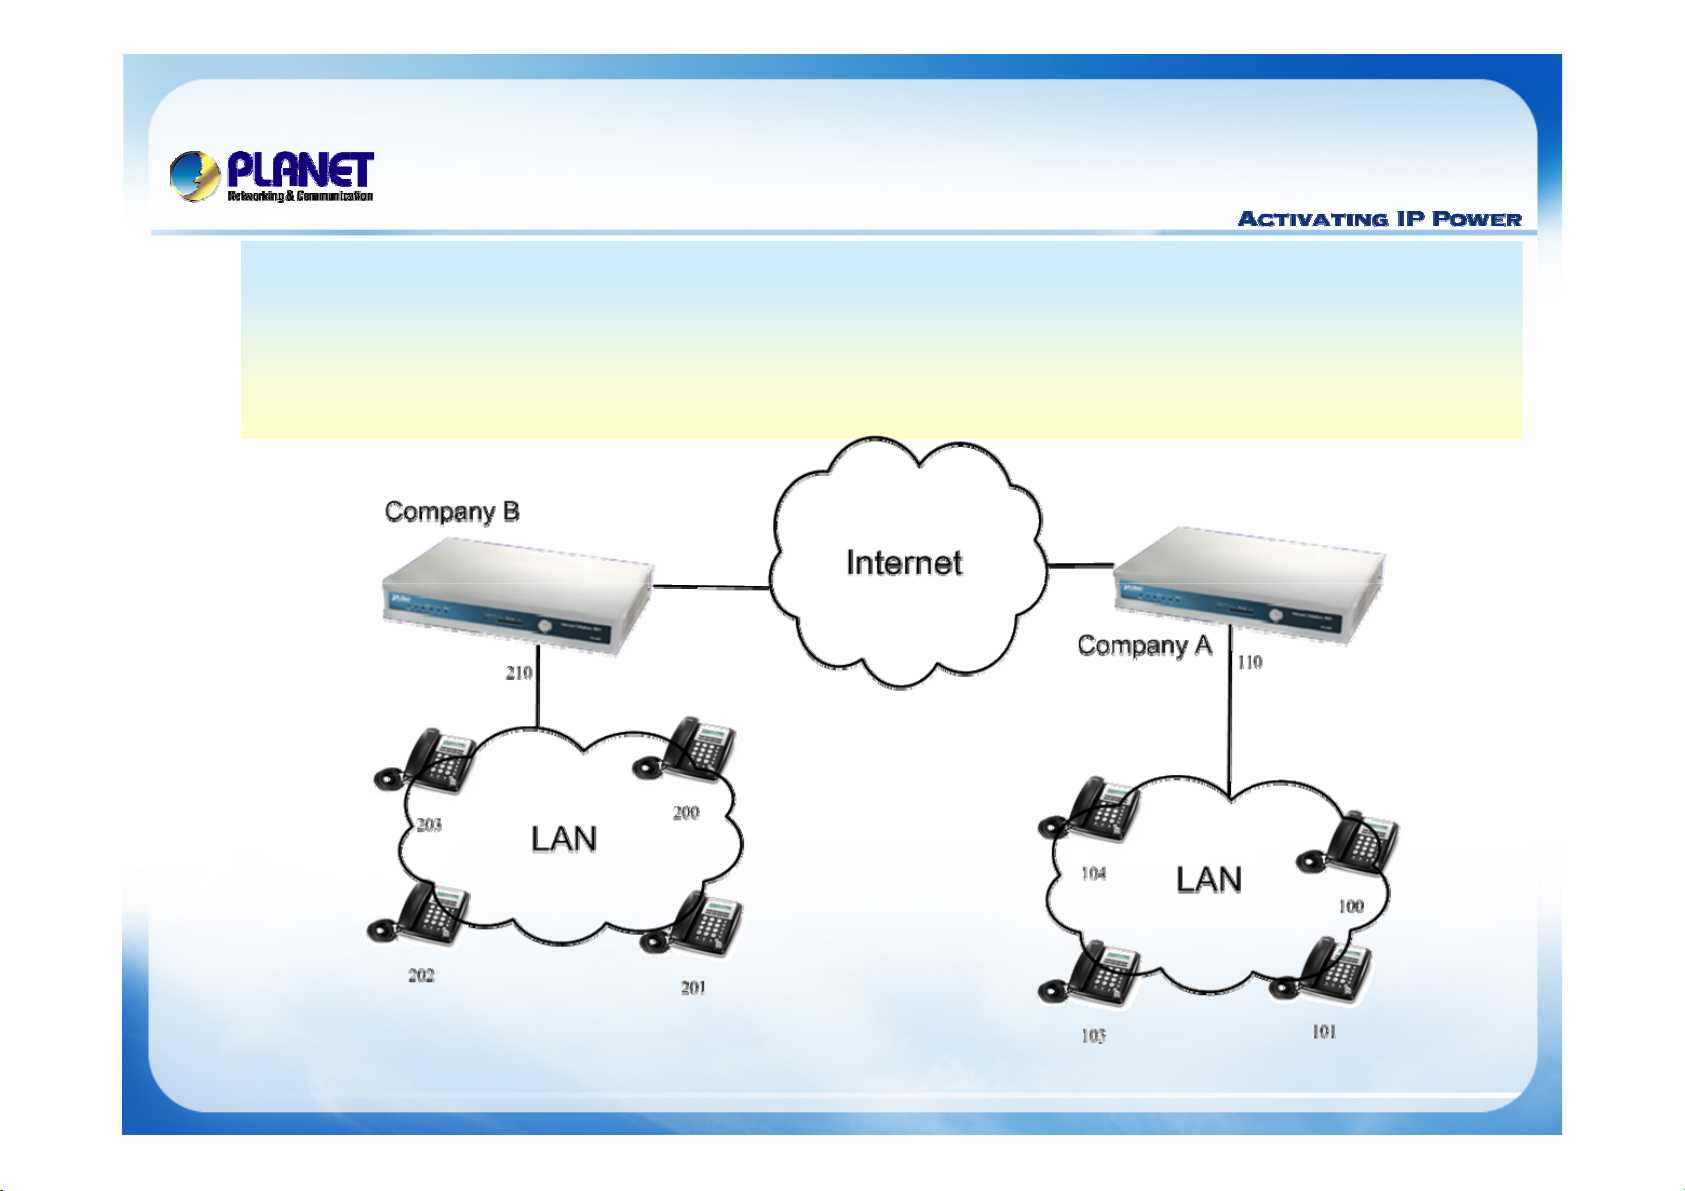
Case 1: Two
Case 1: Two-
-Site Configuration
Site Configuration
IPPBX B
IPPBX A
1
1
2
2
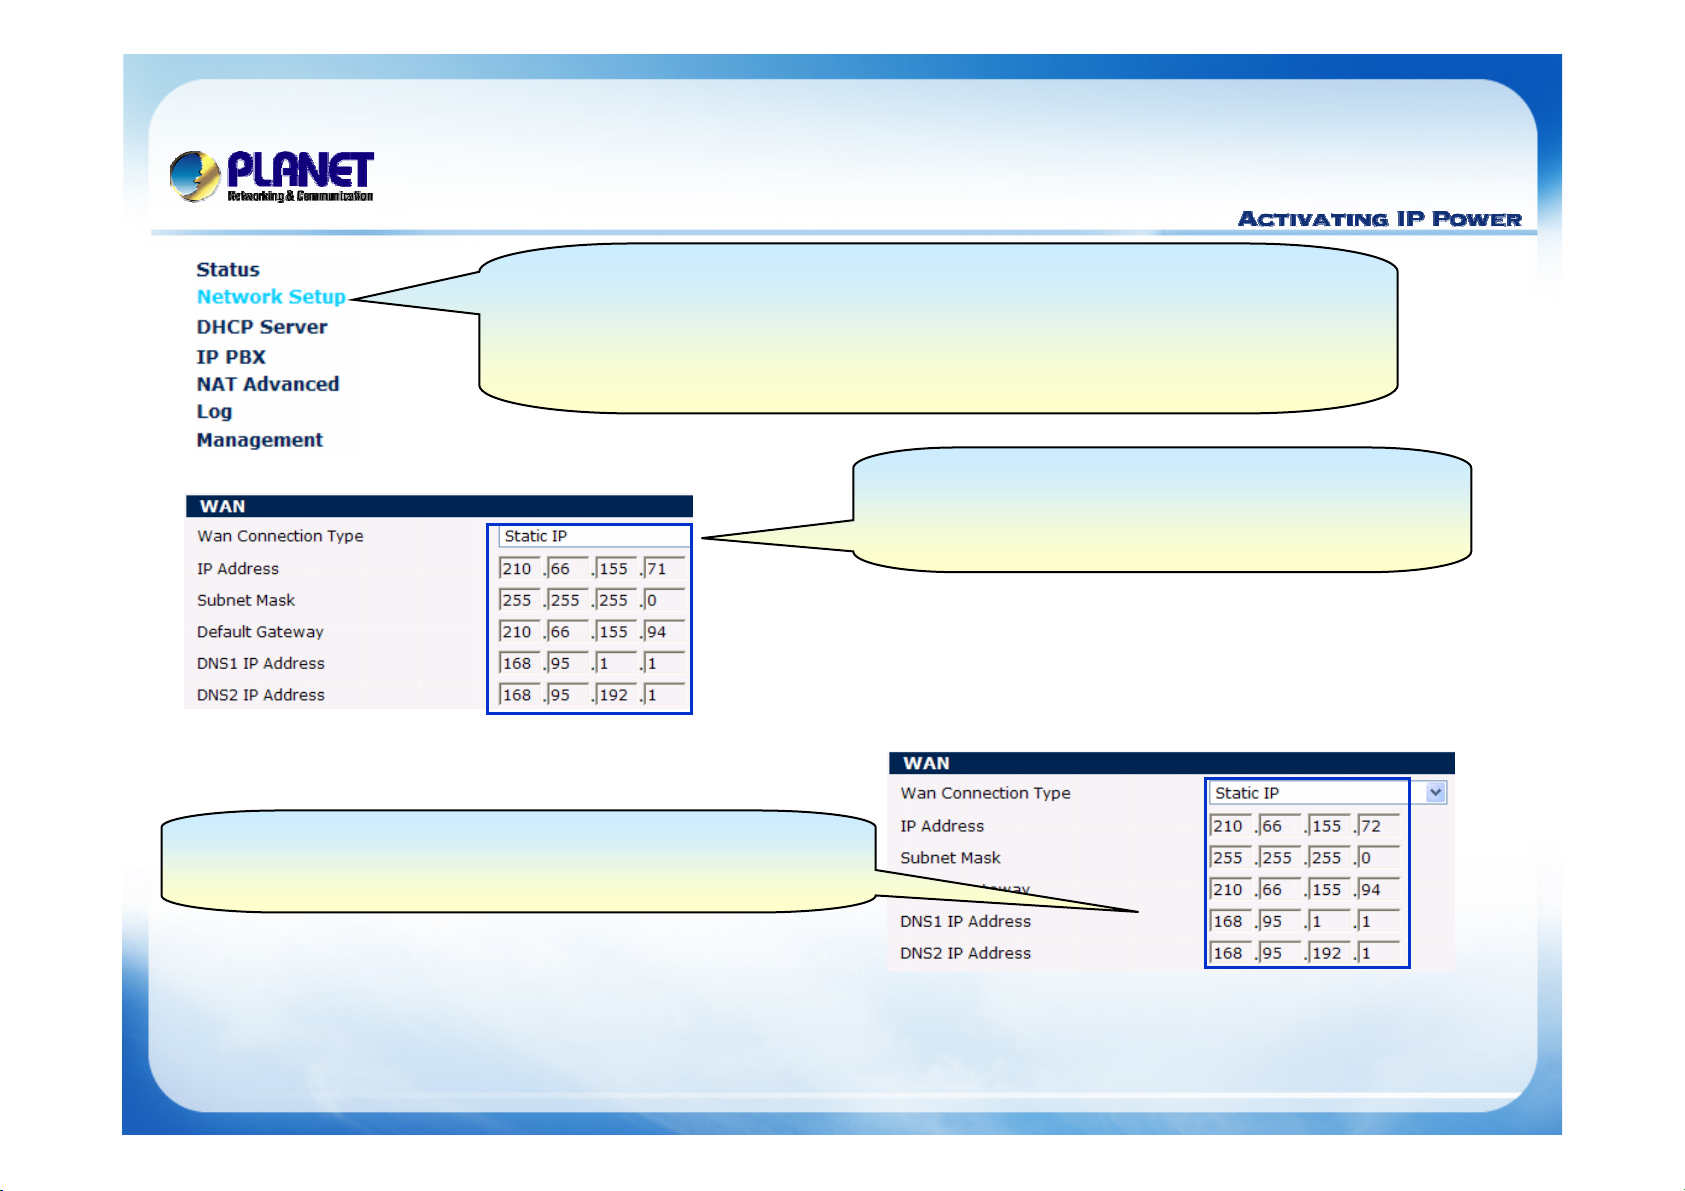
Setup the WAN interface of
Setup the WAN interface of IP PBX A
IP PBX A
follow the information of IP that
follow the information of IP that
provides by ISP
provides by ISP
3
3
Setup the WAN interface of
Setup the WAN interface of IP PBX B
IP PBX B follow
follow
the information of IP that provides by ISP
the information of IP that provides by ISP
Click the [
Click the [Network Setup
Network Setup] to set up the WAN interface for
] to set up the WAN interface for
the IP PBX of company A, said IP PBX A and the IP PBX
the IP PBX of company A, said IP PBX A and the IP PBX
of company B, said IP PBX B. If the IP PBXs not under
of company B, said IP PBX B. If the IP PBXs not under
the NAT, disable the STUN server.
the NAT, disable the STUN server.