PLAYTIVE 309476 User manual
IAN 309476
MINI REMOTE-CONTROLLED
RACING CAR
Instruction manual
LENKTYNINIS NUOTOLINIO
VALDYMO AUTOMOBILIUKAS
Naudojimo vadovas

2
1
4
32
A
2a
2b
2c
F
1l
1b
D
1b
1a 1a
B
1m
1
2b
I
1
1d
3
G
1g 1k
1d 1f
1e
1h 1i
1c
1j
C
1i
2
E
1
1n
1m
H

3
4
K
2a
J
N
P
L
O Q
M

4

5
Scope of delivery (fig. A) ........................................................... 6
Intended use ................................................................................ 6
Technical data ............................................................................. 6
Symbols Used ............................................................................. 6
Replacing batteries ..................................................................... 7
Charging the battery ............................................................ 7 - 8
Using the product ................................................................. 8 - 9
Storage, cleaning ....................................................................... 9
Disposal instructions ................................................................. 10
Disposal measures for batteries/rechargeable battery ........ 10
Notes on the guarantee and service handling .............. 10 - 11
Komplekto sudėtis (A pav.) ...................................................... 12
Tinkamas naudojimas ............................................................... 12
Techniniai duomenys ................................................................ 12
Naudojami simboliai ................................................................ 13
Baterijų keitimas ........................................................................ 13
Akumuliatoriaus įkrovimas ............................................... 13 - 14
Gaminio naudojimas ........................................................ 14 - 15
Laikymas, valymas ............................................................ 15 - 16
Nurodymai dėl atliekų tvarkymo ............................................. 16
Baterijų / akumuliatoriaus atliekų tvarkymo priemonės ........ 16
Pastabos dėl garantijos ir aptarnavimo .......................... 16 - 17
Contents/Turinys
6
Congratulations! By making this
purchase you have selected a
high-quality product.
Become familiar with the prod-
uct before first using it.
For this purpose
read carefully the
following
instructions for use.
Use the product only as des-
cribed and for the indicated
fields of application.
Keep these instructions handy.
Hand over all documents also
when passing the product on to
third parties.
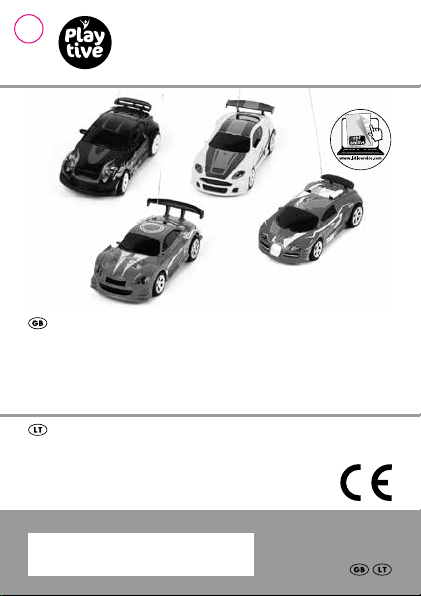
Scope of delivery
(fig. A)
1 x Remote control
with batteries (1)
1 x Mini RC Racer (2)
1 x Antenna (3)
4 x Small traffic cone (4)
1 x Instruction manual
Intended use
This product is intended for
private use as a toy for children
over the age of 3.
Technical data
RC-5859/RC-5861:
Power supply - operation
(battery):
2 x 1.5V LR6, AA
Power supply - drive
(rechargeable battery):
1 x 1.2V NiMH 80 mAh
Radio frequency: 27 MHz
Range: up to 5m
Speed: 2km/h
RC-5860/RC-5862:
Power supply - operation
(battery):
2 x 1.5V LR6, AA
Power supply - drive
(rechargeable battery):
1 x 1.2V NiMH 80 mAh
Radio frequency: 40 MHz
Range: up to 5m
Speed: 2km/h
Symbols Used
This device meets the
basic requirements
and complies with the
other relevant stipulations of
RED 2014/53/EU as well as
the RoHS Directive
2011/65/EU.
GB

7
Full conformity declarations
are available under: http://
www.conformity.delta-sport.
com
Date of manufacture
(month/year): 10/2018
Replacing batteries
WARNING! Follow these
instructions to avoid
mechanical and electrical
damage.
The product comes with two
batteries whose protective foil
(1a) must be removed before
first use (fig. B). If the batteries
no longer work you can
replace them.
1. Open the cover (1b) of the
battery compartment on the
bottom of the remote control
(1) in the direction of the ar-
row and remove the cover
(fig. D).
2. Take out the batteries inside
the product.
3. Insert the new batteries care-
fully into the battery holder
(1l). The batteries must fit fully
into the battery holder.
Note: Pay attention to correct
plus/minus polarity of the bat-
teries and their installation.
4. Slide the cover (1b) onto the
battery compartment on the
bottom of the remote control
(1) to close the battery
compartment.
Charging the battery
1. Open the flap (1n) on the
side of the remote control (1)
and take the battery charger
cable (1m) out of the holder
(fig. H).
2. Connect the battery charger
cable (1m) to the charging
socket (2b) on the Mini RC
Racer (fig. I).
3. Turn the switch (2c) to OFF
(fig. F).
Note: The switch (2c) must
always be set at OFF when
charging. If not, the battery will
not charge.
Charging takes about 4
minutes. During charging the
charging control light (1j)
glows.
4. After charging disconnect the
battery charger cable (1m)
from the Mini RC Racer (2).
GB

8
Clamp the battery charger
cable into the holder of the
flap (1n) and close the flap.
4. After charging disconnect the
battery charger cable (1m)
from the Mini RC Racer (2).
Clamp the battery charger
cable into the holder of the
flap (1n) and close the flap.
Using the product
Preparation
• Hold down the button (1i)
and push the Mini RC Racer
(2) backwards to free the ve-
hicle from the holding device
(1e) (fig. E).
• Screw the antenna (3) into
the antenna socket (1d)
on the remote control (1)
and pull the antenna out
completely (fig. G).
• There are small traffic cones
(4) in the lid of the box. Press
the lever down and take the
traffic cones out (fig. K).
Switching the product
on and off
• To control the Mini RC Racer
(2) with the remote control
(1) the Mini RC Racer must
be switched on.
To switch the Mini RC
Racer on or off slide the
switch (2c) on the bottom of
the vehicle to ON to switch
it on or to OFF to switch it off
(fig. F).
• When the product is not
being used the Mini RC Racer
(2) must be switched off. To
do this slide the switch (2c) to
OFF.
Operating the Mini-RC
Racer
The vehicle can be steered in
various directions using the
remote control (1). To do this
press the following buttons or
combinations of buttons. The
signal light (1h) lights up.
• Arrow pointing forwards (1c):
Vehicle moves forwards (fig. L).
• Arrow pointing backwards
(1g): Vehicle moves back-
wards (fig. M)
• Arrow pointing forwards (1c)
+ Arrow pointing to the right
(1f): Vehicle turns to the right
(fig. N).
GB

9
• Arrow pointing forward
(1c) + arrow pointing to the
left (1k): Vehicle turns to the
left (fig. O).
• Arrow pointing backwards
(1g) + arrow pointing to
the right (1f): Vehicle moves
backwards turning to the right
(fig. P).
• Arrow pointing backwards
(1g) + arrow pointing to
the left (1k): Vehicle moves
backwards turning to the left
(fig. Q).
Note: To enhance your enjoy-
ment while driving set up the
traffic cones (4) at regular
distances apart and steer the
Mini RC Racer around the
traffic cones.
Trimming the front axle
(fig. J)
If the Mini RC Racer no longer
travels in a straight line, even
though you are pressing the
forward arrow on the remote
control, proceed as follows:
1. If the Mini RC Racer drifts to
the right, slide the trimming
lever (2a) a bit to the left.
2. If the Mini RC Racer drifts
to the left, slide the trimming
lever (2a) a bit to the right.
3. Repeat step 1 or step 2 if the
Mini RC Racer continues not
driving in a straight line.
Storage, cleaning
CAUTION: Before you
clean the product the on/
off switch of the Mini RC
Racer must be in the OFF
position.
The Mini RC Racer must be kept
dry and after each use any
soiling, for example woollen
threads, hair, dust, etc. must be
removed. To do this use a dry
cloth for cleaning and avoid
contact with water on elec-
tronics, rechargeable battery,
and motor. Fasten the Mini RC
Racer to the remote control
and store it away in the box.
Store the product in a dry and
dust-free location out of direct
sunlight. The optimal storage
temperature is between 10°C
and 25°C. Switch the Mini RC
Racer off when it is not being
used. Remove the batteries from
the remote control.
GB
10
Disposal instructions
Dispose of the product and
the packaging materials in
accordance with current local
regulations. Children should not
be allowed to have packaging
materials, for example plastic
bags. Keep the packaging
material out of the reach of
children.
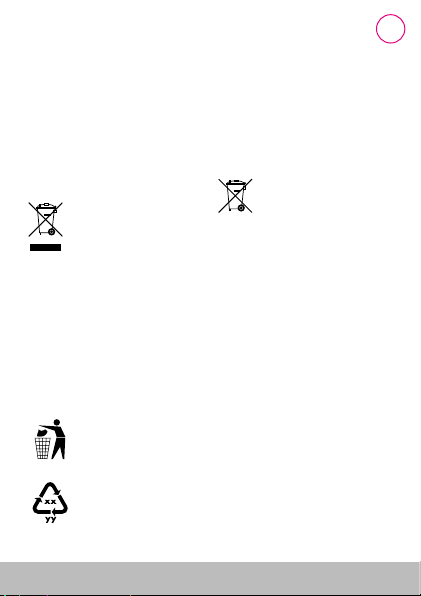
Devices marked with the
adjacent symbol may
not be disposed of
together with household
waste. You are obliged to
separate for disposal such
electric and electronic waste.
Please obtain information from
your local council regarding
controlled disposal. Before
disposal remove the batteries/
rechargeable battery from the
product.
Dispose of the product
and the packaging in
an environmentally safe
manner.
The Recycling Code is
used to mark different
materials to be returned
for recycling.
The Code consists of the
recycling symbol, which is
intended to match the recycling
process, and a number, which
identifies the material.
Disposal measures for
batteries/rechargea-
ble battery
Please note:
Batteries/rechargeable
battery are hazardous
waste that may not be disposed
of together with household
waste.
You can leave used batteries/
rechargeable batteries at the
council collection points or at
the trade outlet free of charge.
Special collection containers
are available there.
Notes on the gua-
rantee and service
handling
The product was produced with
great care and under constant
supervision. You receive a
three-year warranty for this pro-
duct from the date of purchase.
Please retain your receipt.
GB
Other manuals for 309476
2
Table of contents
Languages:
Other PLAYTIVE Motorized Toy Car manuals


