0000101887/071013/A KUA/S EN - 7
KUA-4-S
KUA-2-S
KUA-3-S
© Copyright 2008:All rights reserved.All information within this printed matter may not be reproduced,
handed over, copied, xeroxed or translated into another language in any form or means without written
permission from Plymovent AB.PlymoventAB reserves the right to make design changes.
BSAB no: T0.31
Ser.no: KUA-S/TB
Date: Nov-00
Replace: Sept-97
Ball-bearing jointed extraction arm
- Standing (KUA-S)
Components and operation
Hood operation
The black, enamelled ano-dised
metal hood can be angled 110°
forwards, backwards and to the
sides. Large, 360°, ring handle,
Ø300 mm.
Maneuvering
1. Ring handle for positioning
of the hood. Can be reached
from all sides.
2. Damper control knob.
3. Quick-fit catch for simple ex-
change of extension hose and
hood.
KUA - Standing
The PlymoVent ball-bearing jointed extraction arm – KUA-S – is a flexible and
efficient extractor for dust, welding fumes, soldering fumes, oilmist, fumes from
solvents etc. Ideal for many problem areas. The outer and inner arm are coupled
by an externally mounted elbow joint for which we have a patent application pen-
ding. This external joint is adjusted by hand without the need for any tools. The
lower spring-assisted joint supported in a double ball-bearing mount, gives KUA-S
a smooth, flexible movement. The KUA-S reaches above its mounting height and is
manoeuvrable through 360°. Both outer and inner arms are made of light, smooth
aluminium tubing. This not only makes the arm rugged but also minimises the total
weight and noise level, even at high extraction rates.
Delivery
The arm is delivered complete with mounting flange.
Advantages
• Easy to move thanks to the ball-bearing mountings and spring assistance.
• Inner and outer arms made from aluminium tubing give increased
mechanical strength.
• External, middle joint simplies adjustments.
• Easy-to-reach ring handle ensures simple positioning of the hood.
• Standard stanchion for ceiling, oor and wall mounting makes
installation easy.
• Reaches up to 6 m with stanchions PA-110 or PA-220.
• Rugged construction.
TECHNICAL DESCRIPTION
Standing model.
Flange mounted.
2 m, 3 m and 4 m reach.
Flange included.
Max.
working
radius m
Hose
diameter
mm
Recommended
airflow m3/h
2,0
3,0
4,0
160
160
160
800 – 1200
800 – 1200
800 – 1200
Prod.
no.
KUA-2-S
KUA-3-S
KUA-4-S
4. Switch for light cartridge
(see accessories
HL-20/24).
5. Switch for manual start/
stop of fan or damper (see
accessories SA-24, ES-90
or ASE-12).
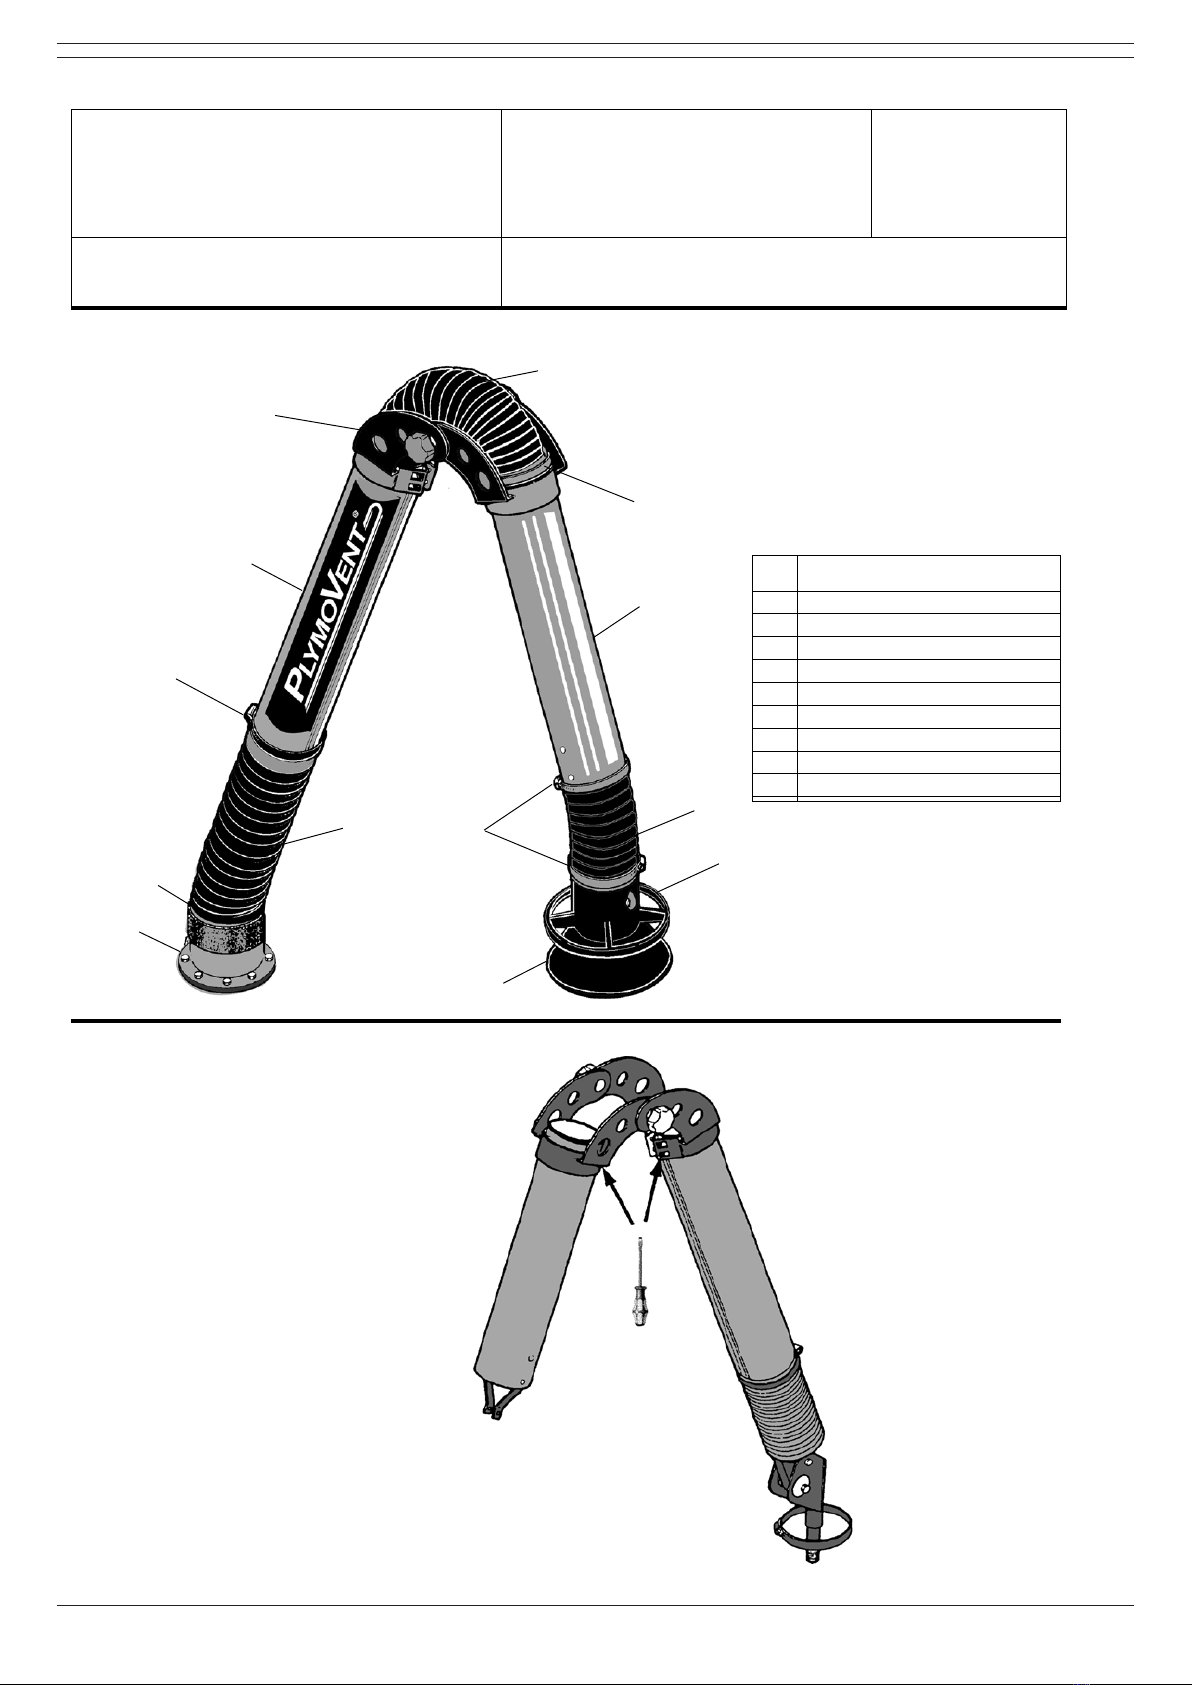
Technical data
A. Mounting flange
B.Inner arm pivot with friction pad tensioning
adjustment.
C Flame resistant hose made from PVC coated woven
polyamide with internal steel spiral.
DAluminium inner arm.
ETensioned support spring.
F Externally adjustable elbow joint (patent application pending).
GAluminium outer arm.
H Universal joint with hood collar and shut-off damper.
I Hood, constructed from sheet steel, includes safety mesh and
quick-
fit coupling. Hood opening Ø300 mm. 360° ring handle Ø300mm.