PNI SafeHome PT945M User manual

PNI SafeHome PT945M
Mini surveillance camera/Мини камера за наблюдение/Mini-
Überwachungskamera/Mini cámara de vigilancia/Mini caméra
de surveillance/Mini megfigyelő kamera/Mini telecamera di
sorveglianza/Mini bewakingscamera/Minikamera monitorująca/
Mini camera de supraveghere

EN User manual ......................................................... 3
BG Ръководство за употреба ............................. 12
DE Benutzerhandbuch .............................................. 21
ES Manual de usuario ............................................... 31
FR Manuel utilisateur ............................................... 40
HU Használati utasítás .............................................. 49
IT Manuale utente .................................................. 58
NL Handleiding ........................................................ 67
PL Instrukcja obsługi ............................................... 76
RO Manual de utilizare ............................................. 85

User manual - 3
Foreword
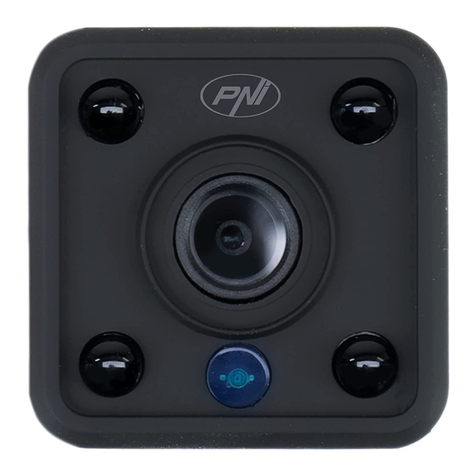
PNI PT945M mini surveillance camera is a 2MP IP camera designed
for remote video and audio surveillance of indoor spaces. The
camera connects to the internet via 2.4GHz Wi-Fi and transmits
real-time video images to the Tuya Smart application installed on
your Android or iOS smartphone. Video recordings are saved locally
on the microSD card inside the surveillance camera (the card is not
included).
Microphone
Reset
Micro USB
Light sensor
Lens
Invisible light
IR LED
Speaker
On/O
State LED
Charging
LED indicator
Micro SD slot

4 - User manual
Install the surveillance camera and the mobile app
»To charge the built-in battery (Li-Ion 750mAh), connect the
camera to a 230V power source using the USB cable and the
adapter in the package. Battery life: 2 hours. Battery charging time:
up to 2 hours. While the battery is charging, the red LED on the
back of the camera stays on. When the battery is fully charged, the
red LED turns o.
»The first configuration of the surveillance camera must be
done as close as possible to the wireless router. After successful
configuration, you can move the surveillance camera to the desired
location. To save recordings, install a micro SD card (up to 64GB) in
the surveillance camera (the card not included).
»Install the Tuya Smart app through the App Store or Google Play
Store or scan the QR cods below:

User manual - 5
»Open the application and log in if you already have an account or
create a new account.
Add the camera to the mobile app
Note:
PNI PT945M only supports the 2.4 GHz Wi-Fi networks. It does not
support 5 GHz Wi-Fi networks. Before configuring the surveillance
camera, please check the router settings.
»Connect your mobile phone to the Wi-Fi router and activate the
GPS location.
»Turn on the surveillance camera by moving the ON /OFF
button to the ON position. The blue LED will light up. Soon, the
blue LED starts flashing. The surveillance camera is now under the
configuration state.
»Open the Tuya Smart app and touch the icona + or Add Device
to add this new device.
»Select Camera & Lock - Smart Camera (WiFi).
»In the next interface, check Make sure the indicator is flashing
quickly and press Next.
»Check the WiFi network name, input the network’s password and

6 - User manual
press Next.
»Hold the mobile phone in front of the surveillance camera’s lens,
15 - 20 cm away. The camera will scan the QR code. Try not to
move the phone while scanning. The camera read the QR code on
the phone when the blue LED no longer flashes. Now press I Heard
a Prompt. Press Done to finish.
Note: Due to the numerous updates of the Tuya Smart application,
it is possible that the images and information described in this
manual are dierent from the version you have installed.

User manual - 7
Real-time viewing interface
1. Screenshot - press to instantly take a photo.
2. Record - press to start manual recording.
3. Photo album - press to access the photo album.
4. Cloud Storage - click to access the Cloud storage service for a
fee.
5. Playback - press to access video recordings.
6. Alarm - motion detection settings: enable/disable.

8 - User manual
Reset the camera
To reset the camera, long press the red button on the top of the
camera. The blue LED (located next to the ON/OFF button on the
rear panel of the camera) will blink to indicate that the device is in
pairing mode.
Troubleshooting
Q: Did you fail to add the camera to the application?
A: Make sure the mobile phone and the surveillance camera are
connected to the 2.4 GHz router. Make sure the Wi-Fi password is
correct. Restart the surveillance camera or reset it and resume the
pairing procedure.
Q: Does the device not display live video images?
A: Check if there is a Wi-Fi signal or if the signal is low. You can
test the signal level by bringing the surveillance camera closer to
the router. If it still doesn’t work, reset the device and add it again.
Q: Why is the surveillance camera still in the list of added devices
after resetting it?
A: The reset returns only the network settings of the camera to the
default settings and cannot change the configuration in the mobile

User manual - 9
application. You must connect to the application to delete the
surveillance camera from the list.
Q: How do I connect the surveillance camera to another router?
A: First remove the surveillance camera from the application, then
reset it and resume the addition procedure with the new router
information.
Q: Why doesn’t the camera recognize the microSD card?
A: It is recommended to insert and remove the microSD card only
when the surveillance camera is turned o. Check the functionality
of the card in a computer. Format the card in FAT32 format. The
application can also display the error “could not find the SD card” in
case of poor connection of the mobile phone or camera.
Q: The device is online and has an alarm event, but the mobile
phone does not display the notification?
A: First of all, check in the mobile phone settings that the application
has all permissions enabled. Under normal circumstances, when an
alarm is triggered, a message will show up in the phone’s notification
bar. You should set a sound or vibration on the notification.
Warning, when viewing the camera in real time through the
application, you will not receive alarms from the video camera
because the default function of the device is to view the camera,
at which point it is considered that the user is already watching live
images and the notifications are no longer necessary. However, the
10 - User manual
surveillance camera will store all alarm messages and pictures.
Technical specifications
Video resolution 2MP 1080P
Video compression H.264
Lens 2.4mm
LEDs 4
Minimum
illumination 0.1LUX/F1.2
Audio compression G.711
Recordings storage 64GB micro SD card (not included) /
Cloud (extra charge)
WiFi frequency 2.4GHz
Transmission power 100mW
Power voltage DC 5V 1A

User manual - 11
Consumption 180 mA (day time)
280 mAh (IR ON)
Built-in battery Li-Ion 3.7V 750mAh 902730
Dimensions 33 x 33 x 33 mm
Working temperature -26°C ~ +80°C
Usage Indoor only
Simplified EU declaration of conformity
SC ONLINESHOP SRL declares that the PNI SafeHome
PT945M Mini Surveillance Camera is in accordance with the EMC
Directive 2014/30/EU and the RED Directive 2014/53/EU. The
full text of the EU Declaration of Conformity is available at the
following website:
https://www.mypni.eu/products/7281/download/certifications

12 -Ръководство за употреба
Предговор
PNI PT945M мини камера за наблюдение е 2MP IP камера,
предназначена за отдалечено видео и аудио наблюдение на
вътрешни пространства.
Камерата се свързва с интернет чрез 2.4GHz Wi-Fi и предава
видео изображения в реално време към приложението Tuya
Smart, инсталирано на вашия Android или iOS смартфон.
Видеозаписите се записват локално на microSD картата
вътре в камерата за наблюдение (картата не е включена).
Microphone
Reset
Micro USB
Light sensor
Lens
Invisible light
IR LED
Speaker
On/O
State LED
Charging
LED indicator
Micro SD slot

Ръководство за употреба - 13
Инсталирайте камерата за наблюдение и
мобилното приложение
»За да заредите вградената батерия (750mAh Li-Ion), свържете
камерата за наблюдение към 230V източник на захранване, като
използвате USB кабела и адаптера в опаковката.
»Първата конфигурация на камерата за наблюдение трябва да се
извърши възможно най -близо до безжичния рутер. След успешно
конфигуриране можете да преместите камерата за наблюдение на
желаното място.
»За да запишете записи, инсталирайте микро SD карта (до 64 GB) в
камерата за наблюдение (картата не е включена).
»Инсталирайте приложението Tuya Smart чрез App Store или Google
Play Store или сканирайте QR кодовете по -долу:
»Отворете приложението и влезте, ако вече имате акаунт или
създайте нов акаунт.

14 -Ръководство за употреба
Добавете камерата към мобилното приложение
Бележки:
PNI PT945M поддържа само 2.4 GHz Wi-Fi мрежи. Не поддържа 5 GHz
Wi-Fi мрежи.
»Свържете мобилния си телефон към Wi-Fi рутера и активирайте
GPS местоположението.
»Включете камерата за наблюдение, като преместите бутона ON
/OFF в положение ON. Синият светодиод ще светне. Скоро синият
светодиод започва да мига. Камерата за наблюдение вече е в
състояние на конфигурация.
»Отворете приложението Tuya Smart и докоснете icona + или Add
Device за да добавите това ново устройство.
»Изберете Camera & Lock - Smart Camera (WiFi).
»В следващия интерфейс проверете Make sure the indicator is
ashing quickly и натиснете Next.
»Проверете името на WiFi мрежата, въведете паролата на мрежата
и натиснете Next.
»Дръжте мобилния телефон пред обектива на камерите за
наблюдение на 15 - 20 см. Камерата ще сканира QR кода. Опитайте
се да не премествате телефона по време на сканиране. Камерата
прочете QR кода на телефона, когато синият светодиод вече не мига.
Сега натиснете I Heard a Prompt.

Ръководство за употреба - 15

16 -Ръководство за употреба
Интерфейс за гледане в реално време
1. Screenshot - натиснете, за да направите незабавно снимка.
2. Record - натиснете, за да започнете ръчен запис.
3. Photo album - натиснете за достъп до фотоалбума.
4. Cloud storage - щракнете за достъп до услугата Облачно
съхранение срещу заплащане.
5. Playback - натиснете за достъп до видеозаписи.
6. Alarm - настройки за детекция на движение: активиране/
деактивиране.
Нулирайте камерата
За да нулирате камерата, натиснете продължително
червения бутон в горната част на камерата. Синият
светодиод (разположен до бутона ВКЛ./ИЗКЛ. на задния
панел на камерата) ще мига, за да покаже, че устройството е
в режим на сдвояване.
Отстраняване на неизправности
В: Не успяхте ли да добавите камерата към приложението?

Ръководство за употреба - 17
О: Уверете се, че мобилният телефон и камерата за
наблюдение са свързани към 2.4 GHz рутер. Уверете се, че
паролата за Wi-Fi е правилна. Рестартирайте камерата за
наблюдение или я нулирайте и възобновете процедурата за
сдвояване.
В: Ус тройство то не показва ли видео изображения на живо?
О: Проверете дали има Wi-Fi сигнал или дали сигналът
е нисък. Можете да тествате нивото на сигнала, като
приближите камерата за наблюдение до рутера. Ако все още
не работи, нулирайте устройството и го добавете отново.
В: Защо камерата за наблюдение все още е в списъка с
добавени устройства след нулирането й?
О: Нулирането връща само мрежовите настройки на
камерата към настройките по подразбиране и не може да
промени конфигурацията в мобилното приложение. Трябва
да се свържете с приложението, за да изтриете камерата за
наблюдение от списъка.
В: Как да свържа камерата за наблюдение към друг рутер?
О: Първо премахнете камерата за наблюдение от
приложението, след това я нулирайте и възобновете
процедурата за добавяне с новата информация за рутера.
В: Защо камерата не разпознава microSD картата?
О: Препоръчително е да поставите и извадите microSD

18 -Ръководство за употреба
картата само когато камерата за наблюдение е изключена.
Проверете функционалността на картата в компютър.
Форматирайте картата във формат FAT32. Приложението
може също да покаже грешката „не можа да намери SD
картата“ в случай на лоша връзка на мобилния телефон или
камерата.
В: Устройството е онлайн и има алармено събитие, но
мобилният телефон не показва известието?
О: Първо проверете в настройките на мобилния телефон
дали приложението има всички разрешени разрешения.
При нормални обстоятелства, когато се задейства аларма,
в лентата за известия на телефона ще се появи съобщение.
Трябва да зададете звук или вибрация на известието.
Внимание, когато гледате камерата в реално време
през приложението, няма да получавате аларми от
видеокамерата, тъй като функцията по подразбиране на
устройството е да гледа камерата, като в този момент се
счита, че потребителят вече гледа изображения на живо и
известията вече не са необходими. Камерата за наблюдение
обаче ще съхранява всички алармени съобщения и снимки.

Ръководство за употреба - 19
Технически спецификации
Видео резолюция 2MP 1080P
Компресиране на
видео
H.264
Лещи 2.4mm
Светодиоди 4
Минимално
осветление
0.1LUX/F1.2
Аудио компресия G.711
Съхранение на
записи
64GB micro SD карта (не е включена)
/облак (допълнително заплащане)
WiFi честота 2.4GHz
Мощност на
предаване
100mW
Захранващо
напрежение
DC 5V 1A

20 -Ръководство за употреба
Консумация 180 mA (през деня)
280 mAh (IR ON)
Вградена батерия Li-Ion 3.7V 750mAh 902730
Размери 33 x 33 x 33 mm
Работна
температура
-26°C ~ +80°C
Употреба Само на закрито
Опростена декларация на ЕС за съответствие
SC ONLINESHOP SRL декларира, че мини камерата за
наблюдение PNI SafeHome PT945M е в съответствие с
Директивата EMC 2014/30/ЕС и Директивата RED 2014/53/
ЕС. Пълният текст на Декларацията за съответствие на ЕС е
достъпен на следния уебсайт:
https://www.mypni.eu/products/7281/download/certifications
Other manuals for SafeHome PT945M
2
Table of contents
Languages:
Other PNI Digital Camera manuals

PNI
PNI Escort C100 User manual

PNI
PNI SafeHome PT945M User manual

PNI
PNI Hunting 350C User manual

PNI
PNI IP390T User manual

PNI
PNI IP660MP User manual

PNI
PNI House WiFi 400 User manual

PNI
PNI Explorer M1 User manual

PNI
PNI IP60 2MP 4G PTZ SOLAR User manual

PNI
PNI HUNTING 2C User manual

PNI
PNI SmartHome SM460 User manual