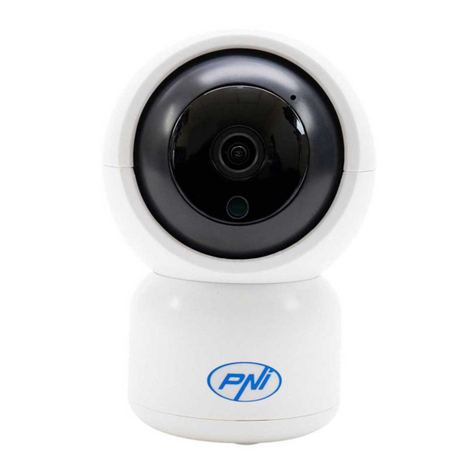
PNI IP60 2MP 4G PTZ SOLAR User manual

PNI IP60 2MP 4G PTZ SOLAR
Camera supraveghere video
EN User manual ......................................................... 3
DE Benutzerhandbuch .............................................. 17
ES Manual de usuario ............................................... 31
FR Manuel utilisateur ............................................... 44
HU Használati utasítás .............................................. 57
IT Manuale utente .................................................. 71
NL Handleiding ........................................................ 85
PL Instrukcja obsługi ............................................... 99
RO Manual de utilizare ............................................. 112


3User manual
English
Main features
• 4G and LAN (RJ45) connection
• Recording on micro SD card, max. 128 GB (card not included)
• Two-way audio communication (built-in microphone and speaker)
• Outdoor mounting, protection class IP66, ABS housing
• 4 IR LEDs for night viewing up to 20 m
• 4 white LEDs for additional lighting
• P2P connection for remote monitoring
• Remote control via CamHi application (Android/iOS) and HiP2P Client
application (Windows PC)
What’s in the box
• Surveillance camera
• Solar panel
• Metal bracket
• Rechargeable 12V 20A Li-Ion battery integrated in the bracket
• Power adapter 230V - 12.6V/5A for the Li-Ion battery
Connections
• 12V power connector - insert the power cable from the battery.
• RJ45 connector - insert a network cable to connect the camera to the
router (if necessary, when setting up the camera for the first use)

User manual 4
English
Installing the camera and making its connections
• Open the cover on the back of the camera.
• Install a 4G SIM card as shown below (steps 1, 2, 3)
Warning: The SIM card with 4G mobile data must not have the PIN code activated.
Insert the SIM card into a mobile phone, deactivate the security PIN code and
check if the mobile data is available by accessing any internet page.
• Install the micro SD card (max. 128 GB), as shown on step 4
• Connect the power adapter of the battery into the camera
• Connect the solar panel to the battery
• Turn on the battery power using the red round switch:

5User manual
English
• The camera will start the initialization. When the camera stops rotating, it
is ready for configuration.
Note: Before using the camera, fully charge the battery for about 8 hours using
the power adapter included in the package. Connect the power adapter to the
black connector with rubber cover.
• The battery status information is provided by the 3 LEDs located on the
metal bracket:
Left LED - Charging Central LED - Battery Right LED - Output
status
On - Solar charging
O - No charge (no
sun)
Flashing red: battery
charged ≤ 25%
Flashes red and green:
battery charged ≤ 50%
Flashes green: battery
charged ≤ 75%
Light green: battery
charged ≤ 100%
On - Active output
O - Output o

User manual 6
English
Add the camera to the mobile application
Quick setup mode
1. Download and install the CamHi application on your phone:
Android iOS
2. Open the application, create an account and log in.
3. Press Add camera
4. In the following interface, you have several options to add the camera:
• Manually enter the camera UID, username and password (find this data
on the label pasted to the camera). The default username and password
are admin.
• Scan the QR code on the label pasted on the camera (Scan QR code,
add UID)
5. After you have successfully added the camera, select it from the list of
devices added to the application in order to view the images taken by it
in real time.
Note: Camera status must be Online. If the status is Oine, access the advanced
configuration mode on the next page.

7User manual
English
Add the camera in the application through the local
network
Advanced configuration mode
Connect both the phone (via WiFi) and the camera (via RJ45 network
cable) to the same local network (router).
Warnings:
• Make sure the phone is connected to the router wirelessly.
• Check that the LAN port on the router to which the camera will be
connected has network access. Use a laptop or computer connected to
this port. Green network indicator - means that there is a connection.
This procedure allows you to add, verify, access and configure the camera
from the dedicated smartphone application “CamHi” or from the
dedicated PC/Laptop application (Windows): “HiP2P Client” from your
local network. This will help you check:

User manual 8
English
- camera status and settings
- status and settings of the 4G GSM network
Configure and view the camera on the mobile phone
• Press Add Camera
• Search for the camera in the local network by pressing Search Camera
from LAN
• Your camera ID will appear on the screen. Click on it, give a name to the
camera, enter the password and complete the procedure.
• After you have successfully added the camera, select it from the list to
view the images in real time (for now, only from the local network).
• Next, configure the 4G GSM connection.
Note: The camera’s default username is admin, and the default password is
admin.
Note: If the procedure Search camera in LAN fails, check the LAN cable and
make sure you have network access on the LAN port the camera is connected to.
Connect the camera to the 4G mobile data network
1. Press next to the camera you want to configure
Note: the status of the camera must be Online.
2. From the settings menu, select 4G Settings.
3. If the network operator name is correct, the signal is greater than 60 and
the APN is correct, go to step 5 and wait about 5 minutes for the camera
to connect.
4. If the camera is not online after 5 minutes, check the network operator
name of the SIM card. If not available:
• check the SIM card and deactivate the PIN code (in a phone);
• check if the SIM is 4G compatible (in a phone);
• check the signal strength (must be greater than 60). If the signal is below
60, move the camera into a location with better signal.

9User manual
English
• check the camera with a dierent SIM card (no active PIN)
• check the APN in the APN Mode menu. Manually enter the correct
APN and save the settings.
5. Disconnect the LAN cable between the camera and the local network
router and restart the camera. Open the application and check the
condition of the camera in about 5 minutes. If everything is OK, the
camera will be Online and you can access it remotely, from another
network.
Configure recordings on the micro SD card
1. Install a micro SD card up to 128Gb (not included) in the camera. The
card installation location is displayed on page 4.
1. Launch the mobile application, click on the icon next to the camera
you want to configure. Note: the status of the camera must be Online.
2. From the settings menu, select Action with alarm.
3. Activate the option Alarm SD REC.
4. Return to the main menu and select the SD Card setting option to check

User manual 10
English
the space available on the card.
5. Make sure that the Enable Record option is enabled in the Recording
Schedule menu.
Note: When the micro SD card installed in the camera has a reduced capacity, we
recommend that you activate the recording only when motion is detected. To do
this, access the menu Alarm settings - Motion detection.
6. To view the recordings on the micro SD card installed in the camera, press
the video option from the bottom of the main application interface.
Select the camera and file you want to play or download.
Note: Detailed instructions on the CamHi application can be found on the CD in
the package, on the product web page in the download section.

11 User manual
English
Access the camera from your computer
Your camera can be accessed from your computer in two ways: through the
Internet Explorer browser or through the dedicated Windows HiP2P Client
application.
Access the camera via Internet Explorer
1. Install the Search Tool application (the installation file can be found on
the CD in the package, on the product web page in the download section)
2. Connect your computer and camera to the same router.
3. Launch the Search Tool application and click on Refresh to search and
find the camera connected in the same local network.
4. From the list displayed, identify your camera by UID (see camera label)
5. Click Next to configure the network parameters. You can enter the
network parameters manually or you can check the DHCP option. Press
Next.

User manual 12
English
6. Open Internet Explorer and enter the IP address of the camera in the
address bar or return to the list of cameras in the Search Tool application
anddouble-clickonthecamerayouwanttoview. It willopenautomatically
in Internet Explorer.
7. From Internet Explorer you can view live images taken by the camera,
you can play the recordings saved on the micro SD card installed in the
camera and you can make various settings related to network, video,
audio and alarm.

13 User manual
English
Note: You can only access the camera in Internet Explorer if you are connected
to the same network as the camera. If you want to access the camera from
your computer, but from another network, install the dedicated HiP2P Client
application.
Access the camera through the HiP2P Client application
(Windows)
1. Install the HiP2P application on your computer (the installation file can
be found on the CD in the package, or on the product web page in the
download section)
2. Launch the application, access the Config menu, select or add the new
area (Add Area) and add the camera (Input UID) using the UID noted on
the camera label or on the phone, if it is already added or looking for the
camera connected in the same network with the computer. Click Search.

User manual 14
English
Note: Detailed instructions for the HiP2P application can be found in the
Download section of the product web page or on the software download link at the
end of the user manual.
Installation of the bracket and the solar panel
Follow the steps below to install the solar panel, bracket (with built-in battery)
and surveillance camera.
The metal bracket has 2 adjustable joints that allow you to turn the solar panel
towards the sun.
Install the solar panel on the metal
bracket using the 4 screws in the
box:
Connect the first joint using the 4
screws in the box:

15 User manual
English
Connect the first joint using the 4
screws in the box: Connect the camera to the bracket
using the 4 dedicated screws in the
box:
Technical specifications
Camera
Sensor F23 CMOS
Sensor resolution 2MP
Registration resolution 1920 x 1080/1-30 fps
IR lighting Colour: 0.1Lux @(F1.2,AGC ON); 0 Lux with
IR, White/Black 0.01 Lux @ (F1.2,AGC ON),0
Lux with IR
Video compression H.265
Audio compression AMR/G.711A
Lens/Zoom 2.8-12mm/5X Zoom Optic
Ethernet 10/100 Mbps RJ45
GSM network 4G GSM Nano SIM
IR LEDs 4 pcs. night view up to 20 m
White LEDs 4 pcs. for additional night lighting
Motion detection Yes + Human detection
Card slot Micro SD, max. 128Gb
P2P connection Yes
Dedicated app CamHi (Adroid/iOS)/HiP2P (Windows)
Supply voltage 12V/2A

User manual 16
English
Dimensions 192 x 70 x 70 mm
Water protection IP66
Housing ABS
Working temperature -26°C ~ +60°C/≤80%RH
Li-Ion battery
Capacity/Voltage 20 A/12 V
Solar panel
Power/Voltage/Current 60W (max)/15V(Vmp)/4A (Imp)
Charging
Solar charger PWM model
230V charger 12.6 V 5A dedicated for Li-Ion

Benutzerhandbuch
Deutsche
17
Hauptmerkmale
• Anschluss 4G und LAN (Konnektor RJ45)
• Aufnahme Mikro Karte SD, höchstens 128 GB (die Karte ist nicht
eingeschlossen)
• Bidirektionale Audio Kommunikation (Mikrophon und Lautsprecher
eingebaut)
• Externer Einbau, Schutzklasse IP66, Gehäuse ABS
• 4 LEDs IR für Nachtsicht bis zu 20 m
• 4 weiße LEDs für zusätzliche Beleuchtung
• Anschluss P2P für Fernüberwachung
• Fernkontrolle durch die App CamHi (Android/iOS) und durch die App
HiP2P Client (PC Windows)
Inhalt
• Überwachungskamera
• Sonnenpaddel
• Einbaugestell für Wand oder Mast
• Beladbare Batterie Li-Ion 12V 20A eingebaut in Gestell
• Versorger 230V - 12,6V/5A für die Li-Ion Batterie
Anschlüsse
• Konnektor Versorgung 12V - stecken Sie das Versorgungskabel vom
eingeschlossenen Akku ein.
• Konnektor RJ45 - stecken Sie ein Netzkabel ein, um die Kamera an
Router anzuschließen (wenn notwendig bei der 1. Konfigurierung)

Benutzerhandbuch
Deutsche
18
• Kamera Einbau und Anschlüsse
• Önen Sie den Deckel hinter der Kamera
• Installieren Sie die SIM Karte 4G GSM, beachten Sie die Schritte 1,2,3.
Warnung: die SIM Karte mit den mobilen Daten 4G muss die PIN Kode
nicht aktiviert haben. Legen Sie die SIM Karte mit den mobilen Daten im
Handy ein, deaktivieren Sie die Sicherheit-PIN Kode und prüfen Sie, ob
die mobilen Daten vorhanden sind, rufen Sie dafür eine Internet Seite ab.
• installieren Sie die Mikro Karte SD (höchstens 128 GB) in der Kamera:
Schritt 4
• Schließen Sie den Batterie Versorgungsadapter an die Kamera an.
• Schließen Sie das Sonnenpaddel an die Batterie an.
• Schalten Sie die Batterieversorgung mit dem roten Schalter ein:

Benutzerhandbuch
Deutsche
19
• Die Kamera beginnt die Initialisierung. Wenn sich die Kamera nicht mehr
dreht, kann sie konfiguriert werden.
Hinweis: Bevor Sie die Kamera benutzen, empfehlen wir Ihnen die Batterie für 8
Stunden vollzuladen, verwenden Sie dafür den Versorger aus dem Paket. Schließen
Sie den Versorger an Konnektor mit Deckel aus schwarzen Kautschuk an.
• Die 3 LEDs gelegen auf dem Einbaugestellt informieren Sie über den
Batterienzustand.
LED links - Ladung LED zentral -
Batterie
LED rechts -
Zustand Ausgang
ausgeschaltet
eingeschaltet -
Sonnenladung
ausgeschaltet - es
lädt nicht (keine
Sonne)
es blinkt rot: Akku voll ≤
25%
es blinkt rot und grün:
Akku voll ≤ 50%
Es blinkt grün: Akku voll ≤
75%
Grün: Akku voll ≤ 100%
eingeschaltet -
Ausgang aktiv
ausgeschaltet-
Ausgang
ausgeschaltet

Benutzerhandbuch
Deutsche
20
Kamera in die mobile App hinzufügen
Schnelle Konfigurierung
Laden Sie herunter und installieren Sie in Ihrem Telefon die App CamHi,
scannen Sie die folgenden Kodes:
Android iOS
1. Önen Sie die App, erstellen Sie ein Account und loggen Sie sich an.
2. Drücken Sie Add Kamera.
3. Im nächsten Interface, haben Sie mehrere Optionen, um die Kamera
hinzufügen: Geben Sie manuell die UID der Kamera, den Nutzer und das
Passwort ein. (Sie finden diese Daten auf der Etikett hinter der Kamera).
Der Name des Nutzers und das Passwort sind implizit admin, admin.
Scannen Sie die QR Kode auf der Etikett hinter der Kamera (Scan QR
Kode, add UID)
4. Nachdem Sie die Kamera hinzugefügt haben, wählen Sie aus der Liste
der hinzugefügten Geräten aus, um die Bilder in Echtzeit zu sehen.
Table of contents
Languages:
Other PNI Digital Camera manuals

PNI
PNI SmartHome SM460 User manual

PNI
PNI SafeHome PT945M User manual

PNI
PNI Explorer M1 User manual

PNI
PNI SafeHome PT945M User manual

PNI
PNI IP390T User manual

PNI
PNI Escort C100 User manual

PNI
PNI House WiFi 400 User manual

PNI
PNI Hunting 350C User manual

PNI
PNI IP660MP User manual

PNI
PNI HUNTING 2C User manual