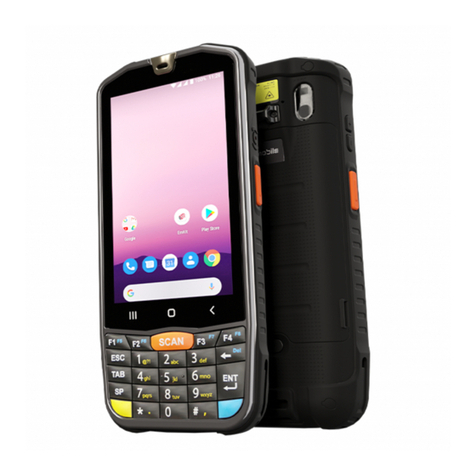
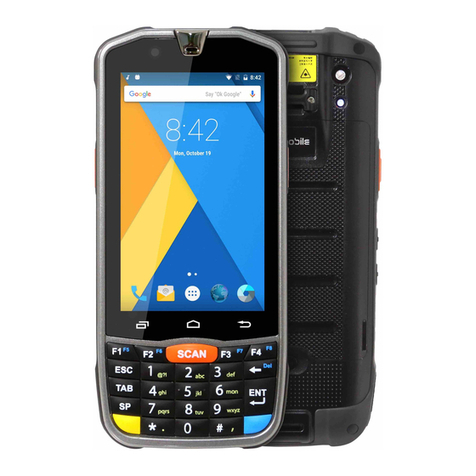
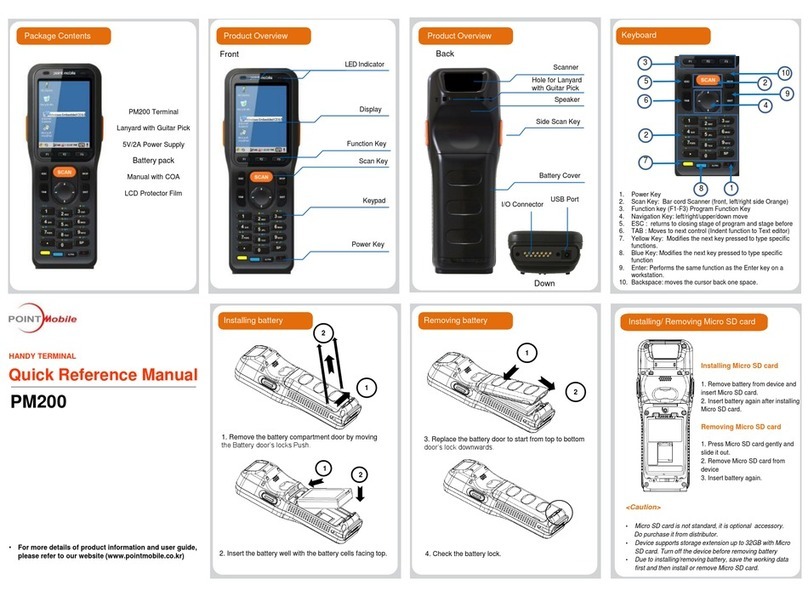
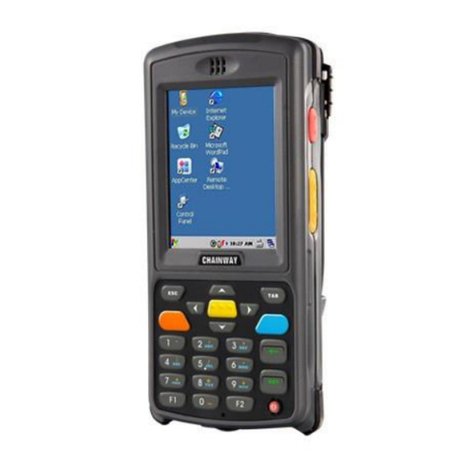
Point Mobile PM250 User manual

30 Mobile Computer
with Windows
®
CE 5.0
User’s Guide

1
Getting Started
Out of the Box
Verify that your carton contains the following items:
• mobile computer (the terminal)
• Main battery pack (3.7v, Li-ion)
• AC power supply
• Localized plug adapters
Step 1. Install the Main Battery
.
PM250 is shipped with the battery packaged separate from the unit. Follow the steps below to install
the main battery.You will need to loosen the hand strap, remove the battery door, insert the battery, and
replace the battery door.
1. Release the strap making it convenient to reach the cover.
2. Remove the battery compartment cover by turning the cover’s pins upward and lifting the cover up.
3. Insert the battery into the battery well with the labels facing upward and the contacts facing
downward.
Q 4. Replace the cover with a hinging motion and turn the pins downwards.
Note: The battery door must be installed prior to booting the unit.
5. Replace the hand strap.
Cover Pins
Main Battery
!

Step 2. Charge the Batteries
We recommend use of PM250 peripherals, power cables, and power adapters. Use of any non-PM250
peripherals, cables, or power adapters may cause damage not covered by the warranty.
DO NOT attempt to charge damp/wet mobile computers or batteries. All components must be dry
before connecting to an external power source.
Step 3. Boot the Terminal
The terminal begins booting as soon as power is applied and runs by itself. Do NOT press any keys or
interrupt the boot process.
When the boot process is complete, the Desktop appears, and the terminal is ready for use.
PM250s ship with both the main battery pack and
internal backup battery significantly discharged of
power. Charge the main battery pack with the PM250
charging cable for a minimum of 4 or 6
hours depending on your battery before initial
use.
1. Attach the appropriate plug adapter to the
plug of the power cable.
2. Insert the plug into the appropriate power
source.
3. Plug the power cable into the DC
Power Jack on the bottom
end of the unit.
Note: If you remove the battery pack or it completely
discharges, there is a 30 minute window in which
to insert a charged battery pack before the
backup battery completely discharges. If your
backup battery completely discharges, the
contents of the RAM memory will be lost. If your
backup battery is less than fully charged, there is
a proportionally smaller window of time available.
LED Indicators
Red LED On Charging
Green LED On Battery is full or fully charged
!
Desktop
Note: You can access the Desktop any time by tapping the Change Views icon in the command bar and selecting
Desktop on the popup menu.
Command Bar Icons
The command bar, located at the bottom of application screens, provides access to many system
functions and programs.
Icon Meaning
Opens the Start menu.
Tap to change views between open applications or to return to the desktop.
Accesses the Bluetooth radio. Double tap this icon to open the Bluetooth Manager
Activates the 802.11b/g radio.
Double tap to configure your WLAN Secure Wireless Client.
Indicates that the USB communication cable is connected. Double tap to display USB status
window.
Tap to change
views
Left and right arrows are used to
scroll through additional icons

Using the Stylus
The terminal comes with a stylus included in a loop on the hand strap. Use this stylus (or your finger) to
select or enter information on the touch screen. The stylus functions as a mouse; generally, a tap is the
same as a click.
Tap Tap the touch screen once or double tap to open menu items and select options.
Drag Hold the stylus on the screen and drag across the screen to select text and images.
Tap & hold Tap and hold the stylus on an item and a pop-up menu appears. On the pop-up menu, tap
the action of the task you want to perform.
Use of objects, such as paper clips, pencils, or ink pens on the touch screen can damage the input
panel and may cause damage not covered by the warranty.
Indicates the status of battery power. Double tap to open the Power control panel setting.
When this icon shows a red power plug, it indicates the device is using external power.
Displays the current time. Double tap to change the time and date.
Indicates whether the keyboard is standard alpha (upper and lower case), all caps alpha, or in
numeric mode. Press the alpha button on the keypad to switch modes.
The up arrow allows you to turn the Wireless LAN and Bluetooth connection on or off. It also
allows you to toggle between the Keyboard and Transcriber. When Keyboard is selected, a
keyboard is displayed so you can tap text and number keys.
Icon
Meaning
!

Selecting Programs
Tap Start > Programs. To open a program, tap the icon on the menu.
Pop-Up Menus
You can quickly choose an action for an item using the pop-up menus.
1. Tap and hold the stylus on the item name. The pop-up menu appears.
2. Lift the stylus and tap the action you want to perform.
The contents of pop-up menus change according to the program you are using.
Using Windows Explorer
Use Windows Explorer to navigate through the files on your system. On the desktop, double tap the My
Device icon and Windows Explorer opens to the root level.
Move files by tapping and holding on the file, then tapping Cut, Copy or Paste on the pop-up menus that
appear.

2
Terminal Hardware Overview
terminals include a number of standard terminal configurations as well as charging and
communication peripherals and accessories to maximize the efficiency of your application setting.
Standard Terminal Configurations
There is standard configurations: WPAN/WLAN.
• Microsoft Windows CE 5.0
• Marvell PXA 300 624MHz
• 128MB RAM X 128 MB (non-volatile) Memory
• 28-key numeric keyboard
• 2.8” 1/4 VGA transmissive active matrix color
display
• Standard Capacity: Li-ion battery: 3.7V /
2200mAh / 8.1 Wh or Extended Capacity: Li-ion
battery: 3.7V / 3300mAh / 12.2 Wh
• 5300SR image engine
• (WPAN/WLAN) - Bluetooth and 802.11b/g
radio
• power cable

Display Backlight
The intensity of the backlight of the touch screen display may be changed and the backlight may be
programmed to turn off after the terminal has been idle for a specified period of time.
To adjust the intensity of the backlight while on battery power, tap Start > Settings > Control Panel >
double tap Backlight.
Screen Backlight - Battery/External Power
Move the slider to adjust the screen backlight while on battery power.
You may turn the screen backlight off if the device is not used for a designated
period of time by checking the option and designating the desired time period.
You may also turn on the screen backlight when a button is pressed or the
screen is tapped by selecting the appropriate checkbox.
Note: Using the backlight option while on battery power substantially reduces battery
life.
You may make the same changes when on external power by tapping the
External tab.
Keyboard Backlight
The intensity of the backlight of the keys on the keyboard may be changed and
the backlight may be programmed to remain on for a specified period of time
once a key is pressed.
To adjust the brightness of the keys, tap the Keyboard tab. Move the slider
to adjust the backlight while on battery power.
Turn on the keyboard backlight, check the checkbox and change the duration
the backlight.

For maximum performance, recalibrate the screen. Tap Start > Settings > Control Panel > double
tap Stylus > Calibration tab.
Tap Recalibrate and follow the instructions on the screen.

Back Panel Features
Hand Strap
The PM250 comes with an adjustable, elastic hand strap. The strap is attached to the device with
the two small screws. It is threaded through the slot on the bottom of the back of the unit.
Keep in mind that the hand strap covers the battery. When you want to replace the battery, you
will need to adjust the hand strap accordingly.
Finger Saddle
This is a slightly depressed and angled area of the back housing that is designed to cradle or
“saddle” your pointer finger while holding the terminal. This unique ergonomic design makes
the terminal comfortable to hold and helps prevent you from accidentally dropping the terminal.
Speaker
The integrated speaker sounds audio signals as you scan bar code labels and enter data but
emits no ambient noise on system activity (i.e., processor, memory access, radio traffic, etc.).
The speaker can also be used for playing sounds (e.g., WAV or MP3 files).
The speaker meets the following SPL levels at 40cm:
• 500Hz–67db
• 1KHz–72db
• 4KHz–72db
Stylus
PM250 terminals ship with a stylus inserted in a loop on the hand strap. Store the stylus in the
hand strap when you’re not using it.
Image Engine Window
Speaker
Installed Battery
Finger
Saddle
Hand Strap (with Stylus)

Left Side Panel Features
Side Button
There is a button like this on both side panels. You can use the Programs Buttons option in
the Control Panel to change the functionality of the scan buttons.
Side Door
The rubber door on the left side panel provides access to the Micro SD slot.
When closed, the side door seals the terminal from moisture and particle intrusion thus
preserving the terminal’s environmental rating.
Installing Memory Cards
The 250 supports Micro Secure Digital (SD) memory cards of the following capacities:
•2GB
•4GB
To install an SD card
1. Press Power key to put the terminal in suspend mode
2. Open the access door on the left side.
3. Insert the SD card with the label facing upward.
Note: To remove an installed SD card while the access door is open, tap on the edge lightly to unlock
the card; the card will pop out just enough for you to grab its edge and pull it out.
4. Replace the access door.
The rubber door is required for 1) proper functioning of the SD card and 2) preserving the
environmental rating for water sealing. Do not remove the rubber door.
Note: Do not use the terminal when the access door is open. When this door is fastened securely and properly, the
memory interface is sealed against moisture and particle intrusion, read/write data is stored securely, and the
terminal’s environmental rating is preserved.
5. Tap the Power key to resume operation.
6. To verify that the operating system recognizes the new memory card, open Windows Explorer and
navigate to My Device\Storage Card.
Side Button
Micro SD Slot

Right Side Panel Features
Headset Jack
The rubber door on the right side panel provides access to the headset jack. This is a 2.5mm
audio jack that supports a headset with a mono speaker and microphone.
When closed, the side door seals the terminal from moisture and particle intrusion thus
preserving the terminal’s environmental rating.
Side Button
There is a button like this on both side panels. You can use the Programs Buttons option in the
Control Panel to change the functionality of the scan buttons.
Top Panel Features
Side Button
Headset
JackS
scan Engine
Window (with engine)

Bottom Panel Features
DC Power Jack
The DC power jack receives external power from the PM250 power cable that comes in the
box with the terminal. When connected to the power cable, the terminal is powered
and the main battery pack is charging.
I/O Connector
The I/O mechanical connector is designed to work exclusively with PM250 peripherals
and cables. This connector powers the terminal, charges the main battery, and facilitates
communication. This connector supports full speed USB 1.1 communication (up to 12 Mbps)
and RS-232 communications with a maximum speed of 115Kbps and seven baud rate
settings.
Through this connector, you can communicate with a host workstation via Microsoft
ActiveSync.
The I/O connector supports the following signals:
• DC IN
• Transmitted Data
• Request To Send
• USB Host +5V
• USB Host D+
• USB Host D-
• USB Host Detect
• Clear To Send
• Received Data
•GND
• RS-232 Shutdown
• USB Client D+
• USB Client D-
• USB Client +5V
Note: Signals referenced are for a DTE device.

Battery Power
The intelligent battery technology inside the terminal features two types of battery power:
• The main battery pack on the back panel
• The backup battery located inside the terminal
Both batteries work together to prevent data loss when the terminal is used over long periods of time.
Both batteries must be charged to full capacity before using the for the first time! Charge the
main battery pack with the PM250 charging cable for a minimum of 4 or 6 hours depending on your
battery before initial use.
Main Battery Pack
We recommend use of Li-Ion battery packs. Use of any non -PM250 battery may result in
damage not covered by the warranty.
There are two Li-ion battery packs available
Standard Capacity: Li-ion 3.7V/2200mAh/8.1Wh
Extended Capacity: Li-ion 3.7V/3300mAh/12.2Wh
The Li-ion battery packs are the primary power source for the terminal as well as the internal
backup battery.
Changing the Main Battery Pack
Before installing a battery pack, press the Power key to put the terminal in Suspend Mode
so that operations are suspended before removing the main power source. Always put the terminal
in suspend mode prior to changing the battery. The 250 is shipped with the battery separate from the
unit. You will need to loosen the hand strap, remove the battery door, insert the battery, and replace the
battery door. Refer to the instructions included in Installing the Main Battery section.
Note: The battery door must be installed prior to booting the unit.
Charging Options
When the battery is installed in the terminal, you can use any of the peripherals listed below to charge the
battery.
• PM250 Cradle
Cover Pins
Main Battery
!

Charging Time
The standard capacity 2200mAh Li-ion battery pack requires four hours to charge to full capacity, while
the extended capacity 3300mAh pack requires six hours.
Managing Main Battery Power
Data and files saved on the 250 terminal may be stored in RAM memory; therefore, maintain a
continuous power supply to the terminal to help prevent data loss. When you remove a battery pack, insert
another charged battery pack in the PM250. If the main battery pack is low, insert the terminal into a
charging peripheral to power the terminal and begin recharging the battery.
Note: If the main battery is low and the terminal is in suspend mode, pressing the Power button does
not
wake
the PM 250 terminal; you must replace the discharged battery with a fully charged battery.
Checking Battery Power
Power icons appear in the command bar at the bottom of the window. Double tap on the battery icon to
open the Power Properties. The Battery tab opens displaying the charge status of both the main and
backup batteries.
Note: To manually check battery power, also tap Start > Settings > Control Panel > double tap Power.
Storage Guidelines
To maintain optimal battery performance, follow these storage guidelines:
• Avoid storing batteries outside the specified range of -4 to 122° F (-20 to 50°C) or in extremely high
humidity.
• For prolonged storage, do not keep batteries stored in a charger that is connected to a power source.
Guidelines for Battery Pack Use and Disposal
The following are general guidelines for the safe use and disposal of batteries:
• We recommend use of PM250 Li-Ion battery packs. Use of any non-PM250 battery may pose a
personal hazard to the user.
• DO NOT attempt to charge damp/wet mobile computers or batteries. All components must be dry
before connecting to an external power source.
• Replace defective batteries immediately; using a defective battery could damage the PM250 terminal.

• Never throw a used battery in the trash. It contains heavy metals and should be recycled according to
local guidelines.
• Don’t use a battery in any other manner outside its intended use in PM250 terminals and peripherals.
• Don’t short-circuit a battery or throw it into a fire; it can explode and cause severe personal injury.
• Excessive discharge damages a battery. Recharge the battery when your terminal indicates low battery
power.
• If you observe that the PM250 battery supplied is physically damaged in some way, send it to PointMobile
or an authorized service center for inspection.
• Although your battery can be recharged many times, it will eventually be depleted. Replace it after the
battery is unable to hold an adequate charge.
Internal Backup Battery
Located inside the terminal, the backup battery is a 3.7V Lithium Polymer battery.
The internal backup battery prevents the terminal from being reset when you remove the main battery
pack. This battery retains RAM data and allows the real-time clock to remain operational for up to 30
minutes. If the terminal is left without the main battery pack for more than 30 minutes, the internal backup
battery discharges and needs to be recharged to function according to specifications.
Note: Even if the internal backup battery fails, data and programs stored in Flash memory or on an
optional SD card are not lost. However, the terminal automatically cold boots when you install a fully charged
battery pack and you need to reset the real-time clock.
Charging
The internal backup battery charges off the main battery pack and requires 2 hours charge time to backup
RAM data for 30 minutes. You can begin using the terminal after charging the main battery for
four or six hours (depending upon your battery); however, the internal backup battery will continue to
charge off the main battery.
To ensure that the internal backup battery functions properly, maintain a consistent power supply for the
first eight hours of terminal operation. This power supply can be external power (using a charging
peripheral) or an installed, charged battery pack or a combination of both.
Charging Guidelines
Follow these guidelines to maximize the life of the PM250’s internal backup battery:
• Keep a charged Li-ion battery pack in the terminal.
• Keep the PM250 terminal connected to a power source when the terminal is not in use.

Resetting the Terminal
Soft Reset: Using the stylus press and release the Reset button. This resets RAM and reloads the OS.
Hard Reset: Using the stylus press and hold the Reset button and then press and release the Power button.
This resets RAM, reloads the OS, and resets the Real Time Clock.
Soft Reset (Warm Boot)
A soft reset re-boots the terminal without losing RAM data and launches Autoinstall, which re-initializes
the terminal.
You would perform a soft reset 1) when the terminal fails to respond, 2) after installing software
applications that require a reboot, or 3) after making changes to certain system settings.
1. Press the Reset button. The screen turns white and the decode and scan LED flashes blue for
approximately three seconds.
2. When the reset is complete, the Desktop appears.
Hard Reset (Cold Boot)
A hard reset erases all of the data and applications stored in RAM memory and launches Autoinstall, which
re-initializes the terminal.
Hard resets automatically launch a soft reset as part of the boot process.
1. Press and hold the Reset button and then press and release the Power button. The screen turns
white and the decode and scan LED flashes red for approximately three seconds.
Note: Set the time and date after each hard reset to ensure that the system clock is accurate. Double-click the date
on the command bar to open the Clock setting and set the time and date.
Suspend Mode
Suspend mode suspends terminal operation. The terminal appears to be “off” when in suspend mode.
The terminal is programmed to go into suspend mode automatically when inactive for a specified period
of time. You can set this time period in the Power setting.
To suspend and resume operation, press the Power button.
Note: You should always put the terminal in suspend mode when you change the battery pack;
Troubleshooting Suspend/Resume
If the terminal does not wake when you press the Power button, the main battery might be too low to
resume operation. To check, remove the battery and install a fully charged battery or connect the terminal
to a PM250 charging peripheral.
Changing the Memory Allocation
You can adjust file storage vs. program memory in System Properties.
!

1. Tap Start > Settings > Control Panel > System > Memory tab.
2. Move the slider to adjust the memory allocation and tap OK. The changes take effect immediately.
Care and Cleaning of the Terminal
When needed, clean the image engine window and the LCD display with a clean, non-abrasive, lint-free
cloth. The terminal can be cleaned with a damp cloth.
Technical Specifications
Operating System Microsoft Windows CE 5.0
Development
Environment
SDK for Windows® CE 5.0
Application Software Tools and Demos
Processor Marvell PXA 300 624MHz
Memory 128MB RAM X 128 MB Flash
Expansion Slot User accessible Micro SD Card up to 4 GB with SDIO support
Display 2.8 in. transmissive active matrix 65K color LCD with backlight, QVGA (240 x 320)
6FDQ Engine6\PERO'5300SR 2D VGA Area Imager with High-Vis bracket aimer
Keyboard 28-key shifted alpha numeric with backlit keys
Voice Communication Voice-over-IP and Push-to-Talk ready
Audio Built-in microphone and speaker, stereo headset jack
Communication
Interface
Full speed USB 1.1 from cradle (or I/O cable); RS232 (115 Kbps) from cradle
Battery Standard Li-ion battery 3.7V / 2200 mAh / 8.1 Wh
Extended Li-ion battery 3.7V / 3300 mAh / 12.2 Wh (includes extended battery door)

* For standard battery pack. Battery life varies with application and use case.
Expected Hours of
Operation
8+ hours (with scan and continuously transmitting)*
Charging 5V/3A input through bottom access or USB/Serial connector
Expected Charge Time Standard Capacity: 2200mAh - four hours
Extended Capacity: 3300mAh - six hours
Charging Peripherals AC wall adapter and Charger )/Communication Cable
HomeBase–single-bay terminal charge
Quad Charger–four-slot battery pack charger (DSA-0421S-03 1)
WPAN (standard) Bluetooth Class II (10 m) v2.0 Enhanced Data Rate (EDR) with on-board antenna. BQB
certified
WLAN Dual Mode 802.11 b/g (11 Mbps/54 Mbps) with internal antenna
WLAN Security WEP, 802.1x, LEAP, TKIP, MD5, EAP-TLS, EAP-TTLS, WPA-PSK, WPA v2.0, PEAP
Operating Temperature 14° to122°F (-10° to 50°C)
Charging Temperature 32° to 104°F (0° to 40°C)
Storage Temperature -4° to 158°F (-20° to 70°C)
Humidity 95% humidity, non-condensing
Construction High impact resistant PC/ABS housings
Magnesium alloy internal chassis with component shock mounts
Drop 4 ft. (1.2m) multiple drops to concrete, all axis, across operating temperature range
Tumble 500 3.3 ft (1.0m) tumbles (1,000 drops)
ESD Air: ± 15k Vdc
Direct: ± 8k Vdc
Environmental IP64 rating
Dimensions 175 mm long x 66 mm wide x 26.8 mm deep (6.8” x 2.60” x 1.06”)
Weight 250 g (8.8 oz) including standard battery pack
Scanner / Decode
Capabilities
5300SR 2D Imager with Adaptus Technology and Laser Aimer. Decodes all standard 1D,
2D, Postal, and OCR codes.
Regulatory and
Compliance

3
Using the Keyboard
Overview
The numeric keyboard is as follows:
Navigation Keys
Located in the center of the keyboard for easy access with either hand, the navigation keys enable you
to move the cursor up and down lines and from character to character.
Navigation
keys
Power key
Software
Reset key
Other manuals for PM250
1
Table of contents
Other Point Mobile Handheld manuals

Point Mobile
Point Mobile PM85 User manual

Point Mobile
Point Mobile PM84 User manual

Point Mobile
Point Mobile PM200 Service manual

Point Mobile
Point Mobile PM450 User manual

Point Mobile
Point Mobile PM67 User manual

Point Mobile
Point Mobile PM260 User manual

Point Mobile
Point Mobile PM70 User manual

Point Mobile
Point Mobile PM60 User manual

Point Mobile
Point Mobile PM66 User manual

Point Mobile
Point Mobile PM86 User manual