PAG. 9 /26
Cod. 8505148
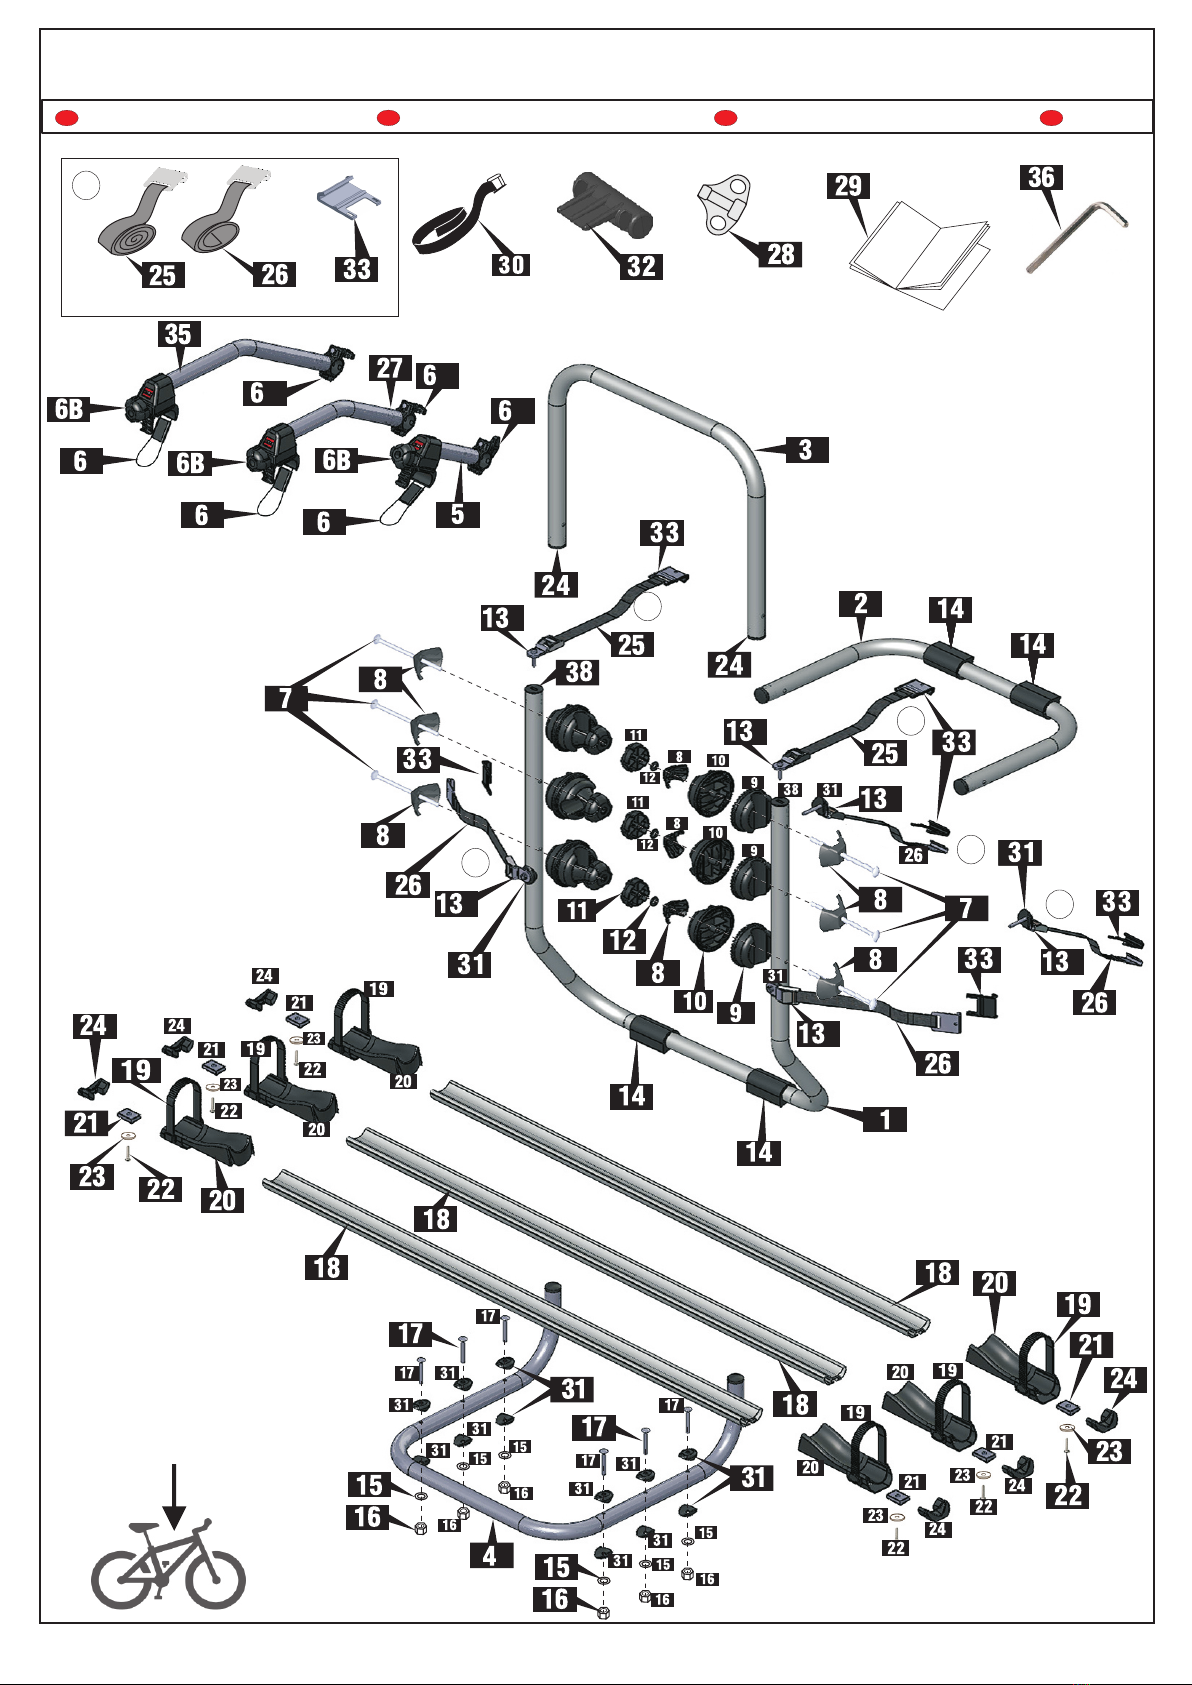
(25+26)
(33)
(33)
Attachez les 2 longues sangles d'arrimage (25) aux
sangles de serrage supérieures (13H) et les 4 sangles
d'amarrage courtes (26) aux sangles de serrage inférieures
(13L).
Assurez-vous que les sangles sont correctement insérées
comme montré dans a figure.
Coupez le caoutchouc de protection (14) avec un couteau
tranchant. Insérez le caoutchouc de protection en commençant
par le bas sur le cadre (1) et sur votre support (2).
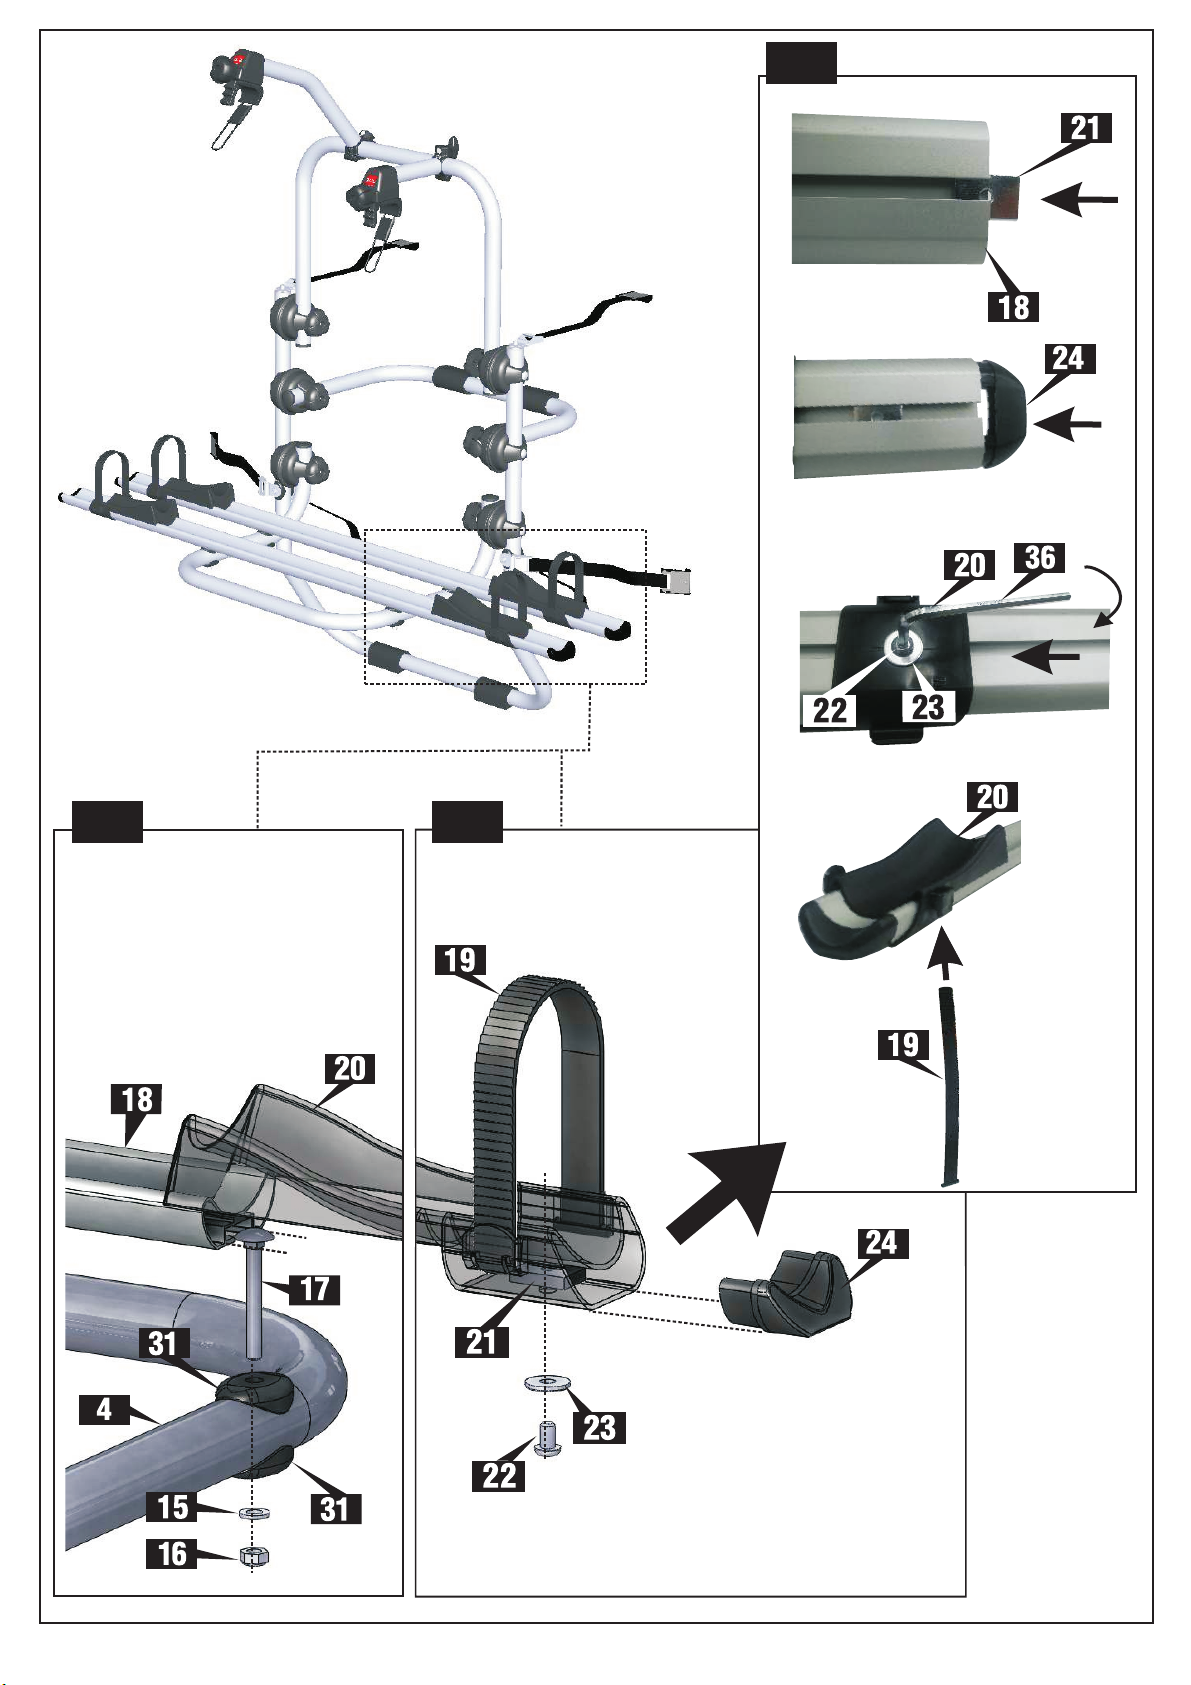
Installation de glissières MTB (18)
Insérez les 2 vis sous la tête dans le binaire inférieure du
glissière MTB(17).
En correspondance des trous sur le cadre (4), bloquer le
glissière en vissant l'écrou (16) et la rondelle (15) sur la vis (17)
à l'aide de 2 cales "vis-bloc" (31) comme montré dans la figure.
Assemblage glissières (18)
Pour chaque extrémité du glissière MTB (18), effectuez les
operations suivantes:
1-Insérez la plaque (21) dans le binaire spécifique située dans
la partie inférieure du glissière.
2- Fermez le binaire en assemblant aux extrémités le capuchon
(24).
3- Insérer la butée de roue (20) et ajuster la distance en
fonction de la distance de la roue par rapport au vélo. Bloquer
la butée de roue (20) en vissant la vis (22) et la rondelle (23)
sur la plaque (21) à l'aide de la clé 36.
4- Glissez la sangle de serrage (19) dans les bagues
appropriées sur les côtés de la butée de roue (20).
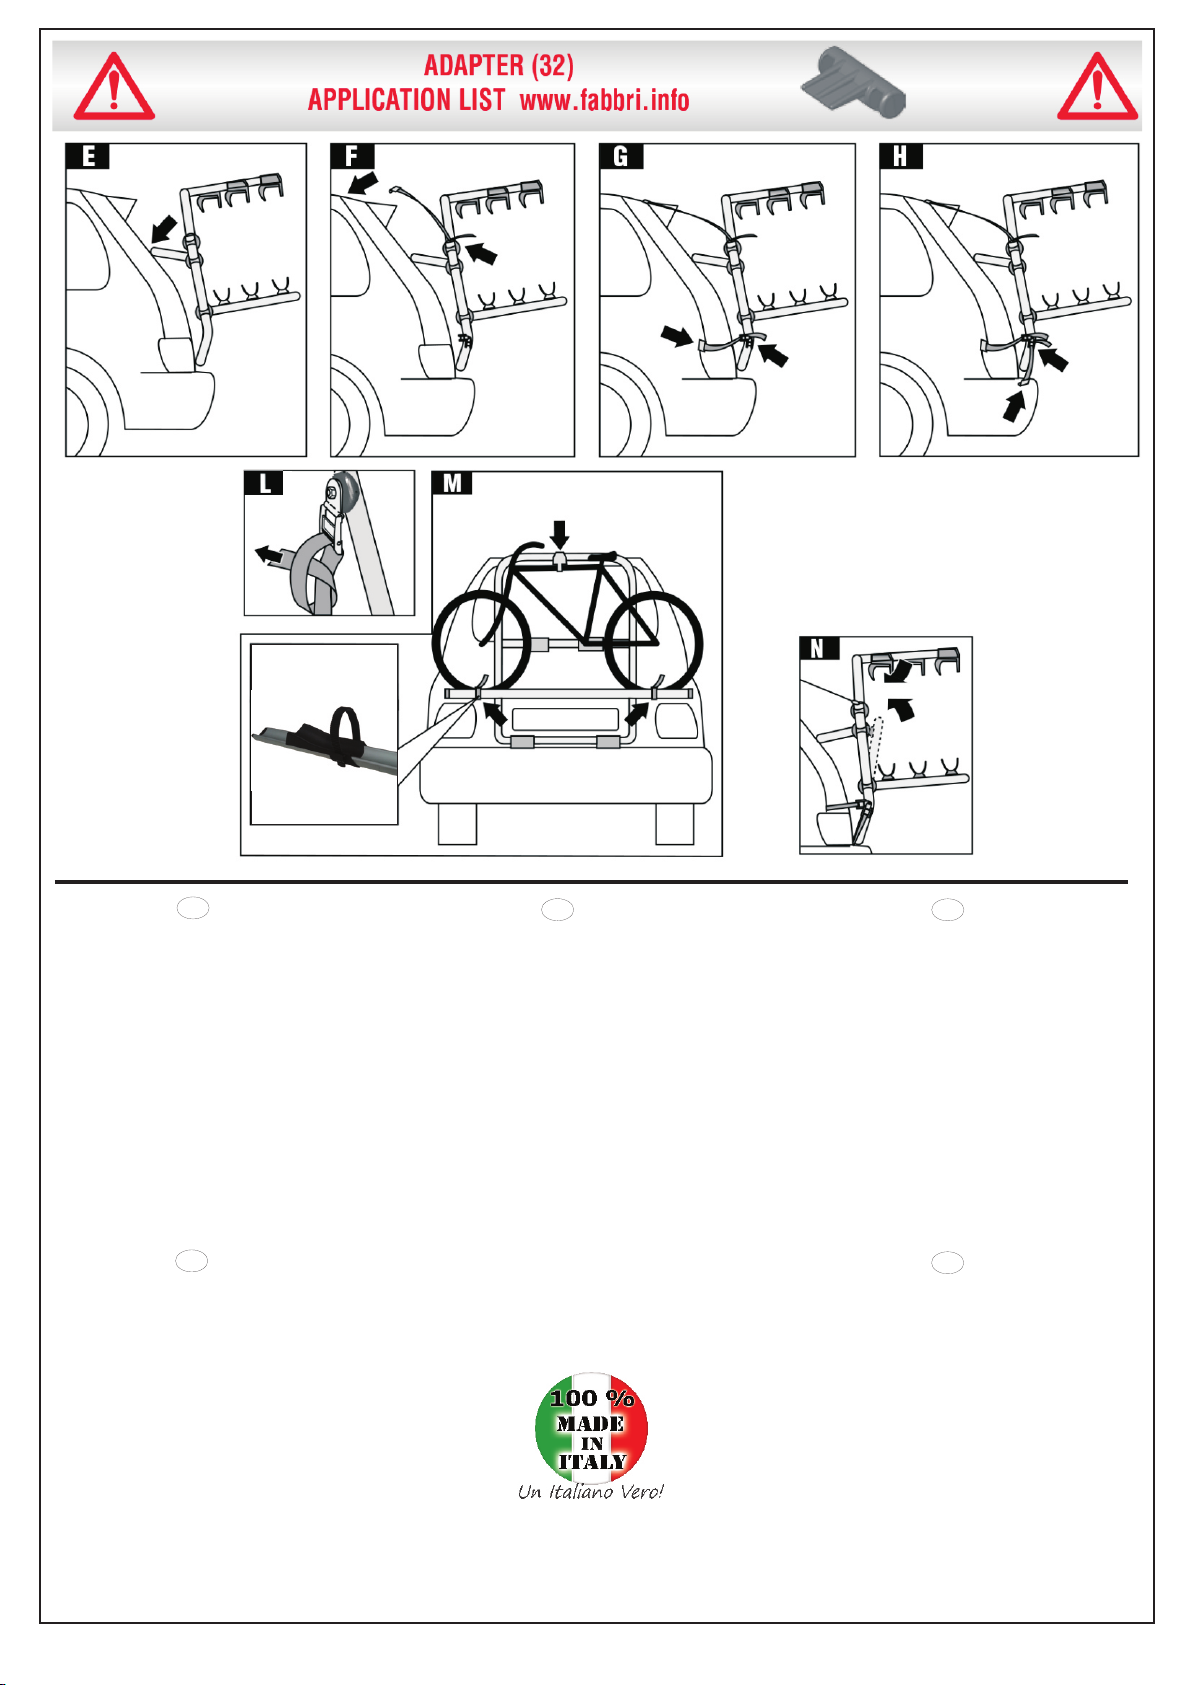
D
C
B
A
D
C
B
A
(11) (11)
(25+26)
(33)
(33)
Fissare le 2 cinghie di ancoraggio lunghe (25) alle fibbie
di serraggio superiori (13H) e le 4 cinghie di ancoraggio corte
(26) alle fibbie di serraggio inferiori (13L).
Assicurarsi che le cinghie siano inserite correttamente come in
figura.
Incidere la gomma di protezione (14) con un coltello
affilato. Infilare la gomma di protezione partendo dal basso sul
telaio (1) e sul tuo d'appoggio (2).
Montaggio canaline MTB (18)
Infilare nel binario inferiore della canalina MTB le 2 viti con
quadro sotto testa (17).
In corrispondenza dei fori sul telaio (4), bloccare la canalina
avvitando il dado (16) e la rondella (15) alla vite (17)
utilizzando 2 spessori “viti-block” (31) come in figura.
Assemblaggio canaline MTB (18)
Per ogni estremità della canalina MTB (18) eseguire le
seguenti operazioni:
1-Infilare la piastrina (21) nell'apposito binario situato nella
parte inferiore della canalina.
2- Chiudere il binario montando alle estremità il tappo copri
testa (24).
3- Infilare il ferma ruota (20) e regolarne la distanza in base
all'interasse ruote della propria bicicletta. Bloccare il ferma
ruota (20) avvitando la vite (22) e la rondella (23) alla piastrina
(21), servendosi della chiave 36.
4- Far scorrere il cinghietto di serraggio (19) negli appositi
passanti situati ai lati del ferma ruota (20).
Rev.04 20/05/2020