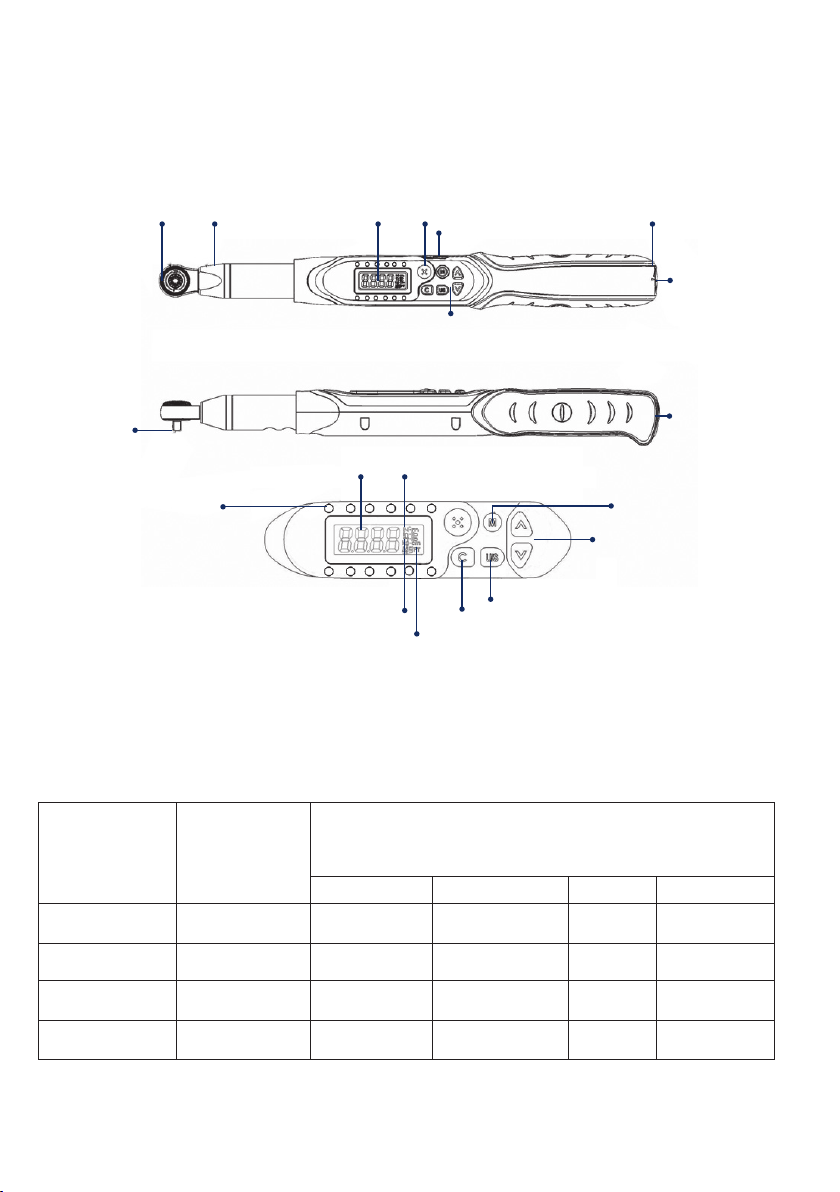
Polar Electro 7314-2030 User manual

DEAR USER
Thank you for purchasing this digital torque wrench.
This manual will help you to use the many features
of your new digital torque wrench.
Before operating the torque wrench, please read
this manual completely, and keep it nearby for fu-
ture reference.
MAIN FEATURES
■Head interchangeable
■Digital torque value readout.
■+/-2% accuracy.
■CW and CCW operation.
■Peak and hold track mode selectable.
■Buzzer and LED indicator for the 9 pre-settable
target torques.
■Engineering units (Nm, ft-lb, in-lb, kg-cm)
selectable.
■50 data memory for recall and joint torque auditing.
■Auto sleep after about 5 minutes idle.
■Both AA and rechargeable batteries are compatible.
INSTRUCTION MANUAL
MODEL
7314-2030
7338-2135
7312-2200
7312-2340
PRODUCT TYPE
DIGITAL TORQUE WRENCH WITH INTERCHANGEABLE HEAD

2
NAMES AND FUNCTIONS OF PARTS
SELECTION GUIDE
Torque accuracy Communication
Ratchet drive
Round head
ratchet insert
Sensor Yoke
Torque value
LED indicator
Pre-setting number Power on/clear button
Unit/setting button
P (Peak hold) /
T (Track mode)
Pre-setting number
selection button
Units (Nm, ft-lb, in-lb, kg-cm)
LCD display Buzzer
Buttons
Battery compartment
Battery cover
Communication port
Handle
Up/down buttons
MODEL SQUARE DRIVE
INCHES
MAX. OPERATION TORQUE
Nm ft-lb in-lb kg-cm
7314-2030 1/4 30 22.12 265.5 306.1
7338-2135 3/8 135 99.5 1195 1378
7312-2200 1/2 200 147.5 1770 2041
7312-2340 1/2 340 250.7 3009 3469
■2%- CW / 3%-CCW ■No
MODELS
ALL

3
SPECIFICATIONS
MODEL
NO.
MAX.
OPERATION
TORQUE
Nm
SQUARE
DRIVE
”
MEASURED
TORQUE
Nm
LENGTH
mm
7314-2030 30 1/4 1.5~30 390
7338-2135 135 3/8 6.8~135 410
7312-2200 200 1/2 10~200 520
7312-2340 340 1/2 17~340 640
ALL MODELS
Accuracy *1 CW: ±2% CCW: ±3%
Data memory size 50
PC connectivity *2 No
Pre-setting no. 9 sets
Operation mode Peak Hold / Track
Bright LED 12 LED
(2 red + 10 green)
Unit selection Nm, ft-lb, in-lb, kg-cm
Head type Round head ratchet insert
Size of head of end
fitting (W x H)
9 x 12 mm (7314-2030, 7338-2135)
14 x 18 mm (7312-2200, 7312-2340)
Axial distance 17.5 mm (7314-2030, 7338-2135)
25 mm (7312-2200, 7312-2340)
Gear teeth 52
Battery *3 AA x 2
Operating temperature
-10°C ~ 60°C
Storage temperature -20°C ~ 70°C
Humidity Up to 90% non-condensing
Drop test 1 m
Vibration test *4 10 G
Life time *5 10.000 cycle
Environmental test *6 Pass
Electromagnetic
compatibility test *7 Pass
Note:
*1: The accuracy of the readout is guaranteed
from 20% to 100% of maximum range
+ /- 1 increment.
The torque accuracy is a typical value.
Calibration line is at the middle line of the
dark spot on the rubber handle.
For keeping the accuracy, calibrate the
wrench for a constant period time (1 year).
And the accuracy is based on the zero
degree of offset from perpendicular drive.
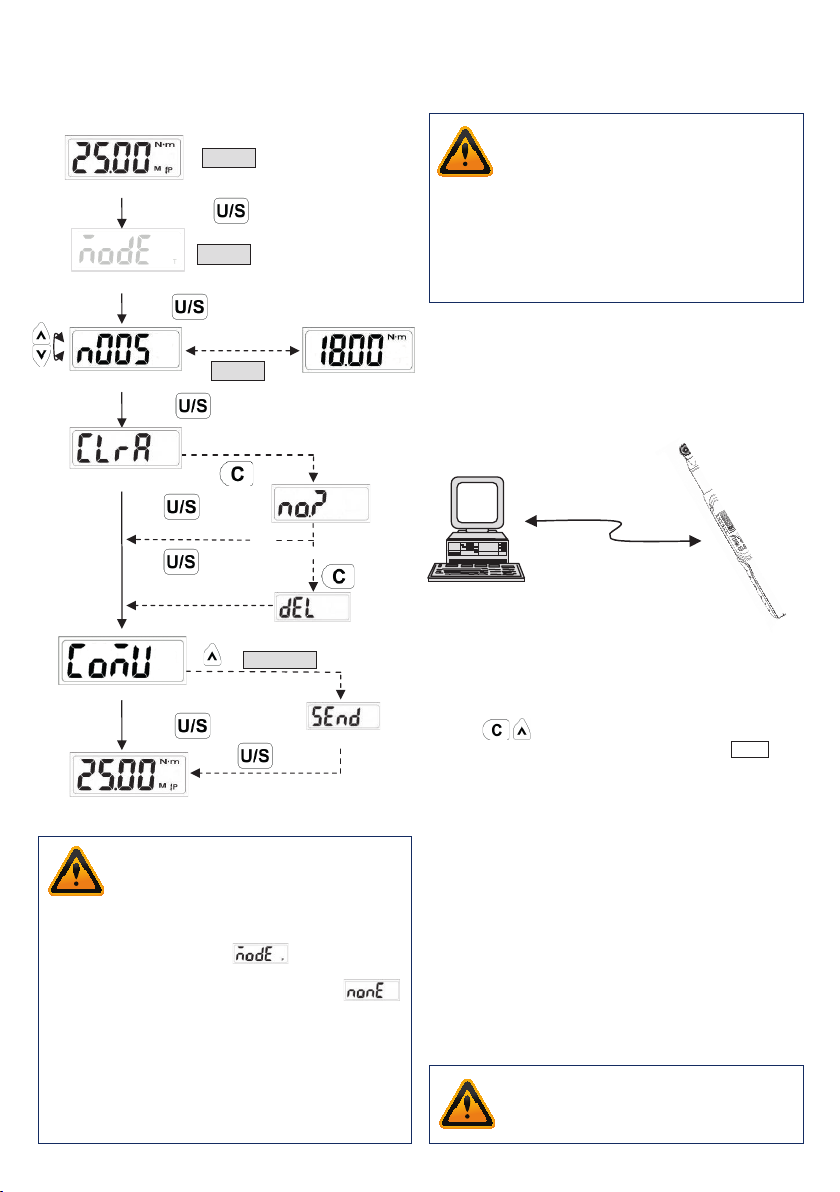
*2: Use a special designed cable (accessory) to
upload record data to PC.
*3: Two AA batteries
(Toshiba carbon-zinc battery)
*4: Horizontal and vertical test
*5: One cycle means swing the torque
wrench from 0 Nm to maximum range
and back to 0 Nm.
*6: Environmental test:
a. Dry heat
b. Cold
c. Damp heat
d. Change of temperature
e. Impact (shock)
f. Vibration
g. Drop
*7: Electromagnetic compatibility test:
a. Electrostatic discharge immunity (ESD)
b. Radiated susceptibility
c. Radiated emission

4
BEFORE USING THE WRENCH
Battery installation
■Remove the battery cap.
■Insert two AA batteries matching the -/+
polarities of the battery to the battery compartment.
■Replace the battery cap and rotate it tightly
according to the following figures.
+
-
Battery and cap
Calibration point
D = D1x (L3+L1) / (L3+L2)
Power on and resetting the wrench
■Press to power on the digital torque wrench.
■Usually press to reset the digital torque
wrench before using it.
Attention
If an external force is applied to the torque wrench
during power-on/reset or wake up period, an initi-
al torque offset will exist in the memory.
Activation during sleep mode
Cautions
During communication period ( send appears), the
sleep function is disabled.
■The wrench will auto sleep after about 5 minutes
idle for power saving. Press to wake up the
wrench during the sleep mode.
Resetting the wrench
■Press together will reset the wrench.
■If the wrench does not function normally,
press together to reset the wrench.
Low battery voltage indicator
When changing the type of head
■If the battery serial voltage is in low voltage
status, the wrench will display a battery symbol
and then turn off after a while.
■If you use the different head of the wrench, the
reading on the display will be different for the
different length of the head. Please refer to the
following explanation.
■Reference dimension for each model:
D: The set torque
D1: The actual torque applied to the nut.
L1: The extended length
L2: The normal length
L3: The length from the fitting pin to
the calibration point.
MODEL L2L3
7314-2030 29 mm 272.7 mm
7338-2135 29 mm 287.7 mm
7312-2200 40 mm 381.2 mm
7312-2340 40 mm 501.2 mm
SETUP
Pre-setting no.
Unit selection/setting
Power on/clear
Up/down
buttons

5
Pre-setting: M1
Pre-setting: M2
Pre-setting: M3
Pre-setting: M9 * Note 1, 2, 3
Press
Press
1. Pre-setting no.
Note:
1. If appears, it means the wrench is
overloaded. Overload = 110% of maximum
torque. Please contact your local dealer for
recalibration.
2. The maximum capacity for “Pre-setting no.”
is 9 sets.
3. The “Pre-setting no.” is cyclic.
‧
‧
‧
Pre.setting unit: Nm
Unit selection: in-lb
Unit selection: ft-lb
Unit selection: kg-cm
PressPress
Press
Press
2. Unit selection
Pre.setting torque value
Increase target torque value
Decrease target torque value
Press
Press
3. Set torque value
Note:
The “Unit Selection” is cyclic.
Track mode
Set peak / track mode
Record no.
Clear record
Peak hold mode
Long press
Press
Press
Press
Press
for selection
4. Peak hold / track mode selection
Note:
Please skip this procedure and continue to the
next step.
*Note 1
*Note 1

6
TRACK MODE OPERATION
(((((((( )))))))) ((((((( )))))))
((…((… …))…)) ((…((… …)) …))
START
*Note 1
*Note 2
*Note 3
(System initial)
Setting target torque
Current torque value
Green LED
Reach 80% of target torque
Red LED
Approached target torque
Buzzer
Buzzer
Reach 80% of target torque
Reach target torque
Apply torque
Note:
1. If appears, it means the wrench is
overloaded. Overload = 110% of maximum
torque. Please contact your local dealer for
recalibration.
2. When 80% of the target torque is reached,
the green LED will begin to flash and the
alarm tone will beep intermittently.
3. When the target torque is approached, the
alarm will change to a steady tone and the
green LED will stop flashing and stay on.
The red LED will also illuminate.
(System indicate)
Setting target torque
Apply torque
Apply torque
Current torque value
(Peak hold)
Released
Recording
Flashing
Buzzer
Buzzer
Green LED
Reached 80% of target torque
Red LED
Approaching target torque
Reached 80% of target torque
Reached target torque
START
PEAK HOLD MODE OPERATION
(((((((( )))))))) ((((((( )))))))
((…((… …))…)) ((…((… …)) …))
*Note 1
*Note 2
*Note 3
*Note 4
Note:
1. If appears, it means the wrench is
overloaded. Overload = 110% of maximum
torque. Please contact your local dealer for
recalibration.
2. If is appeared, that means the
wrench’s memory is full and the next value
record can not be written in. Please refer
the “Peak hold mode recorded value review”
section to clear the memory records.
3. When 80% of the target torque is reached,
the green LED will begin to flash and the
alarm tone will beep intermittently.
4. When the target torque is approached, the
alarm will change to a steady tone and the
green LED will stop flashing and stay on.
The red LED will also illuminate.

7
Press
Press
Press
(Exit)
Press
(Give up)
Deleted
(Clear)
No
Yes
Long press
Peak hold/Track mode
Set Peak/Track mode
Auto change
Record valueRecord no.
Clear record
Communication
Communication
PEAK HOLD MODE RECORDED
VALUE REVIEW
*Note 1
*Note 2
*Note 3
*Note 4, 5, 6
Note:
1. The “Peak Hold” mode recorded value review
also can be operated from “Track” mode
operation.
2. If you operate in the “Peak Hold” mode, the
display will show please go to next
step.
3. If there are no records, it will show .
4. This function is not supported on all type of
models.
5. Communication mode is for uploading
recorded data to a PC.
6. Communication mode is also for calibration
of torque wrench. Please contact your local
dealer for more information.
COMMUNICATION
Precaution:
1. Communication function is only supported
on some models. Check the model no. and
its specification before using communication
function.
2. Do not insert the plug of communication
cable into torque wrench that does not
support communication function.
Connecting communication cable
Uploading record data
■Turn off power and then connect the accessory
cable between the COM port of PC and torque
wrench.
■Make sure the connection between PC and
wrench is normal.
■Press together to reset the wrench.
■Change the wrench operation mode to “Send”.
(Refer to “Peak Hold Mode Recorded Value
Review” section).
■Use PC to start the uploader program.
■In uploader program, first select the correct COM
port no.
■Next, select the file path to save the uploaded data.
■Finally, press “upload” button to transmit the
torque records to PC.
■The uploaded data is then shown on the column
and saved in the *.csv file. Use Microsoft Excel to
view *.csv file.
Caution:
Refer to the uploader program user guide for
the detail operations.

MAINTENANCE AND STORAGE BATTERY MAINTENANCE
■When the wrench is not going to be used for an
extended period of time, remove the batteries.
■Keep a spare battery on hand when going on a
long trip or to cold areas.
■Do not mix battery types or combine used
batteries with new ones.
■Sweat, oil and water can prevent a battery’s
terminal from making electrical contact.
To avoid this, wipe both terminals before loading a
battery.
■Dispose of batteries in a designated disposal
area. Do not throw batteries into a fire.
Caution:
1. Over-torquing (110% of Max. torque range)
could cause breakage or lose of accuracy.
2. Do not shake violently or drop wrench.
3. Do not use this wrench as a hammer.
4. Do not leave this wrench in any place
exposed to excessive heat, humidity, or
direct sunlight.
5. Do not use this apparatus in water (it is not
waterproof).
6. If the wrench gets wet, wipe it with a dry
towel as soon as possible. The salt in
seawater can be especially damaging.
7. Do not use organic solvents, such as
alcohol or paint thinner when cleaning
the wrench
8. Keep this wrench away from magnets.
9. Do not expose this wrench to dust or sand
as this could cause serious damage.
10. Do not apply excessive force to the LCD
panel.
11. Apply torque slowly and grasp the center
of the handle. Do not apply load to the
end of the handle.
Attention!
One-year periodic recalibration is necessary to maintain
accuracy. Please contact your local dealer for calibra-
tions.
POLAR TOOLS A/S
SOLDALEN 9 . 7100 VEJLE . DENMARK . INFO@POLARTOOLS.COM . WWW.POLARTOOLS.COM
This manual suits for next models
3
Table of contents
Other Polar Electro Power Tools manuals