Polini motori E-P3 User manual

POLINI E-P3:
POWERFUL, COMPACT, LIGHT

THE E-BIKE
The maximum speed of the E-Bike is 25 Km / h (the engine turn off once reach this
speed) and the maximum continuous rated power of the engine is 250 Watts.
According with the European Directive 2002/24 / EC, transposed in Italy with the
decree of January 31, 2003 from the Ministry of Infrastructure and Transport, the
engine is power of the eletric bike must be 250 watts, the engine must be activated
automatically when you start riding and it must switched off immediately when stop
riding.
The engine must turn off once the speed of 25 Km / h has been reached, beyond this
speed it is possible to proceed only thanks to the strength of our legs (or downhill).

THE E-P3 ENGINE CONCEPT
Among all types of electric motors, Polini has adopted the center position of the engine
on the bike frame, because we believe it is the most functional and efficient.
The distribution of the weights is optimal and has the possibility to take advantage of the
gearbox already present on the bike.
The engine is operated thanks to a torque sensor positioned on the central axis that
measures the power of the pedal stroke, depending on the selected level the power is
increased.
Without any pression on the pedal the electric assistance must be finish.
The motor is of the brushless type, lighter, smaller and more efficient. This technology is
less subject to breakage.
The battery have the best technology present on the market at the moment , lithium ions
tecnology.
Polini Motori designed their motors so that they can be inspected,
if necessary: this ensures a higher value to the motors, once the
warranty period of 24 months is over.

E-P3 POLINI ENGINE CONCEPT
LEFT STATOR CASE EP3
SECOND GEAR CRANKCASE EP3
PLASTIC INTERMEDIATE
GEAR Z.57 EP3
SECONDARY GEAR
Z.11
CENTRAL PIM SPLASH
GUARD FLAME EP3
TORQUE SENSOR
MOTOR GREASE GUARD
SECONDARY GEAR Z68
RIGHT ENGINE CASE
ELECTRIC CARD
ELECTRIC CARD CABLE
PEDAL AXLE
ENGINE CASE
PRIMARY GEAR
Z8 EP3
Disassembly and assembly

TECHNICAL EXPLANATION:
DIFFERENCES BETWEEN WATT and WATT per HOUR
THE WATT ARE THE MEASUREMENT UNIT OF THE ELECTRIC POWER. FOR EP3
MEAN THE MAXIMUM POWER THAT CAN SUPPLY THE ENGINE.THIS POWER IS
LIMITED TO 250 WATT AS PROVIDED BY LAW.
- THE WATT ARE THE MEASUREMENT UNIT OF THE ENERGY QUANTITY OF THE
BATTERY
- THE WATT per HOUR REPRESENTS THE TANK AT THE DISPOSAL OF THE ENGINE
AND DETERMINE THE DURATION OF THE OPERATION OF THE BIKE.

EP-3 POLINI MOTOR – USER’S MANUAL
1.1- Important Safety information
Handling the battery
• Do not deform, modify and disassemble the battery.
• Do not leave the battery near sources of heat such as heaters.
• Do not subjects the battery to strong shocks or throw it.
• Do not place the battery into fresh or sea water and avoid the battery terminals getting wet.
• Do not recharge the battery in places with high humidity or outdoors.
• Do not insert or remove the plug while it is wet.
• The operating temperatures ranges of the battery :
1. During use: –20 °C /+ 60 °C
2. During charging: 0 °C /+ 45 °C
• Periodically check the battery charger, particularly the wire.
• When you carry a power-assisted bicycle in a car, remove the battery from the bicycle and
place the battery on a stable surface in the car.
• Before connecting the battery, make sure that there is not build-up water or dirt on the
connector where the battery will be connected.
1.2- Cleaning the battery
• Do not use thinner or other solvents to clean any of the products. These substances may
damage the surfaces.
• Use a damp cloth, with the water well wrung-out, when cleaning the battery and
plastic cover.
• Batteries are not guaranteed against natural wear or deterioration from normal use.
• This battery is designed to be fully waterproof and to be used when raining while
properly installed on the bicycle. Do not put the battery in contact with water when
not installed on the bicycle because the electric terminals, in these conditions, are not
protected.
• Do not clean the bicycle using high pressure water jets. If the water
penetrates inside the parts, may result some malfunctioning.

2 - Features of POLINI EP-3 system
The following information must be satisfied before using the E-bike propulsion system:
• Battery is charged, inserted and turned on.
• Speed sensor is connected in accordance to the central movement and the magneto is
properly placed.

2.1- Turn E-P3 system on
1. Turn the battery ON using the on/off button
2. Select your preferred assist mode from 1 to 5 using the arrow buttons.
3. Assistance will start when the pedals start turning
4. Change the assist mode in accordance with the conditions of use.

2.2 - Turn E-P3 system off
1- To keep the travelling data updated on the display, first turn the display off and then
the battery. On the contrary the travelling data on the display are not saved properly.
2- By turning off the display only, the battery remains ON for 2 hours with a low battery
consumption.
3- It is not possible to turn the display off while riding the E-bicycle.

3 - Charging the battery
Charging can be carried out at any time regardless of the amount of charge remaining,
but you should fully charge the battery at the following circumstances. (Be sure to use the
dedicated charger when recharging the battery during these circumstances):
• The battery is not fully charged at the time of purchase. Before riding, be sure to
charge the battery until it is fully charged.
If the battery has become fully spent, charge it as soon as possible. If you leave the
battery without charging it, it will deteriorate before its time.
• If the bicycle will not be ridden for a long period of time, store it away with
approximately 70% battery capacity remaining. In addition, take care not to let the
battery become completely empty by charging it for 2 hours every 3 months.

3.2- About the charger LED lamp
Charger connected into the outlet and battery
under charge – RED Power led /RED charge led
Charger connected into the outlet and battery
recharged (recharged ended)
RED Power led /GREEN charge led
Time to recharge a dead battery is about 5 hours

3.3 - Indications of the battery charge level
After pushing the LED light button, the five LED lamps indicate the charge level. Each LED
corresponds to 20% of capacity.
You can check the current charging status on the LED lamp on the battery (state of
charge ). When charging the battery, the
LED lamps are blinking.
Charge levelLED

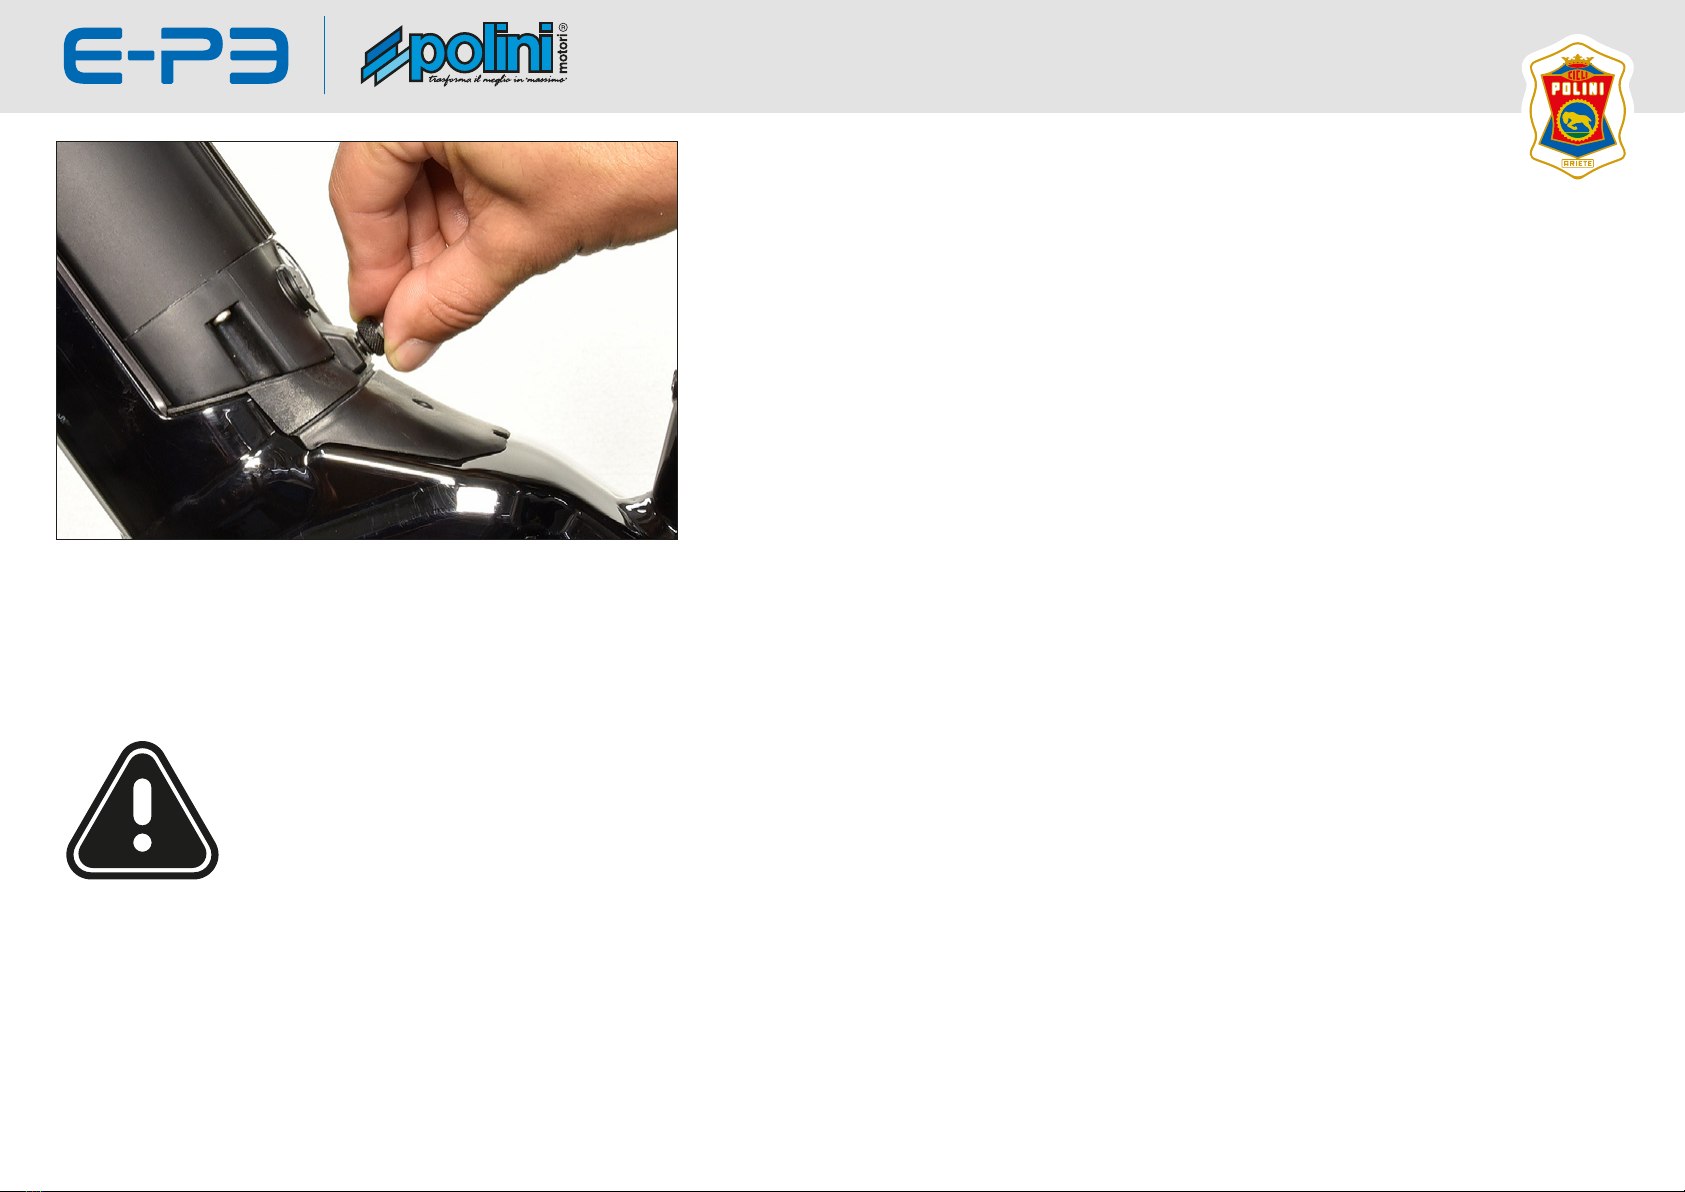
3.4- Removing and Installing the battery
1. Unscrew the security screw.
2. Insert the key in the cylinder on the battery
holder.
3. To open it, turn the key while pulling the battery
upwards.
4.Grab the upper side of the battery and remove
it from the holder.
CAUTION: always turn the battery off before removing or installing it.
Installing the battery
1. Insert the battery into the battery mount paying
attention not to damage the rubber gasket.
2. First insert the upper part of the battery and
then the bottom part of the electric connectors.
3. Press the battery until a click is heard to lock it.
Battery may be assembled even if the key is not
inserted.
4. Proceed carefully and without too much strength
to avoid damaging the electric connectors.
AVVERTENZE: Before riding your bicycle, make sure that the battery is locked in place
and charging port cap is closed.
When transporting the bicycle, remove the battery and place it in a dry place, at the
same time covering the electrical contacts against atmospheric agents.
DANGER – ATTENTION: Do not ride the bicycle with the key inserted, to
prevent the battery from falling out and avoid loosing the key.

4.0 - Displays
The main screen shows the following
information:
1 Display of the current assistance
2 Speed
3 Triangular symbol: assist-walk activated.
Headlights symbol: it activates if the
lights are ON.
4 Battery level indicator (each notch
corresponds to 20% of the battery)
Riding performance
Riding performance example.
It displays the average Watt power
generated by the rider.
Motor power
Motor power screen example.
It displays the power provided by the
pedal-assist electric motor in percentage
respect to the maximum power.
Distance travelled in assist-mode
Example of distance travelled in
assist-mode. It displays the average
of the range to be travelled.
Warning: the average of the range
is calculated in accordance with the
distances covered in the previous tours, so
it is necessary to ride some kms to modify
the data. The average is influenced by the
itinerary and by the level of assistance
used.
Distance travelled
Example of distance travelled.
It displays the distance travelled from the
last reset of the data.
Many pages are included in this screen.
Views

Average speed of the distance
travelled
Example of the average speed of the
distance travelled.
> average speed
It displays the average speed from the last
reset of the data.
Maximum speed of the distance
travelled
Example of the maximum speed of the
distance travelled.
>maximum speed
It displays the maximum speed from the
last reset of the data.
Reset
Example of data reset
Resetting of the trip data.
The trip data. (average and maximum
speed are cleared and lost)
- Joystick (T3): to move downwards and
activate RESET function (RESET outline
changes colour)
- Press the Joystick to cleared up the data.
- Switch the display off (do not switch the
battery off) to save RESET in the motor.
Total distance travelled
Example of total distance travelled.
It shows the total distance covered with
pedal-assist bicycle.
Another page follows to this screen.
Total distance travelled/
maximum speed
Example of the maximum speed.
It displays the maximum speed in
accordance with the total distance
travelled.
Bluetooth
Example of Bluetooth.
It shows Bluetooth connection options
NOTE! Currently Blootooth does not have
any active function.

4.1- Controls
Buons
Funcons
T1
Increase of the level of assistance;
press for more than 3 seconds: walk assist mode
acvated
T2
Decrease of the level of assistance
T3
Joysck
Upper screen
To enter next screen, exit from the modificaon mode
and confirm.
Elaborate the highlighted value
To enter next right screen
Down screen
T4
Switching the Comfort service mode ON/OFF
T5
Short pressure: lights ON
Long pressure: lights OFF
T1
T2
T4
T5
T3

4.2 - Displays
The main screen shows the following information:
1 Display of the current assistance
2 Speed
3 Triangular symbol: assist-walk activated. Headlights symbol: it activates if the lights are ON.
4 Battery level indicator (each notch corresponds to 20% of the battery)
ATTENTION: the notches in the battery symbol do not indicate the battery
recharging level.
How to move in the display screens:
1. Screen symbol
2. Horizontal navigation position
3. Page content
4. Vertical navigation position: it indicates the following pages and displays the actual
position.

• Riding performance
• Motor power
• Distance travelled in assist-mode
• Distance travelled
• Average speed of the distance travelled
• Maximum speed of the distance travelled
• Reset
• Total distance travelled
• Total distance travelled/ maximum speed
• Bluetooth
Other manuals for motori E-P3
2
Table of contents
Other Polini Bicycle Accessories manuals


Popular Bicycle Accessories manuals by other brands


Specialized
Specialized Elite CylcoComputer user manual

Sigma
Sigma BC 16.16 manual

Playcore
Playcore Dero Setbacks installation instructions

VDO Cyclecomputing
VDO Cyclecomputing x3dw instruction manual

Cateye
Cateye RAPID X2 manual

buratti meccanica
buratti meccanica Clorofilla Trail Use and maintenance manual


