Pope 22cc 101PHT22 User manual

To reduce the risk of injury, the user must read and understand the operator’s manual.
Save this manual.
22cc Hedge Trimmer
Model No 101PHT22
Operator’s Manual
WARNING:

Before you use your new hedge trimmer, read this manual carefully to learn how
to operate and maintain your product correctly. Reading this manual will help
you and others avoid personal injury and damage to the product. Although
Pope designs safe state-of-the-art products, you are responsible for using the
product properly and safely. You are also responsible for training persons you
allow to use the product about safe operation.
READ THIS INFORMATION
STOP
Introduction
Thank you for purchasing a Pope®product.
We would like you to be completely satisfied with your new product, so feel free to contact an
authorized service dealer listed at the back of this manual, for help with service, genuine Pope parts
or other information you may require. Or phone the Pope Customer Service Centre for details of your
nearest dealer on 1300 134 880.
The Pope warning system in this manual identifies potential hazards and special safety messages
that help you and others avoid personal injury, even death. DANGER, WARNING and CAUTION are
signal words that identify the level of hazard. However, regardless of the hazard, be extremely careful.
Two other words “Important” and “Note” highlight other valuable information.
Signal Word Explanation
DANGER Indicates an imminently hazardous situation which, if not avoided,
will result in death or serious injury.
WARNING Indicates a potentially hazardous situation which, if not avoided,
could result in death or serious injury.
CAUTION Indicates a potentially hazardous situation which if not avoided,
could result in death or serious injury.
Important Advises you of important information or instructions vital to the
operation or maintenance of the equipment.
Note Advises you of additional information concerning the operation or
maintenance of the equipment.

Contents
Safety Rules ............................................................................................................................................. 4
Symbols ..................................................................................................................................................... 5
Specifications ......................................................................................................................................... 6
Applications ............................................................................................................................................. 6
Features ..................................................................................................................................................... 7
Unpacking ................................................................................................................................................ 8
Operation .................................................................................................................................................. 9
Mixing the Fuel ................................................................................................................................... 9
Filling the Tank ................................................................................................................................... 9
Starting the Product – To Start a Cold Engine .......................................................................... 10
Operating the Hedge Trimmer ....................................................................................................... 11
Maintenance ........................................................................................................................................... 12
Cleaning the Product ....................................................................................................................... 13
Maintaining the Blades .................................................................................................................... 13
Cleaning the Air Filter ....................................................................................................................... 14
Replacing the Spark Plug ............................................................................................................... 15
Storing the Product .............................................................................................................................. 15
Troubleshooting .................................................................................................................................... 16
Warranty ................................................................................................................................................... 17

■Physical Condition of the Operator. Do
not operate this product when tired, ill or
under the influence of alcohol, drugs or
medication.
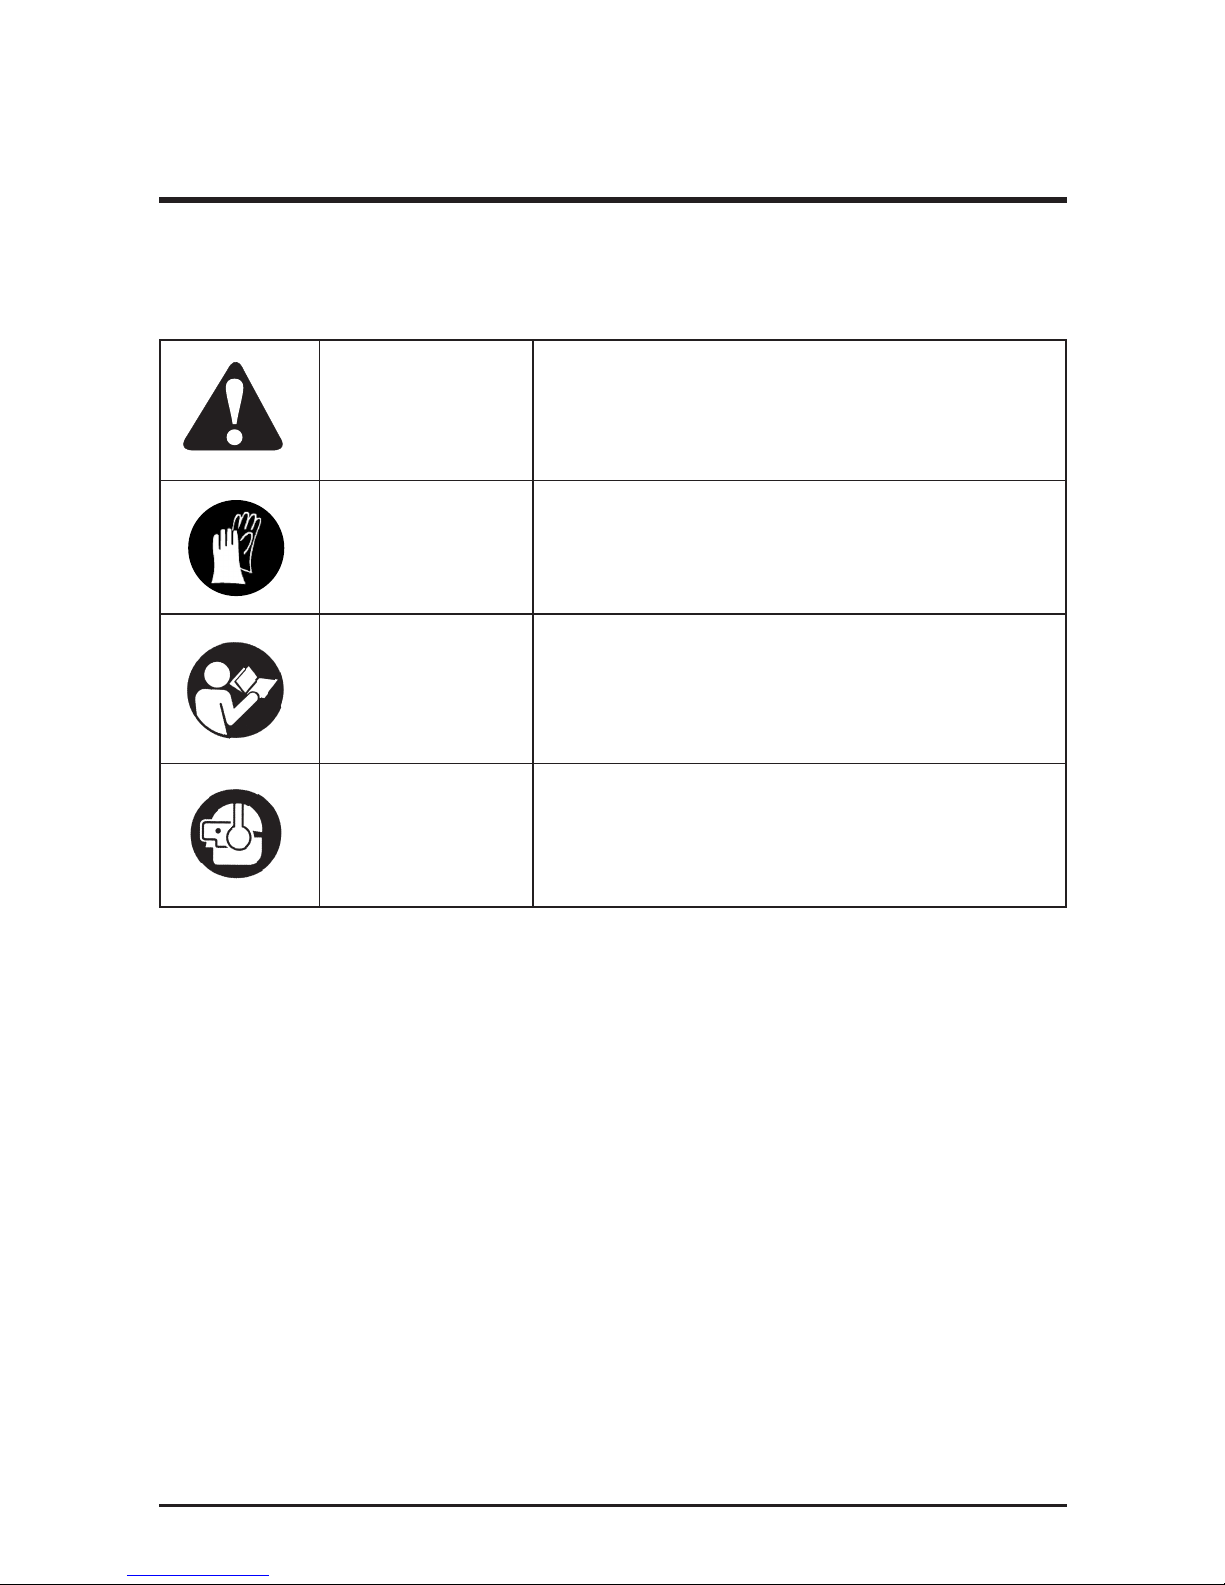
■Clothing Requirements. Always wear long
heavy pants, boots and gloves. Do not wear
loose clothing, jewellery, short pants, sandals
or go barefoot. Secure hair so that it is above
shoulder level to avoid entanglement in
moving parts.
■Protective Accessories Requirements.
Wear safety eye protection and thick work
gloves when operating this product. Wear
hearing protection during extended periods
of operation.
■Condition of Product Before Use. Inspect
the product before each use, particularly the
throttle trigger, stop switch, and cutting tool.
Replace damaged parts. Check for fuel
leaks. Make sure all fasteners are in place
and secure. Replace blades or parts that are
cracked, chipped or damaged in any way.
Always keep the blade sharp. Make sure the
safety guard is properly installed and in the
position recommended by the manufacturer.
■Proper Stance. Keep firm footings and
balance. Do not overreach. Keep the hedge
trimmer away from all parts of your body and
away from hot surfaces.
■Exhaust Gases. Never start or run the
product inside a closed room or building:
breathing exhaust fumes can cause illness or
death.
■Fuelling. Mix and pour fuel outdoors where
there are no sparks or flames. Slowly remove
the fuel cap only after stopping the engine.
Do not smoke while fuelling or mixing fuel.
Wipe spilled fuel from the product. Move at
least 9m from the fuelling source and site
before starting the engine.
■Use of product. Never allow children or
infirm persons to use the tool. Never allow
other persons who are unfamiliar with the
operating instructions to use the tool.
■Work Area. Clear the area to be cut before
each use. Remove all objects such as nails,
wire, string or any obstacles which might get
in the way while working. Clear the area of
bystanders, pets and children. At a minimum,
keep all bystanders, pets and children
outside a 15m radius. Because there still
may be a risk to bystanders from thrown
objects, bystanders should be encouraged to
wear eye protection. If you are approached
while operating the product, stop the engine.
■Dangerous Environments. To avoid falling,
do not use the product in damp or wet
locations.
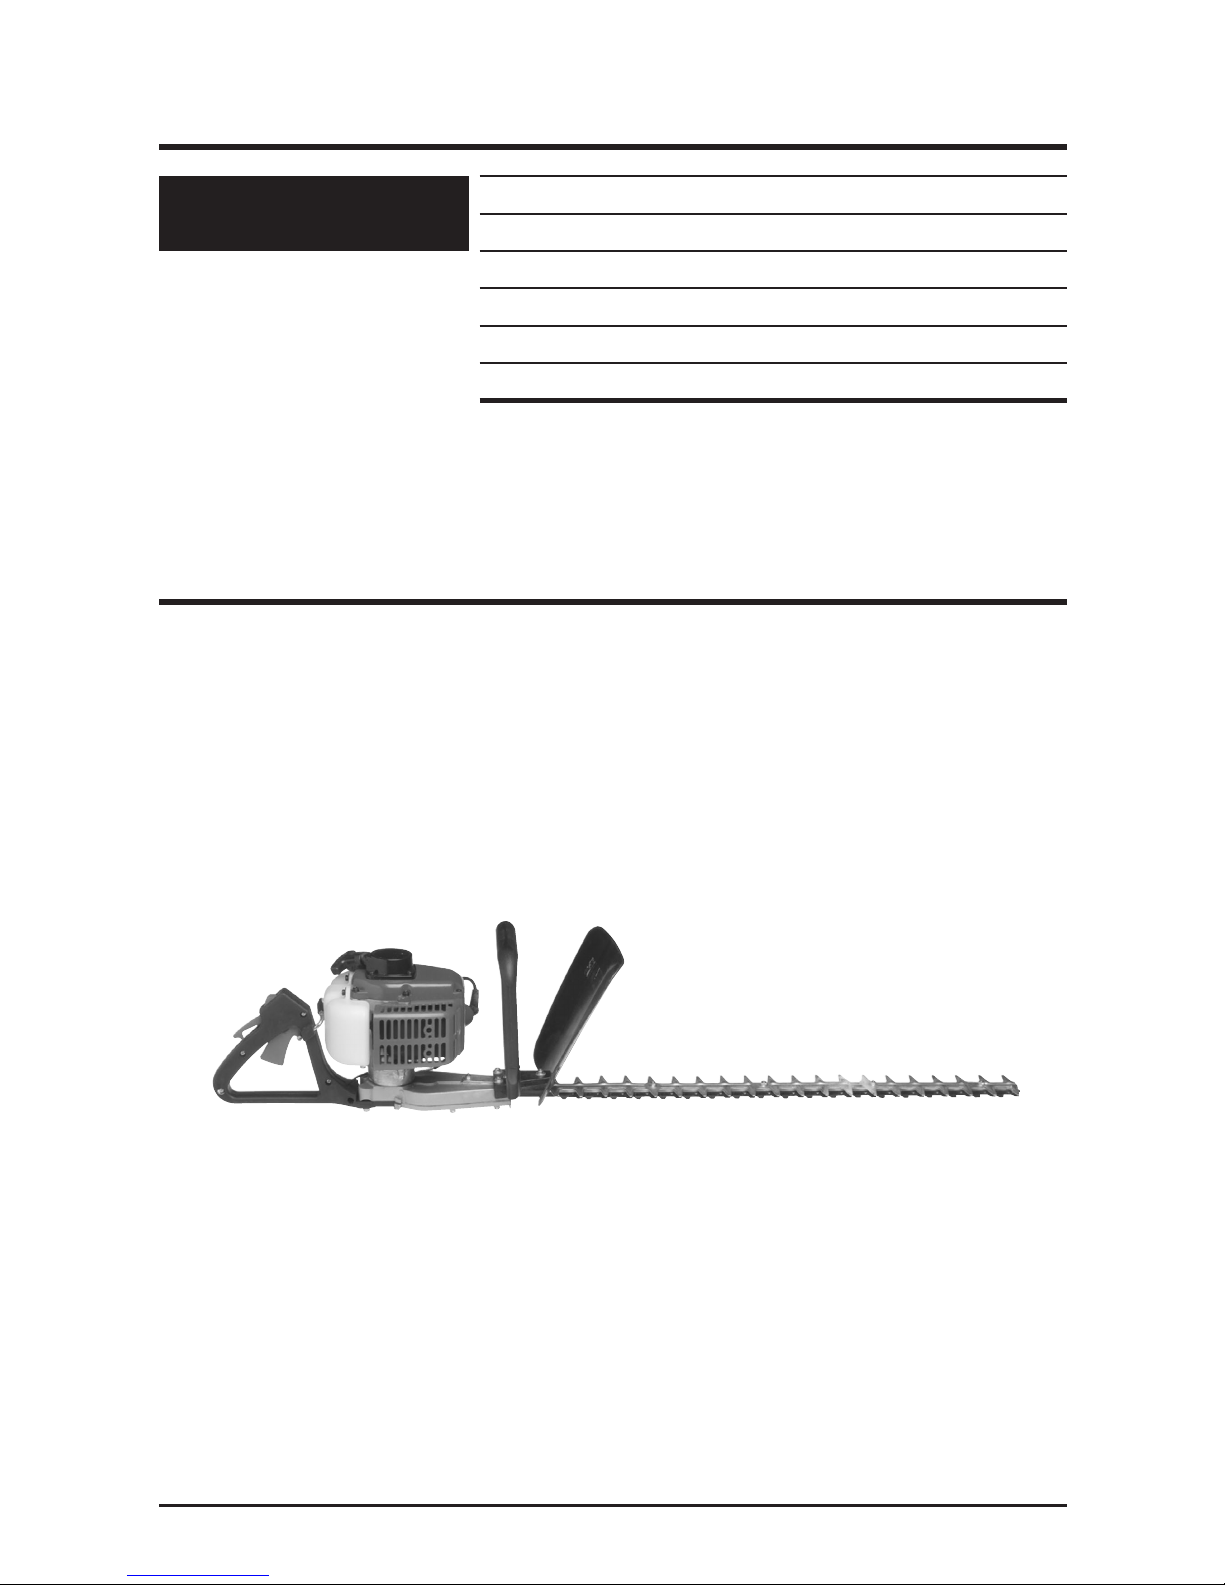
■Use the Right Product. Use the product for
the intended purpose only – ie for trimming
leaves and branches from trees, shrubs and
hedges.
■Use the Equipment Correctly. Do not grip
any part of the hedge trimmer apart from the
handles during operation. Never raise the
hedge trimmer above waist height.
■Kick back. Kick back may occur when the
blade contacts a solid object in the cutting
area. Ensure that the cutting blades are kept
clear of fences, posts, wires etc. This is more
likely to occur in areas where it is difficult to
see the material being cut.
■Stopping the Product. A coasting blade
can cause injury while it continues to spin
after the engine is stopped or the throttle is
released. Maintain proper control until the
blade has completely stopped moving.
■Use the Blade Cover whenever
transporting, or when the hedge trimmer is
being stored or is not in use.
Safety Rules
Read and understand all instructions. Failure to follow all instructions may result in
serious personal injury as well as damage to product.
4
WARNING:

Save These Instructions
Symbols
The following symbols are located on the product. Please study them and learn their meaning.
Proper interpretation of these symbols allows you to operate the product better and safer.
Symbol Name Explanation
Safety Alert Indicates danger, warning or caution. Attention is
required in order to avoid serious personal injury.
May be used in conjunction with other symbols or
pictographs.
Wear Gloves Protect your hands with gloves when handling the
hedge trimmer. Heavy duty non-slip gloves will provide
extra safety and help to improve your grip.
Read Operator’s Read the Operator’s Manual before starting or
Manual operating this product. Failure to follow operating
instructions and safety precautions in the Operator’s
Manual can result in serious injury.
Eye and Ear Thrown objects can cause severe eye injury.
Protection Wear eye protection when operating this product.
Wear hearing protection during extended periods
of operation.
5

6
Specifications
Applications
Use this product for the following applications:
■Trimming and shaping topiary
■Regular trimming of bushes and shrubs
■Shaping and pruning bushes and shrubs
Model 101PHT22
22cc Hedge Trimmer
Engine: 22.5 cc Full Crank
Blade Cutting Length: 600 mm
Cutting Style: Dual action
Weight (Dry): 5.6 kg
Fuel Tank Capacity: 0.6 litres
Maximum Cutting Diameter: 25 mm

Features
Your new product is equipped with the
following features:
Engine
The engine is powerful and easy to start. It is
effectively counterbalanced and has a full crank
which allows for less vibration and greater
durability.
Handles
The front handle should be gripped firmly with
the left hand while the rear handle provides
support for the right hand. Both hands must be
used while operating the trimmer.
Cutter Blade Guard
Covers the blade when not in use and provides
additional safety while transporting.
Safety Guard
The large safety guard helps protect you from
the blade and flying debris.
Blade Guards
Two blade guards for each side of the hedge
trimmer protect the blades during storage and
transportation.
Do not attempt to modify this product or create accessories not recommended for
use with this product. Any such alteration or modification is misuse and could result in
a hazardous condition leading to serious personal injury and will void your warranty.
7
Before using the product, familiarize yourself with all operating features and safety requirements.
However, do not let familiarity with the product make you careless.
Exercise caution when using the product. Careless actions, for even a fraction of a
second, can result in serious or fatal injury.
WARNING:
WARNING:

Unpacking
Instructions
■Carefully remove the product from the box.
■Inspect the product carefully to make sure
no breakage or damage occurred during
shipping.
■Do not discard the packing material until
you have carefully inspected and
satisfactorily operated the product.
Packing List
22.5cc Hedge Trimmer
2 Blade Safety Guards
Fuel Mixing Bottle
Assembly Tools – 1 bag including:
-Spark plug wrench (1)
-Spanner (1)
Operator’s Manual
8
If any parts are missing, do not
operate the product until the missing
parts are replaced.
Failure to do so could result in
serious personal injury.
WARNING:

9
Operation
Mixing the fuel
This product is powered by a 2 stroke engine
and requires pre-mixing petrol and 2 stroke oil.
The oil mix should be 25:1. Never mix petrol
and oil directly in the engine tank.
Use unleaded petrol intended for motor vehicle
use with an Octane rating of 87 ( [R + M] / 2) or
higher. Purchase fuel from a reputable fuel
supplier.
Use the mixing container provided to mix the oil
and petrol in the correct quantities.
Petrol Oil
1 litre 40ml
2 litres 80ml
3 litres 120ml
4 litres 160ml
5 litres 200ml
Mix only enough fuel for your immediate needs.
Fuel should not be stored for more than 30 days.
Follow these steps to mix the fuel:
1. Use the container provided for mixing fuel.
2. Mix the 2 stroke engine oil with unleaded
petrol in the container provided at the rate
of 25 parts petrol to 1 part oil.
3. Mix the fuel thoroughly and also each time
before re-fuelling.
4. Mix in small quantities. Do not mix more
fuel than you expect to use within a 30 day
period.
5. Store fuel only in a clean, safe, approved
container for petrol – not the fuel mixing
bottle provided.
Follow these steps to fill the tank:
1. Clean the surface around the fuel tank to
prevent contamination.
2. Loosen the fuel cap by turning it counter
clockwise.
3. Pour the fuel mixture carefully into the tank.
4. Clean and inspect the gasket.
NOTE: Replace the fuel cap if the gasket is
damaged.
5. Install the fuel cap and tighten it by turning
it clockwise.
Always stop the engine before filling
the tank. Never add fuel to a
machine with a running or hot
engine. Move at least 9m away from
the refuelling site before starting the
engine. Do not smoke while filling the
tank. Do not add fuel to the tank
close to an open fire or sparks. Never
add fuel to the tank in a closed or
non-ventilated area.
Filling the Tank
6. Wipe spilled fuel from the product.
7. Move at least 9 metres away before
starting the product.
NOTE: It is normal for the engine to emit
smoke during use.
Check for fuel leaks. If you find any
leaks, correct the problem before
using the product.
Petrol is extremely flammable and
explosive. A fire or explosion from
petrol will burn you and others.
DANGER: WARNING:
WARNING:
25:1

10
Starting the Product
Starting the product depends on whether the engine is cold or warm.
Operation – continued
The recoil starter can be damaged by abuse.
Never pull the starter cord to its full length.
Always engage the starter before cranking the engine.
Always rewind the starter cord slowly.
To Start a Cold Engine
Follow these steps to start a cold engine:
1. Lay the product on a flat bare surface.
2. Slide the switch to ON by pushing the
switch downwards, away from the STOP
position.
3. Push the primer bulb repeatedly until fuel
comes into the primer pump. For new
engines or engines that have been refueled
this may require numerous attempts.
4. Slide the choke lever up to the position
marked (choke is closed).
5. Holding the machine handle firmly with
your right hand, pull the starter cord slowly
until you feel the starter engage.
6.
Start the machine by pulling the starter cord
upward rapidly. If necessary, repeat step 5
two or three times until the engine starts.
7. Push choke lever down. Excessive
cranking of the choke lever will cause the
engine to flood making it difficult to start.
8. If the engine starts but does not run, open
choke and continue to crank engine.
NOTE: When starting the engine for the first
time, or after refueling, it may take longer for
the fuel to reach the engine and become
operational. You may need to repeat the steps
several times in order to start the engine. If the
engine will not start after repeated attempts,
you should open the throttle and choke fully,
and continue pulling the starter cord until the
motor starts, making sure there is no danger of
persons approaching the head while starting.
NOTE: If the product starts, let it run for 30
seconds before using it. If the product does not
start, repeat the previous steps.
WARNING:
•
Operating the machine with loose, missing or damaged components could allow the
engine to over-speed, possibly causing serious engine damage.
Inspect the entire machine for damaged, loose or missing components or fastenings
and repair as necessary.
CAUTION:
To reduce the risk of injury from
blade contact, do not attempt to
“drop start” the hedge trimmer. Only
ever start the hedge trimmer on firm
flat ground or other solid surface.
WARNING:
Do not start the Hedge Trimmer with
the Blade Guards fitted.
WARNING:

11
Operating the Hedge Trimmer
Do not cut any material other than hedges and
shrubs. The hedge trimmer must only be used
for the operations described in this Operator’s
Manual.
See Figs 1 and 2
Follow these steps to use the Hedge Trimmer:
1. When trimming, the blade should be tilted
approximately 15 degrees towards the
hedge. Always trim from the bottom
upwards.
2. Trim the sides of the hedge first and then
trim the top.
3. If the branches are very long, they should
be cut back in several stages.
4. Make sure that there are no objects in the
hedge, such as railings, that could damage
the blade.
5. If the blade becomes jammed, always
turn off the engine and wait for the
hedge trimmer to cool before clearing
the obstruction.
6. Do not force the Hedge Trimmer to cut
over sized branches. These should be cut
by hand using secateurs or shears.
Operation – continued
Fig 1
Fig 2
Before using this Hedge Trimmer, make sure that you have read all of the safety
instructions.
WARNING:
Always hold your hedge trimmer with both hands. Never attempt to operate this
machine with one hand. Loss of control could result in serious or fatal injury.
WARNING:

Maintenance
12
Emissions Maintenance Schedule
Maintenance, replacement or repair of the emission control device and systems may be
performed by any authorised Toro or Pope Service Dealer.
Before performing any maintenance on this machine, stop the engine and disconnect
the spark plug.
WARNING:
When replacing parts other than engine or emissions parts, use only Pope
replacement parts. Use of any other parts may create a hazard or cause product
damage.
WARNING:
Emission Part
Fuel Tank Assembly
(includes Fuel Lines, Fuel
Cap and Fuel Filter)
X
X
XX
Clean Air Filter
Replace Spark Plug
Inspect before
each use Every 10 hours Every 10 - 15 hours
or yearly

Maintaining the Blades
■Use a resin solvent on the cutter blades.
Resin solvent protects the blades and has
anti-corrosive properties. Use the resin
solvent before and after work. Then start
and run the hedge trimmer briefly to ensure
even distribution along the blades.
■Check the condition of the cutting tool at
regular intervals. Replace damaged or dull
cutting blades immediately even if they only
have superficial cracks.
■Never try to repair damaged blades by
welding, straightening or modifying the
shape. This may cause parts of the blade
to come off and result in serious or fatal
injuries.
BEFORE EACH USE:
■Remove dirt and debris from the product
exterior.
■Inspect the engine, tank and hoses for
possible fuel leaks and repair as necessary.
■Inspect the engine cooling fins for
accumulation of debris and clean as
necessary.
■Inspect the entire machine for damage,
loose and missing components or
fasteners and repair as necessary.
CLEANING THE PRODUCT:
■Stop the product before cleaning.
■Clean the exterior of the product with a
damp cloth.
■Avoid using solvents when cleaning plastic
parts. Most plastics are susceptible to
damage from various types of commercial
solvents and may be damaged by their
use.
■Scrape debris away from air intake vents
on both sides of the motor housing.
Keeping air intake vents free of leaves
and debris prevents motor
overheating and possible failure.
CAUTION:
Maintenance – continued
13
NOTE: Depending on the type of fuel used, the
type and amount of oil used, and/or your
operating conditions, the exhaust port and
muffler may become blocked with carbon
deposits. If you notice a power loss with your
petrol powered tool, you may need to remove
these deposits to restore performance. We
highly recommend that only qualified service
technicians perform this service.

Cleaning the Air Filter
See Fig. 3
Follow these steps to clean the air filter.
Fig. 3
1. Stop the engine.
2. Remove the spark plug boot.
3. Loosen the air cleaner cover by turning the
knob counter clockwise.
4. Remove the air filter cover.
5. Remove the air filter element.
6. Inspect the element. If the element is
distorted or damaged replace it with a new
one.
7. Wash the element in clean fuel and
squeeze or blow dry.
8. Wash the air cleaner in clean fuel and wipe
or blow dry.
9. Rinse the air filter and let it dry completely.
10. Work two drops of oil into the air filter.
11. Replace the air filter (fits only one way).
12. Replace the air filter cover.
13. Tighten the air filter cover by turning the
knob clockwise.
14. Replace the spark plug boot.
Maintenance – continued
14
Air
Filter
Air
Filter
Cover
Knob

Replacing the Spark Plug
NOTE: Before removing the spark plug,
thoroughly clean the spark plug and cylinder
head area.
The Pope Hedge Trimmer 101PHT22 uses
an NGK BPMR7A spark plug. Use an exact
replacement and replace annually.
Follow these steps to replace the spark plug.
1. Ensure the engine is cool before servicing
the spark plug.
2. Remove the spark plug boot.
3. Loosen the spark plug by turning it counter
clockwise with a socket.
4. Remove the spark plug.
5. Hand thread the new spark plug, turning it
clockwise. Do not over tighten.
Be careful not to cross-thread the
spark plug. Cross threading will
seriously damage the product.
CAUTION:
Maintenance – continued & Storing the Product
15
Storing the Product
Storing the product differs depending on the
amount of time it will be in storage.
To Store the Product Short Term
Follow these steps to store the product short
term.
1. Clean all foreign material from the product.
2. Store in a well-ventilated place that is
inaccessible to children.
If you do not intend to use the product for
more than one month, follow these steps to
store the product long term.
1. Drain all of the fuel from the tank into a
container approved for petrol.
2. Run the engine until it stops.
3. Clean all foreign materials from the
product.
4. Remove the spark plug boot, and then the
spark plug.
5. Pour approximately 5ml oil into the cylinder
through the spark plug hole.
6. Pull the recoil starter 2 or 3 times to
distribute the oil over the cylinder walls.
7. Reinstall the spark plug. Follow the
instructions for spark plug replacement.
8. Reconnect the spark plug boot.
9. Store the product in a well-ventilated place
that is inaccessible to children.
NOTE: Keep the product away from corrosive
agents such as garden chemicals.
IMPORTANT: Abide by all federal and local
regulations for the safe storage, handling and
disposal of petrol.
Never store this product with any fuel
remaining in the tank, fuel lines or
carburettor. Your warranty does not
include coverage for damage covered
by stale or contaminated fuels.
CAUTION:
To Store the Product Long Term
(more than 30 days)

Troubleshooting:
16
Problem Possible Cause Solution
Engine will not start 1. Set switch to the ON position.
2. Remove the spark plug. Re-attach the spark plug
and lay the spark plug on the metal cylinder. Pull the
starter cord and watch for a spark at the spark plug
tip. If there is no spark, repeat the test with a new
spark plug.
3. Push primer bulb until the bulb is full of fuel. If the
bulb does not fill, the primary fuel delivery system is
blocked. If the primer bulb fills, the engine may be
flooded. (See next item.)
4. Remove the spark plug. Turn the product so that the
spark plug hole is aimed at the ground. Make sure
the choke lever is open and pull the starter cord
10 to 14 times. This clears excess fuel from the
engine. Clean and re-install the spark plug. With the
trigger fully depressed, pull the starter cord 3 times.
If the engine does not start, set the choke lever to
closed and follow normal starting instructions. If the
engine still fails to start, repeat the procedure with a
new spark plug.
5. Contact an authorised service dealer.
1. Switch set to OFF
position.
2. No spark.
3. No fuel.
4. Flooded engine.
5. Starter cord pulls
harder now than
when new.
1. Check oil fuel
mixture.
2. Air filter is dirty.
3. Spark arrestor
screen is dirty.
Engine does not
reach full speed
1. Use fresh fuel and the correct 2 stroke oil mix.
2. Clear the air filter.
3. Clean the spark plug arrestor.
1. Operating the
product at part
throttle.
2. Check oil/fuel
mixture.
3. Air filter is dirty.
Oil drips from
muffler
1. Operate the product at full throttle.
2. Use fresh fuel and the correct 2 stroke oil mix.
3. Clean the air filter.

Warranty
17
Petrol Operated Products
Limited Warranty
Pope warrants to the original retail purchaser that this Petrol Powered Product is free from defects in
material and workmanship and agrees to repair or replace, at our option, any defective Product free of
charge within these time periods from the date of purchase:
•Two years for Petrol Powered Trimmer, Brushcutter and Blower Vacuum Products, if the Product is
used for personal, family, or household use;
•90 days if the Petrol Powered Trimmer, Brushcutter and Blower Vacuum Products are used for any
other purpose, such as commercial or rental.
Instructions for Obtaining Warranty Service
Any part of the Pope Product found in the reasonable judgement of Toro Australia Pty Limited to be
defective in material or workmanship will be repaired or replaced by an Authorised Service Dealer for this
product without charge for parts or labour. To locate your nearest authorised service dealer, refer to the
list on the back page of this manual, check the website, or phone 1300 134 880.
The Product, including any defective part must be returned to an Authorised Service Dealer for this
product within the warranty period. The expense of delivering the product to the Authorised Service
Dealer for warranty work and the expense of returning it back to the owner after repair or replacement will
be paid for by the owner.
Proof of purchase will be required by the dealer to substantiate any warranty claim. All warranty work
must be performed by a Service Dealer authorised by Toro Australia Pty Limited to service this product.
The warranty does not cover any product that has been subject to misuse, neglect, negligence or
accident or that has been operated in any way contrary to the operating instructions as specified in the
Operator’s Manual. This warranty does not apply to any damage to the Product that is the result of
improper maintenance or to any Product that has been altered or modified so as to adversely affect the
product’s operation, performance or durability or that has been altered or modified so as to change its
intended use. The warranty does not extend to repairs made necessary by normal wear, misuse or by the
use of parts or accessories which are either incompatible with the product or adversely affect its
operation, performance or durability.
Toro Australia Pty Limited reserves the right to change or improve the design of any Petrol Product
without assuming any obligations to modify any product previously manufactured.
ALL IMPLED WARRANTIES ARE LIMITED TO THE DURATION OF THE STATED WARRANTY PERIOD.
ACCORDINGLY, ANY SUCH IMPLIED WARRANTIES INCLUDING MERCHANTABILITY, FITNESS FOR A
PARTICULAR PURPOSE, OR OTHERWISE, ARE DISCLAIMED IN THEIR ENTIRETY AFTER THE
EXPIRATION OF THE APPROPRIATE TWO-YEAR OR NINETY DAY WARRANTY PERIOD.
TORO AUSTRALIA PTY LIMITED’S OBLIGATION UNDER THIS WARRANTY IS STRICTLY AND
EXCLUSIVELY LIMITED TO THE REPAIR AND REPLACEMENT OF DEFECTIVE PARTS AND TORO
AUSTRALIA PTY LIMITED DOES NOT ASSUME OR AUTHORISE ANYONE TO ASSUME FOR THEM
ANY OTHER OBLIGATION. TORO AUSTRALIA PTY LIMITED ASSUMES NO RESPONSIBILITY FOR
INCIDENTAL, CONSEQUENTIAL OR OTHER DAMAGES INCLUDING, BUT NOT LIMITED TO EXPENSE
OF RETURNING THE PETROL POWERED PRODUCT TO AN AUTHORISED SERVICE DEALER AND
EXPENSE OF DELIVERING IT BACK TO THE OWNER, MECHANIC’S TRAVEL TIME TELEPHONE OR
TELEGRAM CHARGES, RENTAL OF A LIKE PRODUCT DURING THE TIME WARRANTY SERVICE IS
BEING PERFORMED, TRAVEL, LOSS OR DAMAGE TO PERSONAL PROPERTY, LOSS OF REVENUE,
LOSS OF USE OF THE PRODUCT, LOSS OF TIME OR INCONVENIENCE.
The above warranty does not exclude any condition or warranty implied by the Trade Practices Act 1974
or any other relevant legislation which implies any condition which cannot be excluded.

Authorised Pope Service Dealers
AUST. CAPITAL TERRITORY
Mitchell Lawnmower
Centre
MITCHELL
(02) 6241 4806
NEW SOUTH WALES
Agrifarm Implements
TAREE
(02) 6552 6888
Agrimow
COFFS HARBOUR
(02) 6652 9893
Barry Austin Mowers
FORSTER
(02) 6554 6935
Bega Farm Supplies
BEGA
(02) 6492 4466
Bike and Power
DURAL
(02) 9651 7170
Bill’s Mudgee Chainsaw
Centre
MUDGEE
(02) 6372 4122
Bridge Mower &
Chainsaw Centre
EAST GOSFORD
(02) 4325 2107
Central West Mowers
& Chainsaws
ORANGE
(02) 6362 0681
Cooma Power
Equipment
COOMA
(02) 6452 2622
Dawmac Industries
BERRIGAN
(03) 5885 2382
Deni Bike & Boat
DENILIQUIN
(03) 5881 5255
Dubbo Mowers &
Chainsaws
DUBBO
(02) 6882 3122/
(02) 6882 9499
Farm Moto
LISMORE
(02) 6622 3999
Grafton Power Products
GRAFTON
(02) 6642 2880
Harvey’s Mower Centre
WAGGA WAGGA
(02) 6925 2234
J & P Motorcycles
GRIFFITH
(02) 6964 2422
Keith Simmons
Engineering
YOUNG
(02) 6382 3999
Ken Mathews Mower
& Auto Centre
ULLADULLA
(02) 4455 1645
LW Burgess Pty Ltd
ARMIDALE
(02) 6772 2227
Lawnpower Pty Ltd
NOWRA
(02) 4421 4466
Macarthur Mowers
CAMDEN
(02) 4655 7793/ (02) 4655 6242
Moruya Mower &
Chainsaw Centre
MORUYA
(02) 4474 3322
Mower World
WAUCHOPE
(02) 6585 2053
Newcastle Chainsaws
ISLINGTON
(02) 4961 1332
Newcastle Chainsaws
RAYMOND TERRACE
(02) 4987 3837
Ranger Geale Enterprises
GOULBURN
(02) 4821 4266
S&T Haddad Mowers
MOREE
(02) 6752 4906
Scone Outdoors
SCONE
(02) 6545 3033
Small Engine Services
GLEN INNES
(02) 6732 1441
Tamworth Small Engines
TAMWORTH
(02) 6765 9737
The Irrigation Specialists
LEETON
(02) 6953 6700
The Mowers Warehouse
LITHGOW
(02) 6351 4008
Tinks
MACKSVILLE
(02) 6568 2344
Town & Country Water Shop
BATHURST
(02) 6331 9622
WH Ireland & Sons
MITTAGONG
(02) 4872 1999
Welvin Mower & Gas
NTH RICHMOND
(02) 4571 1662
NORTHERN TERRITORY
Winnellie Mower Repairs
WINNELLIE
(08) 8984 4529
QUEENSLAND
Aussie Mower Centre
HERVEY BAY
(07) 4125 3152
Boat or Mowers
GLADSTONE
(07) 4972 0135
Braschs Pty Ltd
CAIRNS
(07) 4051 1411
Casali’s
MAREEBA
(07) 4092 3841
David Evans Group
GATTON
(07) 5462 1266
David Evans Group
BILOELA
(07) 4992 1099
Dover & Sons
BEAUDESERT
(07) 5541 1977
Dover & Sons
BOONAH
(07) 5463 1388
Downs Mower Centre
TOOWOOMBA
(07) 4632 4000
Mower World
OXENFORD
(07) 5573 4388
Jackson’s Mower Centre
MACKAY
(07) 4957 5450
Kel’s Chainsaws &
Small Motors
EMERALD
(07) 4982 4701
Keppel Outdoor Products
YEPPOON
(07) 4925 0600
Mudgeeraba Mower
Centre
MUDGEERABA
(07) 5530 4477
Nanango Motors
NANANGO
(07) 4163 1108
Nowa Power Products
BUNDABERG
(07) 4153 1722
Rimrock Agencies
ROCKHAMPTON
(07) 4927 7033
Schilling Small Engines
MARYBOROUGH
(07) 4123 2833
Southside Small Engines
CAPALABA
(07) 3245 6011
Southwest Pumps,
Solar & Small Engines.
ROMA
(07) 4622 4528
Sunstate AG
DALBY
(07) 4672 3333
The Big Mower
BEERWAH
(07) 5494 6151
The Mower Place
BROWNS PLAINS
(07) 3800 4433
The Mower Supastore
BRENDALE
(07) 3205 1299
The Mower Warehouse
CABOOLTURE
(07) 5495 8822
The Watershed
INNISFAIL
(07) 4061 6177
Vic’s Mowers &
Small Engines
MOSSMAN
(07) 4098 1600
Warwick Westside
Chainsaws & Mowers
WARWICK
(07) 4661 2032
SOUTH AUSTRALIA
Mower Plus
SALISBURY SOUTH
(08) 8250 5666
Oaklands Road Mower
Centre
SOMERTON PARK
(08) 8294 9799
Peter Jennings Pumps
MT GAMBIER
(08) 8725 0722
TASMANIA
Central Coast Mower
Market
WEST ULVERSTONE
(03) 6425 3318
Eastern Shore Mowers
& Cycles
LINDISFARINE
(03) 6243 7776
Pellows Saws & Mowers
INVERMAY
(03) 6326 5722
Pellows Saws & Mowers
DEVONPORT
(03) 6424 8364
VICTORIA
Alphine Mowers
MONBULK
(03) 9752 0488
Bendigo Mower Service
BENDIGO
(03) 5443 5242
Benalla Chainsaws
BENALLA
(03) 5762 6177
Black’s Machinery
NAGAMBIE
(03) 5794 2534
Bob Crosby & Co.
WODONGA
(02) 6024 1333
Bolton Motorcycles &
Power Equipment
KYNETON
(03) 5422 2255
Central Gippsland
Mowers & Chainsaws
MORWELL
(03) 5134 8899
Dawn Mowers
SURREY HILLS
(03) 9830 5444
Drouin Mowers &
Chainsaws
DROUIN
(03) 5625 1079
Gendore Leongatha
LEONGATHA
(03) 5662 4044
Gendore
TOORADIN
(03) 5998 3216
Gisborne Power
Products
GISBORNE
(03) 5428 8844
Hastings Mowers
HASTINGS
(03) 5979 1382
Henderson Mowers
BALLARAT
(03) 5331 1618
JR’s Mowers & Chainsaws
BAIRNSDALE
(03) 5152 3202
Magic Mowers
MILDURA
(03) 5022 7088
Mariot’s Motor Cycles
&Equip P/L
LEONGATHA
(03) 5662 2028
Molin Motorcycles &
Marine
KOONDROOK
(03) 5451 1500
Mornington Mowers
MORNINGTON
(03) 5977 1488
Mortons Machinery
RINGWOOD
(03) 9870 7133
Mower Corner
COLAC
(03) 5231 5022
Mowers Galore
NORTH GEELONG
(03) 5272 1066
Mowers Galore
GROVEDALE
(03) 5244 0620
Philip Russell
Motorcycles
WARRNAMBOOL
(03) 5562 0222
Powerquip Mower &
Chainsaw Centre
DOVETON
(03) 9793 3177
Powerquip Mower &
Chainsaw Centre
HALLAM
(03) 9796 5045/
(03) 9796 3687
Roy Hill Motors
SHEPPARTON
(03) 5821 8877
Stihl Echuca Sales &
Service
ECHUCA
(03) 5480 9566
Stihl Shop Seymour
SEYMOUR
(03) 5799 1215
T&I Horticulture
SWAN HILL
(03) 5032 4555
Vin Rowe Farm Machinery
WARRAGUL
(03) 5623 1362
Yarra Glen Mower Centre
YARRA GLEN
(03) 9730 1988
WESTERN AUSTRALIA
Busselton Mower World
BUSSELTON
(08) 9754 1969
Cloverdale Hardware
CLOVERDALE
(08) 9479 4383
Eastern Hills Saws &
Mowers
MUNDARING
(08) 9295 2466
Geraldton Mower Repairs
GERALDTON
(08) 9964 4036
Star Sales & Service
ALBANY
(08) 9842 2455
This manual suits for next models
1
Table of contents
Other Pope Trimmer manuals
Popular Trimmer manuals by other brands

Husqvarna
Husqvarna 536LiP4 Operator's manual

Ikra
Ikra RT 2008 DV GT 5530 Gardol operating instructions

Homelite
Homelite F2020 user manual

Echo
Echo SRM-210 - PARTS CATALOG SERIAL NUMBERS... parts catalog

Echo
Echo GT-200R - PARTS CATALOG SERIAL NUMBER S72612001001 -... parts catalog

Remington
Remington Nano Groom Essentials NE3455 manual