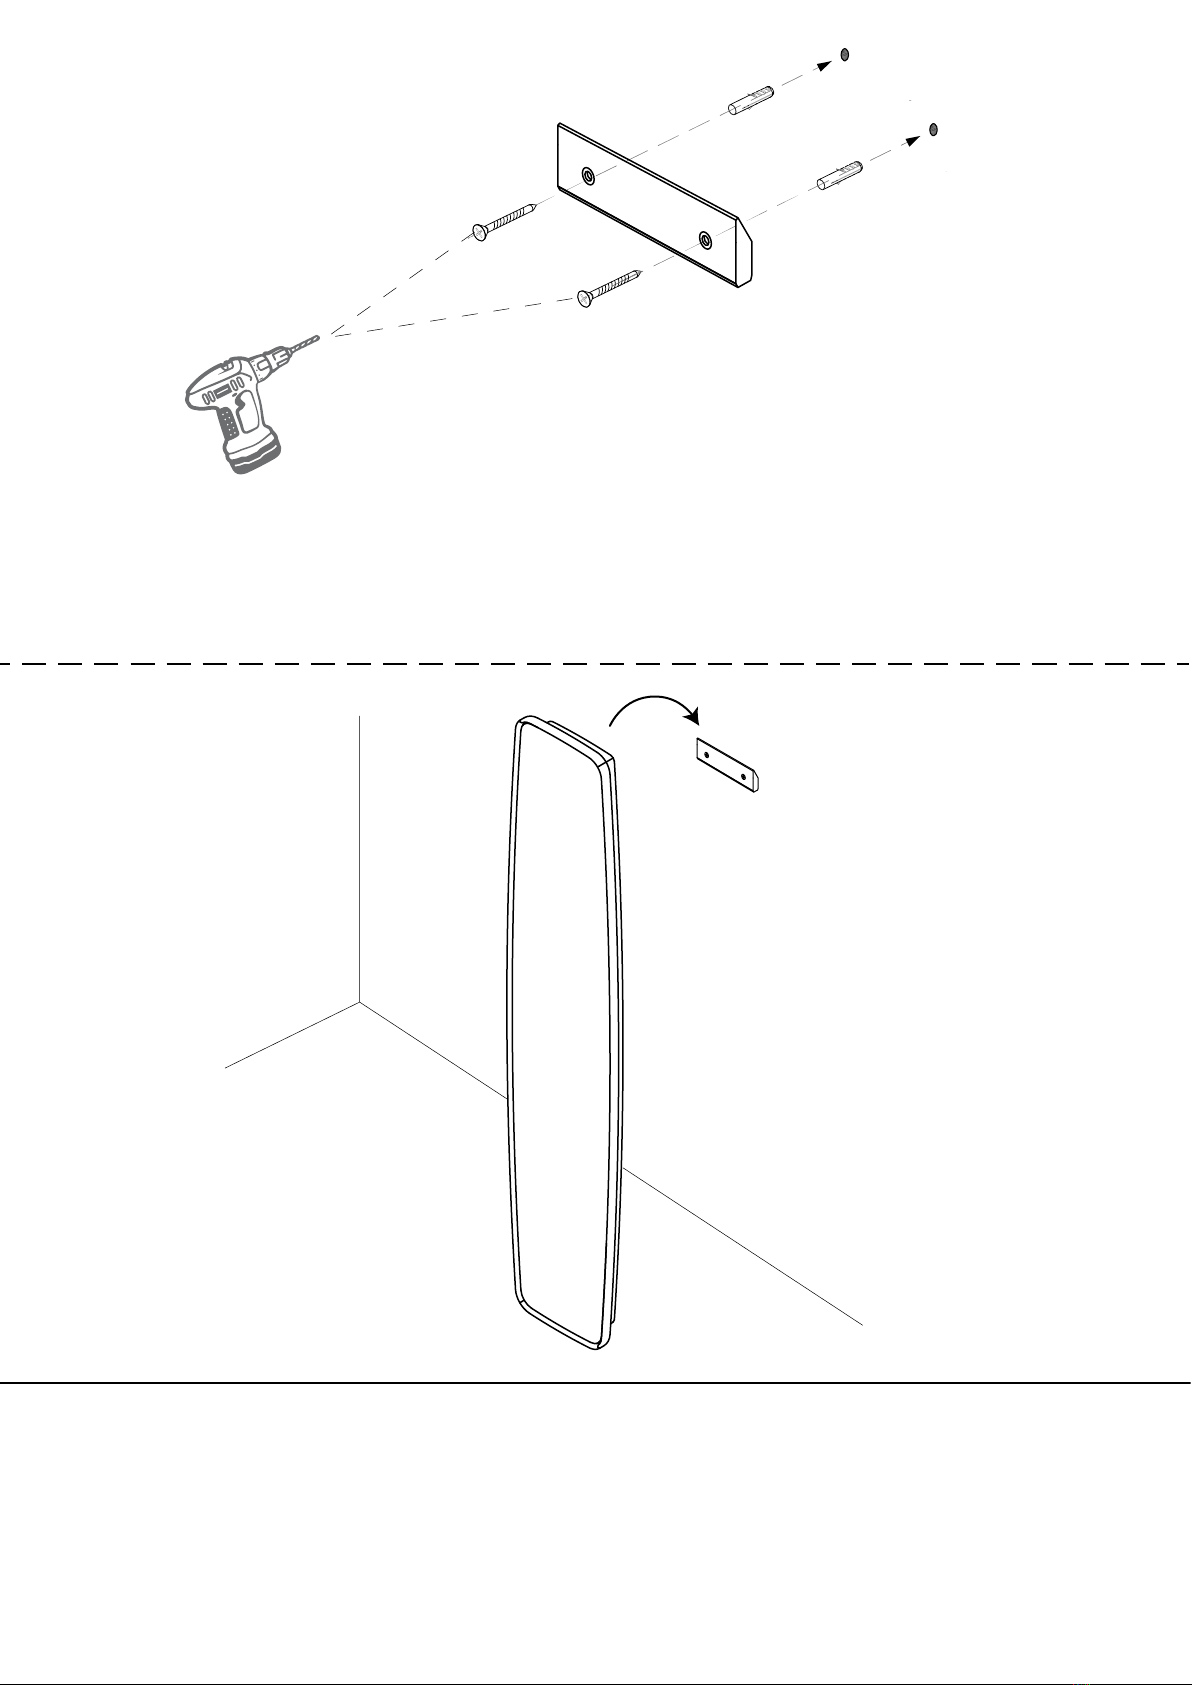
Agganciare lo specchio sul supporto.
Hang the mirror on the support.
Praticare i 2 fori precedentemente segnati sul muro e fissare il supporto alla parete con viti e tasselli in dotazione. Verificare che tasselli
e viti in dotazione siano adatti al tipo di parete alla quale verrà fissato il supporto, altrimenti provvedere alla sostituzione con materiale
idoneo.
Drill the 2 holes and previously marked and fix the support to the wall with the dowels supplied. Please check that the hardware
supplied is suitable for the wall the mirror will be hung on.
3
4
DISCLAIMER Any included instructions are meant for general application only. All assembly, installation and mounting applications are the sole responsibili-
ty of the customer/installer. Porada accepts no liability for the safe and proper assembly, installation and mounting of any of its products. Any and all included
instructions are meant for advisory purposes only and the use of them is completely voluntary.
Porada makes no representations or warranties, express or implied, in connection with the information. Any use or application of this information will be at
the customer/installers sole risk and responsibility. Porada will not be responsible for any loss, claims or damages arising out of the use or application of this
information, regardless of whether the same may be known or foreseeable.
It is the sole responsibility of the customer/installer to see that all installation and mounting procedures conform to any local and state codes and statutes
that may apply. For this reason it is recommended that all assembly, installation and mounting be performed by a qualied contractor.
PORADA
Arredi s.r.l. - 22060 Cabiate (Como) Italia - Loc. Porada - via B. Buozzi, 2 - Tel. +39 031 766215 - Fax +39 031 768386 - [email protected] - www.porada.it