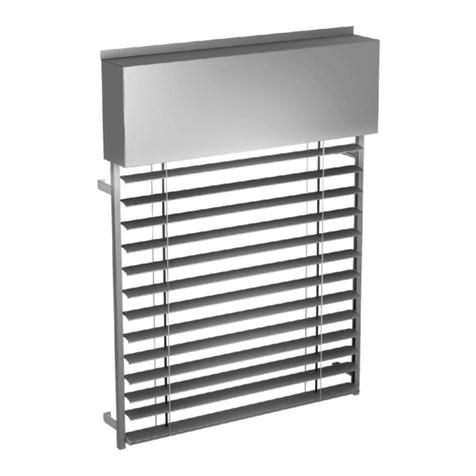
Portos ZF3000-BX User guide

R
INSTRUCTIONS FOR
INSTALLATION AND OPERATION
OF THE EXTERNAL BLIND
®
ZF3000 -BX

ZF3000 -BX BLIND INSTALLATION TYPES
®
A INSTALLATION TYPE - flush-mounted
C INSTALLATION TYPE - on the facade (box 250)
B INSTALLATION TYPE - flush-mounted with a spacer
D INSTALLATION TYPE - on the facade
with a spacer (box 250)
max. 800mm
2.

Before starting installation of the external blind, please read the following instructions.
During transportation and storage, the blind should lie horizontally in a place protected from damage
to the entire structure. The blind should not be placed on the side wall. Any modifications
or changes to the design of the external blind can only be made after consultation with the manufacturer.
Blinds should be installed on an even surface.
Installation of external blinds should be conducted by persons competent in the area
of compliance with health and safety rules and applicable building regulations.
In the case of external blinds operated with an electric drive, the installation can only be carried out by a person
with appropriate permissions (SEP rights up to 1 kV).
Directly before installation, unpack the blind and check if there are all elements necessary
for its installation.
1. Tools needed to install the external blind. The PORTOS company does not provide screws, dowels, cables for placing
the electrical installation.
2. In the case of dimensioning, the smallest dimension taken, is the right dimension.
Dimensioning - ZF3000 external blind
aluminium guides, installation in the window recess
Dimensioning - ZF3000 external blind
aluminium guides,
installation on the facade/ flush-mounted installation
Sz = So
Wz = Wo
EXPLANATIONS TO DIMENSIONING:
Sz - blind width, So - hole width, Wz - blind height,
Wo - height of the hole together with the box height
Sz = So*, Wz = Wo
So
Wo
Wz
Ws
PP
EXPLANATIONS TO DIMENSIONING:
Sz - blind width, So - hole width
Wz - blind height, Wo - hole height, Ws - box height
P - guide width (27mm),
Wz = Wo + Ws
Installation on the facade: Sz = So + 2 x P
Flush-mounted installation: Sz = window width*
ø 6,10,12
INSTALLATION WITH GUIDES
* - It is recommended to take into account the installation clearance for free processing of wood elements.
NOTE - In the case of installation in the window recess, make sure the recess width and height are equal in all points.
If they are different, assume the dimension of the minimum or make a proper correction of the hole.
3
INSTALLATION OF ZF3000-BX EXTERNAL BLINDS

3. Drill holes in the guides. Using a drill of ø6 mm make a hole
through all chambers of the guide, and using a drill of ø10 mm
increase the hole in first two walls on the outer side of the guide.
9. Precisely slide the box onto the guides, carefully inserting
the side pins into the top of the guides.
8. Make a hole for the mechanism in the marked place with
a drill ø12 mm.
7. Mark the drilling place for the cardan crank mechanism on the
wall - 20 mm from the outer edge of the guide and 200 mm
from the edge of the window recess/ frame.
200 mm
20 mm
6.In the version of the blind with a mosquito net, fasten the
mosquito net guides as shown in the figure above with 4.2x13
screws mounted every 50 cm.
5. Fasten the guides to the window frame with appropriate
screws - minimum three per side. (The PORTOS company
offers guide drilling free of charge).
4. Prepare the guides - screw the bottom plugs to the guides
using 3x16 screws. Break out a part of the side wall in the
plug of the guide with a mosquito net, as shown in Figure 1.
1
3a. Drill holes in the guides. Using a drill of ø6 mm make a hole
through all chambers of the guide, and using a drill of ø10 mm
increase the hole in first three walls on the outer side of the guide.
ø 6 ø 10
F-FBR-10, F-FBR-20 F-FBR-30, F-FBR-40
ø 6 ø 10
4INSTALLATION OF ZF3000-BX EXTERNAL BLINDS
max. 800mm
2.

15. Stretch the net and check the operation of the mosquito
net. If necessary, adjust the position of the latch clips for
the mosquito net in the guides by loosening the clips with
a 2 mm Allen key and set them at the appropriate height.
14. Lower the net and, holding the bottom lath diagonally,
place the net together with the lath in the guides below
the sliders.
12. To install the package, unscrew the screws fastening
the inspection cover.
5
INSTALLATION OF ZF3000-BX EXTERNAL BLINDS
10. Drill holes for mounting pins in the rear part of the box.
11. Screw the box to the wall with appropriate mounting pins.
11a. Drill holes for mounting pins through the brackets, then
screw them to the wall.
BOX ANCHORING 250 INSTALLATION ON THE FACADE BOX ANCHORING, FLUSH-MOUNTED INSTALLATION
10a. Apply the mounting brackets (1) to the previously
prepared holes in the box and screw them with the M6x12
screw (included in the set). Option for an extra charge.
1
1
13. Set the top rail handles so that they do not collide with
the bearing or the motor.

23. Tighten the screws fastening the inspection cover.
22. Check the correct operation of the blind by lowering
and lifting it several times.
21. Install the crank mechanism by inserting the crank pin into
the box through the hole in the wall, and then mount it to the
wall using the dowels. Install and screw the mechanism handle.
20. To install the crank of the lifting mechanism on the inside,
insert the crank pin into the wall (1) into the previously
prepared hole as shown in Figure 2. Mark the drilling places
for the dowels on the wall. Remove the mechanism, then
drill holes for the dowels.
2
1
6INSTALLATION OF ZF3000-BX EXTERNAL BLINDS
19. View of the properly installed guides with guide inserts.
18. Put the guide insert into the guides from the bottom.
17. Close the top rail handles and tighten the screws.
16. Install the blind package into the open handles in such
a way that the "WINDOW SIDE" label with information
about the installation side, is on the window side.
WINDOW
SIDE
max. 800mm
2.

25. View of the ZF3000-BX external blind installed.
24. After screwing the guides, insert the covering end caps
into the holes.
max. 800mm
2.

1. Drive for cardan crank.
The operation of the crank lifting mechanism requires special caution and skills because the gear used
allows for obtaining large forces that may damage the elements of the external blind. Therefore, stop
turning the crank when you feel resistance or notice that the blind curtain has stopped during lifting or
lowering. In external blinds, turning the crank clockwise causes lifting the blind curtain, while turning the
crank counter-clockwise causes lowering the blind curtain.
2. Drive for the motor.
Press the key of the remote/ switch with the appropriate marking of the blind movement direction (up/
down). At this moment the blind will start lifting or lowering. To stop the motor operation, press the MY
button on the remote (in the case of a switch, release the key or press the key with the opposite
direction). When the blind is fully open or closed, the motor will be automatically stopped by the limit
switch. Use the scroll wheel on the remote for precise setting the position of the external blind slats.
In case of noticing that the blind curtain has stopped and the motor is still running, stop the motor
immediately by pressing the MY button on the remote (in the case of a switch with non-support mode
release the key or in the case of a switch with support mode press the key with the opposite direction).
The motor has a thermal switch that stops the operation after reaching a certain temperature. The time
of continuous motor operation is about 4 minutes. Then, the motor can be turned off until it cools down,
i.e. for about 4 to 5 minutes, while the total time needed for cooling the drive is 30 minutes.
INSTRUCTIONS FOR OPERATION
OF THE EXTERNAL BLIND
7
max. 800mm
2.

Emergency situations:
1. It should be noted that in winter during strong frosts, do not leave the blind partially lifted when
opening the window. The difference in temperatures causes the water vapor to deposit on the
blind and consequently its subsequent freezing. Therefore, before opening the window, the blind
slats should be fully lifted.
2. In winter, slats may be covered with ice and frozen to the ground. An attempt to open a blind in
such a situation may lead to breaking of the curtain (especially with the electric drive). In the
period of snowfalls or heavy frosts, before activating the blind, check that there is no ice or snow
on the window sill or in the guides. If the blind is icy, crush the ice gently or wait for it to melt.
3. During the expected snowfalls or strong frosts it is recommended to turn off the timer control and
operate the blinds manually, controlling their opening and closing.
4. In the event of possible strong gusts of wind, it is recommended to leave the blinds with the slats
fully lifted.
Maintenance:
The basic rules for the product maintenance consist of cyclical monitoring of the correctness of coiling
and uncoiling the blinds, precise positioning of the end positions and cleaning of accessible elements of
the product. The blind should be cleaned with a soft cloth using generally available cleaning agents. The
use of pressure washers, strong cleaning agents and solvents is forbidden. When cleaning the product,
it is absolutely not advisable to use sharp tools and cleaning agents that cause scratches. In the case of
cleaning the product, it is unconditionally necessary to prevent the possibility of water getting into the top
rail of the product.
Safety regulations:
1. Do not stay in the blind operation area during lifting and lowering.
2. When using the blind, attention should be paid to the condition of the tape and ladder. Their
damage may cause the slats to fall automatically and damage to the blind elements.
3. In case of finding any part of the blind damaged or irregularities in its operation, cease its
operation and call the service. Using a damaged or a defective blind may result in a risk to the
user's health and life.
4. In the case of replacement of damaged elements, use only original spare parts.
5. In the event of a breakdown, it is forbidden to make any temporary repairs.
6. Any work related to the repair or replacement of damaged parts of the external blind may only be
performed by a trained person. Self-repair attempts may result in the loss of the warranty.
7. The remote control elements should be stored in places that are difficult to reach for children.
8. Do not use the product with visible signs of damage or wear of the electrical wiring.
8
max. 800mm
2.

WARNING - FOLLOWING THESE INSTRUCTIONS
IS IMPORTANT FOR THE SAFETY OF PERSONS.
KEEP THESE INSTRUCTIONS
11
PORTOS TR7
spółka z ograniczoną odpowiedzialnością s. k.
PN-EN 13659
All of the certificates of the useful properties
are available on the website www.portos.company
max. 800mm
2.
Other Portos Window Blind manuals