manuals.online logo
Brands
  1. Home
  2. •
  3. Brands
  4. •
  5. Portos
  6. •
  7. Window Blind
  8. •
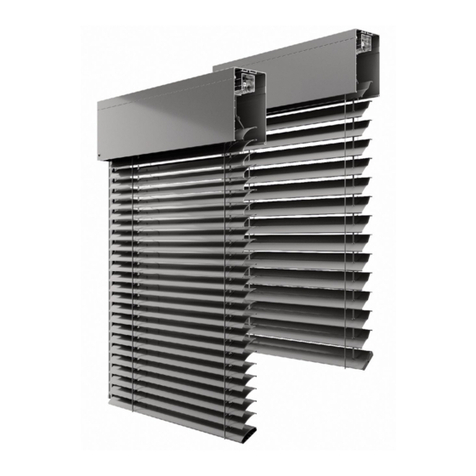
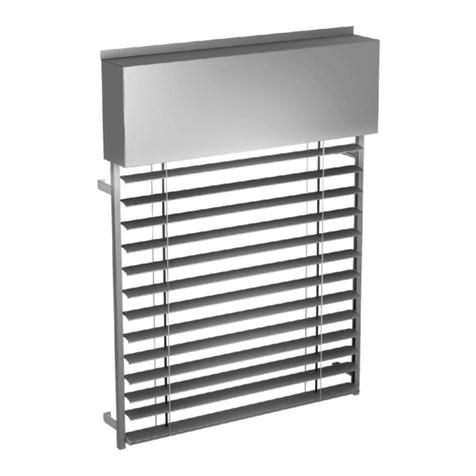
  9. Portos SHUTTERS SN5000 User manual

Portos SHUTTERS SN5000 User manual

AN INSTALLATION MANUAL
WALL-MOUNTED ROLLER
®
SHUTTERS SN5000
1. Before installation of the lifting yoke, attach PURS STANDARD
expanding tape (PORTOS does not include this element in the set,
but it is available in our product offering) to the window frame with glue.
2. The lifting yoke shall be secured to the window profile.
3. Attach the insulation material to the lifting yoke with glue (optional).
4. Choose where the fixing bolts (fix nipples) shall be fixed by
measuring and marking the right distance from the frame edge,
as shown above
INSTALLATION OF WALL-MOUNTED ROLLER SHUTTERS SN5000
5. The fixing bolts (fix nipples) should be mounted approx. every
50 cm apart, however, there should be at least 3 of such bolts per
each side, at the same time 5 cm distance from the bottom and
upper edge of the window frame shall be observed. After tightening,
loosen the bolt by ¼ of the revolution to facilitate insertion of the guide.
6. Before installation of the guides, an undercut shall be made
in the upper part of the guides for the steel side handle. All
such undercuts are made in PORTOS.
7. Fit sliders in the upper of the guides by fixing them with
assembly glue.
8. Fit the assembled box at the angle of approx. 60° into the lifting
yoke secured to the window profile, then position the box evenly
on the window frame.
INTERNAL REVISION (INSPECTION) COVER
50mm
500mm
100mm
7mm
38mm
9. Fix the steel side handles to the window using self-tapping
screws.
10. Next, slide the guides over the earlier screwed to the
window frame fix nipples.
11. Place bottom end caps over the guides and fix them with bolts.
12. The ready set shall be installed in compliance with installation
instructions in the earlier made recess. Before final anchoring of
the shutters, their vertical and horizontal alignment shall be verified.
INSTALLATION OF A STATIC CONSOLE
13. Static console shall be fixed to the box by means of plastic
fixing screws included in the set.
14. Before installation of the lifting yoke, attach PURS STANDARD
expanding tape (PORTOS does not include this element in the set,
but it is available in our product offering) to the window frame with glue.
15. The lifting yoke shall be secured to the window profile.
16. Drill openings – first, approx. 10 cm from the edges of the steel
reinforcement of the box, and then every 40 cm on the steel
reinforcement. Fix the reinforcement and the lifting yoke to the window
frame using screws (self-tapping screws are recommended).
INSTALLATION OF WALL-MOUNTED ROLLER SHUTTERS SN5000
4
17. In the place delimited by earlier fixed reinforcement and the lifting yoke,
attach the bottom part of the console to the window frame using screws
(self-tapping screws are recommended).
18. Attach the insulation material to the lifting yoke using glue. Leave
sufficient space for the installation of the console as show in the
picture. Continue installation of the box following steps 4-12
19. In the lintel, drill openings through the anchor and the box.
20. Next, anchor the console to the lintel using dowels.
21. Connect both parts of the console using M6 screws
included in the set.
22. Close the revision (inspection) cover.
23. Winder should be situated at the level from 0.9m to 1.3m
from the floor. Roll down the aluminium shutter profile, and
then cut the tape so that its length is 25 cm below the position
in which the winder is installed.
Extend the tape through the winder casing opening, cut the
tape and hook to the clip. Holding tightly the spring casing,
turn and release the winder stopper by pushing it. Close the
winder and fix it to the wall. (see the installation manual of
the tape winder).
In case of electrically driven roller shutters, connect power
control elements and power supply in compliance with
the installation manual of the drive/motor and according to
the technical requirements applicable to such connections.
All electrical elements should be connected by a properly
licensed person.
INSTALLATION OF WALL-MOUNTED ROLLER SHUTTERS SN5000
7mm
100mm
1. Fix the external revision (inspection) cover to the front of the
window profile using bolts, as shown in the picture.
2. Choose where the fixing bolts (fix nipples) shall be fixed by
measuring and marking the right distance from the frame edge,
as shown above.
3. The fixing bolts (fix nipples) should be mounted approx. every
50 cm apart, however, there should be at least 3 of such bolts per
each side, at the same time 5 cm distance from the bottom and
upper edge of the window frame shall be observed. After tightening,
loosen the bolt by ¼ of the revolution to facilitate insertion of the guide.
4. Fix the steel side handles to the window using self-tapping
screws.
5. Before installation of the guides, an undercut shall be made
in the upper part of the guide adapter for the steel side handle.
All such undercuts are made in PORTOS.
6. Slide the guides into the earlier prepared adapters.
7. Insert sliders into upper parts of the guides, fixing them
with glue.
8. Next, slide the adapters with guides over the earlier screwed
to the window frame fix nipples.
EXTERNAL REVISION (INSPECTION) COVER
5
50mm
36mm
INSTALLATION OF WALL-MOUNTED ROLLER SHUTTERS SN5000
15. From the top of the box, insert the upper part of the console,
then connect the whole console from the bottom of the box
using a screw, as shown in the picture.
16. Fix the angle bracket to the upper part of the console using
a screw and a nut.
6
9. Place the bottom end caps over the guides and fix them
with glue.
10. The ready set shall be installed in compliance with installation
instructions in the earlier made recess. Before final anchoring of
the shutters, their vertical and horizontal alignment shall be verified.
11. Obudowę zwijacza należy zamontować na wysokości około
1100mm od przewidywanego poziomu posadzki. Do
zamocowania obudowy w otworze użyć gipsu, kleju gipsowego
lub kleju montażowego.
12. Zamocować taśmę w zwijaczu następnie zwijacz włożyć w
obudowę i przykręcić płytkę maskującą.
11. Before installation of the bottom fixing profile with a seal, an
opening shall be drilled with a ø 22 mm drill in order to fix
the console handle.
12. Insert the bottom element of the static console in
the opening, then attach the bottom fixing profile to the seal
using glue.
13. Use a ø 6 mm drill to make a relevant opening in
the window frame.
14. Using a 6mm self-tapping screw connect the window frame
with the bottom part of the console.
INSTALLATION OF A STATIC CONSOLE
INSTALLATION OF WALL-MOUNTED ROLLER SHUTTERS SN5000
7
17. Anchor the console in the upper part to the lintel from the inside and from the outside.
18. After fixing the upper part of the console, fix the bottom
part by tightening the screws appropriately to obtain a rigid
connection between the window and lintel.
INSTALLATION OF WALL-MOUNTED ROLLER SHUTTERS SN5000
WARNING - FOR THE SAFETY OF PEOPLE, IT IS IMPORTANT
TO FOLLOW THIS INSTALLATION MANUAL.
KEEP THIS INSTALLATION MANUAL AT ALL TIMES.
11
PORTOS TR7
spółka z ograniczoną odpowiedzialnością

Other Portos Window Blind manuals

Portos ZF3000-BX User guide

Portos

Portos ZF3000-BX User guide

Portos ZF3000 C80 Guide

Portos

Portos ZF3000 C80 Guide

Popular Window Blind manuals by other brands

Cosiflor FD Slope 3 quick guide

Cosiflor

Cosiflor FD Slope 3 quick guide

CURRENT Luxury SilenTrac installation guide

CURRENT Luxury

CURRENT Luxury SilenTrac installation guide

Velux INTEGRA Solar DSL instructions

Velux

Velux INTEGRA Solar DSL instructions

Roto ZJA M installation manual

Roto

Roto ZJA M installation manual

SMARTWINGS Drapery Quick installation guide

SMARTWINGS

SMARTWINGS Drapery Quick installation guide

SOMFY Sonesse 40 RTS installation instructions

SOMFY

SOMFY Sonesse 40 RTS installation instructions

Vista Simplicity Cellular Shades TDBU quick start guide

Vista

Vista Simplicity Cellular Shades TDBU quick start guide

Louvolite R4045 instructions

Louvolite

Louvolite R4045 instructions

Artens inga Assembly, Use, Maintenance Manual

Artens

Artens inga Assembly, Use, Maintenance Manual

Benthin RM10 quick start guide

Benthin

Benthin RM10 quick start guide

Draper Clutch-Operated FlexShade instructions

Draper

Draper Clutch-Operated FlexShade instructions

Velux SMG manual

Velux

Velux SMG manual

HunterDouglas Wood Blinds Installation/Care

HunterDouglas

HunterDouglas Wood Blinds Installation/Care

smart home WPC010 instructions

smart home

smart home WPC010 instructions

HunterDouglas LiteRise Installation

HunterDouglas

HunterDouglas LiteRise Installation

MOTION BLINDS CM-36-E Setup guide

MOTION BLINDS

MOTION BLINDS CM-36-E Setup guide

HunterDouglas Luminette PowerView Quick tips

HunterDouglas

HunterDouglas Luminette PowerView Quick tips

HOMEDEPOT 1001382583 manual

HOMEDEPOT

HOMEDEPOT 1001382583 manual

manuals.online logo
manuals.online logoBrands
  • About & Mission
  • Contact us
  • Privacy Policy
  • Terms and Conditions

Copyright 2025 Manuals.Online. All Rights Reserved.