Power works PTF314 User manual

EN OPERATOR MANUAL
KO 사용 설명서
นาง้ชใรากอืมู่ค
操作手冊
ZH_TW 操作手冊
2200973
PTF314
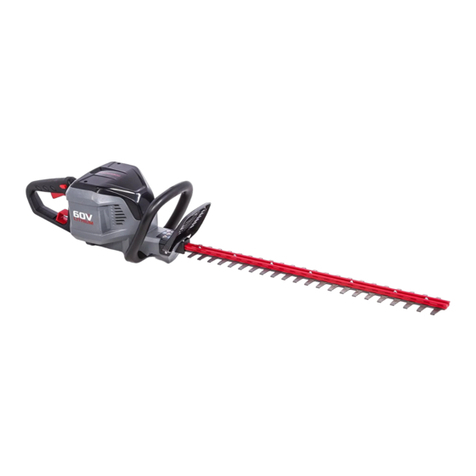
HEDGE TRIMMER
TH
ZH
고지 전정기
้มไมุ่พวนแม็ลเงอ่ืรคเ
绿篱机
籬笆修剪機
OriginalInstructions/기본 지침서/มิดเำนะนแำค /使用手册原版翻译/使用手冊原版翻譯

1 Description......................................... 4
1.1 Purpose.............................................................. 4
1.2 Overview........................................................... 4
2 Safety.................................................. 4
3 Installation......................................... 4
3.1 Unpack the machine.......................................... 4
4 Operation........................................... 4
4.1 Start the machine............................................... 5
4.2 Stop the machine............................................... 5
4.3 Operation tips.................................................... 5
5 Maintenance.......................................5
5.1 Clean the machine............................................. 5
5.2 Lubricate the blade............................................ 5
6 Store the machine..............................5
7 Troubleshooting................................. 6
8 Technical data....................................6
9 EC Declaration of conformity.......... 6
3
English EN

1 DESCRIPTION
1.1 PURPOSE
This machine is intended for cutting and trimming hedges and
bushes in domestic use.
1.2 OVERVIEW
Figure 1
1Blade cover
2Blade
3Hedge trimmer head
4Coupler
5Safety lock button
6Trigger
7Rear handle
8Battery release button
9Pivoting button
2 SAFETY
WARNING
Make sure that you do/obey all safety instructions.
Refer to Safety Manual.
3 INSTALLATION
• Replace the battery pack or the charger immediately if the
battery pack or charger cord is damaged.
• Exam that the machine is in the OFF status before you
install or remove the battery pack.
3.1 UNPACK THE MACHINE
WARNING
Make sure that you correctly assemble the machine before
use.
WARNING
• If the parts are damaged, do not use the machine.
• If you do not have all the parts, do not operate the
machine.
• If the parts are damaged or missing, speak to the service
center.
1. Open the package.
2. Read the documentation in the box.
3. Remove all the unassembled parts from the box.
4. Remove the machine from the box.
5. Discard the box and package in compliance with local
regulations.
3.1.1 INSTALL THE BATTERY PACK
Figure 2
WARNING
• If the battery pack or charger is damaged, replace the
battery pack or the charger.
• Stop the machine and wait until the engine stops before
you install or remove the battery pack.
• Read, know, and do the instructions in the battery and
charger manual.
1. Align the lift ribs on the battery pack with the grooves in
the battery compartment.
2. Push the battery pack into the battery compartment until
the battery pack locks into place.
3. When you hear a click, the battery pack is installed.
3.1.2 REMOVE THE BATTERY PACK
Figure 2
1. Push the battery release button.
2. Remove the battery pack from the machine.
3.1.3 FIT THE HEDGE TRIMMER HEAD
Figure 3
The hedge trimmer head can be mounted directly into handle
pole so as to achieve the standard length.
1. Insert the handle pole into the hedge trimmer head.
2. Slide the collar upwards and turn it clockwise until it is
completely tightened.
WARNING
Periodically check the connections to ensure that they are
tightened securely.
3.1.4 EXTENSION OF THE MACHINE
Figure 3
The maximum reach can be achieved by fitting the extension
tube between the handle pole and the hedge trimmer head.
1. Insert the handle pole into the hedge trimmer head.
2. Slide the collar upwards and turn it clockwise until it is
completely tightened.
WARNING
Periodically check the connections to ensure that they are
tightened securely.
3.1.5 REMOVE THE HEDGE TRIMMER
HEAD/ HANDLE POLE
Figure 3
1. Rest pole hedge trimmer on the ground, loosen the
coupler then take off the trimmer head/ handle pole.
4 OPERATION
• Touch the blade carefully.
4
English
EN

• Do not put your fingers into the notches or in position
where they can get cut.
• Do not touch the blade unless you remove the battery
pack.
• Do not use the machine if the blade is damaged or bent.
• Remove all objects such as cords, lights, wire, or string
which can become entangled in the cutting blade and
create a risk of personal injury.
WARNING
If the blade jams on an electrical cord or line, DO NOT
TOUCH THE BLADE! IT CAN BE LIVE AND
DANGEROUS. Do the steps below:
1. Hold the insulated rear handle or put the machine down
and away from you.
2. Disconnect the electrically service to the damaged line
or cord before you try to free the blade.
4.1 START THE MACHINE
Figure 4
1. Remove the scabbard.
2. Press the safety lock button using your thumb and at the
same time squeeze the trigger.
WARNING
Hold the machine with hands during operation.
NOTE
If the machine accidentally falls,it will stop and the blade
will fully stop after a few seconds. The machine will then
locks OFF.
4.2 STOP THE MACHINE
1. Release the trigger to stop the machine.
4.3 OPERATION TIPS
• Start by trimming the top of the hedge. Slightly tilt the
tool (up to 15° relative to the line of cut) so that the blade
tips point slightly towards the hedge. This will cause the
blades to cut more effectively. Hold the tool at the desired
angle and move it steadily along the line of cut. The
doublesided blade allows you to cut in either direction.
• In order to obtain a very straight cut, stretch a piece of
string along the length of the hedge at the desired height.
Use the string as a guideline, cutting just above it.
• In order to obtain flat sides, cut upwards with the growth.
Younger stems move outwards when the blade cuts
downwards, causing shallow patches in the hedge.
• Take care to avoid any foreign objects. Especially avoid
hard objects such as metal wire and railings, as these
could damage the blades.
• Regularly oil the blades.
WARNING
Keep hands away from blade while operating. Contact with
blade will result in serious personal injury.
5 MAINTENANCE
CAUTION
Do not let brake fluids, gasoline, petroleum-based materials
touch the plastic parts. Chemicals can cause damage to the
plastic, and make the plastic unserviceable.
CAUTION
Do not use strong solvents or detergents on the plastic
housing or components.
WARNING
Remove the battery pack from the machine before
maintenance.
5.1 CLEAN THE MACHINE
WARNING
Keep the machine and the motor free of leaves, branches or
excessive oil to prevent fire risks.
• Use a moist cloth with a mild detergent to clean the
machine.
• Clean all moisture with a soft dry cloth.
• Use a small brush to clean the air vents.
5.2 LUBRICATE THE BLADE
To increase the efficiency and life of the blades, lubricate
them carefully after each work session:
• Put the machine on a flat and smooth surface.
• Use a soft cloth to clean the blades and a brush to remove
more dirt.
• Use a light layer of oil to lubricate the blades along the
top edge of the blade.
NOTE
We recommend to use the non-pollutant type oil.
6 STORE THE MACHINE
NOTE
Clean the machine before storage.
1. Remove the battery pack.
2. Attach the scabbard (optional).
3. Cool the motor.
4. Check that there are no loose or damaged components. If
it is necessary, replace the damaged components, tighten
5
English EN

screws and bolts, or speak to a person of an approved
service center.
5. Remove keys or tools used for maintenance.
6. Store the machine:
• indoors and out of children.
• prevent from inclement weather.
7 TROUBLESHOOTING
Problem Possible cause Solution
The motor shuts
down whilst work-
ing.
The battery pack is
not installed tight-
ly.
Make sure that
you tighlty instal-
led the battery
pack in the ma-
chine.
The battery pack is
out of power.
Charge the battery
pack.
The machine has
damage.
Do not use the ma-
chine and speak to
service center.
The machine
smokes during op-
eration.
The machine has
damage.
1. Immediately
stop the ma-
chine.
2. Remove the
battery.
3. Speak to serv-
ice center.
The motor is on,
blades do not
move.
The machine has
damage.
Do not use the ma-
chine and speak to
service center.
The blades are
blocked.
Remove battery
then clear block-
age from the
blades.
Too much noise
and/or vibration is
experienced while
working.
The parts are loos-
en.
1. Stop the ma-
chine.
2. Remove the
battery.
3. Inspect for
damage.
4. Check and
tighten loose
parts.
The parts have
damage.
Do not use the ma-
chine and speak to
service center.
8 TECHNICAL DATA
Voltage 40V
No load speed 3000
(±10%) /min
Blade speed 3000
(±10%) /min
Blade length 540 mm
Cutting capacity 27 mm
Weight (without battery pack) 3.84 kg
Measuered sound pressure level 80 dB(A),
KPA=3 dB(A)
Guaranteed sound power level 99 dB(A)
Vibration <2.5 m/s2
Uncertainty 1.5 m/s2
9 EC DECLARATION OF
CONFORMITY
Name and address of the manufacturer:
Name: GLOBGRO AB
Globe Group Europe
Address: Propellergatan 1, 211 15 Malmö, Sweden
Name and address of the person authorised to compile the
technical file:
Name: Peter Söderström
Address: Propellergatan 1, 211 15 Malmö, Sweden
Herewith we declare that the product
Category: Pole Hedge Trimmer
Model: PTF314 (2300073)
Serial number: See product rating label
Year of Construction: See product rating label
• is in conformity with the relevant provisions of the
Machinery Directive 2006/42/EC.
• is in conformity with the provisions of the following
other EC-Directives:
• 2014/30/EU
• 2000/14/EC & 2005/88/EC
• 2011/65/EU & (EU)2015/863
Furthermore, we declare that the following parts, clauses of
European harmonised standards have been used:
• EN 60745-1,EN 60745-2-15, EN ISO 10517,EN 55014-1,
EN 55014-2,EN ISO 3744,ISO 11094,IEC 62321-3-1,
IEC 62321-4,IEC 62321-5,IEC 62321-6,IEC 62321-7-1,
IEC 62321-7-2,IEC 62321-8
Measured sound pow-
er level:
LWA: 92.4 dB(A)
6
English
EN

Guaranteed sound
power level:
LWA.d: 99 dB(A)
Conformity assessment method to Annex / Directive
2000/14/EC.
Place, date: Malmö,
01.01.2020
Signature: Ted Qu, Quality Director
7
English EN

1설명.....................................................9
1.1 목적................................................................... 9
1.2 개요................................................................... 9
2안전.....................................................9
3설치.....................................................9
3.1 기계 포장을 풉니다......................................... 9
4작동.....................................................9
4.1 기계 작동 시작............................................... 10
4.2 기계 작동 중지............................................... 10
4.3 작동 관련 팁................................................... 10
5유지관리...........................................10
5.1 기계 청소........................................................ 10
5.2 날의 윤활........................................................ 10
6기계 보관..........................................10
7문제 해결.......................................... 11
8기술 자료.......................................... 11
9 EC 적합성 선언............................... 11
8
한국어
KO

1설명
1.1 목적
이 기계는 가정에서 울타리와 관목을 절단하고 다듬기 위
한 공구입니다.
1.2 개요
그림
1
1날 커버
2날
3전정기 헤드
4연결기
5안전 잠금 버튼
6악세레 바
7후면 핸들
8배터리 분리 버튼
9각도조절버튼
2안전
경고
모든 안전 지침을 이행/준수해야 합니다.
안전 사용 설명서를 참조합니다.
3설치
•배터리 팩이나 충전기 코드가 훼손되어 있을 경우 배
터리 팩이나 충전기를 즉시 교체합니다.
•배터리 팩을 설치하거나 분리하기 전에 기계가 OFF
상태에 있는지 검사합니다.
3.1 기계 포장을 풉니다
경고
사용하기 전에 기계를 제대로 조립해야 합니다.
경고
•부품이 훼손되었을 경우에는 기계를 사용하지 마십
시오.
•부품이 모두 있지 않으면 기계를 사용하지 마십시
오.
•부품이 훼손되었거나 빠져 있을 경우에는 서비스 센
터에 연락하십시오.
1. 포장을 엽니다.
2. 상자에 있는 설명서를 읽습니다.
3. 상자에서 조립되어 있지 않는 부품들을 꺼냅니다.
4. 상자에서 기계를 꺼냅니다.
5. 현지 규율에 따라 상자와 포장을 폐기합니다.
3.1.1 배터리 팩 설치
그림
2
경고
•배터리 팩이나 충전기가 훼손되었을 경우에는 배터
리 팩이나 충전기를 교체합니다.
•배터리 팩을 설치나 분리하기 전에 기계를 중지하고
엔진이 멈출 때까지 기다립니다.
•배터리 및 충전기 사용 설명서 내의 지침사항을 읽
고, 숙지하고, 실행하십시오.
1. 배터리 팩의 훅을 배터리 칸의 홈에 고정시킵니다.
2. 배터리 팩이 제 위치에 잠궈질 때까지 배터리 칸으로
밀어 넣습니다.
3. 클릭 소리가 날 때 배터리 팩이 설치됩니다.
3.1.2 배터리 팩을 분리합니다
그림
2
1. 배터리 해제 버튼을 밉니다.
2. 배터리 팩을 기계에서 분리합니다.
3.1.3 전정기 헤드 연장
그림
3
최대 길이는 핸들 장대와 전정기 헤드 사이에 연장 튜브
를 장착함으로써 연장시킬수 있습니다.
1. 핸들 장대를 전정기 헤드에 삽입합니다.
2. 이음 고리를 위로 밀어서 완전히 조여질 때까지 시계
방향으로 돌립니다.
경고
연결 부위가 단단하게 조여 있도록 하기 위해 주기적으
로 점검합니다.
3.1.4 기계의 연장
그림
3
최대 길이는 핸들 장대와 전정기 헤드 사이에 연장 튜브
를 장착함으로써 연장시킬수 있습니다.
1. 핸들 장대를 전정기 헤드에 삽입합니다.
2. 이음 고리를 위로 밀어서 완전히 조여질 때까지 시계
방향으로 돌립니다.
경고
연결 부위가 단단하게 조여 있도록 하기 위해 주기적으
로 점검합니다.
3.1.5 전정기 헤드/핸들 장대의 분리
그림
3
1. 고지 전정기를 지면에 대고 연결기를풀고 나서 전정
기 / 핸들 장대를 분리합니다.
4작동
•날을 조심스럽게 만집니다.
•손가락을 잘릴 수 있는 표식이나 위치로 넣지 마십시
오.
9
한국어
KO

•배터리 팩을 분리하지 않을 경우 날을 만지지 마십시
오.
•날이 훼손되었거나 구부러져 있을 경우 기계를 사용
하지 마십시오.
•커팅 날에 감겨서 부상을 일으킬 수 있는 코드, 전등,
와이어나 끈 같은 물체를 모두 제거합니다.
경고
날이 전기 코드나 선에 걸려 있을 경우 날을 만지지 마
십시오! 그것은 작동 중이면서 위험할 수 있습니다. 이
행해야 할 단계들:
1. 절연된 후면 핸들을 잡거나 기계를 아래로 내려서
사용자에게서 멀리 합니다.
2. 날을 제거하기 전에 훼손된 선이나 코드에 전원 연
결을 끊습니다.
4.1 기계 작동 시작
그림
4
1. 바카바를 분리합니다.
2. 엄지를 사용하여 안전 잠금 버튼을 누르면서 동시에
악세레 바를 쥡니다.
경고
작동하는 동안 손으로 기계를 잡습니다.
알림
기계가 우발적으로 떨어질 경우 기계는 중단하고 날은
몇 초 후에 완전히 중단합니다. 이후 기계는 OFF로 잠금
설정합니다.
4.2 기계 작동 중지
1. 악세레바를 해제하여 기계 작동을 멈춥니다.
4.3 작동 관련 팁
•울타리 상부를 다듬으면서 시작합니다. 날 끝이 약간
울타리로 향하도록 공구를 약간 기울입니다(절단 선
과 비교하여 최대 15°). 이러한 이유로 날이 더욱 효과
적으로 절단할 수 있습니다. 공구를원하는 각도로 잡
고 그것을 절단 선을 따라 꾸준하게 이동합니다. 이중
면의 날을 통해서는 양 방향으로 절단할 수 있습니다.
•매우 일직선으로 절단하려면, 끈 조각을 원하는 높이
의 울타리 길이를 따라 펼칩니다. 끈을 가이드라인으
로 사용하면서 그것의 바로 위를 절단합니다.
•면을 평평하게 하려면 성장하는 위쪽으로 절단합니
다. 날이 아래로 절단할 때 어린 줄기들은 바깥쪽으로
이동하여 울타리에 얕은 부분이 생기게 됩니다.
•이물질을 피하도록 주의해야 합니다. 특히 철사와 철
책 같이 딱딱한 물체는 날을 훼손시킬 수 있기 때문에
피해야 합니다.
•날에 정기적으로 오일을 바릅니다.
경고
작동하는 중에는 손을 날에서 떨어지도록 합니다. 날에
접촉하면 심각한 부상으로 이어집니다.
5유지관리
조심
브레이크 용액, 가솔린 또는 석유를 원료로 하는 물질이
플라스틱 부품에 닿지 않도록 해야 합니다. 화학물질은
플라스틱을 훼손시킬 수 있고 쓸모 없게 만들 수 있습니
다.
조심
플라스틱 하우징이나 부품에 강한 용제나 세제를 사용
하지 마십시오.
경고
유지관리하기 전에 배터리 팩을 기계에서 분리합니다.
5.1 기계 청소
경고
화재의 위험을 막으려면 기계와 모터에 잎사귀, 나뭇가
지 또는 과도한 오일이 없도록 해야 합니다.
•중성 세제에 적신 축축한 천을 사용하여 기계를 청소
합니다.
•부드럽고 마른 천으로 모든 습기를 제거합니다.
•작은 브러시를 사용하여 공기 통풍구를 청소합니다.
5.2 날의 윤활
날의 효율성과 수명을 늘리려면, 작업 세션이 끝날 때마
다 세심하게 날에 윤활합니다.
•기계를 평평하고 완만한 표면에 놓습니다.
•부드러운 천을 사용하여 날을 청소하고 브러시를 사
용하여 더 많은 이물질을 제거합니다.
•지정된 오일의 윗 부분을 사용하여 날의 상단 모서리
를 따라 윤활합니다.
알림
비오염 오일을 사용해야 합니다.
6기계 보관
알림
보관하기 전에 기계를 청소합니다.
1. 배터리 팩을 분리합니다.
2. 날카바(선택 품목)을 장착합니다.
3. 모터의 열을 식힙니다.
10
한국어
KO

4. 풀어지거나 훼손된 부품이 없도록 해야 합니다. 필요
할 경우, 훼손된 부품을 교체하거나, 나사와 볼트를 조
이거나, 공인 서비스 센터 요원에게 알립니다.
5. 유지보수를 위해 사용한 키나 도구는 제거합니다.
6. 기계 보관:
•실내와 어린이 손이 닿지 않는 곳.
•악천후에 노출되지 않도록 함.
7문제 해결
문제 가능한 원인 해결 방안
작동하는 과정에
서 모터가 멈춥니
다.
배터리 팩이 단단
히 설치되지 않았
습니다.
배터리 팩을 기계
에 단단히 설치해
야 합니다.
배터리 팩에 전원
이 들어오지 않습
니다.
배터리 팩을 충전
합니다.
기계가 훼손되었
습니다.
기계 사용을 멈추
고 서비스 센터로
연락합니다.
기계에서 작동 중
에 연기가 납니
다.
기계가 훼손되었
습니다.
1. 기계 작동을
멈춥니다.
2. 배터리를 분
리합니다.
3. 서비스 센터
로 연락합니
다.
모터가 켜져 있지
만 날이 움직이지
않습니다.
기계가 훼손되었
습니다.
기계 사용을 멈추
고 서비스 센터로
연락합니다.
날이 막혀 있습니
다.
배터리를 분리하
고 나서 날에 막
힌 것들을 제거합
니다.
너무 많은 소음
및/또는 진동이
작동 중에 일어납
니다.
부품들이 풀어져
있습니다.
1. 기계 작동을
멈춥니다.
2. 배터리를 분
리합니다.
3. 훼손 여부를
검사합니다.
4. 풀어진 부분
을 점검하여
조입니다.
부품이 훼손되었
습니다.
기계 사용을 멈추
고 서비스 센터로
연락합니다.
8기술 자료
전압 40V
무부하 속도 3000 (±10%) /min
날 속도 3000 (±10%) /min
날 길이 540 mm
절단 성능 27 mm
중량(배터리 팩 제외) 3.84 kg
측정된 음압 레벨 80 dB(A), KPA=3 dB(A)
보증된 음향 출력 레벨 99 dB(A)
진동 <2.5 m/s2
불확실성 1.5 m/s2
9 EC 적합성 선언
제조사 이름 및 주소:
이름: GLOBGRO AB
Globe Group Europe
주소: Propellergatan 1, 211 15 Malmö, Sweden
기술 파일 제출 담당자의 이름 및 주소:
이름: Peter Söderström
주소: Propellergatan 1, 211 15 Malmö, Sweden
당사 제품에 대한 선언
카테고리:고지 전정기
모델: PTF314 (2300073)
일련 번호:제품 정격 라벨 참조
제조 연도:제품 정격 라벨 참조
•기계류 지침 2006/42/EC의 관련 조항을 준수합니다.
•다음과 같은 그 외 EC 지침 조항을 준수합니다:
• 2014/30/EU
• 2000/14/EC & 2005/88/EC
• 2011/65/EU & (EU)2015/863
또한 당사는 아래와 같은 유럽 통일 규격(의 부분/절)을
사용했음을 선언합니다.
• EN 60745-1,EN 60745-2-15, EN ISO 10517,EN 55014-1,
EN 55014-2,EN ISO 3744,ISO 11094,IEC 62321-3-1,
IEC 62321-4,IEC 62321-5,IEC 62321-6,IEC 62321-7-1,
IEC 62321-7-2,IEC 62321-8
측정된 음향 출력 레
벨:
LWA: 92.4 dB(A)
보증된 음향 출력 레
벨:
LWA.d: 99 dB(A)
부첨 / 지침 2000/14/EC의 적합성 평가 방식.
장소 및 날짜: Mal-
mö, 01.01.2020
서명: Ted Qu, 품질 관리자
11
한국어
KO

12
한국어
KO

1.................................................14
1.1 ........................................................... 14
1.2 ................................................................ 14
2........................................... 14
3................................................ 14
3.1 ....................................................14
4................................................ 14
4.1 .......................................................14
4.2 ..........................................................15
4.3 ..................................................... 15
5........................................... 15
5.1 .................................................. 15
5.2 .......................................................... 15
6.........................................15
7.......................................... 15
8.........................................16
9 EC..................... 16
13
TH

1
1.1
1.2
ภาพประกอบที่ 1
1
2
3
4
5
6
7
8
9
2
/
3
•
•
3.1
•
•
•
1.
2.
3.
4.
5.
3.1.1
รูปที่ 2
•
•
•
1.
2.
3.
3.1.2
รูปที่ 2
1.
2.
3.1.3
ภาพประกอบที่ 3
1.
2.
3.1.4
ภาพประกอบที่ 3
1.
2.
3.1.5 /
ภาพประกอบที่ 3
1.
/
4
•
•
•
•
•
!
1.
2.
4.1
ภาพประกอบที่ 4
1.
14
TH

2.
4.2
1.
4.3
• ( 15
)
•
•
•
•
5
5.1
•
•
•
5.2
•
•
•
6
1.
2. ()
3.
4.
5.
6. :
•
•
7
1.
2.
3.
/
1.
2.
3.
4.
15
TH

8
40 (V)
3000 (±10%) /
3000 (±10%) /
540 .
27 .
() 3.84 .
80 dB(A), KPA=3 dB(A)
99 dB(A)
<2.5 ./2
1.5 ./2
9 EC
:
: GLOBGRO AB
Globe Group Europe
: Propellergatan 1, 211 15 Malmö, Sweden
:
: Peter Söderström
: Propellergatan 1, 211 15 Malmö, Sweden
:
: PTF314 (2300073)
:
:
• Machinery Directive
2006/42/EC
• EC-Directives :
• 2014/30/EU
• 2000/14/EC 2005/88/EC
• 2011/65/EU (EU)2015/863
• EN 60745-1,EN 60745-2-15, EN ISO 10517,EN 55014-1,
EN 55014-2,EN ISO 3744,ISO 11094,IEC 62321-3-1,
IEC 62321-4,IEC 62321-5,IEC 62321-6,IEC 62321-7-1,
IEC 62321-7-2,IEC 62321-8
: LWA: 92.4 dB(A)
: LWA.d: 99 dB(A)
/ Directive 2000/14/EC
: Malmö,
01.01.2020
: Ted Qu
16
TH

1描述...................................................18
1.1 目的................................................................. 18
1.2 概览................................................................. 18
2安全...................................................18
3安装...................................................18
3.1 打开机器包装................................................. 18
4操作...................................................18
4.1 启动机器......................................................... 19
4.2 停止机器......................................................... 19
4.3 操作提示......................................................... 19
5维护...................................................19
5.1 清理机器......................................................... 19
5.2 刀片润滑......................................................... 19
6存放机器...........................................19
7常见故障处理...................................19
8技术数据...........................................20
9 EC 符合性声明................................ 20
17
简体中文
ZH

1描述
1.1 目的
本机器供家庭切割修剪树篱和灌木使用。
1.2 概览
图
1
1刀套
2刀片
3杆修头
4接头
5反自锁按钮
6扳机
7后把手
8电池释放按钮
9旋转按钮
2安全
警告
确保按照所有安全说明进行操作。
请参考《安全手册》。
3安装
•如果电池包或充电器连接线损坏,请立即更换电池包
或充电器。
•安装或拆下电池包前,应检查确保机器处于“关闭”
状态。
3.1 打开机器包装
警告
须确保正确安装机器后再使用。
警告
•如果部件损坏,切勿使用机器。
•如果部件不全,请勿操作机器。
•如果部件损坏或丢失,请与服务中心联系。
1. 打开包装。
2. 阅读包装箱中的文档。
3. 从包装箱中取出所有未安装的部件。
4. 从包装箱中取出机器。
5. 根据当地法规丢弃包装箱和包装。
3.1.1 安装电池包
图
2
警告
•如果电池包或充电器已损坏,则需更换电池包或充
电器。
•关停机器,等到发动机停止再安装或拆下电池包。
•阅读了解电池和充电器手册中的说明,并按照这些
说明进行操作。
1. 将电池包上的导轨对准电池盒中的凹槽。
2. 将电池包推入电池盒中,直至电池包锁定到位。
3. 当听到咔哒声时,电池包即安装到位。
3.1.2 取下电池包
图
2
1. 按下电池释放按钮。
2. 取下电池包。
3.1.3 安装杆修头
图
3
杆修头可直接安装在后手柄上,以达到标准长度。
1. 将后手柄插入杆修头。
2. 将l连接头向上滑动,然后顺时针旋转,直至其完全
紧固。
警告
定期检查连接处,以确保牢固。
3.1.4 延长机器
图
3
在后手柄和杆修头之间安装延长杆可达到最大触及距
离。
1. 将后手柄插入杆修头。
2. 将连接头向上滑动,然后顺时针旋转,直至其完全紧
固。
警告
定期检查连接处,以确保牢固。
3.1.5 拆卸杆修头/后手柄
图
3
1. 将杆修放在地面上,松开连接头,然后取下杆修头和
后手柄。
4操作
•小心触摸刀片。
•不要将手指放入凹口或可能被切割的位置。
•除非取下电池包,否则切勿触摸刀片。
•如果刀片损坏或弯曲,请勿使用本机器。
•清除可能缠绕在切割刀片上并可能造成人身伤害的所
有物体,如绳索、灯、电线或细绳。
18
简体中文
ZH

警告
如果刀片卡在电线或线路上,切勿触摸刀片!刀片可能
带电,非常危险。请按下列步骤操作:
1. 握住绝缘后把手或者将机器放下并远离机器。
2. 断开受损线路或电线的电源,然后尝试松开卡住的
刀片。
4.1 启动机器
图
4
1. 取下刀鞘。
2. 用拇指按反自锁按钮,同时推动扳机。
警告
操作过程中用手抓住机器。
注
如果机器意外跌落,它会停止运转,几秒种后刀片完全
停止。然后,机器会关闭。
4.2 停止机器
1. 松开扳机,使机器停止。
4.3 操作提示
•从修剪树篱顶部开始。使高枝剪略微倾斜(相对于切
割线最多 15°),以使刀尖稍微指向树篱。 这样刀片
可更有效地进行切割。 使高枝剪保持所需要的角度,
沿切割线平稳移动。双面刀片让您可以在两个方向进
行切割。
•为使切面平直,在所需要的高度沿树篱长度方向拉一
根细绳。以细绳为参考,切割其上方的树篱。
•为使侧面平整,随树篱长势向上切割。刀片向下切割
时,幼枝会向外移动,从而在树篱上形成浅窝。
•注意避免接触任何异物。尤其避免接触金属丝、栏杆
等硬物,因为它们可能会损坏刀片。
•定期给刀片涂抹润滑油。
警告
操作时手部应远离刀片。与刀片接触将导致人员重伤。
5维护
警告
切勿使制动液、汽油、石油基材料与塑料部件接触。化
学品可能造成塑料部件损坏,使塑料部件无法使用。
警告
不要在塑料外壳或部件上使用强溶剂或清洁剂。
警告
先将电池包从机器卸下,然后再进行维护。
5.1 清理机器
警告
清除机器和电机上的树叶、树枝或多余油脂,防止发生
火灾。
•用湿布和温和的清洁剂清洁机器。
•用柔软的干布擦干。
•用小刷子清理通风口。
5.2 刀片润滑
为提高刀片的效率和使用寿命,请在每次工作后对刀片
进行仔细润滑:
•将机器放在光滑平坦的表面上。
•用软布清洁刀片,用刷子清除更多污物。
•用指定机油沿刀片上边缘涂薄薄一层,对刀片进行润
滑。
注
建议使用无污染型机油。
6存放机器
注
存放机器前清理机器。
1. 取下电池包。
2. 安上刀套(选配)。
3. 使电机冷却。
4. 检查机器,确保没有松动或损坏的部件。如有必要,
请更换损坏的部件,拧紧螺钉和螺栓,或与经认可的
服务中心的人员联系。
5. 取下用于维护的钥匙或工具。
6. 存放机器:
•放在室内,远离儿童。
•防止恶劣天气。
7常见故障处理
问题 可能的原因 解决方法
工作时电机关
闭。
电池包安装不牢
固。
确保已将电池包
牢固安装在机器
上。
电池包没电了。 给电池包充电。
机器损坏。 不要再使用机
器,与服务中心
联系。
19
简体中文
ZH

问题 可能的原因 解决方法
运行过程中机器
冒烟。 机器损坏。
1. 立即停止机
器。
2. 取下电池。
3. 与服务中心联
系。
电机开启,但刀
片不移动。
机器损坏。
不要再使用机
器,与服务中心
联系。
刀片被阻塞。
取下电池,然后
清除刀片上的阻
塞物。
工作时噪音和/或
振动过大。
部件松动。
1. 停止机器。
2. 取下电池。
3. 检查是否有损
坏。
4. 检查并拧紧松
动的部件。
部件损坏。
不要再使用机
器,与服务中心
联系。
8技术数据
电压 40 伏
空载速度 3000 (±10%) /
分
刀片速度 3000 (±10%) /
分
刀片长度540 毫米
切割能力 27 毫米
重量(不含电池包) 3.84 千克
实测声压级 80 dB(A),
KPA=3 dB(A)
保证声功率级99 dB(A)
振动<2.5 m/s2
未确定 1.5 m/s2
9 EC 符合性声明
制造商名称和地址:
名称: GLOBGRO AB
Globe Group Europe
地址: Propellergatan 1, 211 15 Malmö, Sweden
被授权编制技术文件的人员的姓名和地址:
名称: Peter Söderström
地址: Propellergatan 1, 211 15 Malmö, Sweden
兹声明该产品
类别: 杆修
型号: PTF314 (2300073)
序列号: 参见产品铭牌
建造年份: 参见产品铭牌
•符合机械指令 2006/42/EC 的相关指令。
•符合下列其他 EC 指令的规定:
• 2014/30/EU
• 2000/14/EC & 2005/88/EC
• 2011/65/EU & (EU)2015/863
此外,我们宣布已采用下列协调标准的部分内容,条
款:
• EN 60745-1,EN 60745-2-15, EN ISO 10517,EN 55014-1,
EN 55014-2,EN ISO 3744,ISO 11094,IEC 62321-3-1,
IEC 62321-4,IEC 62321-5,IEC 62321-6,IEC 62321-7-1,
IEC 62321-7-2,IEC 62321-8
实测声功率级:LWA: 92.4 dB(A)
保证声功率级:LWA.d: 99 dB(A)
符合性评估方法参见附录 / 指令 2000/14/EC。
地点,日期: Malmö,
01.01.2020
签名: 质量总监,Ted Qu
20
简体中文
ZH

1說明...................................................22
1.1 目的................................................................. 22
1.2 概覽................................................................. 22
2安全性...............................................22
3安裝...................................................22
3.1 拆封機器......................................................... 22
4操作...................................................22
4.1 啓動機器......................................................... 22
4.2 停止機器......................................................... 23
4.3 操作提示......................................................... 23
5保養...................................................23
5.1 清潔機器......................................................... 23
5.2 為刀片潤滑..................................................... 23
6存放機器...........................................23
7常見故障處理...................................23
8技術資料...........................................24
9 EC 符合性聲明................................ 24
21
繁體中文
ZH
This manual suits for next models
1
Table of contents
Languages:
Other Power works Trimmer manuals

Power works
Power works 2100413 User manual

Power works
Power works P48ST8 User manual

Power works
Power works STF401 User manual

Power works
Power works 2200213 User manual

Power works
Power works XB 20V User manual

Power works
Power works HT60B01PW User manual

Power works
Power works P60LT User manual

Power works
Power works PD60BCB User manual

Power works
Power works STP301 User manual

Power works
Power works P60PHT User manual