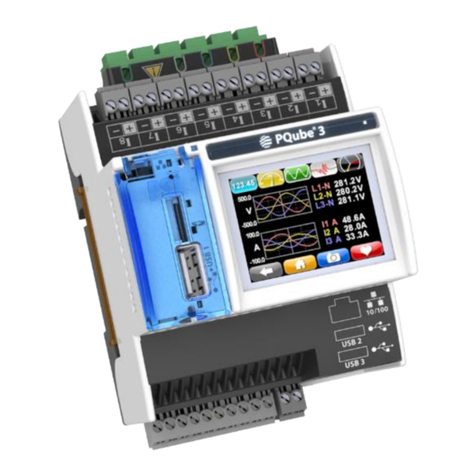
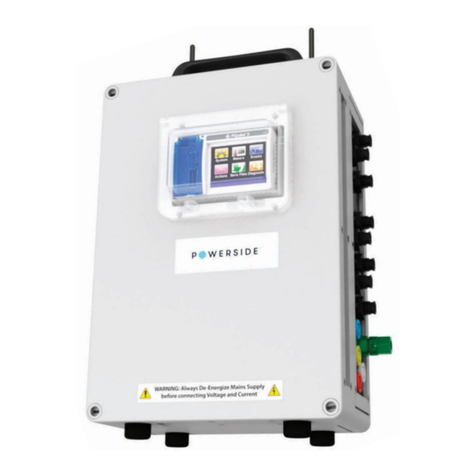
POWERSIDE PQube 3 User manual

Powerside
980 Atlantic Ave., Suite 100
Alameda, CA 94501, USA
Tel +1-510-522-4400│Powerside.com
PQube®3 Portable 480V
Installation Guide

Page 2of 12
The information contained in this document is subject to change without notice. POWERSIDE MAKES NO WARRANTY OF ANY KIND WITH REGARD TO THIS
MATERIAL, INCLUDING, BUT NOT LIMITED TO, THE IMPLIED WARRANTIES OF MERCHANTABILITY AND FITNESS FOR A PARTICULAR USE. Powerside shall not be
liable for errors contained herein or for incidental or consequential damages in connection with the furnishing, performance, or use of this material. If you do
not accept this limitation on liability, please return the product to Powerside prior to use. If you find information in this manual that is incorrect,
misleading, or incomplete, we would appreciate your comments and suggestions.
If this equipment is used in a manner not specified by the manufacturer, the protection provided by the equipment
may be impaired. Installation, service, and maintenance of your PQube 3 must only be done by qualified personnel
for electrical installations.
The information contained in this document is subject to change without notice.
POWERSIDE MAKES NO WARRANTY OF ANY KIND WITH REGARD TO THIS MATERIAL, INCLUDING, BUT NOT LIMITED
TO, THE IMPLIED WARRANTIES OF MERCHANTABILITY AND FITNESS FOR A PARTICULAR USE.
Powerside shall not be liable for errors contained herein or for incidental or consequential damages in connection
with the furnishing, performance, or use of this material. If you do not accept this limitation on liability, please
return the product to Powerside prior to use.
Manufactured in the United States of America.
Symbol
Meaning
Caution. Consult this manual in all cases where this
symbol is marked to find out the nature of the
potential hazards and any actions which have to be
taken to avoid them.
Caution. Risk of Electric Shock.
Alternating current
Alternating current (AC) or direct current (DC)
Double or Reinforced insulation
Functional earth terminal not relied on for safety
© 2008–2022 Powerside All rights reserved. No parts of this document may be copied, reproduced, or translated to another language without the prior written consent of
Powerside “PQube 3” is a registered trademark of Power Standards Lab. “Windows” “Excel,” and “PowerPoint” are registered trademarks of Microsoft Corporation. All
product names, trademarks and registered trademarks are property of their respective owners
WARNING: Death, serious injury, or fire hazard could result from improper connection or operation of this
instrument. Carefully read and understand manual before connecting this instrument.
AVERTISSEMENT: Sil'instrumentestmalconnecté,lamort,desblessuresgraves,ouundangerd'incendie
peuvent s'en suivre. Lisez attentivement le manuel avant de connecter l'instrument.
WARNUNG: Der falsche Anschluß dieses Gerätes kann Tod, schwere Verletzungen oder Feuer verursachen.
Bevor Sie dieses Instrument anschließen, müssen Sie die Anleitung lesen und verstanden haben.
ADVERTENCIA: Una conexión incorrecta de este instrumento puede producir la muerte, lesiones graves y
riesgo de incendio. Lea y entienda el manual antes de conectar.

Page 3of 12
Contents
Introduction..........................................................................................................................4
What is the PQube 3 Portable 480V? .......................................................................................................4
Product Highlights ...................................................................................................................................4
What’s Included - Model PQ3iaB-Portable-4V8I-480V-000-XXXX...............................................................5
Overview of Connections.........................................................................................................................6
Portable PQube 3 480V Installation.......................................................................................7
Important Safety Notices.........................................................................................................................7
Installation Procedures............................................................................................................................8
1.
Turn off the Mainssupplypower at the measurement site ..................................................................................................... 8
2.
Choosea suitablelocation to installyour PQube 3 Portable 480V........................................................................................... 8
3.
Install current transformers: model PQ3iaB-Portable-4V8I-480V-000-XXXX ........................................................................ 9
4.
Installthe voltage sensing wires .......................................................................................................................................... 10
5.
Install the power supply (ifapplicable)................................................................................................................................. 11
6.
Verify connections.............................................................................................................................................................. 11
7.
Securethearea.................................................................................................................................................................. 11
8.
Energize the circuit............................................................................................................................................................. 11
9.
Verifymeter readings......................................................................................................................................................... 12
10.
Configuration............................................................................................................................................................. 12
Maintenance on the PQube 3 Portable 480V..........................................................................................12

Page 4of 12
Introduction
What is the PQube 3 Portable 480V?
The PQube 3 Portable 480V combines the powerful
monitoring and communication capabilities of the PQube
3 Power Analyzer with the quick connectivity and
convenience of a portable instrument.
It is designed for quick installation and temporary measurement
campaigns. It auto-detects your frequency,nominal voltage, and
power configuration. It can be wired to a local LAN but has also a
cell modem ready option that enables remote communications
(no communication cables needed).
The PQube3 can be configured with a USB drive via connection to
the USB port next to the color display of PQube 3. The PQube 3
Portable 480V holds thousands of events and trends data in its
internal flash memory and can be extracted via USB drive or
microSD card.
If you have remote communication enabled, you can receive reports from the PQube 3 as soon as it is powered
up. The PQube 3 can send events and trends via email to your laptop or smartphone - no software required.
Product Highlights
•Easy to install, wire, and operate
•Plug and play flexible CTs and fused voltage leads
•Self-powers from the measured voltage at nominal 360 to 480 Vac
•Powers from 24 Vdc with the providedpower supply (120 to 240 Vac)
•Up to 1-hour (configurable) battery power backup
•Measured voltage range upto480 Vac nominal
•Measure current range up to 3000 A
•Power Quality Class A IEC 61000-4-30 Ed3
•Monitors AC and DC (4 additional analog inputs)
•Detects High-Frequency transients up to 4 MHz
•Records 2 kHz to 150 kHz conducted emissions
•Optional 2 ENV2 environment probes (temperature, humidity, barometric pressure, acceleration)

Page 5of 12
What’s Included - Model PQ3iaB-Portable-4V8I-480V-000-XXXX
Before installation, verify the contents of your PQube 3 Portable 480V package. Please note variations is model number
may reflect a variation in the supplied components.
A B C
H I J K
A. (1) Heavy duty carrying case
B. (1) PQube 3 Portable 480V
C. (1) AC/DC power supply with power cable –100 to 240 Vac input, 24 Vdc output
D. (4) Flexible Rogowski coil current sensors
E. (2) Non-fused 6.5 ft test leads with shrouded banana jacks and (1) alligator clip (white) with max jaw opening:
0.96 in (25mm) and (1) dolphin clip (green) with max jaw opening: 1.26 in (32mm)
F. (3) Fused 6.5 ft voltage sensing test leads with shrouded banana jacks and (3) alligator clips (red, yellow, blue)
with max jaw opening: 0.96 in (25mm)
G. (1) Split-core 5A:0.333V current transformer
H. (1) Small flat-head screwdriver
I. (3) Spare fuses (2 A, 1000 Vac/Vdc, Fast-acting)
J. (1) Installation Guide and USB drive including software and its documentation
K. (1) Hook-and-loop mounting strap 48 in x 2 in
D
E
F
G

Page 6of 12
Overview of Connections
Right Side –Voltage and Current Terminals
A.
L1, L2, L3 voltage inputs. Rated for
100 to 480 Vac nominal, 50/60Hz.
C.
Earth terminal –Functional. Used as
the reference point for voltage
measurements.
B.
Neutral terminal –optional depending
on your power configuration.
D.
Inputs for CT sensors –nominal 0.333 V
RMS
(LOW range) or ±10 Vpk (HIGH range).
Left Side: Communication and General I/O
E.
10/100 Ethernet RJ-45 port. PoE compatible
only when modem is not present.
H.
Analog & Digital I/O terminals
I.
24 Vdc power supply input.
F.
(2) Environment Probe USB interface:
USB 1.0 ports for use ONLY with ENV2.
G.
20 Vdc AUX power output (4 W max)

Page 7of 12
Portable PQube 3 480V Installation
Important Safety Notices
Always De-Energize the Mains Supply Before Connecting Voltage and Current Probes.
Your PQube 3 Portable 480V is rated for up to 480 VAC. Do not install it at circuits that
exceed these ratings. Do not attempt to connect leads to a live circuit. This could result in
damage to your equipment and/orinjury. Inspect all equipment and test leads for damage
prior to installation. If there is any damage, do not proceed with installation.
It is very important that installation and servicing of your PQube 3 Portable 480V be done by a qualified
person, and in accordance with the local or national electrical guidelines and codes (e.g. ANSI/NFPA 70 in
the US, CSA C22.1 in Canada etc.)

Page 8of 12
Installation Procedures
1.
Turn off the Mains supply power at the measurement site
Before working with mains AC voltage wires, always ensure the power is first disconnected. Powerside
recommends using a lock-out, tag-out system for safety.
2.
Choose a suitable location to install your PQube 3 Portable 480V
Determine where you want to install your PQube 3 Portable 480V. Find a flat, level surface in a secure area,
accessible by authorized personnel only.
Your PQube 3 Portable 480V must be in the upright position during operation.
Optionally, you can hang it to a secure location using the included hook-and-loop strap.

Page 9of 12
3.
Install current transformers: model PQ3iaB-Portable-4V8I-480V-000-XXXX
The PQube 3 Portable 480V is compatible with traditional split-core current transformers (with 333 mV voltage
output) and flexible current transformers (Rogowski coils with 333 mV voltage output).
The PQube 3 Portable 480V includes four flexible CTs with bayonet style connectors for the L1, L2, L3 and N
conductors. A split-core 5A CT with bayonet style connectors is included for monitoring ground current.
If using the split-core 5A CT, clamp the CT around the ground conductor with the (white) label facing the source.
Clamp the flexible CTs around each phase conductor. There is an arrow indicator at the junction of each
Rogowski coil (see in the picture below). Ensure the arrow points towards the source.
Connect the secondary wires of the CTs to the PQube 3 Portable 480V to the bayonet style terminals (see picture below).
L1, L2, L3 current flexible CT outputs connect to
terminals I1, I2, I3.
If monitored, the neutral current flexible CT output
connects to I4 terminal.
If monitored, the ground current CT connects to
the I5 terminal
Before continuing, verify that each CT is connected to the correct terminal on the PQube 3 Portable 480V enclosure.
Load
Source
Load
Source

Page 10 of 12
4.
Install the voltage sensing wires
Your PQube 3 Portable 480V includes voltage sensing leads (wires) with built in fuses on the red, yellow, and blue
leads. To access the fuse, twist the banana plug from the thick end of the cable. Ensure a fuse is installed inside each
of the three wires before installation.
The white (Neutral) and green (Earth) leads do not include a fuse.
Plug the voltage sensing leads into the voltage terminals (banana jacks) of your PQube 3 Portable 480V.
Verify that each voltage sensing lead is connected to the correct voltage input terminal on the PQube 3
Portable 480V. The wires and banana jacks are color coded.
Use the included alligator clips to connect the voltage
sensing leads to the circuit to be measured.

Page 11 of 12
5.
Install the power supply (if applicable)
If you are monitoring a circuit with 360 Vac to 480 Vac L-L
nominal voltage, the PQube 3 Portable 480V will automatically
self-power fromthe L1-L2 terminals.
If you are not measuring a circuit within this voltage range, use
the included AC/DC power supply. Connect the power cable into
an outlet rated for 100 to 240 Vac and connect the 24 Vdc jack
into the 24 Vdc power supply input on the PQube 3 Portable 480V.
Whether you are powering from the L1-L2 measurement circuit
or a dedicated 100 to 240 Vac outlet, make sure this circuit can
supply at least 100 watts.
6.
Verify connections
Double check and ensure all voltage sensing leads are installed on the correct wires, and all CTs are clamped
around the correct conductors. Ensure all connections to the PQube 3 Portable 480V are secure.
7.
Secure the area
After verifying all connections, close all cabinets and ensure all hazardous circuits are protected from
unauthorized access.
8.
Energize the circuit
Turn on the power to your circuit and check for hazardous conditions. If there are any hazardous conditions,
turn off the power immediately and contact the facility manager for further troubleshooting.

Page 12 of 12
9.
Verify meter readings
Check the voltage and current readings on the PQube 3 Portable 480V
using the touchscreen.
From the display, press the [Meters] button and check that the measured values
are correct. If you entered PT and CT ratios into your setup file, verify the
voltage and current readings are primary units. Also verify the values for power
(watts) and power factor are correct. If you have inverted your CTs or installed
the CTs on the wrong phases, your power readings will be inaccurate.
Verify the voltage and current vectors are correct. The vector convention for a
balanced 3-phase system is L1 voltage is 0°, L2 voltage is -120° and L3 voltage is
+120°.
If the touchscreen display is not accessible, verify the meter readings by
connecting your laptop to the local network, or directly into the PQube 3 Ethernet
port.
10.
Configuration
Refer to the PQube 3 Installation and Operation manuals for more information. You can find a copy in the included
USB drive or visit the Powerside Help Center website https://help.powerside.com/knowledge/pqube-3 to download
the latest version.
Configuration can be done by copying the PQube 3 setup.ini file onto a USB drive and inserting into the USB port
(next to the color display). Configuration can also be done remotely by connecting to the PQube 3 Ethernet Port
and configuring via the PQube 3 Configurator software. The latest version of this software can be downloaded at
the Powerside Help Center website https://help.powerside.com/knowledge/pqube-3#pqube-3-configurator.
Maintenance on the PQube 3 Portable 480V
Always De-Energize the Mains Supply Before disconnecting Voltage and Current Probes.
Refer to the PQube 3 Installation manual, maintenance section, for more information.
END OF DOCUMENT
Manual#: 851-000123
Version 4: 2/27/2023
Other manuals for PQube 3
4
Table of contents
Other POWERSIDE Measuring Instrument manuals
Popular Measuring Instrument manuals by other brands

TST
TST TM-510 instruction manual

BRUEL & KJAER
BRUEL & KJAER VIBROCONTROL 920 user manual

Rohde & Schwarz
Rohde & Schwarz TS-PSAM user manual

PCB Piezotronics
PCB Piezotronics 357B53 Installation and operating manual

Emerson
Emerson Rosemount 5300 Series quick start guide

KBR
KBR multisio D6-ESBS-4RO-ISO-1 user manual