manuals.online logo
Brands
  1. Home
  2. •
  3. Brands
  4. •
  5. Powr-Flite
  6. •
  7. Floor Machine
  8. •
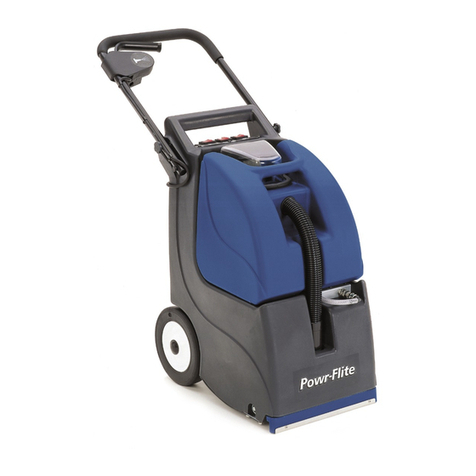
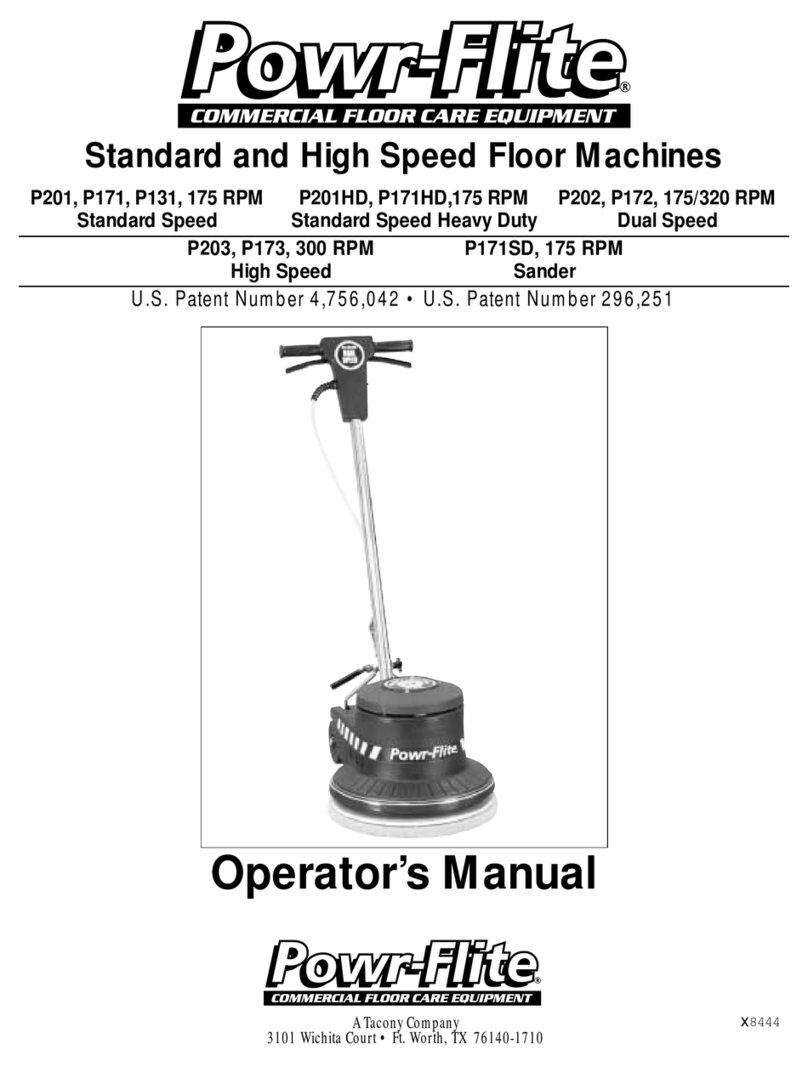
  9. Powr-Flite PFX3S User manual

Powr-Flite PFX3S User manual

WARNING: OPERATOR MUST READ AND UNDERSTAND THIS MANUAL COMPLETELY
BEFORE OPERATING THIS EQUIPMENT.
Self-Contained Carpet Extractors
OPERATORS MANUAL AND PARTS LIST
Model PFX3S, PFX7S, and PFX9S
X8470
A Tacony Company
3101 Wichita Court • Fort Worth,TX 76140
1.800.880.2913
READ ALL INSTRUCTIONS BEFORE USING!
CARE OF THIS SELF-CONTAINED EXTRACTOR
Treat this unit as you would any other high grade precision
made product. Dropping, unreasonable bumping across
thresholds and other misuses may result in a damaged
unit which will not be covered by warranty. When not in use,
power cord should be wrapped around handle for storage.
Read this manual completely before operating this extrac-
tor. It is important to follow instructions in this manual to
prevent the possibility of injury or damage to the user and/
or machine.
Congratulations on purchasing a Powr-Flite self-contained
extractor. Given proper care, this product will afford you
many years of trouble-free operation. All parts have
passed rigid quality control standards before being assem-
bled to produce the finished product.
Prior to packaging, the extractor is again inspected for
assurance of flawless assembly. This unit is protectively
packed to prevent damage in shipment. We recommend
removal and inspection of unit upon delivery for possible
damage in transit. Only a visual examination will reveal
damage that may have occurred.
If damage is discovered, immediately notify the transporta-
tion company that delivered your extractor. As a shipper,
we are unable to report claims for concealed damage.
You must originate any claim within 5 days of delivery.
This manual is for your protection and information.
PLEASE READ CAREFULLY since failure to follow
precautions could result in discomfort or injury. When
using electrical equipment, basic safety precautions should
always be followed.
TABLE OF CONTENTS
INTRODUCTION 2
SAFETY PRECAUTIONS (English) 3
SAFETY PRECAUTIONS (Spanish) (French) 4
GROUNDING INSTRUCTIONS 5
GENERAL INSTRUCTIONS 6,7
Machine Components 6
Machine Operation 6
Pre-operation Checks 6
Cleaning Procedure (accessories) 7
Storage 7
Routine Care & Maintenance 7
ILLUSTRATED PARTS LIST 8-15
MAINTENANCE GUIDE 16
– 2 –
IMPORTANT SAFETY PRECAUTIONS
WARNING!: To reduce the risk of fire, electric shock, or injury
When using this self contained extractor, basic precautions
should always be followed, including the following:
1) DO NOT leave unit when plugged in. Unplug from
outlet when not in use and before servicing.
2) DO NOT allow unit to be used as a toy. Close
attention is necessary when used around or near
children.
3) Use only as described in this manual. Use only
manufacturer’s recommended attachments.
4) DO NOT use with damaged cord or plug. If unit is
not working properly because it has been dropped,
dropped into water, left outdoors, or damaged in any
way, contact a service center of Powr-Flite®.
5) DO NOT pull or carry by cord, use cord as a handle,
close door on cord, or pull cord around sharp edges
or corners. DO NOT run unit over cord. Keep cord
away from heated surfaces.
6) DO NOT unplug by pulling on cord. To unplug,
grasp the plug, not the cord.
7) DO NOT handle plug or appliance with wet hands.
8) DO NOT put any objects into openings. DO NOT
use with any opening blocked: keep free of dust, lint,
hair, or anything that may reduce air flow.
9) Keep hair, loose clothing, fingers, and all parts of
body away from openings and moving parts.
10) DO NOT pick up anything that is smoking or
burning such as cigarettes, matches, or hot ashes.
11) DO NOT use to pick up hazardous chemicals.
12) Turn off all controls before unplugging.
13) Turn unit off immediately if foam or liquid comes from
machine exhaust. Empy & clean out recovery (dirty)
tank and use defoamer to correct the problem.
14) DO NOT use to pick up flammable or combustible
liquids such as gasoline or use in areas where they
may be present.
15) DO NOT use where oxygen or anesthetics are used.
16) DO NOT use an extension cord unless absolutely
necessary. If an extension cord is used, then wire
size must be #14 or larger and should not exceed
25 ft. in length. Extension cord must be a three-wire
type to insure grounding protection.
17) Replace damaged or worn parts immediately with
genuine original equipment parts to maintain safety.
18) This unit must be connected to a properly grounded
outlet only. See grounding instruction.
WARNING
To avoid fire, DO NOT use
with a flammable or com-
bustible liquid to clean floor.
WARNING
To avoid electric shock,
DO NOT expose to rain.
Store Indoors.
– 3 –
– 4 –
GROUNDING INSTRUCTIONS
DANGER: Improper use of the grounding plug can result
in a risk of electric shock.
GROUNDING INSTRUCTIONS
GROUNDING METHODS
This self-contained extractor must be properly grounded. If it
should malfunction or breakdown, grounding provides a path
of least resistance for electrical current to reduce the risk of
electric shock. This machine is equipped with a cord having
an equipment-grounding conductor and grounding plug. The
plug must be insertedinto an appropriate outlet that is prop-
erly installed and grounded in accordance with all local codes
and ordinances. If repair or replacement of the cord or plug is
necessary, DO NOT connect the grounding wire to either flat
blade terminal. The wire with insulation having an outer sur-
face that is green with or without stripes is the grounding wire.
This unit is for use on a nominal 120 volt circuit, and has a
grounded plug that looks like the plug illustrated in (Fig. A).
A temporary adapter that looks like the adapter illustrated in
(Fig. B&C) may be used to connect the plug to a 2-pole
receptacle as shown in (Fig. B) if a properly grounded
outlet is not available.
The temporary adapter should be used only until a properly
grounded outlet (Fig. A) can be installed by a qualified
electrician. The green color rigid ear, lug, or the like extend-
ing from the adapter must be connected to a permanent
ground such as a properly grounded outlet box cover.
Whenever the adapter is used, it must be held in place by
a metal screw.
NOTE: In Canada, the use of a temporary adapter is not permitted
by the Canadian Electrical Code.
WARNING!
Improper connection of the equipment-grounding conductor can result in a risk of elec-
tric shock. Check with a qualified electrician or service person if you are in doubt as to
whether the outlet is properly grounded.
DO NOT modify the plug provided with the appliance. If it will not fit the outlet, have a
proper outlet installed by a qualified electrician.
– 5 –
1) Prepare room for cleaning, moving furniture as need to
provide a clear working area. Cover bottoms of furniture
legs where possible. (Aluminum foil or foam blocks are
ideal for this purpose.) Pin up curtains and drapes.
2) Gather cleaning supplies: a clean, suitable sized bucket,
carpet cleaning solution, such as Powr-Flite’s Kold-Powr,
defoamer solution such as Powr-Flite’s Powr-Defoamer,
and pretreat solutions for heavily soiled traffic areas such
as Powr-Flite’s Fast Lane.
3) Disconnect vacuum hose from recovery tank and lift the
RECOVERY TANK off of the SOLUTION TANK.
4) Measure carpet cleaning solution, per manufacturers rec-
ommended ratio, into the SOLUTION TANK and fill with
hot water. DO NOT use the RECOVERY TANK to fill the
SOLUTION TANK. Debris remaining in the tank could
damage the pump or block the jet. WARNING: DO NOT
exceed water temperature of 150º (65º C).
5) Replace RECOVERY TANK on machine. Add defoamer
solution, per manufacturer’s instructions as needed, in
RECOVERY TANK.
6) Replace the transparent cover on the RECOVERY TANK
and connect the vacuum hose to the front of the
RECOVERY TANK.
7) Pre-treat heavily soiled carpet areas as required.
PRE-OPERATION INSTRUCTIONS for PFX3S
NOTE - FOR COLOR FASTNESS: Before using carpet clean-
ing chemicals, test on an inconspicuous part of the carpet for
color fastness. Place the solution on a small piece of clean
white cloth or tissue. Rub the carpet area vigorously with the
cleaning chemical. Excessive amounts of dye showing on the
material would indicate that the colors are not colorfast, and
should not be wet cleaned.
RECOVERY
(WASTE)
TANK
SOLUTION
(CLEAN WATER)
TANK
CARRYING
HANDLE
TANK COVER
& HANDLE
SOLUTION
SWITCH
VACUUM
SWITCH BRUSH
SWITCH
VACUUM HOSE
SOLUTION
HOSE
SOLUTION
LEVER
FIG. 1A
FIG. 1C
OPERATION OF SELF-CONTAINED CARPET CLEANER
1) Plug the power cord into an outlet. WARNING: This machine must be properly grounded. See Grounding
Instructions on page 4 for additional information.
2) Press the VACUUM switch “on” and the BRUSH switch to the “right” position. See FIG C for a diagram on opera-
tional switches.
3) To clean the carpet, squeeze and hold the SOLUTION LEVER (FIG A) to apply the cleaning solution, pulling the
machine backwards at the same time. Stop spraying the solution approximately 12 inches (30 cm) before the end
of your pass, so that the extractor will vacuum up all of the solution. Slightly overlap the next cleaning pass to
prevent streaking. To avoid overwetting, it is recommended that a maximum of only two wet passes (spraying solu-
tion) be done. One dry pass without spraying solution will also aid in drying time. After a few passes, check the
RECOVERY TANK to verify that no foam is present. Add extra defoamer if necessary.
4) Empty the RECOVERY TANK when it is approximately 3/4 full. Do not refill the SOLUTION TANK without emptying
all of the contents of the RECOVERY TANK first.
– 6 –
GENERAL INSTRUCTIONS
DAILY / INTERVAL
1) The filter in the solution tank (FIG 3) should be kept clean. It can be removed if
necessary. A damaged filter should be replaced, otherwise blockages and/or
damage to the pump head and spray jet can occur.
2) Check the spray jet (FIG 4) for blockage and a uniform spray pattern.
Remove jet and blow through to clean. Do not use a pin or other sharp objects
as this may cause damage to the jet.
3) Check and remove any debris or lint build-up from the vacuum head, brush,
and brush housing.
4) Always wash out the tanks with clean water after use. To do this, pour clean water into
the solution tank and spray through spray tip to clear chemical residue from the pump,
lines, and spray tip. Allow the vacuum to run for a few minutes after use to aid the
machine in drying out and to help prevent bacteria and odors.
5) Wash out mesh filter in RECOVERY TANK of dirt and carpet fibers after dumping waste
from recovery tank. Failure to clean filter may cause damage to vacuum motor.
WEEKLY
1) Inspect hoses (unseen blockages sometimes occur), hose cuffs, and the rubber seal on the recovery tank lid. The main
cable, plug, and switches should also be examined for damage.
NOTE: It is advisable to store the unit with the recovery tank lid removed.
CAUTION: THIS UNIT MUST BE PROTECTED FROM FREEZING. Damage from freezing could cause machine to malfunction.
ROUTINE MAINTENANCE INSTRUCTIONS
STORAGE
WHEN CLEANING IS FINISHED:
1) Disconnect the SOLUTION HOSE on the front of the machine by pushing in on the ring of the solution fitting.
2) Connect the drain hose (clipped to the back) to the SOLUTION HOSE fitting and
place the other end into the RECOVERY TANK. Press the SOLUTION switch to the
“right” position. This will activate the motor to pump any remaining solution into
the RECOVERY TANK for easy drainage.
3) When all of the solution is pumped from the SOLUTION TANK, turn the SOLUTION
switch off, remove the power plug from the outlet and empty the RECOVERY
TANK. Leave the RECOVERY TANK open when storing.
4) Disconnect the DRAIN HOSE by pushing in on the ring of the SOLUTION HOSE
fitting. Replace the DRAIN HOSE in the clip on the back of the machine, and re-
connect the SOLUTION HOSE.
FIG. 2
FIG. 3
FIG. 4
SOLUTION SPRAY JET
– 7 –
GENERAL INSTRUCTIONS
– 8 –
GENERAL INSTRUCTIONS
1) Move the furniture around to give a clear working
area. Cover bottoms of furniture legs where possible.
(aluminum foil or foam blocks are ideal)
Pin up curtains and drapes.
2) Have a suitable size clean bucket available for filling
the solution tank with warm water. CAUTION: - Do
not add the cleaning agent at this stage
3) Adjust the machine brush operating depth with the
knob on the back of models PFX 7S & 9S (FIG. 1A)
and the front of PFX4S (FIG. 1B) to suit the carpet
height. NOTE: The raised counter clockwise position
of the knob should be used when the machine is being
stored. NOTE: Excess brush contact may overload
motor circuit breaker or reduce wet extraction quality.
4) Remove the transparent cover and remove the recov-
ery tank below cover. .(FIG. 1A)
5) Measure carpet cleaning solution such as Powr-Flite’s
Kold-Powr® per manufacturers recommended ratio
into the clean water tank and fill with hot water from a
very clean bucket. DO NOT use the waste tank to fill
the solution tank as debris could damage the pump or
block the jet. WARNING: DO NOT exceed 150° (65°
C)
6) Replace recovery (dirty water) tank above solution
tank. (FIG. 1A) Add defoamer solution per
manufacturer’s instructions as needed. 2 oz.
Powr-Flite Powr-Defoamer®
7) Replace the transparent cover. Pull back handle to
lock cover into place. (FIG. 1A) Treat heavily soiled
areas by using traffic lane cleaner such as Powr-Flite’s
Fast Lane®.
PRE-OPERATION INSTRUCTIONS for PFX7S and PFX9S
OPERATION OF SELF-CONTAINED CARPET CLEANER
NOTE: (color fastness) Before using carpet cleaning
chemicals, test on an inconspicuous part of the carpet for color fast-
ness. Place the solution on a small piece of clean white material
or tissue, then rub the carpet vigorously. Excessive amounts of dye
showing on the material would indicate that the colors are not fast,
and should not be wet cleaned.
1) Plug main power cable (FIG. 1A) into outlet. WARNING: This machine must be properly grounded.
See grounding instructions.
2) Press the master switch to the on position. Then press the vacuum switch on and the accessory/brush switch to the
right. (FIG 1C)
3) Press and hold the solution switch (FIG 1C) to apply the cleaning solution. Pull the machine backwards at the
same time to clean the carpet. Stop the solution spray about 12” (30cm) before the end so all of the solution is
vacuumed up. Slightly overlap the next cleaning pass to prevent streaking. A two (2) wet pass maximum is recom-
mended to avoid overwetting and one dry pass without solution spray will aid in drying time. After a few passes,
check the waste tank to see that no foam is present. Add extra defoamer if necessary.
4) Make sure to empty the recovery (top) tank (FIG. 1A) when it is approximately 3/4 full. Do not refill the solution
tank without emptying all the contents of the recovery tank first.
BRUSH HEIGHT
ADJUSTMENT
KNOB - PFX7S & 9S
RECOVERY
(WASTE)
TANK
SOLUTION
(CLEAN WATER)
TANK
CARRYING
HANDLE
TANK COVER
& HANDLE
SOLUTION
SWITCH
CIRCUIT
BREAKER
MASTER
SWITCH
VACUUM
SWITCH
ACCESSORY / BRUSH
SWITCH
MAIN
POWER
CABLE
POWER
CORD
FIG. 1A
PFX7S shown
FIG. 1C
BRUSH HEIGHT
ADJUSTMENT
KNOB - PFX4S
FIG. 1B

Other manuals for PFX3S

2

This manual suits for next models

2

Other Powr-Flite Floor Machine manuals

Powr-Flite Shine Brite 1200 RPM User manual

Powr-Flite

Powr-Flite Shine Brite 1200 RPM User manual

Powr-Flite C1600 User manual

Powr-Flite

Powr-Flite C1600 User manual

Powr-Flite M201-3 User manual

Powr-Flite

Powr-Flite M201-3 User manual

Powr-Flite NM171HD User manual

Powr-Flite

Powr-Flite NM171HD User manual

Powr-Flite PAS14G User manual

Powr-Flite

Powr-Flite PAS14G User manual

Powr-Flite NM2000 User manual

Powr-Flite

Powr-Flite NM2000 User manual

Powr-Flite PFX1080E User manual

Powr-Flite

Powr-Flite PFX1080E User manual

Powr-Flite MULTIWASH 14 User manual

Powr-Flite

Powr-Flite MULTIWASH 14 User manual

Powr-Flite PFX1082E User manual

Powr-Flite

Powr-Flite PFX1082E User manual

Powr-Flite C171 User manual

Powr-Flite

Powr-Flite C171 User manual

Powr-Flite PEB Installation and operation manual

Powr-Flite

Powr-Flite PEB Installation and operation manual

Powr-Flite ORB1420 User manual

Powr-Flite

Powr-Flite ORB1420 User manual

Powr-Flite PAS20BA-BC User manual

Powr-Flite

Powr-Flite PAS20BA-BC User manual

Powr-Flite B171 Product manual

Powr-Flite

Powr-Flite B171 Product manual

Powr-Flite PFX1080 SERIES User manual

Powr-Flite

Powr-Flite PFX1080 SERIES User manual

Powr-Flite PAS26R User manual

Powr-Flite

Powr-Flite PAS26R User manual

Powr-Flite BlackMax B171 User manual

Powr-Flite

Powr-Flite BlackMax B171 User manual

Powr-Flite Predator PAS20 User manual

Powr-Flite

Powr-Flite Predator PAS20 User manual

Powr-Flite 98150-PF User manual

Powr-Flite

Powr-Flite 98150-PF User manual

Powr-Flite PFX3S Guide

Powr-Flite

Powr-Flite PFX3S Guide

Powr-Flite B2000 User manual

Powr-Flite

Powr-Flite B2000 User manual

Powr-Flite P1500-3 Installation and operation manual

Powr-Flite

Powr-Flite P1500-3 Installation and operation manual

Powr-Flite M201-3 User manual

Powr-Flite

Powr-Flite M201-3 User manual

Powr-Flite PFX3S User manual

Powr-Flite

Powr-Flite PFX3S User manual

Popular Floor Machine manuals by other brands

WOLFF OMEGA Series Translation of the original manual

WOLFF

WOLFF OMEGA Series Translation of the original manual

Superabrasive LAVINA ELITE L321GEB user manual

Superabrasive

Superabrasive LAVINA ELITE L321GEB user manual

Tennant 6600 Operator's manual

Tennant

Tennant 6600 Operator's manual

COMAC CM1500 S Use and maintenance manual

COMAC

COMAC CM1500 S Use and maintenance manual

Windsor SCEX264 operating instructions

Windsor

Windsor SCEX264 operating instructions

CMi 115256 operating instructions

CMi

CMi 115256 operating instructions

Windsor LB1500 operating instructions

Windsor

Windsor LB1500 operating instructions

Texas Handy Sweep 600R-5 user manual

Texas

Texas Handy Sweep 600R-5 user manual

Mi-T-M AW-7020-8004 quick start guide

Mi-T-M

Mi-T-M AW-7020-8004 quick start guide

Minuteman X17 ECO CFS user manual

Minuteman

Minuteman X17 ECO CFS user manual

DiamaPro Systems SVX3-M owner's manual

DiamaPro Systems

DiamaPro Systems SVX3-M owner's manual

Kärcher BD 80/100 W Classic Bp manual

Kärcher

Kärcher BD 80/100 W Classic Bp manual

Tennant T17 Series Operator's manual

Tennant

Tennant T17 Series Operator's manual

Tennant 2260 Operator and parts manual

Tennant

Tennant 2260 Operator and parts manual

comoc CM1817 Use and maintenance manual

comoc

comoc CM1817 Use and maintenance manual

COMAC CS700 B 2021 Use and maintenance manual

COMAC

COMAC CS700 B 2021 Use and maintenance manual

Kärcher 1.008-058.0 manual

Kärcher

Kärcher 1.008-058.0 manual

Tennant 5200 Operator and parts manual

Tennant

Tennant 5200 Operator and parts manual

manuals.online logo
manuals.online logoBrands
  • About & Mission
  • Contact us
  • Privacy Policy
  • Terms and Conditions

Copyright 2025 Manuals.Online. All Rights Reserved.