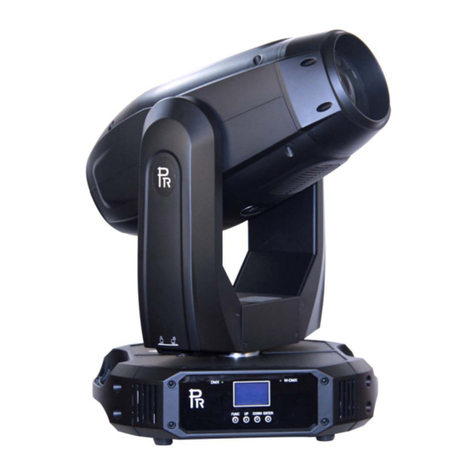
PR Lighting XR 1700 Wash User manual

2/2
INDEX
1. SAFETYANDWARNINGS
2. INSTUCTIONS
●CLEANINGAND MAINTENANCE
●LUBRICATION
●TROUBLESHOOTING
3.APPEARANCE
4.INSTALLATION
●RIGGING
●POWERCONNECTIONS
●DMX CONTROLCONNECTIONs
●DMXTERMINATOR
●ALIGNMENT/INSTALLATION/REPLACEMENTOFALAMP
5.SETUPAND CONFIGURATION
●FRONTPANELOPERATION
●DMX STARTADDRESS
●DMXWIRELSESSCONTROL
●STAND-ALONEMODE
●MASTER/SLAVEMODE
6.OPERATION MENU
7.DMXPROTOCOL
8.ICONSOFTHETOUCH SCREEN
9.ERRORMESSAGES
10.TECHNICALDATA
11.CIRCUITDIAGRAMANDPCB CONNECTIONS
●CIRCUITDIAGRAM
●PCB CONNECTION
12.COMPONENTORDERCODES
3
4
4
4
4
5
6
6
7
7
8
8
9
9
9
9
10
10
10
12
17
17
18
21
21
22
23
ACCESSORIES
The following items are supplied with theprojector and please check:
Name
Quantity
Unit
Remark
Gclamps
2
Pcs
XLR connector
1
Set
Male andfemale
Safetycord
2
Pcs
User manual
1
Pc
Ω clamps
2
Pcs
Optional
Please note that as part of our ongoing commitment to continuous product development, specifications are
subject to change without notice. Whilst every care is taken in the preparation of the manual we reserve the
right to change specifications in the course of product improvement. The publishers cannot be held responsible
for the accuracy of the information herein, or any consequence arising from them.
Every unit is tested completely and packed properly by the manufacturer. Please make sure the packing and /
or the unit is in good condition before installation and use. Should there be any damage caused by
transportation, consult your dealer and do not use the unit. Any damage caused by improper use will not be
assumed by the manufacturer and / or dealer.
Any future technical changes in the user manual won’t be with any further notice.
Note: Forthe products made by Guangzhou PR lighting Ltd, the warranty forthe whole product is one yearstarting from
the delivery date butthe light sourceis notwithinthewarranty.

3/3
1. SAFETYANDWARNINGS
NOTE
Before a projector’s installation, power-on, operation and maintenance, please carefully read
thesafetyinformationhereinafter!
Thefollowingsafetysignsareused inthe usermanual.
Warning
User
Manual
Electrical
shock
Goggles
Protective
Gloves
Flames
High
Temperature
● When unpacking , check if there is transportation damage before using the projector. Should there be any
damagecausedbytransportation,consultyourdealeranddonotuseit.
●The manufacture is not responsible for loss caused by the user not following the manual or changing the projector
ashe/shelikes.
●Pleasebenoted thatthedamagecausedbychangingthe projectorat willisnot warranted.
●Do not hesitate to contactthe dealer or the manufacturer if anyquestionsor advice.
● Theprojector is forindoor useonly,IP20.
● Use only in dry locations. Keep this unit away fromrain and moisture, excessive heat, humidity and dust. Do not
allowcontact withwateror anyother liquids.
●The projector should be kept away from high temperature, fire, electrical surge, vibration and strong light while
beingoperated.
●The projector is only intended for installation, operation and maintenance by qualified personnel. And the
operationmust strictlyfollowtheproceduresinthemanual.
●Norepairablepartsinthe projectoranddo notopencoversfor maintenance byyourself.
●Don’t look straightly into the light sources especially for epileptics, otherwise eyes will be burned..
●Donotconnectthisdeviceto anytypeofdimmerpack.
●After lampswitchedon,theminimumdistancebetweentheprojectorandilluminated surface is10m.
●lensandotheroptical partsshallbe replaced immediatelyiftheyhave deformedor beendamaged,otherwise the
lightoutput willbecompromised.
●Before operation, please confirm that all covers(housing) are on and screws tightened. It’s forbidden to use a
projector whilecovers(housing)areoff.
●Keep thelampcleananddo not touch it withbare hands.
●Whileoperating it, wearprotectiveitems.
●Any electrical connectionmustbecarried outbyaqualifiedperson.
●Beforeinstallation,pleaseconfirm thevoltagesupplied matcheswhatisrequired forthe projector.
●Eachprojectormustbeproperlyearthedand installedasper relatedelectricalstandards.
●Do not usepower cord withits insulatordamaged andconnect thepower cordwithother cables.
●If the projector is not used or under cleaning,, please hold the plug and unplug it. Do not unplug it forcefully
orbypullingthepower cable.
●Allpower cordsmustconformtorelatedsafetyand regulations.
●Whilebeingoperated, theprojectorshouldnotbeunderrainsor inhumidity.
●Do not switch on and off the projector constantly in very short intervals, otherwise the light source’s and other
electricalparts’ life willbeshortened .

4/4
●There are safety cord holes at the bottom of the base of a projector. In view of safety, please run the safety
cord supplied throughthe safetycord holesfor safety support.
●Before any installation, maintenance and cleaning work, please ensure the projector is disconnected from
powermains.
●After running for30minutes, the temperature ofthe housing oftheprojector is45℃.After stable operation,
itstemperature is80℃.
●Whilethelamp isstrickenfor thefirsttime,there willbe smokeand strangesmell.It’s normal and does not
meantheprojectorhas some defects.
●Donotmount theprojectordirectlyoninflammable surface.
●Donotprojectthebeamstraightlyoncombustible items andtheminimumdistancebetweentheprojector
andilluminateditemsis10m.
●Aprojector should be installed with good ventilationand the minimum distance betweenthe projector and
wallsis 50cm.At thesametime,pleaseensure thefansandairinletsandoutletsareworkable.
2. INSTRUCTIONS
●CLEANINGANDMAINTENANCE
If a projector can’t start. Please check if the fuse is blown up. If it does, replace it with a new fuse with same ratings. And the
projector has over-temperature protective device. If the temperature is too high, the protective device will be triggered to shutthe
projector off. When it happens, please check if the fans run normally or fan shield is blocked by dust. After the issue is solved,
restart theprojector.
The accumulationof oil, smoke and dust on the lens will compromise the light output. Cleaning a projector is very necessary to
ensure a reliable use of it. Cooling fans need to be cleaned every 15days. Internal lens, reflector and hot mirror need to be cleaned
periodicallytooptimize lightoutput.
Cleaningfrequencyis to be decided byoperations and its environment. Use soft cloth and normaldetergent for glassfor cleaning
work. It’s advised external optical system be cleaned every 20days and internal optical systems every 30/60days. Keep lens clean
and do not touchoptical parts with bare hands.
●Beforeanymaintenance and cleaning,please ensure theprojectisoffthepower.
●Onlyqualifiedperson isallowedtodo maintenance.
●Duringmaintenance and before maintenance, the projector mustbeoffpower.
●To avoid internal damage, sun light or other light mustn’t penetrate into the projector via front lens
whether itrunsornot.
●Do notuse alcohol or other organic solventto cleanthehousingtoavoiddamage.
●Do not use anysolvent withchemical elementsto cleancolorfiltersor hot mirror.
●LUBRICATION
To ensure smooth movement of gobos and zoom and focus lens, it’s advised rotators’ bearings and 2 sliding bars for zoom and
focuslensbelubricated every2 months.Highqualityandhightemperature lubricant/greaseisadvised..
●TROUBLESHOOTING(Details varywithdifferentprojectors)
PROBLEM
ACTION
The projector doesn’t switch on
Checkthe fuseonthepower socket.
Checkthe lamp.
Thelamp ison but the projector doesn’t respond
tothecontroller
Makesurethatthe fixture’s start address is right
Replaceor repair theXLRsignalcable.
Theprojector functions intermittently
Makesurethefanisworkingwellorfansandtheirshieldsarenotblocked
Beamappearsdim, Low inbrightness
Make sure the lamp is withinitslifespan
Removedustor grease fromthe lenses.
Theprojectimageappearsto haveahalo
Carefullycleanthelamp,opticallensesandothercomponents.
HeavilyDefectiveBeam
Checkif lensareingood condition(not cracked)
Cleandustor greaseon thelens.

5/5
3. APPEARANCE
During transportation, the head should be locked-Pan lock (5)and Tilt Lock(6) should be in LOCK position. Before operation,
bothneed tobeunlocked.
.Backpanelofthebase
Frontpanelofthebase
OK
1
2
3
4
5
6
7
8
9
10
1
2
3
4
5
6
7
8
9
10
Fresnel lens
Front Cover of
the head
front and back covers
of the head
U arm cover
Pan Lock
handle in the base
Front side cover of
the head
Tilt lock
Back side cover of the head
lamp cove
1234
7
5 6
8
1
2
3-pin XLR socket(Female)
3-pin XLR socket(Male)
4
5
6Power switch
7Air inlet
3
8Wireless Receiver(Only for the
lighting fixture with wireless
control function)
Power socket
Fuse holder
Ethernet Port
OK
123456
1
2
3
4
5
6
USB interface
down key
up key
Escape key/ left key
Touch screen
right key

6/6
4. INSTALLATION
●RIGGING
Before moving a projector, Please lock Pan and Tilt. Before its operation, please unlock them. It’s forbidden to run a
projectorwithpowerwhile itislocked.
Take 2 clamps and the safetycord out fromthe package and mount 2 clampson the underside of fixture with 2 retainers attached
to each clamp. Hang the fixture on the structure and fasten the screws attached to each clamp. (See the WARNING on the
underside of the base as shown above) To passthe SAFETY CORD throughthe HOLESfor safety! Always ensure that the
projector is firmlyanchored to avoid vibration and slipping whilst functioning. Always ensure thatthe structure that youaregoing
tomounttheprojectorto is secureand strong enoughto support theweightofaXR1000 Framing.
WARNING:
●TheprojectorMUSTbe liftedor carriedbythe HANDLESinstead ofclamps.
●.For safety the safety cord should afford 10 times the Projector’s weight.
●POWERCONNECTION
Connect the power cordas follows:
L(live)=brown
E(earth) =yellow/green
N(neutral)=blue
Before power connection, please ensure the power supplied mustmatch what the nameplate says. It is recommended that each
projector be connected withpowerseparatelyso thattheymaybeindividuallyswitchedonandoff.
Note: If projectors are connected in series, please connect POWERIN port of the 1st projector with the Power Mains, then
connectitsPOWEROUTwithPOWER INof the2nd projector,and so ontillallfixturesare connected.Ifthe voltagesupplied
is 200V-240V, the maximum projectors connected is 8pcs, ifit is 100V-120V, the maximum is 4pcs. The diameter of the cores
ofthewires forthePowerin/outcablesmustbeequalorbiggerthan2.5mm2.
●The earth wire(yellow/green) must be connected to the ground. And electrical connection must be in
accordancewiththestandardsconcerned.
●Ifany questionsabouttheelectricalinstallation,donotcontinuebutconsultaqualifiedelectrician.
safety cord hole
warning
please run the safety cord
through safety cord hole for safety
safety cord clamp
Handle operation
panel

7/7
●DMXCONTROLCONNECTION:
Connection between controller and projector and between one projector and another must be made with a twin-screened cable, with
each wire having at least a 0.5mm in diameter. Connection to and from the projector is via cannon3 pin (which are included with the
projector) or3pinXLRplugsand sockets.TheXLR'sareconnectedasshownin the figureabove.
Note: care should be taken to ensure that none of the pins touch the metallic body of the plug or each other. XLR plugs and sockets
mustn’t be connected in any way other than mentioned in the above figure. The projector accepts digital control signals in protocol
DMX512(1990).
Connect the controller’s DMX output to the first fixture’s DMX input, and connect the first fixture’s DMX output to the second
fixture’s DMX input and connect the rest fixtures in the same way. Eventually connect the last fixture’s DMX output to a DMX
terminatorasshown inthefigurebelow.
input DMX
controller
input
input outputoutputoutput
DMX
terminator

8/8
●DMXTERMINATOR
In the Controller mode, at the last fixture in the chain, the DMX output has to be connected with a DMX terminator. This prevents
electricalnoisefromdisturbingand corruptingthe DMXcontrol signals.
The DMX terminator is simply an XLR connector with a 120(ohm) resistor connected across pins 2 and 3, which is thenplugged
into the outputsocket on the lastprojector inthe chain.Theconnectionsare illustrated below.
● ALIGNMENT/INSTALLATION/REPLACEMENTOFALAMP
Beforeinstallation/replacement/alignment ofalamp, disconnect the unit fromthe power andlet it cool first.
LockTilt inthefigurebelowand openthelampcoverafter its4 screws are loosened.
After removalofthelamp cover,turnthelamp anti-clockwise and take itoutofthe ceramic stand..
Insert a new lamp. Note: while placing a new lamp, do not touch the burner of the lamp with bare hands, otherwise the light output
will becompromised.
Fastenthe4fast-fit screwsafter the lamp cover is on
Important: The unit uses high voltage discharge lamp with external igniter( ). While using the lamp, please carefully read
“INSTRUCTIONS” packed with the lamp.
●Don’t touch the internal surface of the reflector and the burner of the lamp with bare hands so as not to
impairthebeamoutput.While lamp’s installation, do not damage the metalwirearound the burner.
●Pleaseread"Instructions" enclosed withthe lamp
●Do operate the projector while adjustingthe lamp
5. SETUPANDCONFIGURATION
21
3
120
DMX TERMINATOR
CONNECTION
Connect a 120 (OHM) resistor
across pins 2 and 3 in an XLR plug
and insert into the DMX out socket
on the last unit in the chain. PIN 3
PIN 2
lamp
Lamp cover
fast fit screw

9/9
●FRONTPANELOPERATION
Theprojectorconfigurationcanbesetconveniently viapushbuttonsandcolortouch screen.
To browse through or change the projector ’s settings, touch the white area of the touch screen or press OK button for more than
3s(Only powered by the battery, pressing the OK button) to unlock the screen , then press ►key to enter the projector ’s function
menus. Each main menu hasits sub-menus. And each menu stands for special function. For the details, please see the following 6th
point ”Operation Menu”.:
1. At the page to set the fixture’s functions, press ◄,►,▲,▼keysortheirrespective icons to select the functionsdesired.
2. While at 2nd,3rd and 4th level of menus, the◄key is for ESCAPE, but ►key won’t work, and OK key is used for ENTER.
Press OK key to save the changes or enter into the sub menus. Press ▲or ▼keys to change the numbers(minus or plus).
Ortouch the option needed forchange.
Shortcut keys: After the Function Menu is entered into, there are all options for the functions on the top of the screen. On the
rightthereare4 shortcutkeyslike ←,→Lamp Controland English/Chinese.
●DMX STARTADDRESS
Eachprojector mustbe given aDMX start address so that the correctprojector responds to the correct controlsignals. This DMX start
address is the channel number from which the projector starts to “listen” to the digital control information being sent out from the
controller. The projector has 3DMX modes. There are standard mode ,short mode and extended mode. For example standard mode
has 19 channels, so set the No. 1 projector’s address 001, No. 2 projector’s address 020, No. 3 projector’s address 039,No. 4
projector’s address 058,andsoon.
Switch on the Projector . Press OK key more than 3 seconds to unlock panel, then press ►key to enter into the fixture’s operation
menus.
Select DMX Address icon and press OK key or touch the icon directly on the display and select DMX address at the 2nd level menu
fortheaddresssetting.
Press▲or ▼keysortouch<、>displayedfortheDMX addressdesired.
PressOKkeytoconfirm.
Pressthe◄keytogo back to theupperlevelmenu.
.
●DMXWIRELESSCONTROL
The projectorhaswirelesscontrolfunctionwithwirelessreceivermodule and antenna forremote control.
The setupofitisbelow:
1. Press OK for more than 3s to unlock the control panel, then press ►key to enter into the operation menu and select
“Config Settings”.
2. Select “Wireless First” or “Wireless Only” from the menu of “Signal Select”.

10/10
Only after the projector is linked with a transmitter, can it receive wireless signal sent by the transmitter. If unlinking it,
Press “Enter” for the menu of Un-link Wireless under the upper level menu of Config Settings , thenthe fixture is unlinked
with thewirelesstransmitter.
●STAND-ALONEMODE
Operate the projector without connecting with a controller, enable the master mode through the operation panel, the
projector will run in Stand-Alone mode automatically.
DMX address can be set at any number within 512.
●MASTER/SLAVEMODE
Many projectors can run synchronously in the Master/Slave mode by linking them with each other. First,
Connectthe first fixture’s DMX output to the second fixture’s DMX input using XLR-XLR control cable and then connect the second
fixture’s DMX output to the third fixture’s DMX input, and so on until all projectors areconnected inthis way. Eventually connectthe
last fixture’s DMX output to a DMX terminator. Set 1st projector as the master and others are Slaves.
StartAddressesofallSlavesare001; Operationmode of the Master can be set any mode for a Master’ and Slaves’ operation mode can
besetaccordingly.
After Poweredon,the groupwillrun in Master/Slave Mode
6.OPERATIONMENU
input
input
input outputoutputoutput
Slave Slave Master

11/11
1stLEVEL
2ndLEVEL
3rdLEVEL
4thLEVEL
5thLEVEL
Address
DMX Address
1-512
IP Address
DefaultIPAddress
2.X.X.X/10.X.X.X
CustomIPAddress
X.X.X.X
SubNet Mask
X.X.X.X
ArtNet Universe
0-255
Reset
TotalReset
ReallyReset?
Pan&TiltReset
ReallyReset?
ColourSystemReset
ReallyReset?
Dimmer/Shutterreset
ReallyReset?
Zoomreset
ReallyReset?
ConfigSettings
DMXChannel Mode
Short Mode
StandardMode
ExtendedMode
ViewSelected Mode
LampControl
LampControl
OFF/ ON
OnByPower On
OFF/ ON
Control By DMX
OFF/ ON
Lamp Power
1500/ 1700
SignalSelect
XLROnly
XLRFirst
WirelessOnly
WirelessFirst
WirelessIn/XLROut
LossofDMX
Normal timeout
Hold LastValue
DisplayConfig
DisplayMode
OffAfterDelay
OnAlways
DisplayInvert
Invert OFF
Invert ON
InvertAuto
LanguageSetting
English
Chinese
Touch Calibration
TemperatureUnit
CelsiusDegree
Fahrenheit Degree
Un-LinkWireless
ReallyUn-Link?
Defaults
RestoreDefaults?
Option Settings
Pan/Tilt Settings
PanDMXInvert
OFF/ ON
TiltDMXInvert
OFF/ ON
PanTilt Swap
OFF/ ON
XYFeedback
OFF/ ON
Pan/Tilt mode
Speed/Time
Invert Settings
DimmerInvert
OFF/ ON
ZoomInvert
OFF/ON
CMYInvert
OFF/ ON
CTOInvert
DimmerCurve
Linear/ inverseSquare Law
Defaults
RestoreDefaults?

12/12
Information
ViewDMXValues
LampHours
Reset Lamp Hours
Total Hours
Temperature
SoftwareVersion
ElectronicSN
RDMDevice Label
Fan Status
Encoder
Service
ManualEffectControl
StrobeXXX
DimmerXXX
…
PositionCalibrations
InputPassword
Pan XXX
Tilt XXX
…
Producttype
Input Password
USBUpdateSoftware
Operation
Mode
DMXMode
ChangeOperationMode?
MasterMode
Preset Memory
ChangeOperationMode?
User Memory1
ChangeOperationMode?
User Memory2
ChangeOperationMode?
Stand-AloneMode
Preset Memory
ChangeOperationMode?
User Memory1
ChangeOperationMode?
User Memory2
ChangeOperationMode?
Static Scene
ChangeOperationMode?
User
Memories
EditUserMemory
EditUserMemory1
/
EditUserMemory2
SceneXX
(1~200Scenes)
StrobeXXX
DimmerXXX
…
DelayTimeXXX
DelayUnit
LinkTo StepXXX
EditStaticScene
StrobeXXX
DimmerXXX
…
Init User Memory
Reset UserMemory1
Reset User Memory?
Reset UserMemory2
Reset User Memory?
Reset StaticScene
Reset StaticScene?
7.DMXPROTOCOL

13/13
Basicmode
Standard
mode
Extended
mode
Function
DMXValue
FunctionDescription
1
1
1
Strobe
000-010
Close(Lamp Switches to 1200 watt mode after shutter is
closed for5seconds)
011-025
Open
026-225
Strobe speed fromslow`to fast
226-246
Macroeffect
247-255
Open
2
2
2
Dimmer
000-000
Close
001-255
Dimmerfromdarkto light(0-100%)
3
3
Dimmerin16bit
000-255
DimmerFine
3
4
4
CMY macro
000-007
Reserved
008-009
ColourMacro1
010-011
ColourMacro2
012-013
ColourMacro3
014-015
ColourMacro4
016-017
ColourMacro5
018-019
ColourMacro6
020-021
ColourMacro7
022-023
ColourMacro8
024-025
ColourMacro9
026-027
ColourMacro10
028-029
ColourMacro11
030-031
ColourMacro12
032-033
ColourMacro13
034-035
ColourMacro14
036-037
ColourMacro15
038-039
ColourMacro16
040-041
ColourMacro17
042-043
ColourMacro18
044-045
ColourMacro19
046-047
ColourMacro20
048-049
ColourMacro21
050-051
ColourMacro22
052-053
ColourMacro23
054-055
ColourMacro24
056-057
ColourMacro25
058-059
ColourMacro26
060-061
ColourMacro27
062-063
ColourMacro28
064-065
ColourMacro29
066-067
ColourMacro30

14/14
068-069
MediumBastardAmber
070-071
MediumYellow
072-073
Fire
074-075
BrightRed
076-077
Lavender
078-079
SkyBlue
080-081
Tokyo Blue
082-083
JustBlue
084-085
LimeGreen
086-087
DarkYellowGreen
088-089
SpringYellow
090-091
Yellow
092-093
Light Amber
094-095
Straw
096-097
DeepAmber
098-099
Orange
100-101
PrimaryRed
102-103
DarkPink
104-105
PeacockBlue
106-107
MediumBlue-Green
108-109
Steel Blue
110-111
Light Blue
112-113
DarkBlue
114-115
Deep Blue
116-117
LEEGreen
118-119
BrightPink
120-121
MarineBlue
122-123
MediumBlue
124-125
Golden Amber
126-127
Deep Golden Amber
128-129
PaleLavender
130-131
Special Lavender
132-133
PaleGreen
134-135
PrimaryGreen
136-137
BrightBlue
138-139
Apricot
140-141
BrightRose
142-143
PaleGold
144-145
PaleRose
146-147
Pink
148-149
Deep Orange
150-151
Bastard Amber
152-153
FlameRed
154-155
DaylightBlue

15/15
156-157
Lilac Tint
158-159
Deep Lavender
160-161
Lagoon Blue
162-163
ChromeOrange
164-165
Dark Lavender
166-167
Congo Blue
168-169
AliceBlue
170-171
FullC.T. Blue
172-173
Half C.T.Blue
174-175
QuarterC.T. Blue
176-177
FullC.T. Orange
178-179
Half C.T. Orange
180-181
QuarterC.T.Orange
182-183
LEEMinusGreen
184-185
HalfMinusGreen
186-187
Three QuarterC.T. Blue
188-189
Three QuarterC.T. Orange
190-191
GlacierBlue
192-193
LighterBlue
194-195
CabanaBlue
196-197
MillenniumGold
198-199
VanityFair
200-255
CMYcolourmixingfromslowtofast
4
5
5
Cyan
000-255
Cyan(Linear0-100%)
6
Cyanin16bit
000-255
Cyanin16Bitprecision
5
6
7
Yellow
000-255
Yellow(Linear0-100%)
8
Yellowin16bit
000-255
Yellowin16Bitprecision
6
7
9
Magenta
000-255
Magenta (Linear0-100%)
10
Magentain16bit
000-255
Magenta in 16 Bitprecision
7
8
11
CTO
000-255
Linearadjustfromhightolow
12
CTOin16bit
000-255
CTOin 16 Bit precision
8
9
13
Colorwheel1
000-063
index0-360°
064-067
White
068-071
White/Red
072-075
Red
076-079
Red/Yellow
080-083
Yellow
084-087
Yellow/ Blue
088-091
Blue
092-095
Blue /Green
096-099
Green
100-103
Green/Pink
104-107
Pink
108-111
Pink/Orange

16/16
112-115
Orange
116-119
Orange/ UV
120-123
UV
124-127
UV/White
128-191
Rainbowrotationspeedfromslowtofast
192-255
Rainbowreverserotationspeed fromslowto fast
10
14
Color wheel1 fine
000-255
Colour Continualpositioningin16 Bit precision
9
11
15
Colorwheel2
000-063
index0-360°
064-067
White
068-071
White/DeepRed
072-075
DeepRed
076-079
DeepRed/DeepMagenta
080-083
DeepMagenta
084-087
DeepMagenta/LightMagenta
088-091
LightMagenta
092-095
LightMagenta/Light yellow
096-099
LightYellow
100-103
LightYellow/Lightgreen
104-107
Light green
108-111
Light green/Deep cyan
112-115
Deepcyan
116-119
Deepcyan/ lightcyan
120-123
Lightcyan
124-127
Light cyan7/white
128-191
Rainbowrotationspeedfromslowtofast
192-255
Rainbowreverserotationspeed fromslowto fast
12
16
Color wheel2 fine
000-255
Colour Continualpositioningin16 Bit precision
10
13
17
Zoom
000-255
Linearlyzooming
18
ZoomFine
000-255
Zoomin 16 Bitprecision
11
14
19
Pan
000-255
Pan movement
15
20
PanFine
000-255
Pan movementin 16bitprecision
12
16
21
Tilt
000-255
Tiltmovement
17
22
TiltFine
000-255
Tilt movement16 bitprecision
13
18
23
Pan&TiltSpeed
000-001
Speed Mode
002-255
Pan&Tiltspeed fromfasttoslow
14
19
24
Power/Special
functions
000-019
Reserved
1.Toactivatefollowingfunctions,stayinDMXvalueforatleast5s
2.Thelamp isallowed to beturned off5 minutesafterthelamp ison. Andthe
lampisallowedtobeturnedon5minutesafterthelampisoff.
3. Before the lamp on or lamp off, set “control by DMX”/Lamp
Control/ConfigSettingsasONviacontrolpanel.
020-024
GraphicdisplayOn
025-029
GraphicdisplayOff

17/17
030-034
Reserved
035-039
Lamp power1500W
040-044
Lamp power1700W
045-089
Reserved
090-094
Pan/Tiltspeed mode
095-099
Pan/Tilttimemode
100-129
Reserved
130-139
LampOn
140-149
Pan/Tiltreset
150-159
Coloursystemreset
160-169
Reserved
170-179
Dimmer/Shutterreset
180-189
Zoomreset
190-199
Reserved
200-209
Totalreset
210-229
Reserved
230-239
LampOff
240-255
Reserved
1. The projector can’t be turned on within 1 minute after the lamp-off.
2.Fanerrorcancauselamp-off.
3. "SpeedMode"means Pan and Tilt willmovefromPointA to PointBat their respective maximumspeeds."Time Mode"
meansbothPanandTiltwillarriveat designatedpointatthe same time.It'sadvisedTime Modebe used iftheprojector runs
circlesorinobliquelines.
8.ICONSOFTHETROUCHSCREEN

18/18
LampControl
OptionSettings
Chinese/English
Information
ErrorMessages
Service
Address
OperationMode
Reset
UserMemories
ConfigSettings
9.ERROR MESSAGES
Thesystemcandetectsome errorsduring thereset,if displayed,touch to viewtheerror.
Theerror messagesareas follows:
Name
Type
Correction
Pan
Timeout/magnetSensor/Encoder
Checkifwiring,positioningpartsandmotorsarenormal
Tilt
Timeout/magnetSensor/Encoder
Check ifwiring,positioningpartsand motors arenormal
Cyan
Timeout
Checkifwiring,positioningpartsandmotorsarenormal
Yellow
Timeout
Check ifwiring,positioningpartsand motors arenormal
Magenta
Timeout
Checkifwiring,positioningpartsandmotorsarenormal
CTO
Timeout
Checkif wiring,positioningpartsand motorsare normal
ColorWheel1
Timeout
Checkifwiring,positioningpartsandmotorsarenormal
ColorWheel12
Timeout
Check ifwiring,positioningpartsand motors arenormal
Dimmer
Timeout
Checkifwiring,positioningpartsandmotorsarenormal
Strobe
Timeout
Check ifwiring,positioningpartsand motors arenormal
Zoom
Timeout
Check ifwiring,positioningpartsand motors arenormal
Anglelens
Timeout
Checkif wiring,positioningparts and motorsarenormal
LampFan1
Error
Checkiffanand itswiringare normal
LampFan2
Error
Check iffan and itswiringare normal
CMYFan1
Error
Checkiffanand itswiringare normal
CMYFan2
Error
Check iffan and itswiringare normal
Base Fan1
Error
Check iffan and itswiringare normal
BaseFan2
Error
Check iffan and itswiringare normal
PanandTiltBoard
Error
Checksignalwire
MotorDriverBoard1
Error
Checksignalwire
MotorDriverBoard2
Error
Checksignalwire
Lampon
Timeout
Checkifhe lamp isdamaged
LampLife
TimeoutWarning
LampOff[FanError]
Error
Checkifallfans arenormal
LapsedTime
Timeout

19/19
TimeIC
Error
Lapsedtime
Xdays
Usehours Setting
successfully
10.TECHNICALDATA
INPUTVOLTAGES
Input voltage200V~240VAC,50/60Hz
Inputpower2100W @220V
Currentatmaximum AC10A
Power factor PF>90%
LAMP SPECIFICATIONS
Lamp
lok-it1700W/PS
ColorTemperature
CeramicStand
5600K
Single-ended
ManufacturersRated Lamp Life
750hours

20/20
COLORS
CMYlinearcolor mixing systemwithmacros
2Colorwheels: 7colors+Open, half-coloreffect,bi-directionalrainboweffect with variablespeeds,
Stepping/linearcolorchanging
ColorWheel1
ColorWheel2
CTO:
0-100%LinearCTOsystem
No.
CodeNo.
Colors
WaveLength
1
090070041A
Red
λ=620±5nm
2
090070044A
Yellow
λ=510/545±5nm
3
090070043A
Blue
λ=500±5nm
4
090070042A
Green
λ=540±5nm
5
090070045A
Pink
λ=490/585±5nm
6
090070046A
Orange
λ=600±5nm
7
090070047A
UVlight
λ=460/690±5nm
No.
CodeNo.
Colors
WaveLength
1
090070034A
DeepRed
λ=645±5nm
2
090070037A
DeepMagenta
λ=450/630±5nm
3
090070040A
Light Magenta
λ=445/620±5nm
4
090070039A
LightYellow
λ=520±5nm
5
090070035A
Light Green
λ=485/525±5nm
6
090070036A
DeepCyan
λ=575±5nm
7
090070038A
LightCyan
λ=590±5nm
ZOOM
DMX linear zoom
DIMMER
0-100% Linearlyadjustable
This manual suits for next models
1
Table of contents
Other PR Lighting Light Fixture manuals

PR Lighting
PR Lighting XRLED 700-WBWS User manual

PR Lighting
PR Lighting XR330 BWS User manual

PR Lighting
PR Lighting ARC LED 1572 User manual

PR Lighting
PR Lighting LS 90 Logo User manual

PR Lighting
PR Lighting XLED 2007 BEAM PR-8123 User manual

PR Lighting
PR Lighting XL WASH 1200 PR-2905 User manual

PR Lighting
PR Lighting XR440 BWS User manual

PR Lighting
PR Lighting LS 150 Water User manual

PR Lighting
PR Lighting AQUA 350E BWS User manual

PR Lighting
PR Lighting THEATRE COLOUR LT User manual