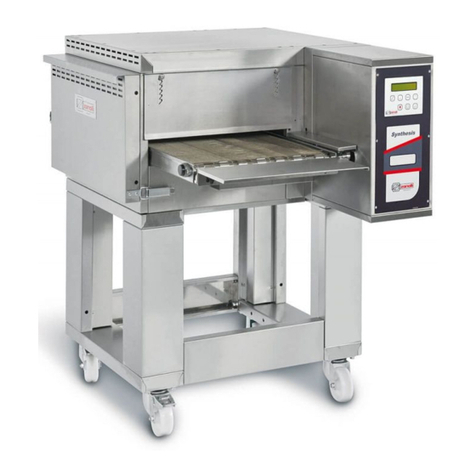
Pratica Miniconv Claaoic HPE80 User manual

BAKING OVENS
BAKING OVENS
INSTALLATION AND OPERATION MANUAL
HPE80
AND
(SIMPLE VERSION AND PROGRAMMABLE)


LETTER TO CUSTOMERS
Pratica Inc. is proud to become part of your day-to-day lives with our products. By
purchasing Pratica's equipments, you will have a partner always attentive to your
needs and interested in keeping customers satisfied.
We are available to serve you at any time, whether it is to hear your ideas,
criticisms, suggestions or to solve an issue.
Count on us!
Our Mission
.
Bring quality and productivity to the food preparation environment.
Our Commitment
.
ŸTo know and meet the needs of our customers.
.
ŸOffer reliable, high-performance, and energy-efficient products.
.
ŸAlways looking for improvements of processes, products and cost to offer
more value to our customers every single day.
.
ŸTreat our customers with complete honesty and respect.
.
ŸPrática Inc. donates a portion of its profit to charitable causes.
This manual contains all the information for you to install and use your equipment
correctly and get the best performance results, with quality and safety.
We recommend you to read and follow all the guidelines contained therein and the
always keep it in a suitable place for future consultations.


INDEX
IMPORTANT SAFETY INSTRUCTIONS
Use recommendations................................................................................
IDENTIFICATION OF SYMBOLS USED IN THIS MANUAL.............................
WARRANTY TERM
Terms and detailing.....................................................................................
Warranty exclusions....................................................................................
Notes and recommendations......................................................................
INSTALLATION INSTRUCTIONS
Electrical installation...................................................................................
Exhaust system............................................................................................
Hydraulic installation..................................................................................
Drain...........................................................................................................
Dimensions.................................................................................................
General recommendations.........................................................................
Application.................................................................................................
OPERATING INSTRUCTIONS
Panel...........................................................................................................
Operation and programming.......................................................................
CLEANING INSTRUCTIONS......................................................................
PROBLEMS: CAUSES AND SOLUTIONS.....................................................
06
08
09
09
10
12
13
14
14
15
17
17
18
20
25
28

06
IMPORTANT SAFETY INSTRUCTIONS
USE RECOMMENDATIONS
ŸOven operation: It is recommended that the oven operator to always wear
thermal protection gloves and an apron to prevent burns when in contact with
the oven chamber and possible spillage of the contents of the trays.
ŸUse of the panel: The panel must be operated with fingers only, the use of any
instrument may damage the unit and jeopardize the operator's safety.
ŸRemove metal or plastic sealing wires of bags inserted in the unit. Check if the
container used is under specification for temperature and microwaves provided
by the unit. Do not use plastic utensils.
ŸFully sealed packages should not be heated in the oven as they can explode.
ŸIt is recommended that children be watched to ensure that they are not playing
with the equipment.
ŸDo not use the equipment if it is damaged, specially if its door is not closing
properly.
ŸDo not place any object between the inner cavity and the oven door, obstructing
the door from closing.
ŸUse this equipment only for the funcons described in this manual.
CAUTION: To avoid burns, do not use containers with liquids or
kitchen products that become liquids by heating up to a boiling
point. The oven must be mounted after the installation at
63in/ 5ft / 1.6m above floor level.

RECOMMENDATIONS FOR USE (continuation)
CAUTION!
To avoid steam burns, open the door in two steps:
ŸThis equipment is not intended for use by people (including children) with
limited physical, sensory or mental abilities, or by people with a lack of
experience and knowledge, unless they have received instructions concerning
the use of the equipment or are under the supervision of someone responsible
for its safety.
ŸDo not use the oven handle to move the equipment. The oven
must be moved exclusively from its sides.
ŸDo not use the equipment door as support. This will cause
unevenness of the door and equipment malfunction.
ŸThe oven door is only intended for sealing microwaves generated
during cooking. Using the door for any other purpose not
described in this manual may void the warranty.
ŸThe maximum load limit are:
Miniconv: 2,4 Kg per unit;
HPE80: 5,6 Kg per unit.
CAUTION: If there is smoke, turn off the oven, disconnect
the plug from the outlet and keep the oven door closed till
the flame goes out.
07
1°) Leave the door half-
opened for the heat and
steam outlets from the
oven.
2°) Open the door
completely

08
IDENTIFICATION OF SYMBOLS USED IN THIS MANUAL
DANGER! THREAT OF RISK THAT MAY CAUSE SERIOUS INJURY OR DEATH
ALERT
WARNING - FIRE RISK - TO REDUCE THE FIRE RISK DO NOT REMOVE THIS
COVER. NO USER-SERVICEABLE PARTS INSIDE. REPAIR SHOULD BE DONE
BY AUTHORIZED SERVICE PERSONNEL ONLY
WARNING - RISK OF ELECTRIC SHOCK - TO REDUCE THE RISK OF ELECTRIC
SHOCK DO NOT REMOVE THIS COVER. NO USER-SERVICEABLE PARTS
INSIDE. REPAIR SHOULD BE DONE BY AUTHORIZED SERVICE PERSONNEL
ONLY
WARNING - BURN RISK - DO NOT TOUCH ANY PART WITH THIS SYMBOL
WHILE THE OVEN IS IN OPERATION.
WARNING - RISK OF BURN FROM SPILLING OF HOT LOAD - TO AVOID
BURNS, DO NOT USE CONTAINERS WITH LIQUIDS OR KITCHEN
PRODUCTS THAT BECOME LIQUIDS BY HEATING UP TO A BOILING
POINT.
GROUNDING SYMBOL
EQUIPOTENTIAL SYMBOL
USE TIPS AND INFORMATION

09
WARRANTY TERM
TERMS AND DETAILING
a) Our products are warrantied for twelve 12 months for parts and labor, and twenty-
four months for the all heating element parts; from the date the product is installed.
If, for any reason, there is no record of the installation date nor the purchase invoice
is not found, the date of manufacture of the equipment contained on the indicative
label will be considered the date of beginning of the applicability of this guarantee.
b) If new visits are needed to complete the delivery/installation of the product due to
the lack of adequate, electrical, or exhaust related conditions, the costs of such visits
shall be the customer's responsibility.
c) For the appliance's installation, the customer must provide all conditions required
in the installation blueprint. The customer will also be responsible for transporting
the equipment to the installation site.
d) The warranty only covers manufacturing and component failures, damages
caused by lack of heeding label warnings on the product will not be covered.
e) The warranty will cover adjustments and replacement of defective parts. It is the
responsibility of the authorized service technician to return the defective parts to
Pratica Inc. for analysis when requested by the Manufacturer.
f) Warranty service calls will not justify the extent of the warranty, returns or
exchanges of the equipment, or any other type of claim.
WARRANTY EXCLUSIONS
a) The customer should thoroughly inspect the equipment upon delivery and
contact the carrier in case of shipping damage arising from transport.
b) Prática will not respond for any issues arising for electrical building irregularities,
or a lack of abiding to the local electrical code.
c) Use or installation not in accordance with the Installation and Operation Manual
accompanying the product.

10
d) Failure to observe the installation details per the Installation and Operation
Manual, such as uneven floors, installing the oven next to equipment that exudes fat,
heat or solid particles, lack of air circulation, etc.
e) Any damage and defects resulting from inappropriate cleaning products that
result in damages to the components will not be covered under warranty. For
example, pouring water inside the electric panel, etc.
f) Changes performed by unauthorized technicians in the original conditions of
installation such as electrical distribution, installation location, etc.
g) Use of aggressive or abrasive products that are unsuitable for cleaning which may
tarnish, wear, scratch or damage accessories or equipment components.
h) Occurrences from electrical discharges arising from acts of nature or voltage
peaks caused by generators or power supply companies.
i) Damage to the equipment or its accessories caused by accidents, improper
operation, improper handling or installation as described by the Operation Manual
included with this product.
j) Repair attempts by unauthorized third parties or use of non-OEM parts and
components, regardless of the damage or defects.
NOTES AND RECOMMENDATIONS
a) The operator should use the Installation and Operation Manual as a guide.
b) Make sure that the electric systems are made and installed by a qualified company
or technician.
c) Before contacting technical assistance, check the manual for troubleshooting tips
that can be solved without a technician. Always remember that Pratica must be
contacted first before contracting with a service agent.

11
d) You can call our technical assistance to provide feedback, offer suggestions, or get
assistance troubleshooting during normal business hours at +1 214 584- 6269 or +1
469-583-4643.
EQUIPMENT IDENTIFICATION
(Fill in to make technical support calls easier )
MODEL
VOLTAGE
SERIAL NUMBER
RESELLER
INVOICE
NUMBER
PURCHASE DATE

INSTALLATION INSTRUCTIONS
ELECTRICAL INSTALLATION
ŸAlways follow the installation instructions in the instruction manual or the
product's spec sheet. This form is attached to the manual, in addition to being
sent by email upon approval of the order, it is also available on our website
(www.praticaus.com), in case of doubts, contact Practical Technical Assistance:
+1 214 584- 6269 or +1 469-583-4643.
ŸThe equipment MUST be grounded.
ŸThe oven must have a dedicated circuit breaker.
ŸDo not immerse the power cord or connect water.
ŸKeep the power cord away from heated surfaces.
ŸIf the power cable is damaged, it must be immediately replaced
by an authorized technician to avoid shock hazards.
ŸOnly qualified personnel should open the equipment panel.
ŸThere is an equipotential point on the rear panel of the oven.
ŸUse of pressure cables to prevent movement of the power cable.
ŸIn case the oven voltage is 380/400 volts, a neutral cable (independent of the
ground) must be available.
ŸEnsure that the electrical characteriscs
of the power grid are in accordance with
the technical specificaons located on
the idenficaon tag label located on
front boom cover of the unit.
ŸT h e po wer g r i d i s a cust omer' s
responsibility.
ŸThis unit must be properly grounded to
avoid electrical shock .
ŸThe circuit braker should be located no
more than 1,5m away from the unit.
Maximum
distance
1,5m
Water Tap
Ø ⁄"
1m
Note: The equipment has a connector for interconnect it with other
equipment. This connector is intended to keep several devices with
the same electrical potential. Not necessarily the grounding of a
local connection. This connector on the back of the device is
identified by the symbol on the right:
12

INSTALLATION INSTRUCTIONS
EXHAUST SYSTEM
ŸDo not block the air inlets and outlets on the right and rear sides of the oven.
ŸThe steam outlet is located at the rear of the equipment.
ŸIt is mandatory to use an exhaust hood to capture the vapors generated during
the baking.
ŸThe exhaust hood shall be at least 40cm above the oven roof and shall project
30cm beyond the front face of the oven so that vapours emanang from the
steam outlet and opening the door are captured by the exhaust hood.
ELECTRICAL SPECIFICATIONS
75
EXHAUST HOOD
400
300
13
Voltage Phases Power Circuit Breaker Cable
Socket
Models
HPE80
(Simple and Programmable)
230V
220V
380V
Single
Multi
32A
32A
16A
3x4 mm²
3x4 mm²
5x2.5 mm²
32A(2P+E)
32A(2P+E)
16A(3P+N+E)
Miniconv Classic
(Simple and Programmable) 230V
220V Single
Single
16A
16A
3x1.5 mm² 16A(2P+E)
16A(3P+E)
2.56kW
2.8kW 3x1.5 mm²
400V Multi 16A 5x2.5 mm² 16A(3P+N+E)
5.5kW
Single 6.1kW
5.5kW
6.1kW

INSTALLATION INSTRUCTIONS
.
HYDRAULIC INSTALLATION
ŸThe oven must be connected to a cold water plumbing. A 3/4" log with external
thread shall be available for connection of the water inlet hose located at a
maximum distance of 1.5 m from the oven.
ŸWe recommend the original 3M filter (not included) to reduce water hardness.
ŸImportant: Before carrying out the water installation, discharge the ducts on the
side of the building installation to remove any dirt from the plumbing (purging).
For proper performance, note the hydraulic network pressure:
Use only new hoses for water installation.
Measurement Unit
m.c (water column meters)
bar
kPa
Psi
Minimum
5,0
0,5
50
7,3
Maximum
15,0
1,5
150
21,8
14

INSTALLATION INSTRUCTIONS
MINICONV CLASSIC - DIMENSIONS
NOTE: DIMENSIONS IN MILLIMETRES (mm)
694mm
124
mm
396
mm
106
mm
68
mm
586mm
446
mm
530mm
SIDE VIEW
FRONT VIEW
TOP VIEW
WITH OPEN DOOR
590mm 486mm
1076mm
15

SIDE VIEW FRONT VIEW
TOP VIEW
WITH THE DOOR OPEN
Dumper
Power
Cable
Water
inlet
HOOD
Steam
outlet
400
300
832 61 75
893
Water Tap
Ø ⁄"
1m
905
600
775
138
1572
Steam outlet
286
INSTALLATION INSTRUCTIONS
HPE80 - DIMENSIONS
NOTE: DIMENSIONS IN MILLIMETRES (mm)
Maximum
distance
1,5m
16

GENERAL RECOMMENDATIONS
ŸDo not use this product near water, kitchen sink, wet places, or
near a swimming pool.
ŸIf a residue accumulation inside the chamber cathes fire, keep the
oven door closed, turn the equipment off and unplug it from the
power outlet.
ŸDo not use the oven to dry or to store clothes.
ŸIf the oven door is damaged, it must not be operated until it gets
repaired by a qualified technician.
ŸThe oven must be installed in a level, venlated locaon. Failures
caused by improper installing locaon may result in warranty loss.
ŸA minimum distance of 25mm from the sides and 75mm from the
boom of the venlaon inlets shall be observed.
.
ŸTo facilitate the installaon and maintenance of the oven, a space of at least
800mm from the right side and the wall and 150mm from the le and rear sides is
recommended. Aer maintenance/installaon, this departure can be reduced to
the distances menoned above.
.
ŸThe oven shall not be positioned next to stoves, fryers and hot plates or other heat
sources exhaling fats, vapours and heat.
ŸIn case of voltage loss or error during a recipe, the progress will be lost. Recipes
will keep intact if the issue regarding power grid.
ŸDo not cover or block any air inlet and outlet of the unit.
ŸDo not use the oven outdoors.
ŸDo not store food inside the oven when it is not in operation.
APPLICATION
The Miniconv Classic and HPE80 Prática line is to be used for preparing bakery and
confectionery products in general. In reason these are convection ovens, the
temperatures and times used in food preparations will normally be below those
used in oven without forced air circulation.
17

ATTENTION: The Manual Steam Injection
Button (6) is only available in the
Miniconv with Steam version.
1 - Temperature Indicator: Shows the desired temperature.
2 - LED: When lit, it indicates that the set temperature has
not been reached.
3 - Temperature adjustment: Adjusts the temperature that
should be reached.
4 - Time Indicator: Shows the time left for the process to
finish.
5 - Time adjustment: To adjust the cooking time of food, an
alarm sounds when the programmed time expires. The
equipment remains in operation and only switches off with
the intervention of the operator, opening the door or
switching off the oven.
6 - Manual Steam Button: While pressed, it injects steam
inside the chamber.
.
7 - On/Off: Turns the oven off or puts the oven into
operation.
OPERATING INSTRUCTIONS - PANEL
MINCONV CLASSIC AND HPE80 (SIMPLE VERSION)
min.
1
2
3
4
5
6
7
1
2
3
4
6
7
5
18

OPERATING INSTRUCTIONS - PANEL
MINCONV CLASSIC AND HPE80 (PROGRAMMABLE)
46
5
13
2
7 9
0
8
Temperature
indication
Temperature
indication LED
Temperature
adjustment
Vapor Manual
On/Off
Time
adjustment
Time indication
Return
Settings
Program/Play
Direct access
to recipes
Note: Touching any key turns the light on for 1 minute.
19

OPERATION AND PROGRAMMING
ŸTo turn on the oven, press the On / Off key:
ŸAfter turning on the oven, the Temperature Indication and Time Indication of the
oven will show the last temperature worked and the infinite time.
ŸTo adjust the cooking time, press the Time Adjustment keys located SPACE
below the time display.
ŸTo set the desired temperature, press the Temperature Setting key: which SPACE
are below the temperature indication.
ŸTo use the steam injection, in case of a manual program, press the manual steam
key:
ŸTo adjust the manual injection level, press and hold the Manual Steam key TEC
for 3 seconds. The top screen will show the message "STEA" and you can select
the level between low (LOW), medium (MID) and high (HIGH). To confirm the
select level press the Program/Run key.TEC
PROGRAM RECIPES
ŸTo start the programming process of a recipe, press the Program/Run: key. TEC
ŸUsing the lower keys (Time Adjustment) or selecting from the numeric UP/DO
keypad, selecting the recipe to be edited.
ŸAfter selecting the recipe, press and hold the Program/Run key for 3 seconds TEC
to enter edit mode.
Note:
Up to 100 recipes can
be programmed.
Note:
If the "Edit" parameter of the settings is set to "On" it
is necessary to enter the user password to edit the recipe.
Note:
Time can be set up to 360 minutes.
Note: The temperature can reach up to: Miniconv Classic: 210°C;
Miniconv Prog: 230°C; HPE80: 230°C and HPE80 Prog: 250°C.
Note: The oven will automatically return to 0% (no steam)
if a programmed recipe is made or if the time in manual
mode reaches zero.
20
Table of contents
Other Pratica Oven manuals
Pratica
Pratica Copa Express User manual

Pratica
Pratica Rocket Express User manual
Pratica
Pratica Rocket Express User manual
Pratica
Pratica EC3 User manual

Pratica
Pratica FORZA STI User manual
Pratica
Pratica EC3 User manual

Pratica
Pratica Rocket Express User manual

Pratica
Pratica Rocket Express User manual

Pratica
Pratica Copa Express User manual
Pratica
Pratica Forza Express User manual
