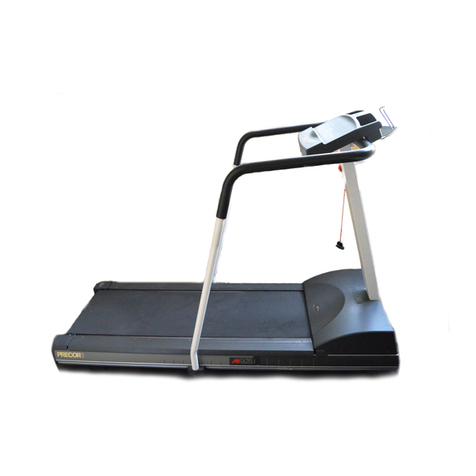
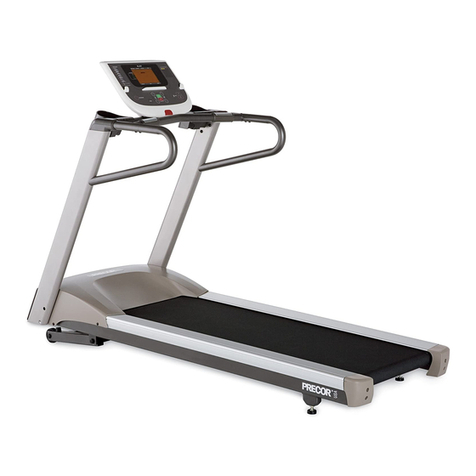
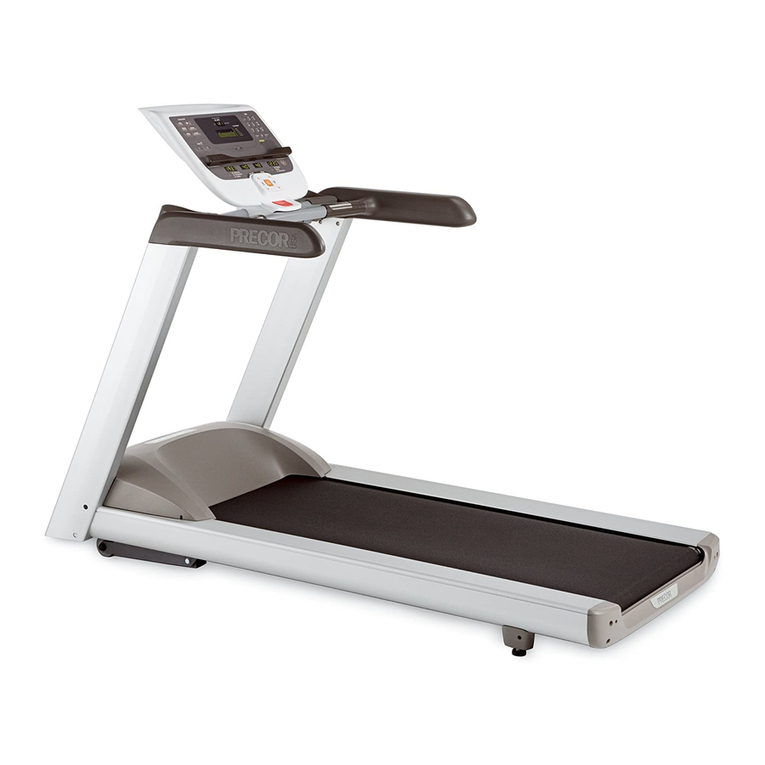
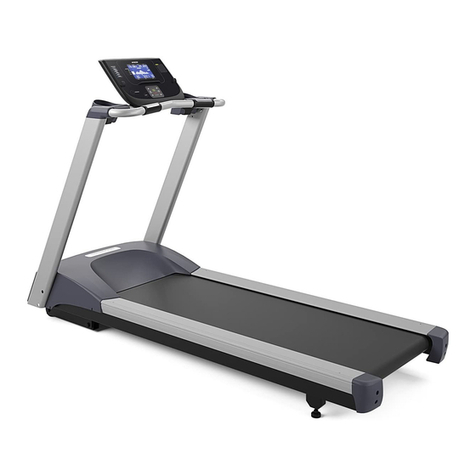
Precor 9.33 User manual

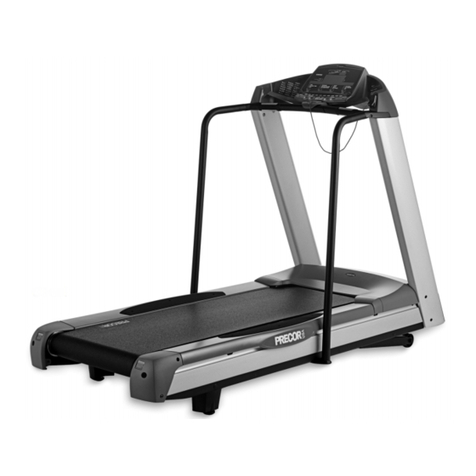
9.33, 9.35 240V Treadmill
Page 1
9.33, 9.35 Treadmill
Warning: This service manual is for use by Precor trained service providers only.
IfyouarenotaPrecorTrainedServicer,youmustnotattempttoserviceanyPrecorProduct;
Call your dealer for service.
This document contains information required to perform the majority of troubleshooting, and
replacement procedures required to repair and maintain this product.
This document contains general product information, software diagnostic procedures (when
available), preventative maintenance procedures, inspection and adjustment procedures,
troubleshooting procedures, replacement procedures and electrical block and wiring diagrams.
To move directly to a procedure, click the appropriate procedure in the bookmark section to the
left of this page. You may “drag” the separator bar between this page and the bookmark section
to change the size of the page being viewed.
© 2008 Precor Incorporated
Unauthorized Reproduction and Distribution Prohibited By Law
20081-119

9.33, 9.35 240V Treadmill
Page 2
Section One -
Things you Should Know
The 9.33, 9.35 incorporate new drive motor system and display systems. The drive motor is a
three phase AC motor. The drive motor controller converts a single phase AC input into three
phase motor control.
Section One, Things You Should Know. This section includes technical specifications. Read
this section, as well as the 9.33, 9.35 Treadmill Owners Manual, before you perform the
maintenance procedures in this manual.
Section Two, Software Features. Precor’s 9.33, 9.35 Treadmills are programmed with several
diagnostic and setup features. This section contains the procedures you need to access the
diagnostic features on this treadmill.
Section Three, Checking Treadmill Operation. This section provides you with a quick way of
checking treadmill operation. Check treadmill operation at the end of a maintenance procedure
and when it is necessary to ensure that the treadmill is operating properly.
Section Four, Inspection and Adjustment Procedures. Perform inspection procedures when
a trouble symptom points to a particular problem and after removing and replacing major
components. Many maintenance problems can be fixed by adjusting various treadmill
components. This section also provides you with the step-by-step procedures required to make
these adjustments.
Section Five, Troubleshooting Procedures. The diagnostic and troubleshooting procedures
contained in this section should be performed when it is necessary to isolate a problem to a
particular component.
Section Six, Replacement Procedures. When a treadmill component must be replaced, go to
this section and follow the step-by-step procedures required to remove and replace the
component.
Section Seven, Technical Diagrams and Parts Lists. This section includes wiring diagrams,
and block diagrams for the 9.33, 9.35 Treadmills.
9.33, 9.35 240V Treadmill
Page 3
Safety guidelines you should know and follow include:
• Read the owner’s manual and follow all operating instructions.
• Operate the treadmill on a solid, level surface.Visually check the treadmill before beginning
service or maintenance operations. If it is not completely assembled or is damaged in any
way, exercise extreme caution while operating and checking the treadmill.
• When operating the treadmill, do not wear loose clothing. Do not wear shoes with heels or
leather soles. Check the soles of your shoes and remove any embedded stones. Tie long
hair back.
• Do not rock the unit. Do not stand or climb on the handlebars, display enclosure, or cover.
• Do not set anything on the handlebars, display enclosure, or cover. Never place liquids on
any part of the treadmill, while performing service.
• To prevent electrical shock, keep all electrical components away from water and other
liquids.
• Do not use accessory attachments that are not recommended by the manufacturer-such
attachments might cause injuries.
• Removing the hood exposes high voltage components and potentially dangerous
machinery. Exercise extreme caution when you perform maintenance procedures with the
hood removed.

9.33, 9.35 240V Treadmill
Page 4
General Information
For the latest exploded view diagram, part number and part pricing information, visit the Precor
dealer website at “www.precor.com/connection.

9.33, 9.35 240V Treadmill
Page 5
Procedure 2.1 - Accessing the Hardware Validation Program
The treadmill's diagnostic program consists of the following modes:
• Display Test
• Keyboard Test
• Heart Rate Test
• Machine Test
Procedure
1. Plug the power cord into the wall outlet, then turn on the treadmill with the circuit breaker.
2. Refer to diagram 2.1 below and press keys RESET,5,1,7,6,5,7,6,1, sequentially. Use the
numeric keypad to enter the number sequence. The ARROW keys will step you through the
test modes listed above, allowing you to skip tests or perform only specific tests.
3. DISPLAY TEST.
4. Press the OK key to enter the display test. Press the OK or ENTER key several times to
step through all of the LED’s on the display. Ensure that all of the LED’s illuminate. Press
and hold the OK or ENTER key to exit the display test.
Diagram 2.1 - 9.33 Display
Numeric
Keypad
OK key
Arrow Keys
RESET key

9.33, 9.35 240V Treadmill
Page 6
5. KEYBOARD TEST.
6. The keyboard test will place a dot on the display for each key on the display, including the
numeric keypad. Pressing a key will cause the dot associated with the key to go out. Test all
of the keys in this manner. Tug on the safety key lanyard, to ensure that the STOP key is
activated.
7. Press and hold the OK or ENTER key to exit the keyboard test.
8. HEART RATE TEST.
9. The heart rate test will display the heart rate being received during this test from the hand
held grips, chest strap transmitter or test transmitter.
10. The display will toggle between unfiltered and filtered heart rate readings. They will be
prefixed “U” for unfiltered, “F” for filtered. When a heart rate signal is being accepted the
“heart” will blink and the heart rate will be displayed in the heart rate window and the main
window. Test the heart rate in both the hand held and wireless (chest strap or test
transmitter) modes.
11. Press the OK or ENTER key to exit the heart rate test.
12. MACHINE TEST.
13. There are two test modes in the MACHINE TEST, they are BELT SPEED and INCLINE.
Use the ARROW keys to select the desired test.
14. BELT SPEED
15. Press the OK or ENTER key. POWERBITS will be momentarily displayed then the powerbit
number will be displayed. The power bit level can be checked by starting the running belt.
16. Press the OK key to exit the belt speed test.
17. INCLINE
18. Press the OK or ENTER key. A/D will be momentarily displayed then the analog to digital lift
position number will be displayed. The analog to digital lift position number represents the
incline’s physical position. The A/D number is used to calibrate the incline. The incline must
be calibrated when a new lift motor is installed.
Press the RESET to exit the MACHINE TEST.

9.33, 9.35 240V Treadmill
Page 7
Procedure 2.2
- Accessing the Information Display Program
The information display will access the following data;
• Odometer
• U Boot SW
• U Base SW
• Lower SW
• Usage log
• Error log
Procedure
1. Plug the power cord into the wall outlet, then turn on the treadmill with the circuit breaker.
2. Refer to diagram 2.1 above and press keys RESET,6,5 sequentially. Use the numeric
keypad to enter the number sequence. The ARROW keys will step you through the display
modes listed above, allowing you to skip displays or view only specific displays.
3. The display will momentarily read, DIAGS - INFORMATION DISPLAY.
4. ODOMETER
5. Press the OK or ENTER key. The treadmill’s odometer will be displayed as 1234567 MILES
or 1234567 KM.
Note: The odometer data is stored in non-volatile memory on the upper PCA. If the upper PCA
is replaced the odometer data will be lost.
6. Press the OK or ENTER key to exit the odometer display.
7. HOUR METER.
8. Press the OK or ENTER key. The operating time of the unit will be displayed as 12345
HOURS. The operating time is defined as total amount of time that the unit has operated in
program modes with the drive motor running. The hour meter is also used to provide the
“time stamp” for the error code log.
9. Press the OK or ENTER key to exit the hour meter display.
10. U BOOT SW
11. Press the OK or ENTER key. The U Boot SW part number will be displayed. The U Boot SW
is the software internally used to upload upper PCA operating system software (U Base
SW).
12. Press the OK or ENTER key to exit the U Boot SW display

9.33, 9.35 240V Treadmill
Page 8
13. U BASE SW
14. Press the OK or ENTER key. The U Base SW part number will be displayed. The U Base
SW is the upper PCA operating system software.
15. Press the OK or ENTER key to exit the U Base SW display.
16. LOWER SW
17. Press the OK or ENTER key. The Lower SW part number will be displayed. The Lower SW
is the lower PCA operating system software.
18. Press the OK or ENTER key to exit the Lower SW display.
19. SERIAL NUMBER
20. Press the OK or ENTER key. The treadmill’s serial number will be displayed.
21. Press the OK or ENTER key to exit the serial number display.
22. USAGE LOG
23. Press the OK or ENTER key. The usage for each program can be displayed. The ARROW
keys will allow to scroll through the list of programs. For example the manual program usage
will be displayed as MANUAL USED X TIMES TOTAL X MINUTES.
24. Press the OK or ENTER key to exit the usage log display.
25. ERROR LOG
26. Press the OK or ENTER key.
27. The error log will store up to 10 error conditions. The errors are logged with the most recent
error in position one. When a new error condition occurs, each existing error is pushed down
one position in log. If there was an error in position 10 when a new error was logged, the
error that was in position 10 will be lost.
28. Each error in the log will show the odometer reading (in miles) and the time (hour meter) and
motorcurrentreadingwhentheerroroccurred.Theerrorsaredisplayedas;
1 ER20 XXXXX MI XXX HRS. XX.X AMPS
29. The ARROW keys will allow you to scroll through the log.
30. When the QUICK START key is held for 2 seconds the message HOLD TO CLEAR
ERRORS will be displayed. If the QUICK START key is held for an additional 2 seconds, the
log will be cleared. The message NO RRORS will be displayed and all error are erased from
the log.

9.33, 9.35 240V Treadmill
Page 9
Procedure 2.3 - Setting Club Parameters
This procedure allows you to change the following settings:
• Safety Code
• Select Units
• Set Max Pause Time
• Set Cool Down Time
• Set Speed Limit
Procedure
1. Plug the power cord into the wall outlet, then turn on the treadmill with the circuit breaker.
2. Refer to diagram 2.1 above and press keys RESET,5,6,7,1 sequentially. Use the numeric
keypad to enter the number sequence. The ARROW keys will step you through the display
modes listed above, allowing you to skip displays or view only specific displays.
3. The display will momentarily display DIAGS - SET PARAMETERS
4. SAFETY CODE
5. Press the OK or ENTER key. When enabled the safety code will require the user to enter a
“password” before the trammel can be used.
6. Use the ARROW keys to select either ENABLED or DISABLED.
7. Press the OK or ENTER key to exit the safety code display
8. SELECT UNITS
9. The currently selected measurement unit will then be displayed.
10. Use the ARROW keys to toggle between U.S. and METRIC.
11. Press the ENTER key to select the currently displayed measurement unit.
12. SET MAX PAUSE TIME
13. Press the OK or ENTER key.
14. Use the ARROW keys to set the maximum pause time between 1 and 10 minutes.
15. Press the ENTER key to select the currently displayed pause time.
16. SET COOL DOWN TIME

9.33, 9.35 240V Treadmill
Page 10
17. Press the OK or ENTER key.
18. Use the ARROW keys to set the COOL SOWN time between 1 and 5 minutes.
19. Press the ENTER key to select the currently cool down time.
20. SET SPEED LIMIT
21. Press the OK or ENTER key.
22. Use the ARROW keys to set the maximum speed between 1 and 12 MPH.
23. Press the ENTER key to select the currently displayed speed limit.
24. Press the RESET key to exit the set club parameters display.

9.33, 9.35 240V Treadmill
Page 11
Procedure 2.4
- Documenting Software Problems
When a problem is found with the software in the upper or lower PCA, record the information
listed below.
When a problem occurs, record the following information:
• Model and serial number
• Software version number
• Program number running when the problem occurred
• A description of:
•a. What happened or failed to happen.
b. The action taken by the user just before the problem occurred.
c. Problem-related information (such as how far into the program the problem occurred,
the work level being used when the problem occurred, error code displayed, etc.).
• The frequency of occurrence.

9.33, 9.35 240V Treadmill
Page 12
Section Three
- Checking Treadmill Operation
This section provides you with a quick method of checking treadmill operation. Check treadmill
operation at the end of a maintenance procedure and when it is necessary to ensure that the
treadmill is operating properly.
Procedure
1. Plug the power cord into the wall outlet, then turn on the treadmill with the circuit breaker.
2. Operate the treadmill in the Manual program. Adjust the speed of the running belt to 2–3
m.p.h. Operate the treadmill for at least 5 minutes.
a. Concentrate on the feel of the running belt and the sound of the drive motor and rollers.
Be on the alert for unusual noises, smells, or vibrations.
b. Observe the LED’s on the electronic console. Make sure that each LED lights as the in-
formation corresponding to that LED is displayed on the electronic console.
c. Enter the diagnostics program (see Procedure 2.1) and log the power bits under loaded
and unloaded conditions.
3. Press the STOP key. When the treadmill comes to a stop, view the electronic console as the
treadmill scans time, speed, distance and percent of incline.
4. Press the INCLINE ▲key while viewing the electronic console. Confirm that the running
bed inclines and the incline display increments to 15% as the INCLINE ▲key is pressed.
5. Press the INCLINE ▼key while viewing the electronic console. Confirm that the running bed
returns to a level position and the incline display decrements to 0% as the INCLINE ▼key is
pressed.
6. Turn off the treadmill with the circuit breaker, then unplug the treadmill from the wall outlet.

9.33, 9.35 240V Treadmill
Page 13
Procedure 4.1 - Calibrating the Lift Motor
1. Set the treadmill circuit breaker in the “off” position and unplug the line cord from the wall
outlet.
2. Remove the hood.
3. Place the treadmill on it’s right side. Remove hitch and clevis pins that secure the lift tube to
the lift platform.
Diagram 4.1 - Lift Motor Mounting
1-1/16”
Lift Tube
Drive Screw

9.33, 9.35 240V Treadmill
Page 14
4. Plug the power cord into the wall outlet, set the treadmill circuit breaker in the “on” position.
5. Press keys RESET, 5,1,7,6,5,7,6,1, sequentially to enter the diagnostics routine. Refer to
Procedure 2.1 and advance to the lift test. When the lift calibration number is displayed on
the console, use the INCLINE or INCLINE key to set the lift calibration number to 38.
CAUTION
While running the lift motor in the diagnostics mode it is possible to operate the lift motor beyond
it’s normal range of motion. When you perform the next step, care must be taken not to jam the
lift tube against the motor frame.
6. Press the RESET key to exit the diagnostics mode.
7. Set the treadmill circuit breaker in the “off” position, unplug the line cord from the wall outlet.
8. Rotate the lift tube clockwise, by hand, as far as possible. Then rotate the lift tube counter-
clockwise until the distance from the top of the lift tube to the lift motor is 1 inch. See
Diagram 4.1. While rotating the lift tube, be sure the lift motor drive screw does not rotate. If
the drive screw is rotated, return to step 4 and repeat steps 4 through 7.
9. Replace the clevis and hitch pins removed in step 3. Return the treadmill to an upright
position.
10. Plug the line cord into the wall outlet, set the treadmill circuit breaker in the “on” position.
11. check the calibration of the lift system by performing the following steps:
a Press the INCLINE key until the console displays 15% incline.
b Press the INCLINE key to return to 0% incline.
12. Re-install the hood per Procedure 6.11.

9.33, 9.35 240V Treadmill
Page 15
Procedure 4.2 - Adjusting Drive Belt Tension
1. Set the treadmill circuit breaker in the “off” position and unplug the line cord from the wall
outlet.
2. Remove the hood.
3. Place the drive belt tension gauge on the drive belt as shown in Diagram 4.2.
Diagram 4.2 - Drive Belt Tension Gauge
4. The gauge should read approximately 80 inch/pounds. The drive belt tension is acceptable
if it is in the range of 70 to 90 inch-pounds.
5. If the drive belt tension is less than 70 or greater than 90 inch/pounds, slightly loosen the
four drive motor mounting bolts. The drive motor mounts on slotted holes allowing the drive
motor to be move forward or rearward. Move the drive motor forward or rearwards, as
required, until the belt gauge reads approximately 80 inch/pounds and tighten the four drive
motor mounting bolts. See Diagram 4.3. Momentarily remove the drive belt tension gauge
from the drive belt. Replace the drive belt tension gauge on the drive belt and re-adjust the
drive belt tension, if necessary. Torque the four drive motor mounting bolts to 204 inch
pounds (17 foot pounds).

9.33, 9.35 240V Treadmill
Page 16
Diagram 4.3 - Drive Belt Adjustment
6. Re-install the hood.
7. Plug the line cord into the wall outlet and set the treadmill circuit breaker in the “on” position.
8. Check treadmill operation per Section 3.

9.33, 9.35 240V Treadmill
Page 17
Procedure 4.3 - Treadmill Belt Cleaning
Procedure:
1. First, check for proper operation of the safety stop key. Stand to one side of the treadmill.
Insure that the stop key tether is hanging straight down from the stop key and is not
wrapped around the handle bars. Push the “Quick Start” button and wait for the display to
count down and for the running belt to begin moving. Once the running belt is moving pull
the safety stop key tether. See the illustration below.
CAUTION: If the running belt does not stop, turn off the power using the ON/
OFF switch at the front of the treadmill and unplug the power cord.
The treadmill must remain out of service until the stop switch is
repaired.
If the running belt stops, continue with the cleaning procedure.
2. A clean, dr towel approximatel 36 inches or 1 meter in length is required.
Fold the towel in half lengthwise, lift the running belt up and insert the
towel beneath the belt so that an end of towel extends on to each deck
trim. See the illustration below.
3. Stand to one side of the treadmill, push the “Quick Start” button, grasp the
towel as illustrated in the illustration above. Note: You will have 3 seconds
to firml grasp our hands on the towel before the treadmill running belt
begins to move. Allow the treadmill to run for about one minute while hold-
ing the towel firml in place.
CAUTION: If the towel becomes loose it ma be pulled into the treadmill’s
rollers. Pull the safet ke tether to stop the treadmill and retrieve
the towel, no damage should occur. Start the procedure over again.
See the illustration below.
4. Keep one hand firml grasped on the towel, use our other hand to pull on
the safet stop ke tether to stop the treadmill running belt. See the illus-
tration below.
Safety Stop Key Tether
Front
Towel

9.33, 9.35 240V Treadmill
Page 18
5. Turn the power off. Place our hands on the towel and push it up and down
the length of the running deck several times to clean the deck.
6. Remove the towel.
It is recommended that this procedure be performed frequentl to extend the life of the running belt and
running deck.
Safety Stop Key Tether

9.33, 9.35 240V Treadmill
Page 19
Procedure 5.1 - Troubleshooting the Keypad and Upper PCA
If the function keys on the electronic console are unresponsive, the problem may be either the
upper PCA or keypad.
Procedure
1. Set the circuit breaker in the “on” position.
WARNING
Before continuing with this procedure, review the Warning and Caution statements listed in
Section One of the Commercial Treadmill Service Manual.
2. If the treadmill powers up and functions normally until a particular key(s) is pressed, skip to
step 8.
3. If a Stuck Key message is immediately displayed when the treadmill is powered up,
continue with the next step.
4. This condition may be caused by either the keypad or upper PCA. Set the circuit breaker in
the “off” position. Remove the two screws that retain the reading rack and remove the
reading rack. Remove the eight screws that retain the display face, two are under the
reading rack. See Diagram 5.1.
Diagram 5.1 - Display Console (Rear View)
Reading Rack
Mounting Screw
Reading Rack
Mounting Screw
Display Face
Mounting Screw

9.33, 9.35 240V Treadmill
Page 20
5. Carefully, lift the display housing front panel off of the display housing backing plate.
Disconnect both keypad cables from the upper PCA. See Diagram 5.2. Note: If the STOP
switch cable is disconnected or the STOP switch is activated or defective the message
STOP SWITCH will be displayed.
Diagram 5.2 - 9.33 Upper PCA & Keypad
6. If the STUCK KEY message is still displayed, replace the upper PCA. If the STUCK KEY
message is no longer displayed, replace the display panel.
7. If you have performed all of the procedures above and have been unable to correct the
problem, call Precor customer service.
8. Access the diagnostics program per procedure 2.1. If the key(s) necessary to access the
diagnostic program is not functioning, skip to step 11.
9. Test the keypad per Procedure 2.1.
10. If all of the keys test good, the problem may be user error or a key function that is normally
disabled during a particular user program.
11. If one or more keys do not function correctly, either the keypad (display housing) or upper
PCA could be defective. Replace the display and repeat step 9. If the display housing did
not correct the problem, re-install the original display housing and replace the upper PCA.
12. If you have performed all of the procedures above and have been unable to correct the
problem, call Precor customer service.
Upper PCA
Heart Rate
PCA
Metrics
PCA
Safety/Stop
Cable
Upper
Keyboard
Cable
Lower
Keyboard
Cable
Data Cable
Other manuals for 9.33
2
This manual suits for next models
1
Table of contents
Other Precor Treadmill manuals

Precor
Precor M9.41si User manual

Precor
Precor PRECISION SERIES Technical manual

Precor
Precor M9.45 User manual

Precor
Precor M9.45i User manual

Precor
Precor C934 User manual

Precor
Precor 9.45 User manual

Precor
Precor C932 User manual

Precor
Precor ENERGY SERIES User manual

Precor
Precor 9.31 User manual

Precor
Precor 9.55 User manual

Precor
Precor 9.33 User manual

Precor
Precor TRM 885.v2 User manual

Precor
Precor 9.31 User manual

Precor
Precor 9.33 Owner's manual

Precor
Precor C954i User manual

Precor
Precor 9.35 Owner's manual

Precor
Precor Teambike 800 User manual

Precor
Precor Electronic M9.4 User manual

Precor
Precor M 9.1 User manual

Precor
Precor 9.35 User manual