manuals.online logo
Brands
  1. Home
  2. •
  3. Brands
  4. •
  5. Precor
  6. •
  7. Treadmill
  8. •
  9. Precor Teambike 800 User manual

Precor Teambike 800 User manual

Treadmill 800 Line Assembly Guide
Assembly requirements
Precor recommends at least two people for this installation. DO NOT
attempt assembly by yourself.
Follow the steps in the order listed in this assembly guide. Be sure to:
lAssemble the equipment close to where you plan to use it.
lAssemble the equipment on a solid, flat surface, so that it remains level and stable.
lLocate the equipment a minimum of .6 m (23.6 in.) on either side of the equipment and 2
m (79 in.) behind the treadmill. DO NOT move the equipment without assistance.
Hardware kit
Required Tools
Hex wrenches: 5/32, 3/16, and 7/32-inch 3/4-inch open end wrench
7/16-inch-pound torque wrench #3 Phillips screwdriver
Roll of string or fish tape
Component Description Quantity
Buttonhead screw (3/8-inch x 1-inch 12
Narrow flat washer (3/8- inch) 12
Buttonhead screw (3/8-inch x 1-inch) 6
Buttonhead screw (1/4-inch x 1-inch) 4
Begin assembly
IMPORTANT After unpacking, follow the ramp assembly instructions (included)
on how to build and use a ramp to safely and securely roll the treadmill base off
the shipping pallet.
1. Ensure the treadmill is sitting on the ground.
2. Remove the hood off the treadmill base and set aside
3. Place the upright support (right side) onto its base frame
side bracket. Route the data cable from the treadmill drive
unit through the smaller channel opening in the upright
support, from bottom to top (Figure 1).
Figure 1
4. Secure the upright support to its side bracket using three
screws and three washers . Partially tighten the fasteners
using a 7/32-inch hex wrench.
5. Repeat Step 4 to attach the other upright support on the
right.
6. Lower the treadmill back (dash assembly) over the upright
supports, then remove the dash cover (Figure 2). Figure 2
7. Route the data cable, as shown, securing it behind each
cable clip (Figure 3). Ensure there is enough cable to reach
the top right of the console.
Figure 3
©2020 Precor Incorporated |800 Treadmill Assembly Guide|P/N 305032-101D |23 October 2020 |1
Rewire the treadmill
1. Rewire the treadmill (Figure 4) using the following console
cables:
lEthernet
lTV (coaxial)
lPower
Figure 4
2. Partially tighten the fairing to the upright supports on both
sides using six screws and six washers for each side (Figure 5
- one side shown). Make sure the fairing is not externally
supported.
IMPORTANT DO NOT wrench tighten the fasteners in the above
step until the unit has been fully assembled. Make sure the cables
are not pinched between any fasteners and the body of the unit, or
between the arm covers and the upright supports. The Precor
Limited Warranty does not cover cables damaged by improper
installation.
Figure 5
For touchscreen consoles only
Attach the filter to the drive power cable
1. Disconnect the existing power cable from the drive unit, power
filter, and ground terminal. Then completely remove it from the
treadmill (Figure 6).
Figure 6
2. Connect the new power cable according to Figure 7 and Table 1.
Position Connector
Figure 7
Drive input connectors
Brown lead with quick-connect terminal
Blue lead with quick-connect terminal
Green and yellow lead with quick-connect terminal
AC input cable to the Networked Fitness Console power cable
3. Use the Velcro® fasteners to attach the power supply to the right side of the front cross
member on the treadmill base.
4. Plug the AC input cable into the socket on the power supply.
5. Route the DC output cable through the cable ties behind the power supply, toward the
upright support on your right. Bend the cable ties over the DC output cable to hold it in
place. NOTE Bundle the excess cable and secure it under the cable clips.
6. Connect the black, AC power cord on the AC wiring harness to the socket on the power
supply.
Install the accessory jack panel
IMPORTANT The Networked Fitness Console includes an accessory jack panel that you must
install on the treadmill. The panel connects the TV and Ethernet cables to the facility’s network.
1. Remove the screws securing the blank plate at the right-front
corner of the treadmill (Figure 8). Discard the blank plate.
Figure 8
2. Thread the cable assembly down through the channel in the
upright support on your right (Figure 9). Drape excess cable over
the inside edge of the support and tape into place, if necessary.
Figure 9
3. Pass the lower end of the TV cable through the right-hand grommet, and insert it into the
connector inside the jack panel. Use a 7/16-inch torque wrench to tighten the connectors
to 30 in-lb.
4. Pass the lower end of the Ethernet cable through the right-hand grommet and snap it into
the eight-pin coupler in the jack panel.
5. Fit the lower ends of any optional console cables into the notch in the upper edge of the
jack panel.
6. Replace the panel and fully tighten the corresponding screws.
Complete assembly
WARNING Before you finish assembling the treadmill
base, examine the electrical bleed line between the belt
motor and the frame. Make sure the bleed line is
connected securely to both the motor and the frame as
shown in the following figure, and verify that it is not
damaged. DO NOT connect the treadmill to electrical
power while the hood is removed.
1. Attach both corner covers and secure each with one screw (Figure
10).
2. Refer to the console Installation Guide (either online or in the con-
sole box) for instructions on how to install the console, including
replacing the power harness. Once you’re done, come back to this
page and complete the treadmill assembly from the next step
onward. Figure 10
©2020 Precor Incorporated |800 Treadmill Assembly Guide|P/N 305032-101D |23 October 2020 |2
3. To position the hood, gently flex the bottom edge of the hood around the bracket at the
front of the treadmill.
4. Insert a screw into each of the two side holes. Partially tighten both screws.
5. Insert a screw into each of the two outer holes and one screw into the two inner holes on
the front of the hood. Partially tighten all six screws.
6. Attach the access covers onto each upright using four screws
(Figure 11).
7. After completing the console assembly, reattach the back
cover (see Figure 2).
Figure 11
8. Fully tighten all screws used in the preceding procedures to 23 ft-lbs of torque, in the fol-
lowing order:
lThe four screws that secure the side of the upright supports to the treadmill base
(see Figure 5).
lThe two screws that secure the edges of the upright supports to the treadmill base.
lThe six screws that secure the console to the upright supports.
Level the treadmill
CAUTION To eliminate movement, make sure the adjustable feet are
in contact with the floor. Ensure that the unit sits on a flat surface.
Equipment feet adjustments cannot compensate for extremely uneven
surfaces.
Adjust only one rear foot at a time. DO NOT extend the adjustable feet
more than 3/4 inch (2 cm). Adjusting the rear feet can’t compensate
for extremely uneven surfaces. If you can’t make the running surface
level and stable, move the treadmill to a more stable location.
It is important to level the treadmill properly every time you move it.
1. Use a 3/4-inch open-end wrench to loosen the jam nuts on
the rear feet and adjust as needed to level the treadmill.
Then retighten the jam nuts (Figure 12).
2. Plug the power cord into an appropriate outlet.
IMPORTANT The treadmill requires a 20-amp individual branch
circuit grounded per NEC (National Electric Code) guidelines or
local region electric code.
Figure 12
Adjust the running belt tracking
IMPORTANT Failure to align the belt may cause the belt to tear or fray, which is
not covered by the Precor Limited Warranty.
To adjust and align the running belt:
1. Start the treadmill and set the speed to 3 MPH (5 KPH).
2. Observe the running belt tracking while verifying that the belt remains centered:
If... Then...
If the belt starts to drift
toward the right
Slowly and manually turn the right side take-up roller mounting
bolt clockwise in quarter-turn increments until the drifting stops.
If the belt starts to drift
toward the left
Slowly and manually turn the right side take-up roller mounting
bolt counterclockwise in quarter turn increments until the drifting
stops.
3. Increase the speed to 9 MPH (14 KPH) and then 12 MPH (19 KPH), making any small adjust-
ments as needed.
4. Press STOP to stop the belt.
5. Turn off the treadmill
IMPORTANT During this functional test, if there is noticeable hesitation
of the running belt with each foot plant, check the Running Belt Tension
procedure in the Cardio Equipment Maintenance Guide at
www.precor.com.
Notes
lThe tracking adjustments should only be done in quarter turn
increments.
lONLY use the right side take-up roller mounting bolt to adjust
tracking.
lONLY use hand tools to adjust tracking.
Figure 13
Check alignment of the running belt
1. Turn on the treadmill.
2. Standing beside the treadmill (not on it), press GO or QuickStart on the console.
3. Press SPEED UP until the console shows a speed of 3 MPH (5 KPH).
4. Observe the belt from the rear of the treadmill for a few minutes. The belt should remain
centered along the running bed. If it drifts off center, adjust it (refer to Adjust the running
belt tracking section).
CAUTION Failure to align the belt may cause the belt to tear or fray, which is not
covered by the Precor Limited Warranty.
5. Press STOP to stop the belt.
6. Turn off the treadmill.
Safety code
All Precor treadmills contain an inactive safety code feature that requires activation to prevent
unauthorized use. If you wish to activate this safety code, read it online in the Assembling and
Maintaining TRM 800-Series Treadmills Guide at www.precor.com.
©2020 Precor Incorporated |800 Treadmill Assembly Guide|P/N 305032-101D |23 October 2020 |3
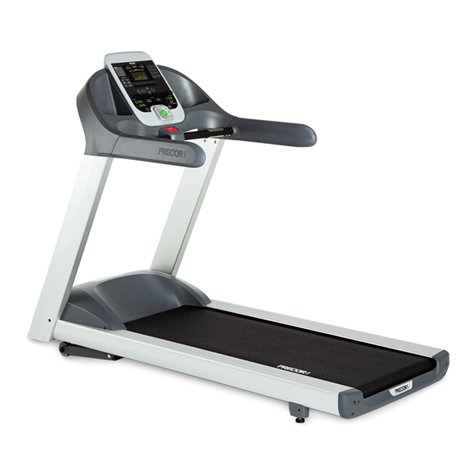
IMPORTANT Before any exerciser uses the treadmill, verify that the STOP button,
reset switch, and Auto Stop™ feature are all working correctly.
Test the Stop button
1. Start any workout on the treadmill.
2. Press STOP once. The console indicates that the workout is paused.
3. Press STOP again. The console displays a workout summary.
Test the reset switch
1. Start any workout on the treadmill.
2. Give the safety clip lanyard a slight tug. The reset switch pops up and the treadmill should
slow to a stop immediately.
3. Press the reset switch back into its normal position. The console should reset itself and
return to the Welcome screen or banner.
Test the treadmill Auto Stop™
Auto Stop™ (Automatic Stop) is a feature designed to bring the treadmill to a gradual stop when
it is not in use (after two minutes). This might occur if an exerciser steps off the treadmill before
the end of a workout and leaves the treadmill running. IMPORTANT The default setting for this
feature is ON. An administrator can turn off this feature in the System Settings; however, Precor
recommends it remain ON.
1. Start any workout on the treadmill, but DO NOT step onto the running belt.
2. Wait two minutes without stepping onto the running belt. At this point or shortly before-
hand, the treadmill should slow to a stop and the console should ask the previous user to
confirm that he or she is still present. If there is no confirmation, the console returns to the
Welcome screen or banner and it is safe to step onto the running belt.
To properly maintain the equipment, refer to the Cardio Equipment Maintenance Guide at www.-
precor.com.
©2020 Precor Incorporated |800 Treadmill Assembly Guide|P/N 305032-101D |23 October 2020 |4
Other manuals for Teambike 800

2

Other Precor Treadmill manuals

Precor C932 User manual

Precor

Precor C932 User manual

Precor 905e User manual

Precor

Precor 905e User manual

Precor 9.33 User manual

Precor

Precor 9.33 User manual

Precor M9.45i User manual

Precor

Precor M9.45i User manual

Precor Experience Series 700 Line User manual

Precor

Precor Experience Series 700 Line User manual

Precor Cycles Integrated LCD Screen Option none User manual

Precor

Precor Cycles Integrated LCD Screen Option none User manual

Precor M9.25i User manual

Precor

Precor M9.25i User manual

Precor M9.5sp User manual

Precor

Precor M9.5sp User manual

Precor TRM 885.v2 User manual

Precor

Precor TRM 885.v2 User manual

Precor 905e User manual

Precor

Precor 905e User manual

Precor Experience TRM700-16 User manual

Precor

Precor Experience TRM700-16 User manual

Precor ENERGY SERIES User manual

Precor

Precor ENERGY SERIES User manual

Precor 9.41s User manual

Precor

Precor 9.41s User manual

Precor M9.55 User manual

Precor

Precor M9.55 User manual

Precor 9.21 User manual

Precor

Precor 9.21 User manual

Precor C954 User manual

Precor

Precor C954 User manual

Precor C962i User manual

Precor

Precor C962i User manual

Precor Experience Series 700 Line User manual

Precor

Precor Experience Series 700 Line User manual

Precor Treadmills 932i Owner's manual

Precor

Precor Treadmills 932i Owner's manual

Precor C966i User manual

Precor

Precor C966i User manual

Precor M9.57 User manual

Precor

Precor M9.57 User manual

Precor M9.45 User manual

Precor

Precor M9.45 User manual

Precor 9.31 User manual

Precor

Precor 9.31 User manual

Precor PRECISION SERIES Technical manual

Precor

Precor PRECISION SERIES Technical manual

Popular Treadmill manuals by other brands

Klarfit 10034444 manual

Klarfit

Klarfit 10034444 manual

NordicTrack NTL19010.6 user manual

NordicTrack

NordicTrack NTL19010.6 user manual

BH FITNESS 3265710 Instructions for assembly and use

BH FITNESS

BH FITNESS 3265710 Instructions for assembly and use

American Fitness YQ-T4011 instruction manual

American Fitness

American Fitness YQ-T4011 instruction manual

Keys Fitness EC1500-C owner's manual

Keys Fitness

Keys Fitness EC1500-C owner's manual

Domyos TC 5 Instructions for installation

Domyos

Domyos TC 5 Instructions for installation

MyStuff WalkingPad P1 user manual

MyStuff

MyStuff WalkingPad P1 user manual

FYTTER runner RU-05B manual

FYTTER

FYTTER runner RU-05B manual

NordicTrack A2550 user manual

NordicTrack

NordicTrack A2550 user manual

Weslo Cadence 400cs Treadmill user manual

Weslo

Weslo Cadence 400cs Treadmill user manual

Trojan CARDIO 450 Care instructions and assembly manual

Trojan

Trojan CARDIO 450 Care instructions and assembly manual

NordicTrack NTL15008.3 user manual

NordicTrack

NordicTrack NTL15008.3 user manual

NordicTrack T8.0 Treadmill manual

NordicTrack

NordicTrack T8.0 Treadmill manual

Landice L10 90 Series Installation manual & quick start guide

Landice

Landice L10 90 Series Installation manual & quick start guide

Garlando Everfit TFK 155 SLIM Instruction

Garlando

Garlando Everfit TFK 155 SLIM Instruction

Gold's Gym CWTL05607.4 user manual

Gold's Gym

Gold's Gym CWTL05607.4 user manual

Merax L510C user manual

Merax

Merax L510C user manual

Robotouch RBT35 manual

Robotouch

Robotouch RBT35 manual

manuals.online logo
manuals.online logoBrands
  • About & Mission
  • Contact us
  • Privacy Policy
  • Terms and Conditions

Copyright 2025 Manuals.Online. All Rights Reserved.