manuals.online logo
Brands
  1. Home
  2. •
  3. Brands
  4. •
  5. Prem-I-Air
  6. •
  7. Dehumidifier
  8. •
  9. Prem-I-Air PDB16EPT User manual

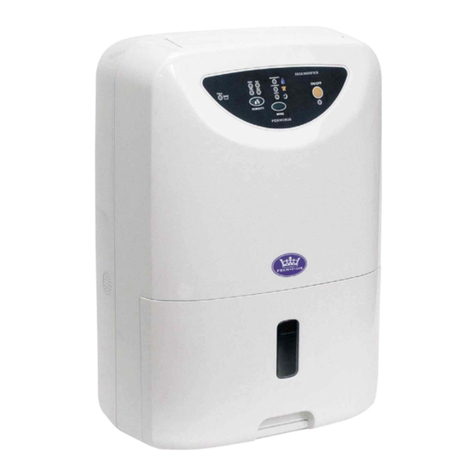
Prem-I-Air PDB16EPT User manual

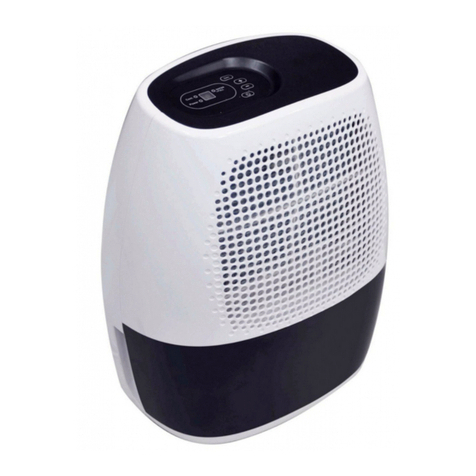
16 LITRE / DAY DEHUMIDIFIER
PLEASE READ THIS INSTRUCTION MANUAL
BEFORE OPERATING AND KEEP
SAFE FOR FUTURE REFERENCE
Please note: continuous drain hose not supplied
IMPORTANT SAFETY INSTRUCTIONS
1. Do not operate the unit with a damaged cord or plug, after it malfunctions or
has been dropped or damaged in any way. Return to an authorized service
facility for examination and repair.
2. This unit should always be kept in an upright position to avoid any damage.
3. Locate the unit on a flat stable surface.
4. Check the household voltage to ensure it matches the units rated
specification before operating.
5.
6. Ensure that the air inlets and outlets are not blocked or covered.
7. Do not place the unit too close to curtains or other objects – min 40cm.
8. Never place anything on top of the unit and do not cover with any kind of
material while in use.
9. This product is intended for domestic and light office use ONLY and not for
commercial, industrial or outdoor use.
10. To protect against electrical shocks, do not immerse unit, plug or cord in
water, or spray with liquids.
11. Never unplug the power cord without press the "ON/OFF" key to off first,
as this could damage the unit.
12. Always unplug the unit when not in use or moving location. To disconnect
from the power supply, grip the plug and pull from the power socket. Never
pull by the cord.
13. Always empty the water tank before storing the unit away.
14. Close supervision is necessary when any appliance is used by or near by
children and pets.
15. Do not run power cord under carpeting, or cover with rugs or runners.
16. Arrange the cord away from areas where it may be tripped over.
17. Never operate or store the unit in direct sunlight.
18. To repair the unit, take it to a qualified service engineer. Repairs carried out
by unqualified people may cause damage to the unit or injury to persons or
property and void the warranty.
19. Where possible, avoid the use of an extension cable as they may overheat
and cause a risk of fire. Only use an extension cord after ensuring it is in
perfect condition.
20. Do not use the unit without the air filter.
SAVE AND READ THESE IMPORTANT SAFETY INSTRUCTIONS
1
16E
T
P
MODEL
D
B
P
Operate this unit in an ambient temperature between
ºC and 35ºC.
5
PARTS DESCRIPTION
1. Control Panel
2. Air inlet / filters
3. Water level window
4. Handle
5. Water tank
6. Air Outlet cover
7. Air outlet
8. Rear plate
9. Continuous drainage point
10. Castors
11.Power cord
FILTER ASSEMBLEY
CONTROL PANEL
DISPLAY WINDOW
1.Heat
2.UV function
3.Timer
4.Digital display
5.Speed
6.Humidifier
7.ON/OFF
Grille Washable
filter
Active
carbon filter
Filter fixer
UV
8
2
3
1. Humidity display: continuous set dehumidifying , 50%, 60%, 70%,
80%
2. Ambient humidity function: good fair, bad
3. Compressor working. When defrost function is operating, water
drops will flash.
Compressor not operating.
Water tank full will flash and window will display as red.
4. HEAT indicator illuminates in heat mode when the temperature is lower
than 25oC. Fan speed will operate at high. The heater will automatically
cut out when temperature of 25oC is reached.
* This PTC heater is protected by thermostat & thermal fuse for overheat
protection.
5. UV (ultraviolet) indicator.
6. Timer indicator, 1 to 24 hours.
7. Room temperature indicator displays the room temperature in Celsius (oC).
By pressing “HUM” button at least 2 seconds.
8. Fan speed indicator: high speed, low speed.
CLEANING
1. Turn off the unit, wait for a few minutes until the unit stops operating.
Unplug from the power socket.
2. Clean the surface with a damp soft cloth.
3. Wash the water tank with a mild detergent and remove from the unit
before cleaning. Do not use abrasive cleaning liquids or chemical agents
(Alcohol, petrol etc...), as these will damage the unit.
4. Dry thoroughly with a cloth after cleaning.
5. To clean the washable air filter, remove it from the unit and clean using
your vacuum cleaner hose attachments. If it is particularly dirty washing
with water and mild detergent.
6. Active carbon filter - This filter is not washable. Its life span is variable
and depends on the ambient conditions where the appliance is used. The
filter should be checked periodically (about every 6 months) and replaced
if necessary.
EMPTYING THE WATER TANK
When the water tank is full the unit will automatically stop operating and the
Switch off the unit on the control panel and unplug from the power socket.
Carefully pull out the water tank and empty down your sink or toilet.
Refit the water tank when empty, ensuring you have fully pushed into position.
When the water tank is full or has not been positioned well, the water level window will
turn red.
CONTINUOUS DRAINAGE
When the dehumidifier is operated at very high humidity levels, the water tank
will require more frequent drainage. In this situation, it may be more convenient
to set the unit up for continuous drainage.
A 12mm diameter hose is required (not supplied)
1. Cut out the outlet at the back of the unit (Fig 1) and connect the hose you
have purchased (Fig 2).
NB. If you wish to revert back to draining into the tank, when the unit is
Fig 1
Fig 2
5
4
DISPLAY WINDOW GUIDE
The water
will
thus drain back into the tank.
DO NOT block
not drain into
the tank and the unit will malfunction
water level window will turn red.
A buzzer will sound for approximately 15
seconds to make you aware the tank is full.
the hole the water will
switched off and unplugged, simply remove the drainage hose.
o
r
SPECIFICATION
Power: 880W max Voltage: 220-240V ~50Hz
N.W. 12kg G.W. 13.5kg
BS PLUG WIRING
Wiring Instructions: Should it be necessary to change the plug please
note the wires in the mains lead are coloured in accordance with the
following code : BLUE - NEUTRAL
BROWN - LIVE
GREEN AND YELLOW - EARTH
As the colours of the wires in the mains lead of this appliance may not
correspond with the coloured markings identifying the terminals in your plug,
proceed as follows:
1. The BLUE wire is the NEUTRAL and must be connected to the terminal
which is marked with the letter Nor coloured BLACK.
2. The BROWN wire is the LIVE and must be connected to the terminal which
is marked with the letter Lor coloured RED.
3. The GREEN/YELLOW is the EARTH and must be connected to the
terminal which is marked with the letter Eor or coloured GREEN OR
GREEN/YELLOW.
4. Always ensure that the cord grip is positioned and fastened correctly.
If a 13A (BS 1363) fused plug is used it must be fitted with a 13A (BS 1362)
fuse. If in doubt consult a qualified electrician.
Wiring for a 13 Amp Plug (BS 1363)
Please note. The Earth Terminal is marked with the letter Eor Earth Symbol
SERVICE & WARRANTY
• Do not operate the unit with a damaged cord or plug, after the unit
malfunctions, or has been dropped or damaged.
• For your convenience, record the complete model number and product
name (located on the Product Identification Plate), the date you
purchased the product, and attach your purchase receipt docket as proof
of purchase. To ensure your product is covered by warranty, the
complete faulty product together with your purchase receipt should be
returned to your retailer.
This product has been manufactured to comply with
EEC Directives 73/23/EEC and 89/336/EEC
Waste electrical products should not be disposed of with household waste.
Please recycle where facilities exist. Check with your Local Authority or retailer
for recycling advice.EHS, Manchester, M17 1RN
08/06
ONE (1) YEAR LIMITED WARRANTY
Save This Warranty Information
EHS (International) Ltd. G
uarantees this product free from
de
fects in materials and workmanship for a period of one (1)
year.
Should this unit be operated under conditions other than those
recommended, at voltages other than the
voltage indicated on
the unit, or any attempts made to service or modify the unit, will
render this WARRANTY VOID. Th
e product you buy may
sometimes differ slightly from illustration.
This warranty is in
addition to, and does not affect, your statutory rights
Should you have a problem with this product, please call
our
Help Desk on: (0870) 742 5021.
Live
13 AMP
67

Other Prem-I-Air Dehumidifier manuals

Prem-I-Air DR102TB User manual

Prem-I-Air

Prem-I-Air DR102TB User manual

Prem-I-Air EH1352 User manual

Prem-I-Air

Prem-I-Air EH1352 User manual

Prem-I-Air EH1572 User manual

Prem-I-Air

Prem-I-Air EH1572 User manual

Prem-I-Air EH1418 User manual

Prem-I-Air

Prem-I-Air EH1418 User manual

Prem-I-Air EH1504 User manual

Prem-I-Air

Prem-I-Air EH1504 User manual

Prem-I-Air EH1220 User manual

Prem-I-Air

Prem-I-Air EH1220 User manual

Prem-I-Air EH1104 User manual

Prem-I-Air

Prem-I-Air EH1104 User manual

Prem-I-Air EH1936 User manual

Prem-I-Air

Prem-I-Air EH1936 User manual

Prem-I-Air EH1208 User manual

Prem-I-Air

Prem-I-Air EH1208 User manual

Prem-I-Air RMDH-09 User manual

Prem-I-Air

Prem-I-Air RMDH-09 User manual

Prem-I-Air EH1461 User manual

Prem-I-Air

Prem-I-Air EH1461 User manual

Prem-I-Air EH1932 User manual

Prem-I-Air

Prem-I-Air EH1932 User manual

Prem-I-Air PD14DEN User manual

Prem-I-Air

Prem-I-Air PD14DEN User manual

Prem-I-Air EH1209 User manual

Prem-I-Air

Prem-I-Air EH1209 User manual

Prem-I-Air EH1506 User manual

Prem-I-Air

Prem-I-Air EH1506 User manual

Prem-I-Air EH1930 User manual

Prem-I-Air

Prem-I-Air EH1930 User manual

Prem-I-Air EH1104 User manual

Prem-I-Air

Prem-I-Air EH1104 User manual
Prem-I-Air EH1384 User manual

Prem-I-Air

Prem-I-Air EH1384 User manual

Prem-I-Air EH1210 User manual

Prem-I-Air

Prem-I-Air EH1210 User manual

Prem-I-Air EH1934 User manual

Prem-I-Air

Prem-I-Air EH1934 User manual

Prem-I-Air PDEH2020 User manual

Prem-I-Air

Prem-I-Air PDEH2020 User manual

Prem-I-Air EH1220 User manual

Prem-I-Air

Prem-I-Air EH1220 User manual
Popular Dehumidifier manuals by other brands

Dantherm CDT 30S MK III Service manual

Dantherm

Dantherm CDT 30S MK III Service manual

ElectrIQ CDW12L user manual

ElectrIQ

ElectrIQ CDW12L user manual

Electrolux EXD16DN3W user manual

Electrolux

Electrolux EXD16DN3W user manual

Carel DryClim user manual

Carel

Carel DryClim user manual

Argo PLATINUM 21 operating instructions

Argo

Argo PLATINUM 21 operating instructions

Somogyi home DHM 700 instruction manual

Somogyi

Somogyi home DHM 700 instruction manual

Desa Master DH 41 H operating manual

Desa

Desa Master DH 41 H operating manual

Altrad LT 500 LT 800 Original instructions

Altrad

Altrad LT 500 LT 800 Original instructions

Haier DM32EK User and care guide

Haier

Haier DM32EK User and care guide

Eva-Dry EDV-1100 instruction manual

Eva-Dry

Eva-Dry EDV-1100 instruction manual

Philips DE5206 user manual

Philips

Philips DE5206 user manual

PROZIS ATMOS User Manual Warranty Statement

PROZIS

PROZIS ATMOS User Manual Warranty Statement

Mitsubishi Electric MJ-E16VX-A1 instruction manual

Mitsubishi Electric

Mitsubishi Electric MJ-E16VX-A1 instruction manual

OMEGA AIR RDP 20-1900 Troubleshooting

OMEGA AIR

OMEGA AIR RDP 20-1900 Troubleshooting

Anslut 417-046 operating instructions

Anslut

Anslut 417-046 operating instructions

DeLonghi de 400 owner's manual

DeLonghi

DeLonghi de 400 owner's manual

Frigidaire FFAP5033W1 use & care

Frigidaire

Frigidaire FFAP5033W1 use & care

Pingi DSB-600C operating instructions

Pingi

Pingi DSB-600C operating instructions

manuals.online logo
manuals.online logoBrands
  • About & Mission
  • Contact us
  • Privacy Policy
  • Terms and Conditions

Copyright 2025 Manuals.Online. All Rights Reserved.