Premier ED-4819 User manual

MANUAL DE INSTRUCCIONES
MOLINO DE CARNE
ED-4819
ESTIMADO CLIENTE
Con el fin de que obtenga el mayor desempeño de su producto, por favor lea este manual de
instrucciones cuidadosamente antes de comenzar a utilizarlo, y guárdelo para su futura referencia.

P-1
ÍNDICE
DESCRIPCIÓN .......................................................................................................................................... 2
INSTRUCCIONES DE SEGURIDAD ......................................................................................................... 3
MONTAJE.................................................................................................................................................. 3
MOLER CARNE......................................................................................................................................... 4
FUNCIÓN DE REVERSA........................................................................................................................... 5
HACER KIBBE .......................................................................................................................................... 5
HACER SALCHICHAS .............................................................................................................................. 6
LIMPIEZA YMANTENIMIENTO................................................................................................................ 6
ESPECIFICACIONES ................................................................................................................................ 6
PRECAUCIÓN
RIESGO DE CHOQUE
ELÉCTRICO , NO ABRA
Precaución: Para reducir el riesgo de choque eléctrico, no
retire la cubierta, no hay partes manipulables por el usuario al
interior de la unidad. Refiera todo mantenimiento o
intervención técnica a personal técnico calificado.
Este símbolo indica la existencia de voltaje peligroso al
interior de esta unidad, que constituye un riesgo de choque
eléctrico.
Este símbolo indica que hay importantes instrucciones de
operación y mantenimiento en la literatura que acompaña a
esta unidad.
LÍNEAS DE SERVICIO AL CLIENTE PREMIER
Venezuela:
0800 – ELECTRIC (353-2874)
Panamá:
300-5185
Sitio Web:
www.premiermundo.com
E-mail:
NOTA
Nos reservamos el derecho de modificar las especificaciones, características y/u operación de este
producto sin previo aviso, con el fin de continuar las mejoras y desarrollo del mismo.

P-2
DESCRIPCIÓN
1. Empujador de alimentos
2. Tolva de depósito
3. Perilla de bloqueo
4. Carcasa del motor
5. Interruptor de encendido y apagado
6. Botón de reversa
7. Cabeza
8. Tornillo de alimentación
9. Cuchilla de corte
10. Placa de corte (fino)
11. Placa de corte (mediano)
12. Placa de corte (grueso)
13. Anillo de fijación
14. Acople de embutidos
15. Acople de kibbe

P-3
INSTRUCCIONES DE SEGURIDAD
•La unidad está diseñada únicamente para uso doméstico, no para uso industrial.
•Desconecte el cable de poder cuando esté armando o desarmando la unidad.
•Se requiere supervisión estricta si la unidad está siendo utilizada cerca de niños.
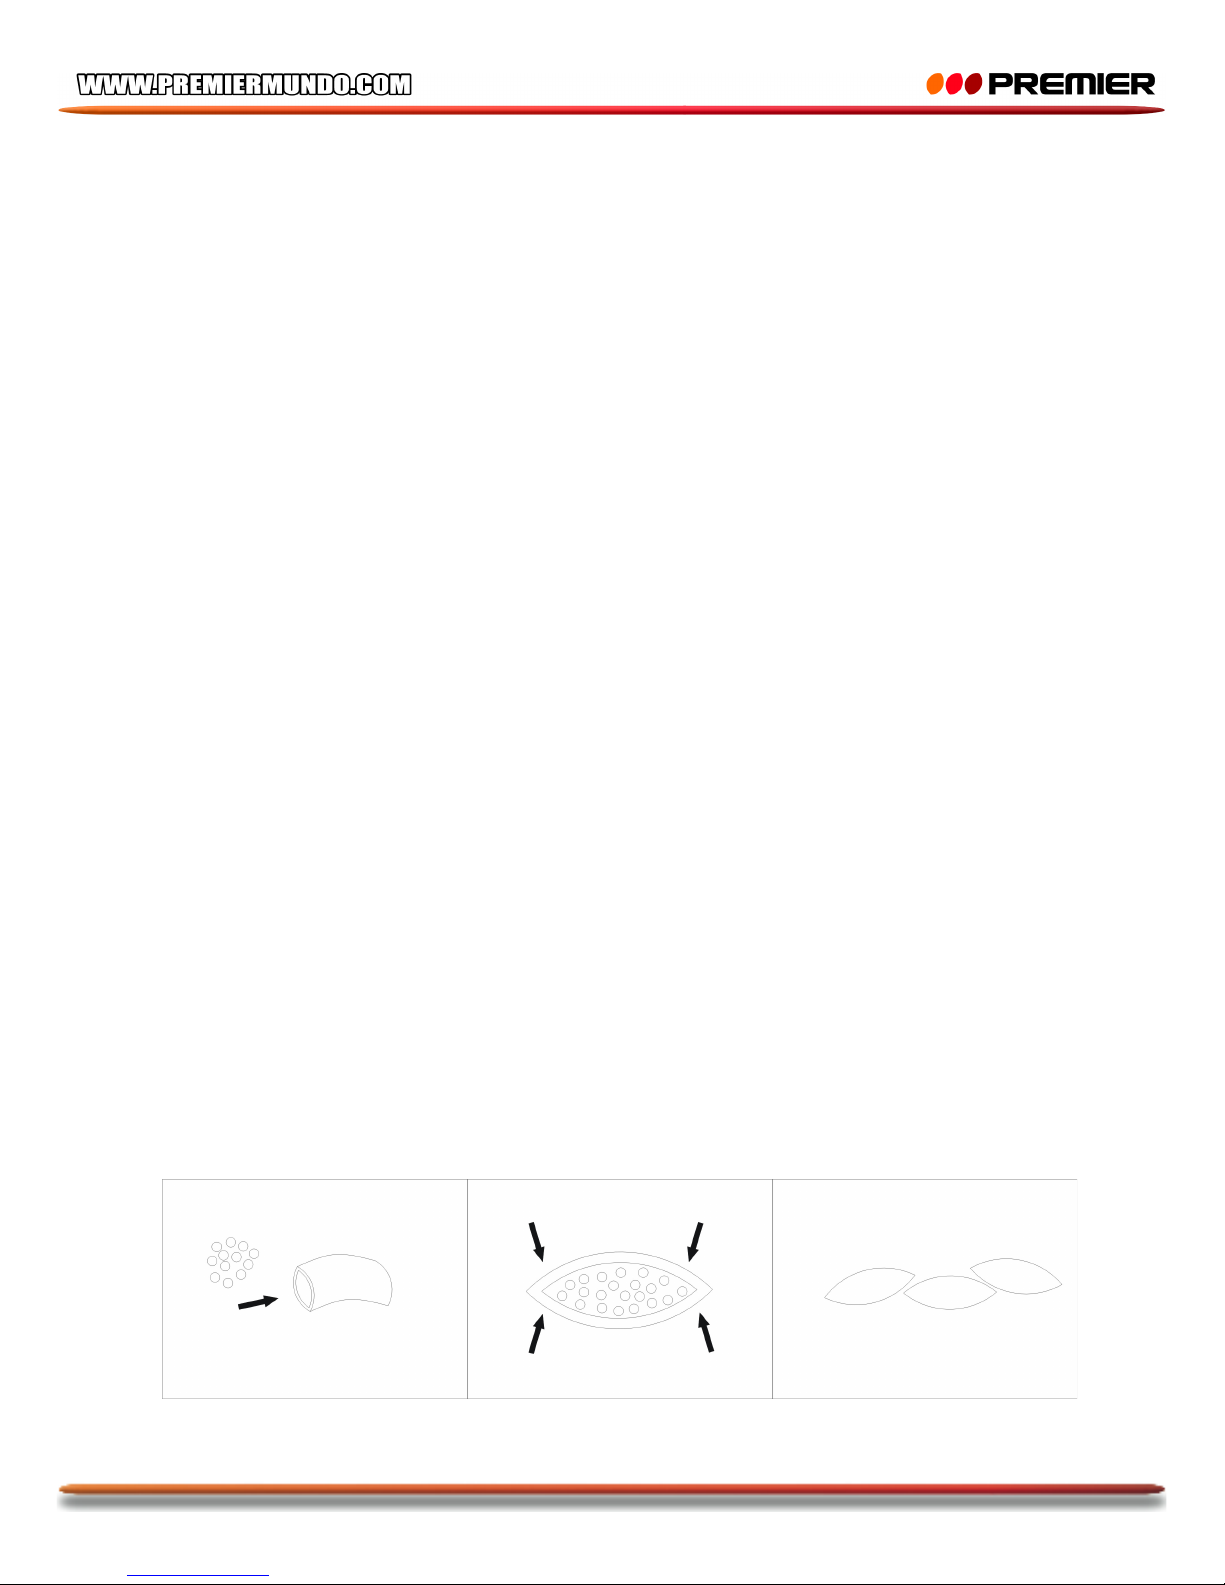
•No fije la cuchilla de corte y la placa de corte cuando utilice el acople de kibbe.
•No introduzca el alimento con las manos dentro de la unidad. Utilice siempre el empujador.
•No corte piezas duras como huesos, nueces, etc. o materiales fibrosos.
•No sacuda los accesorios sin haber presionado primero el botón de bloqueo.
•No utilice la unidad por más de 5 minutos seguidos con el fin de proteger el motor.
•La función de reversa no debe ser utilizada cuando la unidad está funcionando normalmente. Para
usar la función, espere a que la unidad se detenga por completo y luego haga el cambio.
•Después de utilizar la unidad puede haber un poco de comida en ella. Esto es normal. Si observa un
pequeño polvo metálico de color negro en la parte final del alimento, es normal y parte del proceso,
pero debe desechar este alimento.
•Con el fin de evitar que la unidad se atore no haga fuerza excesiva.
•Si este activa el corta circuitos, no encienda la unidad.
•No utilice la unidad si el cable de poder se encuentra dañado.
•No intente reparar la unidad usted mismo. Remita toda revisión, mantenimiento y reparación a
personal de servicio técnico calificado.
AL USAR POR VEZ PRIMERA
•Verifique que el voltaje de la unidad corresponde con el del lugar donde la va a conectar.
•Lave todas las partes (a excepción del cuerpo principal) en agua jabonosa.
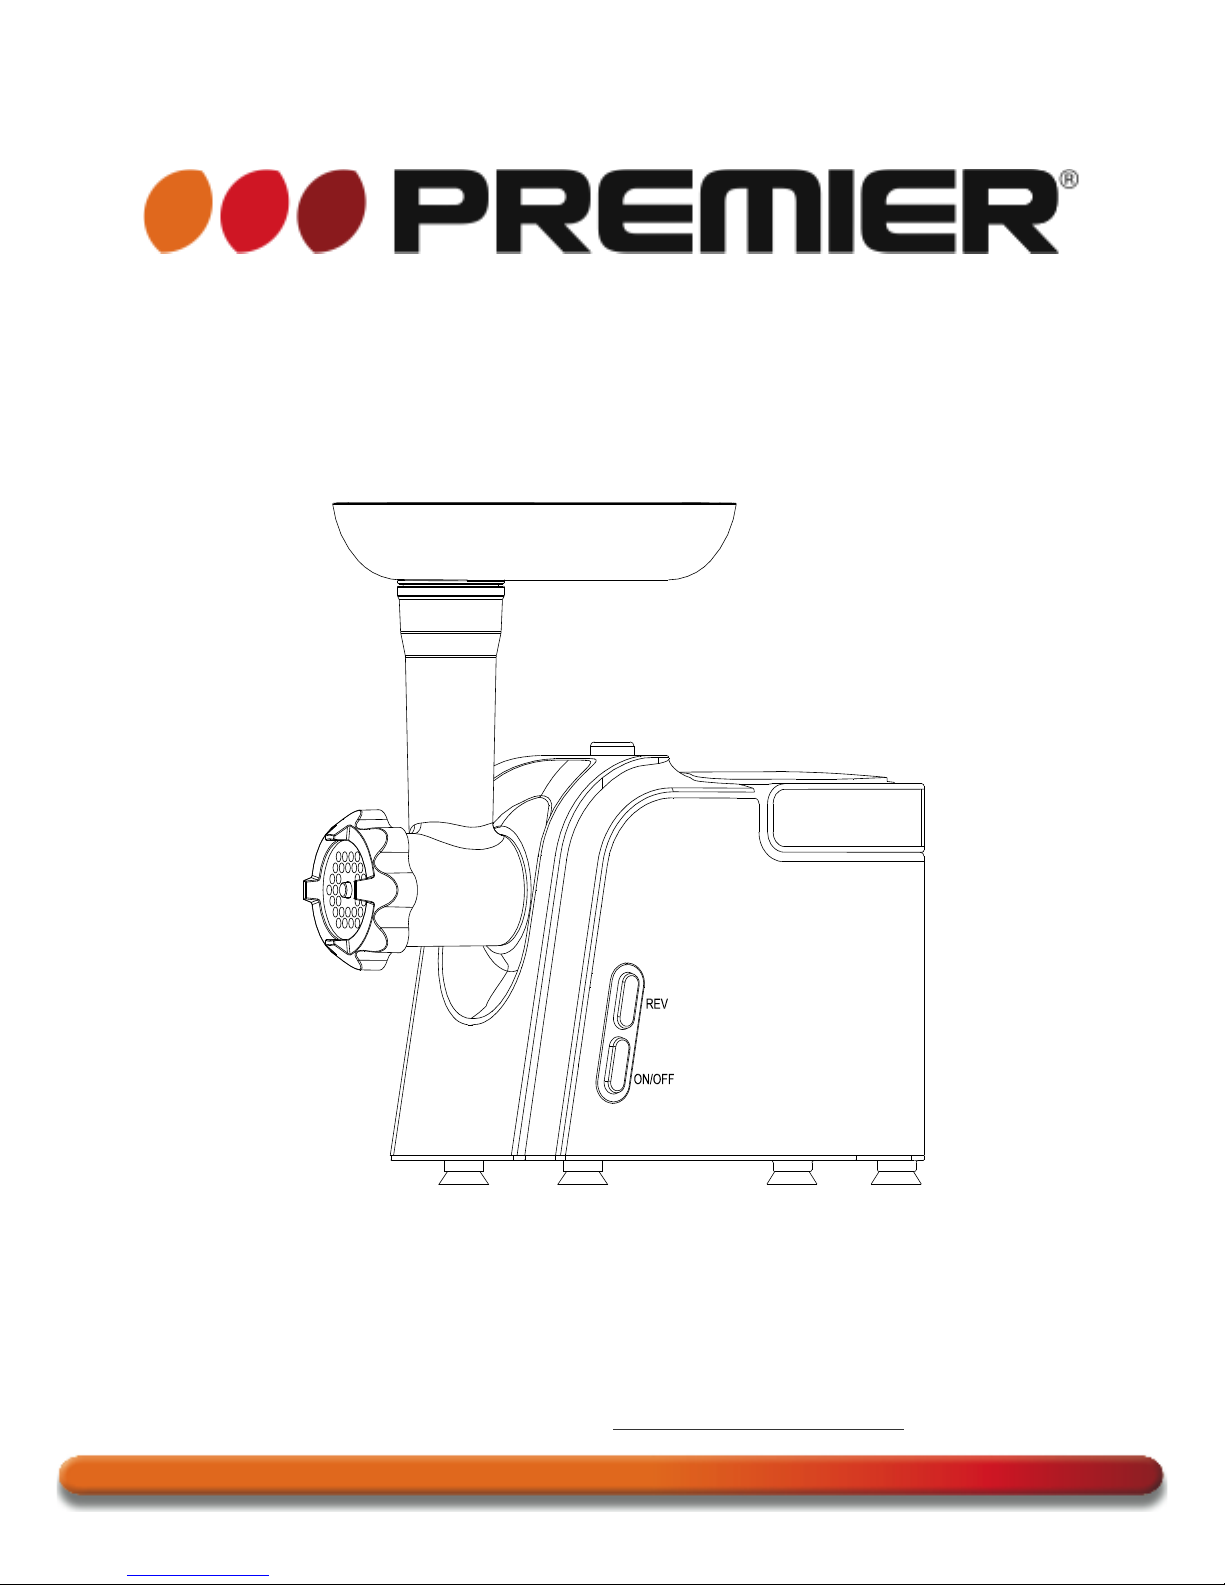
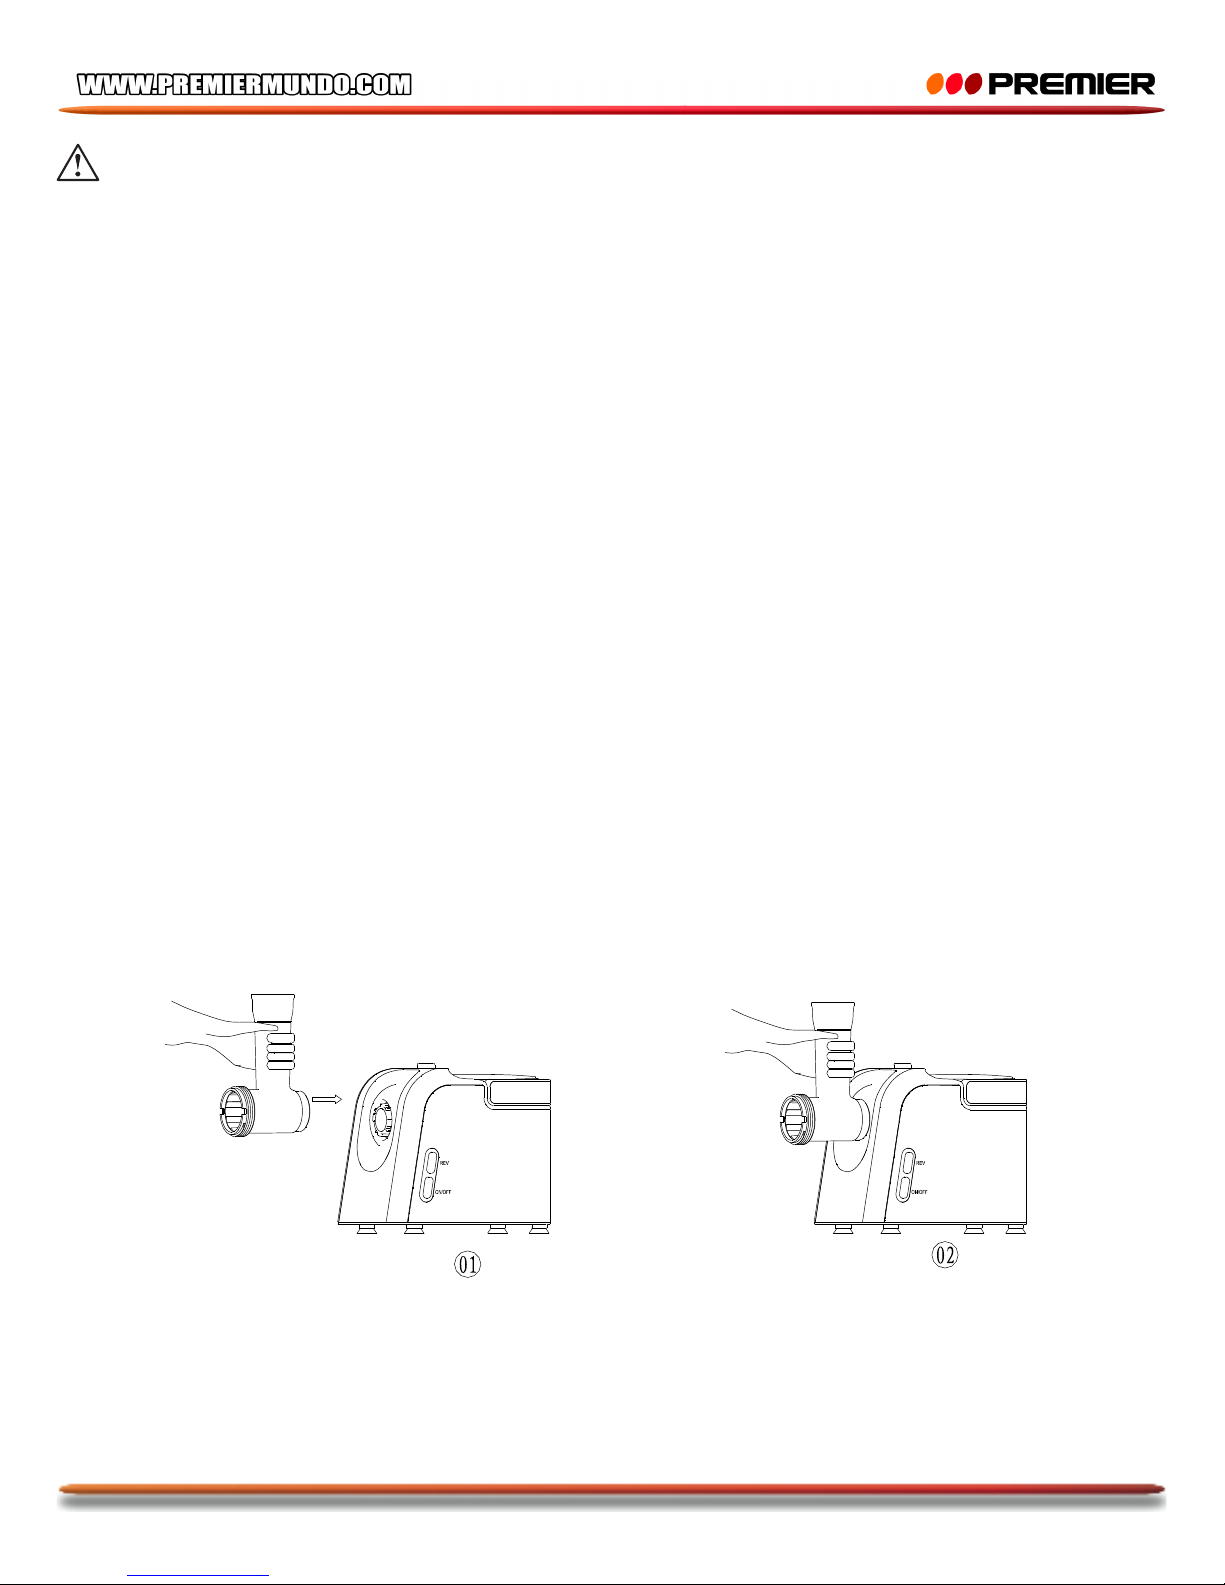
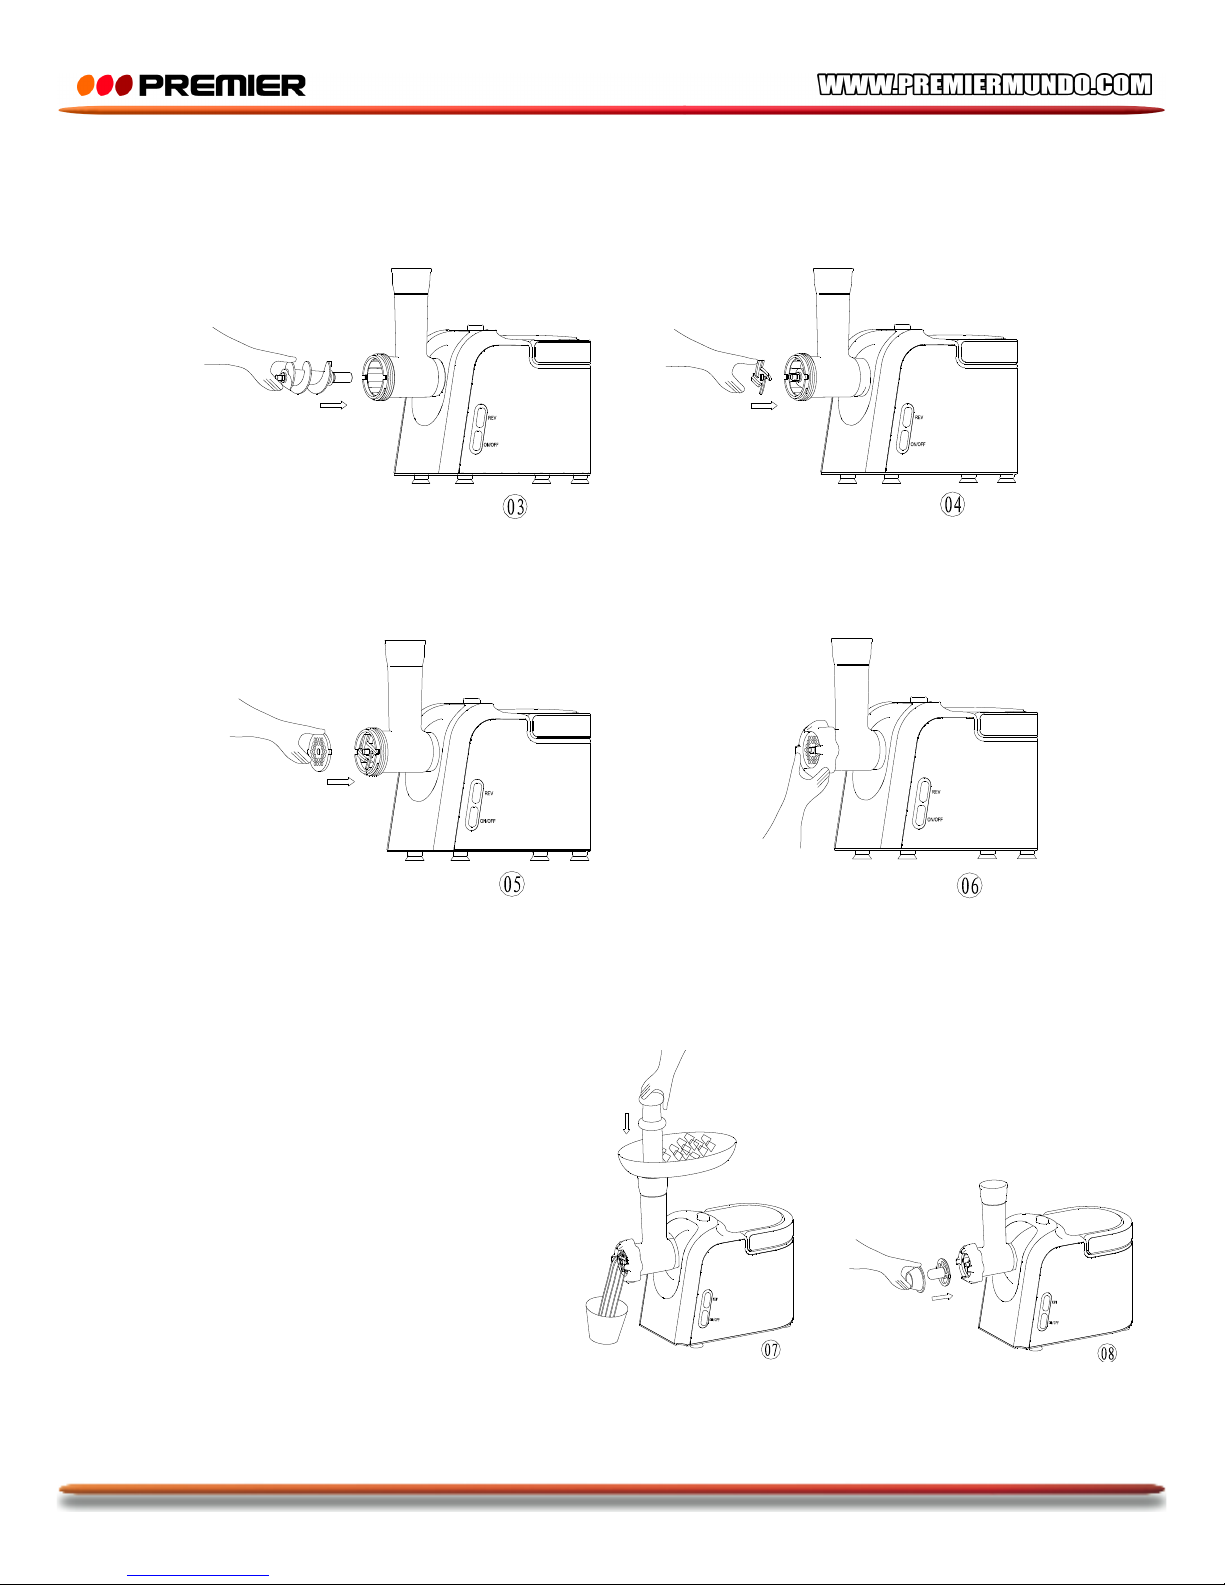
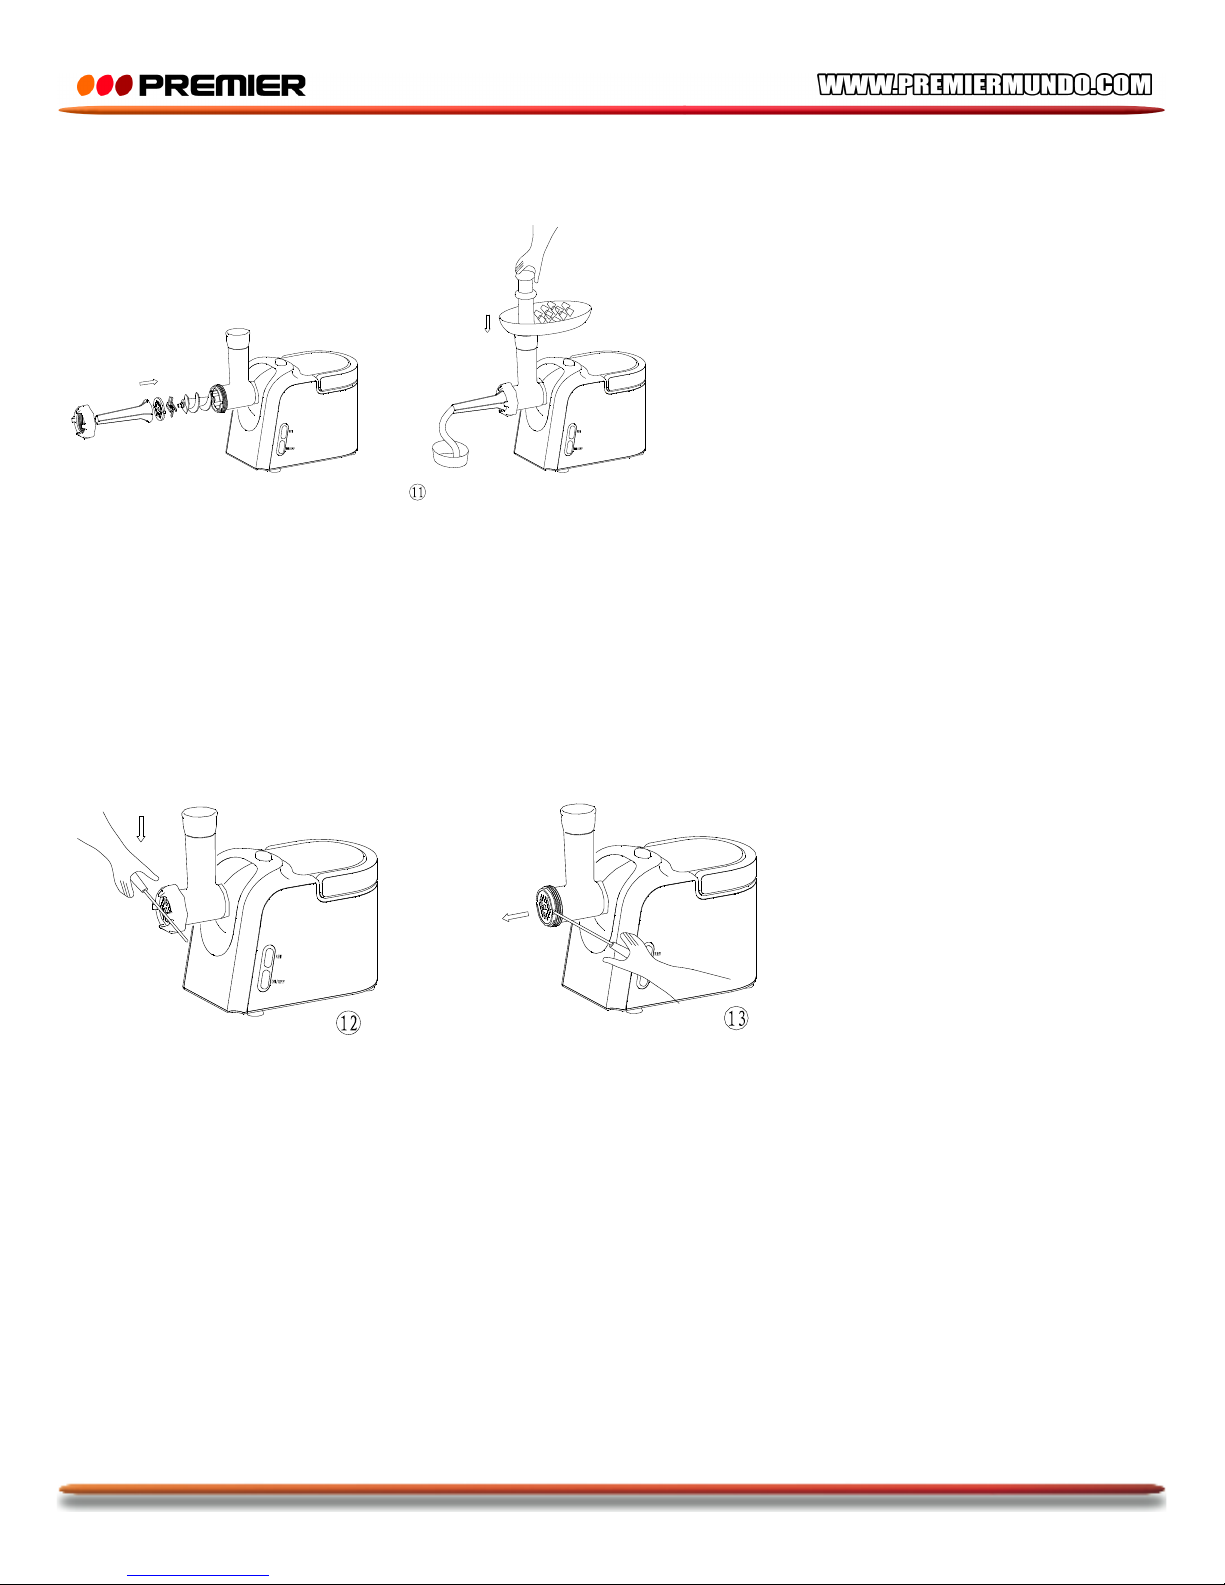
MONTAJE
1. Sostenga la cabeza en insértela en la entrada con una mano. Ajústela girándola hacia la izquierda.

P-4
2. Coloque el tornillo de alimentación en la cabeza (la parte larga hacia adelante) girándolo hasta que
ajuste en la carcasa del motor.
3. Coloque la cuchilla de corte en el eje del tornillo de alimentación con la parte cortante mirando hacia
adelante. Debe estar puesta correctamente para funcionar como se espera.
4. Coloque la placa de corte deseada junto a la cuchilla, ajustando las partes salientes en las ranuras.
5. Sostenga el centro de la placa de corte con el dedo y ajuste el anillo de fijación con la otra mano
hasta que se firme, pero no apriete demasiado.
6. Coloque la tolva de depósito en la cabeza y ajústela.
7. Coloque la unidad completa sobre una superficie firme y estable.
8. Los pasajes de aire en la parte inferior y a los lados de la carcasa del motor deben mantenerse
libres y no ser bloqueados.
MOLER CARNE
1. Corte los alimentos en trozos pequeños (se
recomienda la carne sin tendones, huesos
ni grasa, en pedazos de 2 x 2 x 6 cm) de
manera que quepan fácilmente por la
abertura.
2. Coloque los alimentos en la tolva de
depósito.
3. Empuje la carne únicamente con el
empujador y permita que la unidad al
proceso, saliendo carne molida por el otro
extremo.
4. Después de cada uso desconecte la unidad.

P-5
FUNCIÓN DE REVERSA
1. En caso de que la unidad se atore utilice la función de reversa.
2. Apague la unidad y espere al menos 1 minuto a que se detenga completamente. Luego presione el
botón de reversa.
3. El tornillo de alimentación comenzar a girar en la dirección contraria y la cabeza quedará limpia.
4. Si no funciona, apague y desconecte la unidad y límpiela.
HACER KIBBE
RECETA DE RELLENO
Carne de cordero 100g
Aceite de oliva 1 cucharada
Cebolla (finamente picada) 1 cucharada
Especias al gusto
Sal al gusto
Harina 1 cucharada
•Muela la carne de cordero una o dos veces.
•Frite las cebollas hasta que queden de color café y agregue la carne molida, especias, sal y harina.
CUBIERTA
Carne magra 450g
Harina 150 – 200g
Especias al gusto
Nuez moscada (finamente picada) 1
Pimentón rojo en polvo al gusto
Pimentón al gusto
•Muela la carne 3 veces y mezcle todos los ingredientes en un recipiente. Más carne y menos harina
para la cobertura dan mejor consistencia y sabor.
•Muela la mezcla 3 veces.
•Desarme la unidad y coloque los acoples kibbe A y B en el tornillo de alimentación, ajustándolos.
•Opere la unidad para hacer los kibbe. Cuando estén listos póngalos a freír.

P-6
HACER SALCHICHAS
Para hacer salchichas utilice la unidad normalmente pero con el acople para hacer salchichas.
LIMPIEZA Y MANTENIMIENTO
DESMONTAJE
1. Asegúrese de que el motor se ha detenido completamente.
2. Desconecte el cable de poder.
3. Desarme la unidad completamente. Si no es fácil quitar el anillo de fijación utilice una herramienta.
4. Para retirar fácilmente la placa de corte utilice un destornillador entre la placa de corte y la cabeza,
como se ve en la ilustración.
LIMPIEZA
•Retire los residuos de alimento y lave cada parte con agua jabonosa.
•No utilice soluciones blanqueadoras ya que quitarán el color de las partes de aluminio.
•No introduzca la carcasa del motor en agua. Sólo utilice una prenda húmeda suave.
•No utilice tiner o alcohol.
•Seque todas las partes con una toalla.
ESPECIFICACIONES
Entrada de energía AC120V/60Hz
Potencia 1200W
Peso 3.8Kg neto / 5.1Kg bruto
Dimensiones 432 x 226 x 282 mm


INSTRUCTION MANUAL
MEAT GRINDER
ED-4819
DEAR CUSTOMER
In order to achieve the best performance of your product, please read this instruction manual carefully
before using, and keep it for future reference.

P-1
CAUTION
RISK OF ELECTRIC
SHOCK, DO NOT
OPEN
Caution: To reduce the risk of electric shock do not open
this device, there are not serviceable parts for customers.
Please refer any maintenance or repair to qualified
personnel.
This sign means the existence of dangerous voltage at
the inside of the unit, which states a risk of electric shock.
This sign means that there are important instructions of
operation and handling in the manual that comes with this
device.
PREMIER CUSTOMER SERVICE
Venezuela:
0800 – ELECTRIC (353-2874)
Panama:
300-5185
Website
www.premiermundo.com
E-mail:
NOTE
This unit may be submitted to changes in specifications, characteristics and/or operation without prior
notice to the user, in order to continue improving and developing its technology.

P-2
1. Food pusher 2. Hopper plate
3. Locking knob 4. Motor housing
5. ON/OFF switch 6. REV switch
7. Head 8. Feed screw
9. Cutting blade 10. Cutting plate (fine)
11. Cutting plate (medium) 12. Cutting plate (coarse)
13. Fixing ring 14. Sausage attachment
15. Kibbe attachment
Household use only. Do not use for industrial purpose.
Unplug from outlet when assembling and disassembling the unit.
Close supervision is necessary when any appliance is used near children.
That the carrying out must both hands holding appliances. Don't just holding hopper
plate or head.
Do not fix the cutting blade and cutting plate when using kibbe attachment.
Never feed food by hand. Always use food pusher.
Do not grind hard food such as bones, nuts, etc.
Do not grind ginger and other materials with hard fiber.
Do not shake the head accessories before you press the lock button when you want
to take out the head accessories.
DESCRIPTION
IMPORTANT SAFEGUARDS

P-3
Continuous running of meat grinder should be not more than 5 minutes.
Reverse function is prohibited while the appliance is operating (For example
switch“ON”knob to“R”knob or on the contrary), wait at least one minute until grinder
has come to a complete stopotherwise it may cause an abnormal noise, vibration or
a transitory electric spark in the appliance. It could result easily damage to appliance
and make a user frightened.
After use, there would be a little food left in the grinder head. This is normal. There
might be a bit of black metal powder adhering to the food ground in the end. Please
pick them out and throw away, do not eat them.
To avoid jamming, do not force to operate the unit with excessive pressure.
When the circuit breaker activates, do not switch on.
Never try to replace the parts and repair the unit by yourself.
Children or handicapped should be supervised to ensure that they do not play with the
appliance.
If the supply cord is damaged, it must be replaced by the manufacturer, its service
agent or similarly qualified persons in order to avoid a hazard.
Check that voltage indicated on the rating label corresponds the mains voltage in your
home.
Wash all parts (except body) in warm soapy water.
ASSEMBLING
Holding the head and insert it in the inlet with one hand, revolves toward left (fig.2).
Place the feed screw into the head, long end first, by turning the feed screw slightly
until it is set into the motor housing (fig.3).
FOR THE FIRST TIME
INSTRUCTION FOR USE

P-4
Place the cutting blade onto the feed screw shaft with the blade facing the front as
illustrated (fig.4). If it is not fitted properly, meat will not be ground.
Place the desired cutting plate next to the cutting blade, fitting protrusions in the slots
(fig.5).
Support or press the centre of the cutting plate with one finger then screw the fixing
ring until tight with another hand (fig.6). Do not over tighten.
Place the hopper plate on the head and fix into position.
Locate the unit on a firm place.
The air passage at the bottom and the side of the motor housing should be kept free
and not blocked.
MINCING MEAT
Cut all foods into pieces (Sinewless, boneless and fatless meat is recommended,
approximate size : 20 mm x 20 mm x 60 mm) so that they fit easily into the hopper
opening.
Feed foods into the hopper plate. Use only the food pusher (fig.7).
After use switch the unit off and unplug it from the power supply.

P-5
·REVERSE FUNCTION
In case of jamming switch the appliance off by turning the“REV”switch to
“ON”switch to“OFF”position. wait at least one minute until grinder has come to a
complete stop.Then, turn the“REV”switch.
Feed screw will be rotating in the opposite direction, and the head will get empty.
If it doesn't work, switch the unit off and clean it.
RECIPE STUFFING
Mutton 100g
Olive oil 1 1/tablespoons
Onion (cut finely) 1 1/tablespoons
Spices to your taste
Salt to your taste
Flour 1 1/tablespoons
MAKING KIBBE

P-6
Mince mutton once or twice.
Fry onion until brown and add minced mutton, all spice, salt and flour.
OUTLET COVER
Lean meat 450g
Flour 150-200g
Spices to your taste
Nutmeg (cut finely) 1
Powdered red pepper to your taste
Pepper to your taste
Mince meat three times and mix all ingredients together in a bowl. More meat and less
flour for outlet cover creates better consistency and taste.
Grind the mixture three times.
Disassemble by reversing the steps from 5-3 to remove the cutting plate and cutting
blade.
Place kibbe attachments A and B onto the feed screw shaft together, fitting
protrusions in the slots (fig.8).
Screw fixing ring into place until tight. Do not over tighten (fig.9).
Make the cylindrical
outlet cover (fig.10).(
Form kibbe as
illustrated below and
deep fry.
Before starting please assemble sausage attachment as per following (fig.11)
MAKING SAUSAGE

P-7
DISASSEMBLING
Make sure that the motor has stopped completely.
Disconnect the plug from the power outlet.
Disassemble by reversing the steps from 6-1 pictures.
If the fixing ring is not easily removed by hands, please use toolsfig.12.
To remove the cutting plate easily, place a screwdriver between the cutting plate and
the head as illustrated and lift it up (fig.13).
CLEANING
Remove meat, etc. Wash each part in warm soapy water.
A bleaching solution containing chlorine will discolor aluminum surfaces.
Do not immerse the motor housing in water, but only wipe it with a damp cloth.
Thinners and petrol will crack or change the color of the unit.
Wipe all the cutting parts by vegetable oil -wet cloth.
Power supply
AC120V/60Hz
Max. Locked motor approx.
wattage
1200W
Net/Gross weight
3.8Kg/5.1Kg
Overall dimension(L×W×H)
432mm×226mm×282mm
CLEANING AND MAINTENANCE
SPECIFICTION
Table of contents
Languages:
Other Premier Meat Grinder manuals