4
3. Settings
Before recording, you can set up the device according to your requirements.
-In video mode, press [MENU] to enter main menu and select mode which
you like.
-In seng list, use [ ]/[ ] to navigate the function, click the option to
confirm the selecon, press [back] to exit.
VIDEO SETTINGS
PICTURE SETTINGS
•
•
•
•
•
•
•
•
•
•
•
3
Resolution: Select the resolution of recorded video: FHD 1920 x 1080, 720P 1280x720
Movie Clip time: Set the video duration (1, 3, 5 minutes or off) for loop recording. When the
microSD card is full, the device will delete the oldest unlocked video file automatically.
Motion Detection Off, Low Level, Middle Level, High Level. Turn on or off motion detection. If
there is any motion detected while the car engine is stopped, your car DVR will start recording
automacally.
Sound Record: Off/On. Set to record sound or not.
Date Stamp: Off/On. Add date stamp onto videos.
Protect Level: Off, Low Level, Middle Level, High Level. Select the sensivity of the G-sensor. The
smaller the number is, the higher the sensivity is. When reaching the sensive value (such as
collision), the recording file will be automacally protected.
Parking Monitoring: Off/On.
Still image size: Select the picture image size from 1.2M , 2M , 3M.
Still Quality: Set the photo quality Fine/Super Fine.
Sharpness: Adjust the sharpness value.
ISO: Set the ISO value.
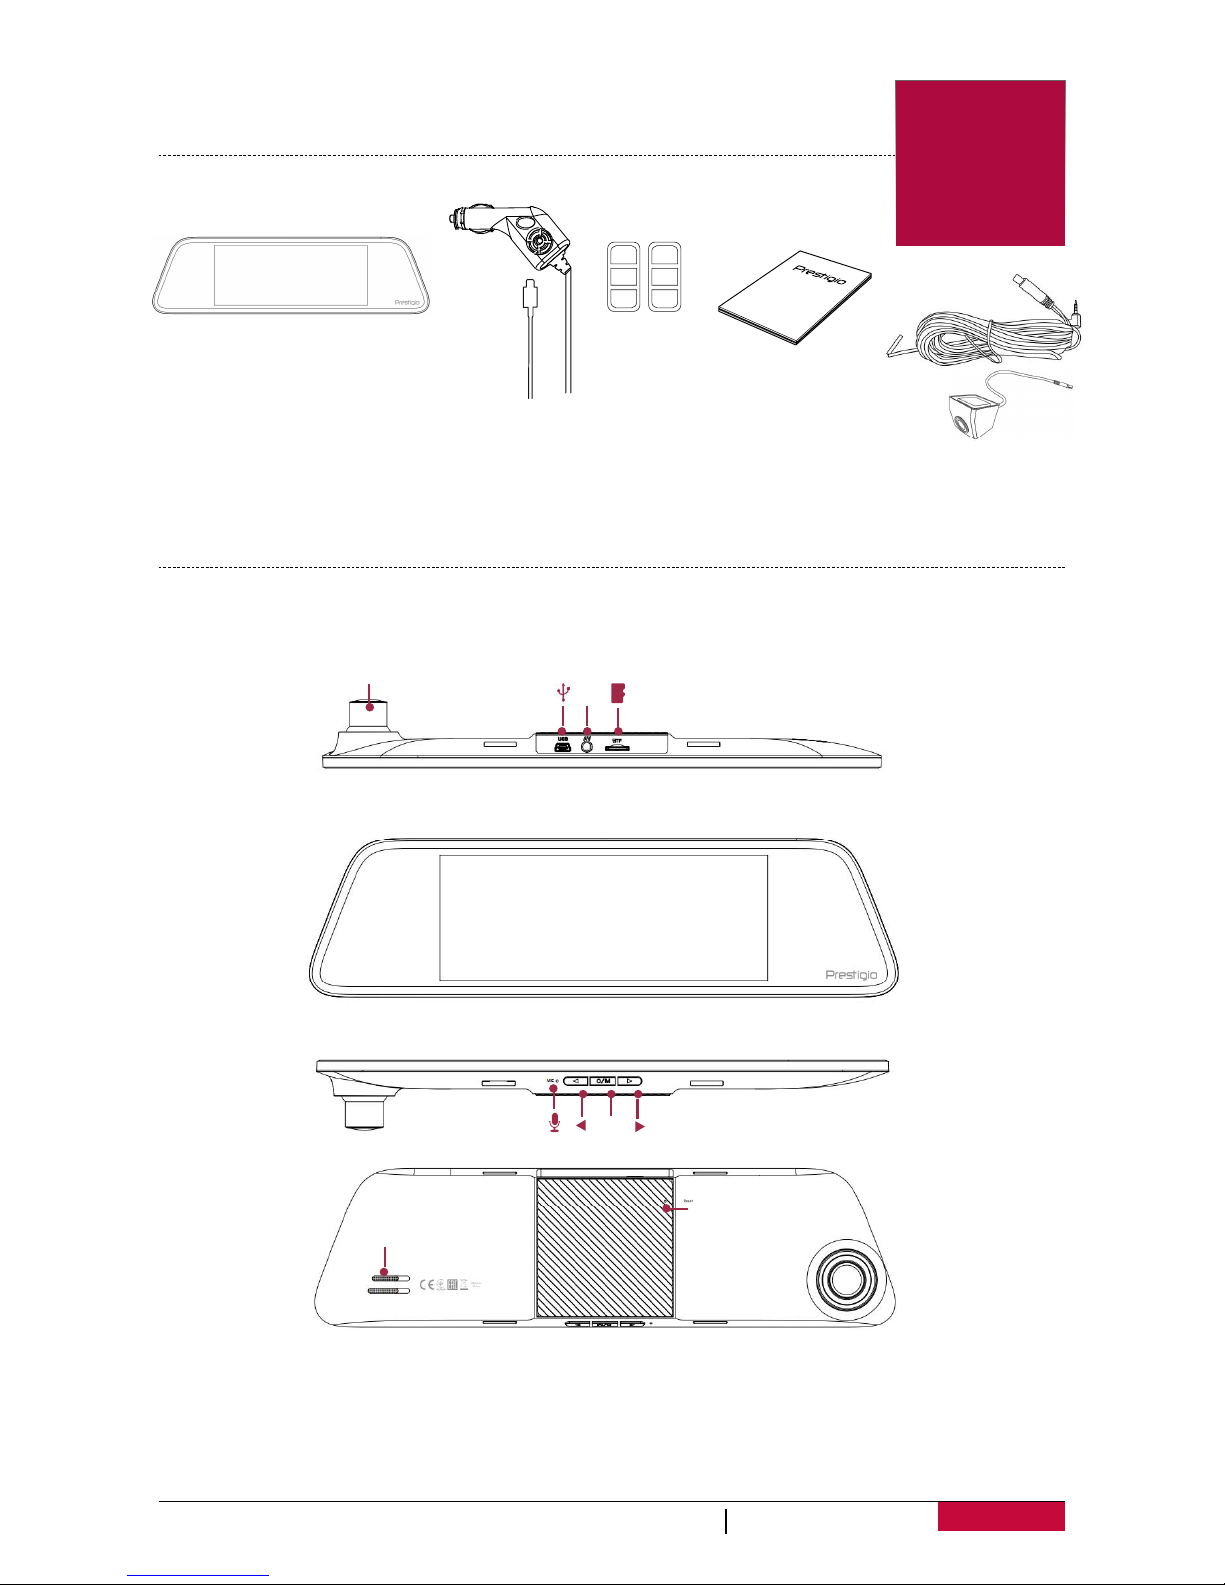
User Manual RoadRunner M irror
GENERAL SETTINGS
Clock: Set date and me on device.
Movie Off Time: Set automac power off when the device is not in use. Off, 1 Minute, 3 Minutes, 5
Minutes.
Beep Sound: Off/On. Turn off/on beep sound.
Stamp Date: Off/On. Add date stamp onto videos.
Stamp Time: Off/On. Add me stamp onto videos.
Stamp Logo: Off/On. Add logo stamp onto videos.
Language: Choose your language.
Flicker:
50Hz, 60Hz. For a given luminance, the frequency of light fluctuaon that evokes a
sensaon of flicker. Set a right flickering frequency to avoid horizontal stripe interference.
Format SD: Format the memory card.
Formang will erase all your stored data. Back up your data before proceeding.
White Balance: Select an appropriate white balance, so images have a true-to-life color range. It is
for specific lighng situaons.
LCD Power Off: Adjust the backlight me Off/30 seconds/1 Minute/3 Minutes.
Exposure: Set exposure value to determine how much light the camera’s sensor receives. For
lowlight situaons, use a higher exposure.
Reset Setup:
Restore to default sengs.
Version:
•