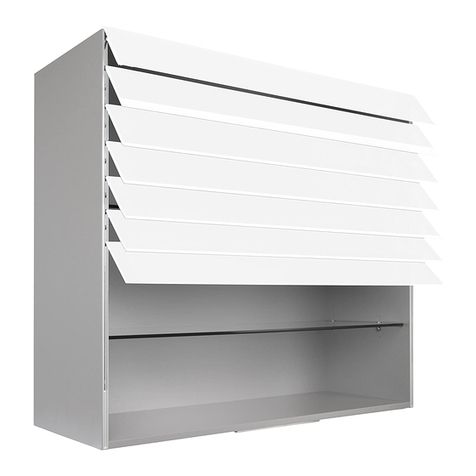
Presto Lifts PLS53-150P Setup guide

Lift Stik
Installation, Operation
and Service Manual
Model Number ___________________
Serial # _________________________
Date Placed in Service _____________
IMPORTANT: READ CAREFULLY
BEFORE INSTALLING OR OPERATING LIFT
Part orders are subject to a $50 minimum charge.
March 2016
PLS53-150P
PLS53-150W

PRESTO OWNER’S MANUAL Page 3 LIFT STIK
C O N T E N T S
S E C T I O N 1:
Introduction.............................................................................................................4
Responsibility of Owners and Users.......................................................................5
S E C T I O N 2:
Safety Alert Symbols and Signal Words .................................................................6
Safety ......................................................................................................................7
S E C T I O N 3:
Installation...............................................................................................................7
A. Inspection ........................................................................................................7
S E C T I O N 4:
Operation.................................................................................................................7
A. Operating Instructions.......................................................................................7
B. Daily Operations Maintenance Checks .............................................................8
Operator Instructions ..............................................................................................8
A. Preparation for Use ...........................................................................................8
B. Operations .........................................................................................................9
S E C T I O N 5:
Battery Maintenance ...............................................................................................9
A. Preparing to Charge a Battery ..........................................................................9
B. Locating the Charger ........................................................................................9
C. Precautions .......................................................................................................9
D. Battery Charger Connection Precautions .......................................................10
S E C T I O N 6:
Testing Electronic Components ...................................................................... 13-16
TROUBLESHOOTING....................................................................................................12
ORDERING REPLACEMENT PARTS ...........................................................................17
RESTOCKING POLICY..................................................................................................18
WARRANTY....................................................................................................................19

PRESTO OWNER’S MANUAL Page 4 LIFT STIK
S E C T I O N 1
INTRODUCTION
This manual attempts to provide all of the information necessary for the safe and
proper installation, operation and maintenance of Presto Lifts Inc. Lift Stik. It is
important that all personnel involved with the installation, maintenance or operator
of the stacker read this manual. Additional manuals are available upon request or
at www.prestolifts.com.
Each of the Presto Lift Inc. stackers is equipped with nameplate, serial number and
model identications. Please refer to these numbers when ordering parts or request-
ing further information.
The Presto Lifts Inc. stackers are designed for lifting, lowering and positioning a
wide variety of loads. WHERE UNIQUE SITUATIONS ARISE, WHICH ARE
NOT COVRED IN THIS MANUAL, CALL PRESTO LIFTS FOR FURTHER
INSTRUCTIONS.
The battery-operated stackers are designed for in-plant/non-hazardous locations only.
These units are not for personnel lifting. All equipment is manually propelled and
powered vertical travel.
Distributed by:
Custom Equipment Company
866-333-0728
www.custommhs.com

PRESTO OWNER’S MANUAL Page 5 LIFT STIK
Responsibility of Owners and Users
Inspection and Maintenance
The device shall be inspected and maintained in proper working order in accordance with
Presto’s owner’s manual.
Removal from Service
Any device not in safe operating condition such as, but not limited to, excessive leakage,
missing rollers, pins, or fasteners, any bent or cracked structural members, cut or frayed
electric, hydraulic, or pneumatic lines, damaged or malfunctioning controls or safety de-
vices, etc. shall be removed from service until it is repaired to the original manufacturer’s
standards.
Repairs
All repairs shall be made by qualied personnel in conformance with Presto’s instructions.
Operators
Only trained personnel and authorized personnel shall be permitted to operate PowerStak.
Before Operation
Before using the device, the operator shall have:
• Read and/or had explained, and understood, the manufacturer’s operating instructions
and safety rules.
• Inspected the device for proper operation and condition. Any suspect item shall be
carefully examined and a determination made by a qualied person as to whether it
constitutes a hazard. All items not in conformance with Presto’s specication shall be
corrected before further use of the Lift Stik.
During Operation
The device shall only be used in accordance with this owner’s manual.
• Do not overload.
• Ensure that all safety devices are operational and in place.
Modications or Alterations
Modications or alterations to any Presto industrial positioning equipment shall be made
only with written permission from Presto.

PRESTO OWNER’S MANUAL Page 6 LIFT STIK
SAFETY ALERT SYMBOLS AND SIGNAL WORDS
The safety of all persons operating, maintaining, repairing, or in the vicinity of this equipment is of paramount concern.
This is a powerful machine with moving parts, and is capable of causing personal injury if proper precautions are
not taken. Therefore, throughout this manual, certain hazards have been identied which may occur in the use of
the machine, and there are appropriate instructions or precautions which should be taken to avoid these hazards. In
some cases, there are consequences which may occur if instructions or precautions are not followed. Below are the
symbols and signal words along with their denitions referenced from ANSI Z535.4 - Product Safety Signs and Labels.
Safety Alert Symbols
These are the safety alert symbols.. They are used to alert you to potential physical injury haz-
ards. Obey all safety messages that follow this symbol to avoid possible injury or death.
For use with DANGER signal word
(Red Background)
For use with WARNING signal word
(Orange Background)
For use with CAUTION signal word
(Yellow Background)
Signal Words
The meaning of different signal words as dened by ANSI Standard Z535.4 indicates the relative
seriousness of the hazardous situation.
DANGER indicates a hazardous situation which, if not avoided,
will result in death or serious injury.
WARNING indicates a hazardous situation which, if not avoided,
could result in death or serious injury.
CAUTION, used with the safety alert symbol, indicates a haz-
ardous situation which, if not avoided, could result in minor or
moderate injury.
NOTICE is used to address practices not related to personal
injury.
(Red Background)
(Orange Background)
(Yellow Background)
(Blue Background)
SAFETY
INSTRUCTIONS
SAFETY INSTRUCTIONS (or equivalent) signs indicate safety-
related instructions or procedures.
(Green Background)

PRESTO OWNER’S MANUAL Page 7 LIFT STIK
S E C T I O N 2
SAFETY
The battery-operated stackers are very powerful lifts
capable of doing large amounts of work.
DO NOT INSTALL OR OPERATE THESE LIFTS
WITHOUT CAREFULLY READING THIS MANUAL.
In order to provide for the safe operation of these stack-
ers, Presto Lifts Inc. has identied certain hazards that
may occur during the installation, maintenance and use
of these lifts. For safety reasons these units are designed
to be serviced or repaired in the collapsed position. If
performed properly, this will greatly reduce the possibil-
ity of injury.
WARNING!
The following guidelines should be used when
using a lifter:
Under no circustances should the lifter lift
above the weight capacity.
The lifter must not be used to lift people.
There must be only one person in constact with
the lifter while it is being operated.
There should be no body parts near the slide
on the tower or other litng eqiupmet when the
lifter is being oeprated.
There must be no people or body parts below
the load.
The lifter must be operated on a rm level sur-
face when lifting or transporting loads.
When moving a load, the load should be low-
ered to a low position and secured so that it
cannot slide.
When leaving or storing the lifter, ensure that the
sled is lowered completely,and that the lifter is free
of any load or cargo.
The load's center of gravity should be behind the
front wheels of the uspport legs.
The lifter should only be cleaned by wiping with
a damp cloth, otherwise water may enter into the
contacts and control panel.
The timing belt should be replaced every 8 years.
S E C T I O N 3
INSTALLATION
A. INSPECTION:
Upon receipt of the stacker, inspect the equipment com-
pletely to determine if there is any shipping damage,
and that the lift is complete. Presto Lifts Inc. tests and
inspects every piece of equipment prior to shipment. If
damage is apparent, a freight claim must be led with
the freight company. Do not use the lift if there appears
to be any damage. With the lift in a collapsed position,
check the following:
1 Check for signs of damage especially to the
back cabinet that houses the battery and power
pack.
2 Check base frame for dimensions and struc-
tural integrity.
3 Inspect for any bent or damaged metal parts.
S E C T I O N 4
OPERATION
A. OPERATING INSTRUCTIONS:
1. To raise lift, push "Lift" button.
2. To lower lift, push "Lower" button.
3. Whenever the control handle is released,
the lift stops.
AUTHORIZED OPERATORS SHOULD READ
AND UNDERSTAND ALL INSTRUCTIONS, PRE-
CAUTIONS AND WARNINGS.
IMPROPER USE OF THIS LIFT COULD
RESULT IN INJURY AND/OR DAMAGE
TO LOAD AND EQUIPMENT.
1 Inspect the lift for damaged or worn parts. Do
not use if not in safe operating condition.
2 Use lift on hard level surfaces only.
3 Make sure load is evenly distributed, not loose
or unstable, and is as far back on platform or forks
as possible. Do not pick up loads on tips or forks
or edge of platform.
4 For fork models, adjust forks to the maximum
practical width. Pick up loads on both forks (not
one).

PRESTO OWNER’S MANUAL Page 8 LIFT STIK
5 Do not overload. Check load center and load
weight capacities on manufacturer’s nameplate.
6 Make sure travel and work area is clear of
obstructions.
7 Check overhead clearance before lifting loads
or transporting.
8 Make sure oor lock pad is in rm contact
with oor before lifting load, lowering load or
using as a workstation.
9 Brace or block lift when sliding loads on or
off platform or forks.
B. DAILY OPERATIONS
MAINTENANCE CHECKS:
1. Battery
A. Check for corroded and loose terminals.
A white powder substance will be present if
there is any existing corrosion.
B. Visually inspect for any cracks or damage
to the casing.
C. Check for loose battery tie-downs.
2. Charger
A. Inspect wire connections.
B. Check power cord for nicks/damage.
C. Check charger for proper mounting.
3. Frame Assembly
A. Check wheel lock.
B. Check chain roller assembly connections.
C. Check for any worn or damaged parts.
OPERATOR
INSTRUCTIONS
WARNINGS
DO NOT use this lift until you have been trained and
authorized to do so.
DO NOT operate until you have read all warnings and
instructions.
DO NOT exceed load center or load weight capacities
DO NOT operate until you have checked the conditions
of the truck: lift systems, forks, chains, cables and
oor lock.
DO NOT use if any part is damaged, worn or not work-
ing properly.
DO NOT use on ramps or inclines. Only smooth level
surfaces.
DO NOT use for lifting or carrying people.
DO NOT handle unbalanced, unstable or loosely
stacked loads.
DO NOT travel with forks or platform in an elevated
position.
DO NOT handle high-unsecured loads that could fall
backwards.
DO NOT allow people to stand or pass under forks or
platform with or without load.
DO NOT operate when parts of anyone’s body may be
close to mast structure or any moving parts.
DO NOT drop loads on platform or forks.
DO NOT alter or modify this lift in any way.
A. PREPARATION FOR USE
This lift left our factory in perfect condition. It has been
inspected and tested to assure performance standards
have been met.

PRESTO OWNER’S MANUAL Page 9 LIFT STIK
Visually inspect lift for damage. Check for attachments
and accessories that may have been ordered. If there is
any damage or missing parts, report it to your carrier
and your Presto Lifts dealer immediately.
Remove all metal/plastic bands, cardboard and other
material used for shipping purposes.
Check to see if chains are in place, the wheel lock is
in working order, and that the lift system is in working
order.
Connect battery cable. Check cables and wires on bat-
tery charger as well as battery.
B. OPERATIONS
PRECAUTIONS:
AUTHORIZED OPERATORS SHOULD READ
AND UNDERSTAND ALL INSTRUCTIONS,
PRECAUTIONS AND WARNINGS. IMPROPER
USE OF THIS LIFT TRUCK COULD RESULT
IN INJURY AND/ OR DAMAGE TO LOAD AND
EQUIPMENT.
Inspect the lift for damaged or worn parts. Do not use
if not in safe operating condition.
Use lift on hard level surfaces only.
Make sure load is evenly distributed (not loose or un-
stable), and is as far back on forks as possible. Do not
pick up loads on tips of forks or edge of platform.
Adjust forks to the maximum practical width. Pick up
loads on both forks (not one).
Do not overload: Check load center and load weight
capacities on manufacturers name plate.
Make sure travel and work area is clear of obstruc-
tions.
Check overhead clearance before lifting loads or trans-
porting.
Make sure oor lock or pad is secured to oor before
lifting, lowering or using as a workstation.
Brace or block lift when sliding loads on or off platform
or forks.
S E C T I O N 5
BATTERY MAINTENANCE
A. PREPARING TO CHARGE A BATTERY
1. Be sure area around lift and the battery is well
ventilated while battery is being charged.
2. The battery terminals, connections and wiring
including the plug in the battery box and charger
connections should be clean and free of corrosion.
When cleaning any of these components wear a
face shield or other suitable protective eyewear.
3. Do not operate charger in a closed area or restrict
ventilation in any way.
4. For a sealed battery (a battery without cell caps)
carefully follow the manufacturer’s recharging
instructions that are provided with the battery. If
you do not have a copy of these instructions or
the instructions for the battery charger they are
available free of charge by calling Presto Lifts @
1-800-343-9322.
5. Read, understand and follow all battery and battery
charger manufacturer’s specic precautions while
working with and/or charging batteries.
B. PRECAUTIONS FOR GROUNDING
AND AC POWER CORD CONNECTION
Charger should be grounded to reduce risk of elec-
tric shock. Charger is equipped with an electric
cord having an equipment-grounding conductor
and grounding plug. The plug must be plugged into
an outlet that is properly installed and grounded
in accordance with all local codes and ordinances.
DANGER
Never alter the AC cord or plug provided. If it
will not t outlet, have proper outlet installed by
a qualied electrician. Improper connection can
result in a risk of an electric shock.

PRESTO OWNER’S MANUAL Page 10 LIFT STIK
D. BATTERY CHARGER CONNECTION
PRECAUTIONS
CAUTION
Connect and disconnect the DC output plug
(or clips) only when the AC cord is disconnected
from the electric outlet. Never allow clips
to touch each other.
1. When hooking up the charger, attach the plug into
the twist-lock receptacle on the side of the battery box
or connect the clips directly to the battery on units that
are not pre-wired with a plug on the side of the battery
box.
FOR UNITS NOT EQUIPPED WITH A TWIST-
LOCK, PREWIRED CHARGER PLUG FOLLOW
THESE ADDITIONAL PRECAUTIONS
1. Check polarity of battery posts. POSITIVE (POS, P,
+) battery post usually has larger diameter than NEGA-
TIVE (NEG, N, -) battery post.
2. Determine which post of battery is grounded (con-
nected) to the chassis of the machine. Connect the
NEGATIVE (Black) clip from the battery charger to
the machine chassis as far away from the battery as
possible.
3. The POSITIVE (red or white) clip from the battery
charger to the POSITIVE (POS, P, +) post of the bat-
tery.
4. When making each connection, twist or rock clip back
and forth several times to make a good connection and
to reduce the risk of a clip slipping off and creating a
spark. Do not twist or rock clip on the battery after the
second clip connection is made.
5. When disconnecting the charger, disconnect AC cord
from the electrical outlet before removing any clips from
battery or chassis.
IF THESE INSTRUCTIONS ARE NOT CLEAR OR
IF THERE ARE ANY QUESTIONS PLEASE CON-
TACT PRESTO LIFTS INC.
CAUTION
SAFETY SYSTEMS
The lifter is equipped with the following safety sys-
tems:
• Free-running ball bearings that eliminate the risk of
crushing when lowering.
• Electronic control panel that disconnects the lifting
feature if the load is greater than the lifter's capacity
or if the load is unevenly distributed (this does not
prevent overloading when the lifter is not lifting).
APPLICATION
The platform may only be used for lifting and handling
goods.
OPERATING THE LIFTER
The lifter is operated using the Commander located on
the lifter's control panel. This is used to operate the lifting
and lowering function.
ñThe lifter will lift as long as the Commander is
turned clockwise.
òThe lifter will lower as long as the Commander is
turned anticlockwise.

PRESTO OWNER’S MANUAL Page 11 LIFT STIK
BATTERIES AND CHARGER
The lifter is charged with the enclosed charger, which
is connected to the 230V charging plug on the lifter.
The charger should be connected daily as total dis-
charge can damage the battery or shorten its life.
The charger automatically charges the batteries and
switches off when the batteries are fully charged.
The lifter is functionally charged after approx. 4 - 5
hours and fully charged after approx. 8 hours.
# 1 LED: Red = charge, Green = maintenance charg-
ing
# 2 LED: Green = wrongly connected
DESIGN
The masts, handlebars, legs and covers are made of
anodized aluminium (red and neutral).
The slides are made of electro-galvanized steel.
RESIDUAL RISKS
There are residual risks due to extraordinary wear,
material or product failure, and the sudden onset of
defects on the lifter; e.g. a faulty wheel bearing as a
result of a heavy collision.

PRESTO OWNER’S MANUAL Page 12 LIFT STIK
FAULT TYPE CHECK THE FOLLOWING RESOLVED BY
The belt cracks
(the timing belt jumps onto the
gear sprocket)
Is the belt slack? Tighten the belt with the two screws at
the top of the mast.
Is the belt worn? Replace the belt
The belt squeaks
(the belt is skewed)
Is the belt running skewed in the
track on the top sprocket?
Adjust the screw at the top of the mast,
on the side to which the belt is skewed.
Is the belt worn? Replace the belt
The slide jerks Is there dirt in the mast on which
the slide runs?
Remove the dirt and wipe with alcohol.
Is there dirt on the slide wheels? Remove the dirt or replace the wheels.
The lifter does not respond Check whether the item being
lifted is heavier than the lifter's
capacity
Remove the item
Check the main fuse Replace the main fuse (below the top
cover screen on the legs)
Check that the batteries are
charged and not defective
Connect the charger and try to lift with
the charger attached (with no load). If it
rises, recharge the batteries. If this does
not work replace the batteries
The lifter works very slowly Check the voltage of the batteries Connect the charger
TROUBLESHOOTING

PRESTO OWNER’S MANUAL Page 13 LIFT STIK
Testing Electronic Components
S E C T I O N 6

PRESTO OWNER’S MANUAL Page 14 LIFT STIK
Lifter Does Not Go Up or Down
Take off the load of the platform. Press the ON button. Connect charger and
press the H-Commander (or the activator 13). If it starts to work a little bit in
both directions, it is most likely the fuse has broken or the batteries are worn
down. Replace fuse located behind the white distance block. Check batteries
and replace if needed. If the test with charger is successful, the charger is work-
ing properly. See below for a full test of the charger.
UP or DOWN Function Doesn't Work
If UP doesn’t work it is most likely a failure at the contact arm of the top limit switch (22) or the UP-switch (26).
Down switch is pos 11. Take off the front cover and put a wire across the top limit switch connections. Press UP
button and if it works you can replace the top limit switch using a hexagon key 2,5mm. Make sure the wires are
connected to the NC pins 1 & 4. Contact arm with roller shall be mounted in the middle position.
Testing Relay and Motor
Measure 24V DC on + / -. If voltage is between 24V and 26V
the batteries are okay. Measure if you have the same voltage on
F. (Your black measuring pin must be on minus -). If the micro
switches are okay you can use the H-commander to activate the
relay.
You should hear the clicking from relay in both directions.
If the relay clicks but the motor does not move please check
connection to the motor. Measure on M1 and M2 and you shall
read 24V DC changing direction when you press the up or down button. If you have the changing 24 V DC it is
most likely the motor or the wires to the motor are broken.

PRESTO OWNER’S MANUAL Page 15 LIFT STIK
Testing Charger
Take off front cover of the mast and locate the back side of charger inlet. Connect the charger.
Led # 2 will shortly turn green and then go off. Led #1 will turn red to indicate the charger is in step 1 (Bulk
charging). Measure DC voltage on the plug. While charger is at step 1 the voltage shall be increasing slowly read-
ing about 26-29V DC. When charger goes green the voltage will drop below 27,4VDC.
If the charger immediately goes green on LED#2 and stays green the fuse is most likely broken or
the wires to batteries are not connected. Voltage at the plug will read 27,4-27,6V DC. If batteries and fuse are ne
and the voltage is NOT increasing at step 1 the charger must be replaced.
Note that the charger has a “memory” of the status of the batteries as long as it is connected to the plug. It shall be
turned off and disconnected from plug for at least 30 seconds to reset this memory and start a new charging cycle.

PRESTO OWNER’S MANUAL Page 16 LIFT STIK
Electrical Diagram
Page 11
10. Electrical Chart

PRESTO OWNER’S MANUAL Page 17 LIFT STIK
Ordering Replacement Parts
Presto Lifts has carefully chosen the components in your unit to be the best available for the purpose.
Replacement parts should be identical to the original equipment. Presto Lifts will not be responsible
for equipment failures resulting from the use of incorrect replacement parts or from unauthorized
modications to the unit.
Presto Lifts can supply all replacement parts for your lift. With your order, please include the model
number and the serial number of the unit. You can nd these numbers on the name plate. This plate
is located within the cabinet, or the angle iron cylinder cross support.
To order replacement parts, please call the Presto Parts Department. Parts are shipped subject to the
following terms:
• FOB factory
• Returns only with the approval of our parts department.
• Credit cards preferred (except parts covered by warranty).
• Freight collect for truck (except parts covered by warranty).
• Freight - prepaid and invoice for small parcel shipments (except parts covered by warranty).
• The warranty for repair parts is 30 days from date of shipment.
Parts replaced under warranty are on a “charge-credit” basis. We will invoice you when we ship the
replacement part, then credit you when you return the worn or damaged part, and we verify that it is
covered by our warranty. Labor is not covered under warranty for Parts orders.
Presto Lifts Parts Department
50 Commerce Way
Norton, MA 02766
Telephone: 800-343-9322
FAX: 888-788-6496
Email: [email protected]
www.PrestoLifts.com

PRESTO OWNER’S MANUAL Page 18 LIFT STIK
PARTS
Standard parts may be returned with a 20% restocking fee. Modied or custom-engineered parts
are not returnable. Unfortunately, due to potentially concealed damage, all sales of electrical
assemblies are nal.
QUALITY ISSUES
Should you feel there is a quality problem, please contact the seller to ask questions and gather
information on how to rectify the issue. Presto Lift Inc. reserves the right to determine potential
credits, as a result of factory defects, based on its inspection of the merchandise.
GENERAL
All products shipped from our factory have passed Quality Assurance inspection and testing.
The carrier of choice has signed for, and accepted the product in new working condition. The
customer should inspect to ensure it is not received damaged, has no concealed damage or is not
incomplete. Parts orders are determined to be complete based upon Presto Lift, Inc. inspection
sheets and carrier shipping weights.

PRESTO OWNER’S MANUAL Page 19 LIFT STIK
Presto Lifts Limited Warranty Policy
Presto Lifts warrants all of its products against defects in the welded structural frame and, if applicable,
scissor legs from faulty material and workmanship for a period of ve (5) years from the date of invoice.
All batteries and battery chargers have a limited warranty against defects in faulty material and work-
manship for a ninety (90) day period from the date of invoice through Presto Lifts. All other components
have a limited warranty against defects in faulty material and workmanship for a two (2) year period
from the date of invoice and a 30 day limited warranty on labor. Please note that prior authorization
from Presto Lifts is required on all warranty work.
There are no implied warranties of any kind, more specically, there are no warranties of merchantability
or tness for any particular purpose. Presto Lifts' sole warranty shall be as set forth in this limited warranty.
Presto Lifts will elect to repair or replace a defective component without charge, if any components
should become defective within the limited warranty period. Proof of purchase is required for war-
ranty. The charge for shipping the defective component is the responsibility of the buyer and must be
accompanied with an RMA number. The shipping charge to return the component to the buyer is the
responsibility of Presto Lifts, Inc.
This limited warranty does not cover labor expense for removal or reinstallation of components after
thirty days. This limited warranty shall not cover, among other things: damages resulting from foreign
matter or water, failure to provide reasonable and necessary maintenance, and if applicable, use of prod-
uct while charger is plugged into an AC outlet, or failure to follow operating instructions. The limited
warranty is not valid for damage resulting from negligence, accident, unreasonable use, abuse or misuse,
exceeding data plate capacities or altering the product without Presto Lifts authorization.
Presto Lifts expressly disclaims and excludes any liability for consequential, incidental, indirect or
punitive damages or nancial loss to people or property resulting from any breach of warranty or the
operation or failure of this product.
Presto Lifts makes no representation that this product complies with local, state, or federal safety/
product standards codes. Should this product fail to comply in any way with those codes, it shall not be
considered a defect of materials or workmanship. Presto Lifts shall not be held liable for any damages
resulting from noncompliance. It is the dealer's responsibility to exercise this limited warranty. This
limited warranty is provided to the original purchaser (dened as the original end user) and is nontrans-
ferable. This constitutes the complete and nal agreement involving Presto Lifts and limited warranty
obligations for products.
This manual suits for next models
1
Table of contents
Other Presto Lifts Lifting System manuals
Presto Lifts
Presto Lifts ECOA DXS Series Setup guide
Presto Lifts
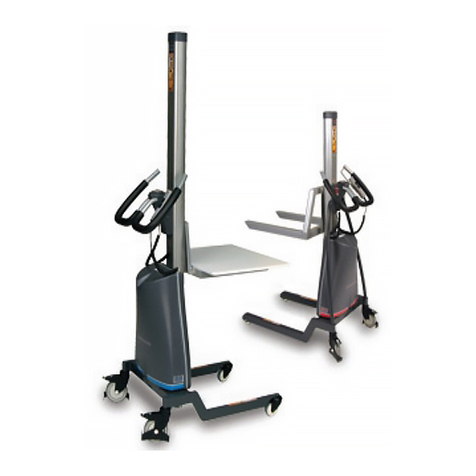
Presto Lifts PLS52-185 Setup guide
Presto Lifts
Presto Lifts XBP68-05 User manual

Presto Lifts
Presto Lifts M100 Setup guide
Presto Lifts
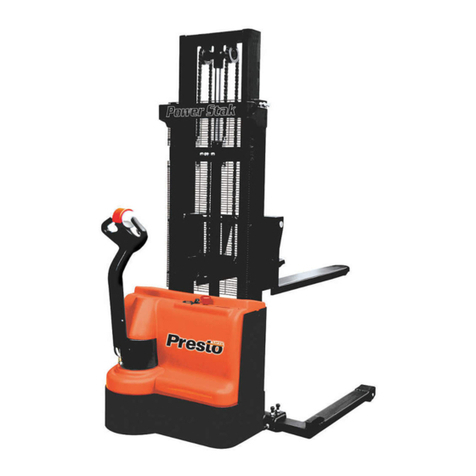
Presto Lifts Power Stak PPS2200-125AS Setup guide

Presto Lifts
Presto Lifts LIFT-STIK User manual

Presto Lifts
Presto Lifts Dock Lift Series User manual

Presto Lifts
Presto Lifts PowerStack PPS2200-125AS Setup guide
Presto Lifts
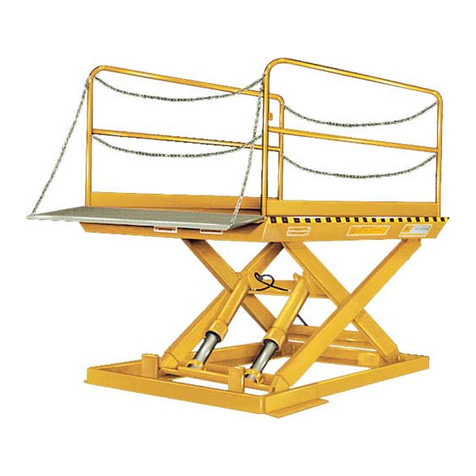
Presto Lifts SizzrDok HLD Setup guide
Presto Lifts
Presto Lifts ECOA Series User manual
