Prilux ENERGY TECH 10W User manual
[GRÁFICOS: Unidades en mm/ GRAPHICS: Units in mm/GRAPHIQUES: Unités en mm/GRÁFICOS: Unidades em mm]
1/3 agosto 2020
Energy Tech
SENSOR
PRECAUCIONES:
• Este producto es para uso exterior.
• No manipular el producto mientras se encuentra en funcionamiento. Para
su manipulación desconecte la corriente.
• No sumerja este producto en agua ni lo manipule con las manos mojadas.
• Si el producto se encuentra dañado sustitúyalo por uno nuevo.
• En caso de rotura o daño del cristal protector deberá reemplazarlo
inmediatamente.
• No toque el cuerpo del protector cuando está caliente.
• Siga atentamente las instrucciones de este manual.
• En caso de duda consulte con un técnico especializado.
INSTRUCCIONES DE MONTAJE:
1. Desconecte la corriente.
2. Desmonte la lira de la luminaria.
3. Fije la lira a la supercie de montaje con la tornillería apropiada teniendo
en cuenta que el objeto a iluminar debe estar como mínimo a un metro
de distancia del proyector.
4. Sujete la luminaria a la lira con sus accesorios correspondientes.
5. Conecte los cables de línea (L), neutro (N) y puesta a tierra ( )
correctamente al cable de alimentación.
6. Regule la posición de la luminaria y aprete los tornillos.
7. Conecte la corriente.
ESPECIFICACIONES DEL SENSOR:
• Rango de detección: 120º~180º
• Distancia de detección: 8~2m (si la temperatura es menor a 24ºC)
• Tiempo de demora: 5sec~12min
• Altura de instalación: 2~2,5m
FUNCIONAMIENTO CONTROLES DEL SENSOR:
• TIME: Regula el periodo de tiempo que el foco mantiene la iluminación en
un rango de 5sec hasta 12min.
• LUX: Regula la sensibilidad respecto del umbral de luz natural del ambiente.
• SENS: Regula la distancia de activación respecto al objeto/persona en
movimiento. La distancia máxima del sensor es de 12m a una temperatura
de 24ªC, si la temperatura es mayor, la distancia se reducirá.
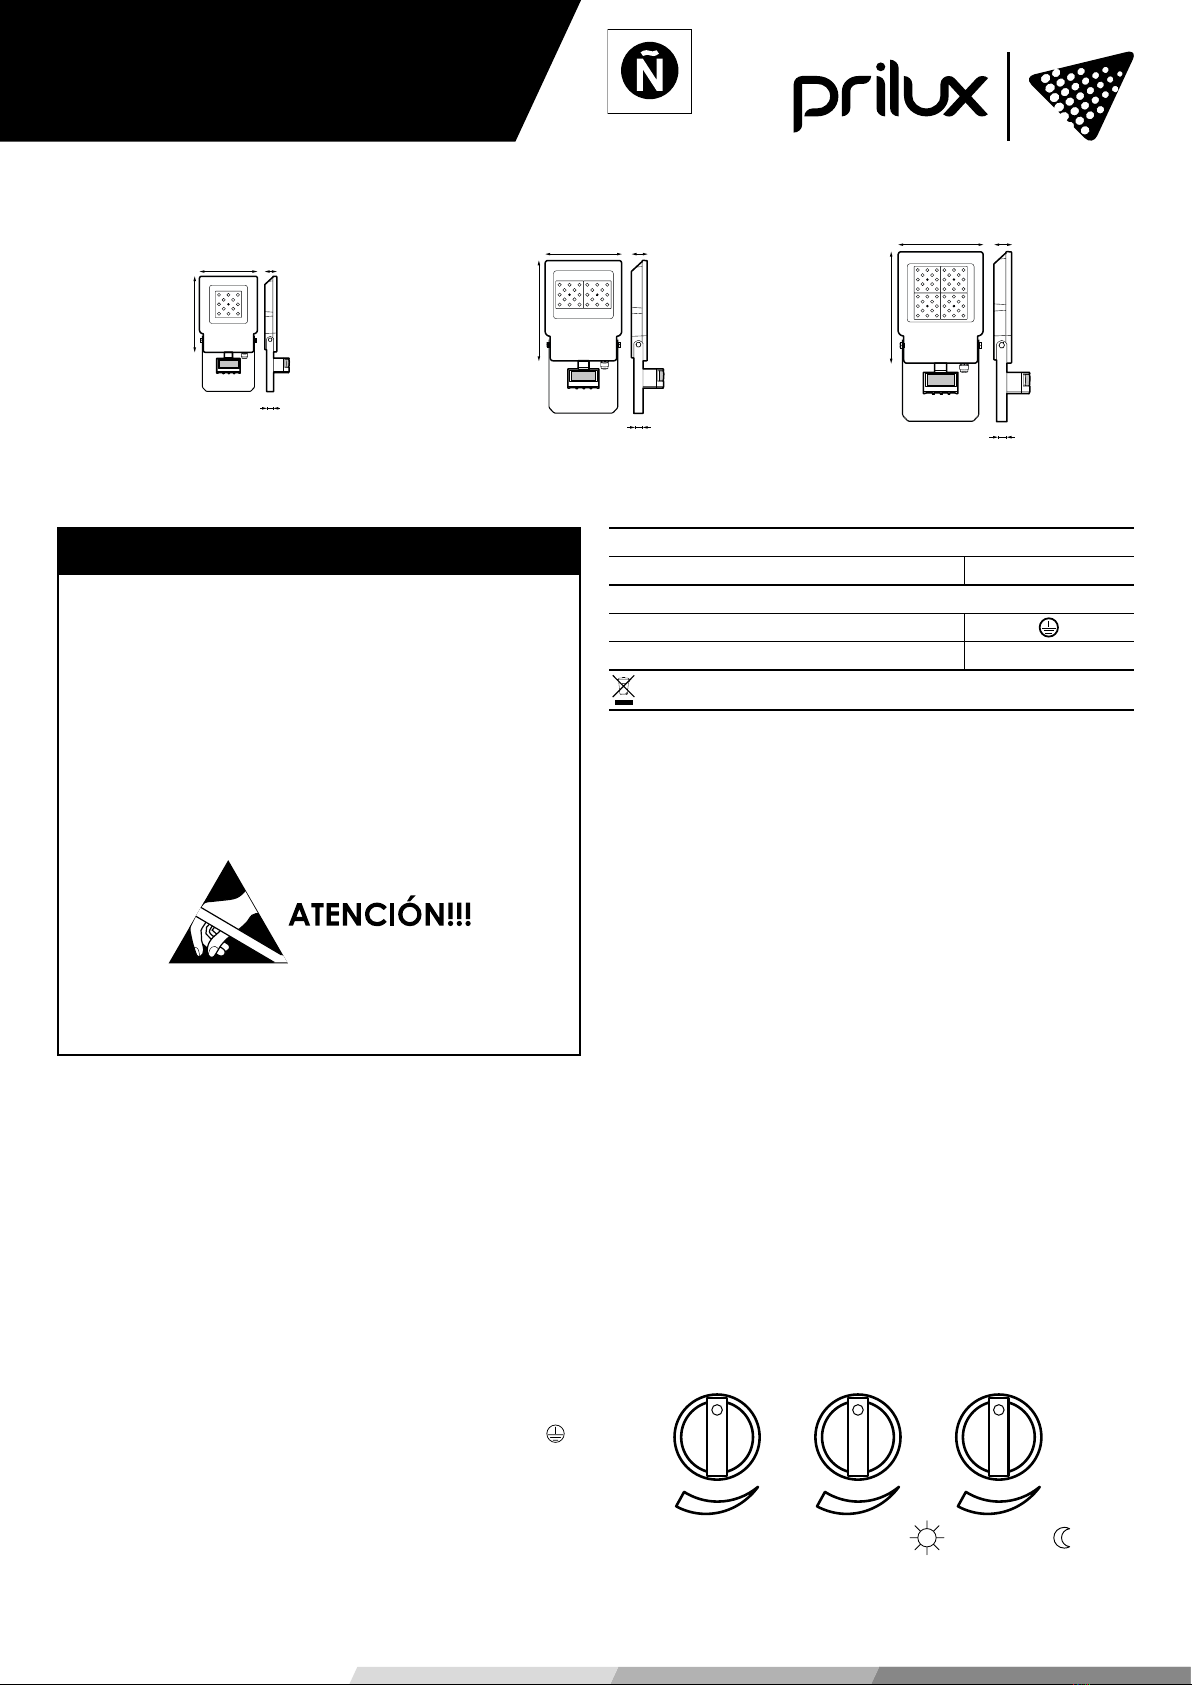
145
118 35
18
183
149 42
20
212
172 45
22
ENERGY TECH 10W ENERGY TECH 20W ENERGY TECH 40W
SENS TIME LUX
CARACTERÍSTICAS ELÉCTRICAS
Tensión 200-240V ac
GRADO PROTECCIÓN
Aislamiento eléctrico
Grado de estanqueidad IP65
AVISO
ANTES DE COMENZAR LA INSTALACIÓN DE ÉSTE PRODUCTO,
POR FAVOR, LEA ATENTAMENTE LAS INSTRUCCIONES Y
GUÁRDELAS EN UN SITIO SEGURO.
LA INSTALACIÓN DEBE REALIZARLA PERSONAL
CUALIFICADO.
LA GARANTÍA CUBRE ÚNICA Y EXCLUSIVAMENTE EL PRO-
DUCTO SUMINISTRADO.
LAS AVERÍAS OCASIONADAS POR INSTALACIONES FUERA
DE LO QUE INDICA EL REBT 2002 EXIMEN DE LA VIGENCIA
DE LA GARANTÍA EN LOS PRODUCTOS DAÑADOS.
ES DE OBLIGADO CUMPLIMIENTO EN INSTALACIONES IN-
TERIORES LA APLICACIÓN DEL ARTÍCULO 16, PUNTO 3 DEL
REBT 2002.
RESPETAR LAS PRECAUCIONES DE MANIPULACIÓN
DE LOS COMPONENTES SENSIBLES A DESCARGAS
ELECTROSTÁTICAS (LED).

2/3
FUNCIONAMIENTO 1
43
2
AMARILLO/VERDE
MARRÓN
L
NAZUL
La luminaria puede conectarse a la red eléctrica
a través de bloque de conexión, por ejemplo,
Stucchi tipo 1602/VCB-SM, 2602/VCB-SM. Como
alternat4a, puede utilizarse un bloque de conexión
estanco, por ejemplo, Techno tipo THB384A1A,
THB384B1A.

3/3
Para evitar la acumulación de agua en la parte del difusor, coloque la
luminaria con una inclinación de 10º.
POSICIÓN DE MONTAJE:
www.grupoprilux.com

[GRÁFICOS: Unidades en mm/ GRAPHICS: Units in mm/GRAPHIQUES: Unités en mm/GRÁFICOS: Unidades em mm]
1/3 agosto 2020
PRECAUTIONS:
• This product is for outdoor use.
• Do not handle the product while it is in operation. When handling, switch
off the power supply.
• Do not immerse this product in water or handle it with wet hands.
• If the product is damaged, replace it with a new one.
• In the event of breakage or damage to the protective glass, it must be
replaced immediately.
• Do not touch the body of the protector when it is hot.
• Carefully follow the instructions in this manual.
• If in doubt, consult a qualied technician.
ASSEMBLY INSTRUCTIONS:
1. Turn off the power.
2. Remove the bracket from the luminaire.
3. Attach the bracket to the mounting surface with the appropriate screws
taking into account that the object to be illuminated must be at least one
meter away from the projector.
4. Attach the luminaire to the bracket with its accessories.
5. Connect the line (L), neutral (N) and ground cables ( ) correctly to
the power cord.
6. Adjust the position of the luminaire and tighten the screws.
7. Turn on the power.
SENSOR SPECIFICATIONS:
• Detection range: 120º~180º
• Detection distance: 8~2m (if the temperature is less than 24ºC)
• Delay time: 5sec~12min
• Installation height: 2~2,5m
OPERATION SENSOR CONTROLS:
• TIME: It regulates the period of time that the focus keeps the illumination in
a range from 5sec to 12min.
•
• LUX: Adjusts the sensitivity to the natural light threshold of the environment.
•
• SENS: Adjusts the activation distance from the object/person in motion. The
maximum distance of the sensor is 12m at a temperature of 24°C, if the
temperature is higher, the distance will be reduced.
Energy Tech
SENSOR
145
118 35
18
183
149 42
20
212
172 45
22
ENERGY TECH 10W ENERGY TECH 20W ENERGY TECH 40W
WARNING
BEFORE INSTALLING THIS PRODUCT, PLEASE READ THE INS-
TRUCTIONS CAREFULLY AND STORE THEM IN A SAFE PLACE.
THE INSTALLATION SHOULD BE CARRIED OUT BY TRAINED
STAFF.
THE WARRANTY COVERS ONLY AND EXCLUSIVELY THE
PRODUCT SUPPLIED.
FAILURES CAUSED BY INSTALLATIONS OUTSIDE OF WHAT
THE REBT 2002 INDICATES, EXEMPT THE VALIDITY OF THE
WARRANTY ON DAMAGED PRODUCTS.
IT IS OF OBLIGED COMPLIANCE WITH INTERIOR INSTALLA-
TIONS THE APPLICATION OF ARTICLE 16, POINT 3 OF THE
REBT 2002.
ATTENTION!!!
OBSERVE PRECAUTIONS FOR HANDLING
ELECTROSTATIC SENSITIVE DEVICES.
ELECTRICAL CHARACTERISTICS
Voltage 200-240V ac
DEGREE OF PROTECTION
Electrical isolation
Degree of waterlightness IP65
SENS TIME LUX

OPERATION 1
43
2
The luminaire can be connected to the electricity
network through the connection block, for
example, Stucchi tipo 1602/VCB-SM, 2602/VCB-
SM. Alternatively, a watertight connection block,
for example, can be used Techno tipo THB384A1A,
THB384B1A.
YELLOW/GREEN
BROWN
L
NBLUE

3/3
To avoid the accumulation of water in the part of the diffuser, place the
luminaire with an inclination of 10º.
MOUNTING POSITION:
www.grupoprilux.com
This manual suits for next models
5
Table of contents
Languages:
Other Prilux Accessories manuals

Popular Accessories manuals by other brands


Acuity
Acuity AccuRange AR500 user manual

GSI Group
GSI Group II Series Installation and operation manual

OMNIDOTS
OMNIDOTS SWARM quick start guide

Squirrel
Squirrel Freak 3 user manual

PCB Piezotronics
PCB Piezotronics F8159-0011A Installation and operating manual

Dometic
Dometic WAECO TC07 Installation and operating manual


