Primedic RECK MOTOmed loop User manual
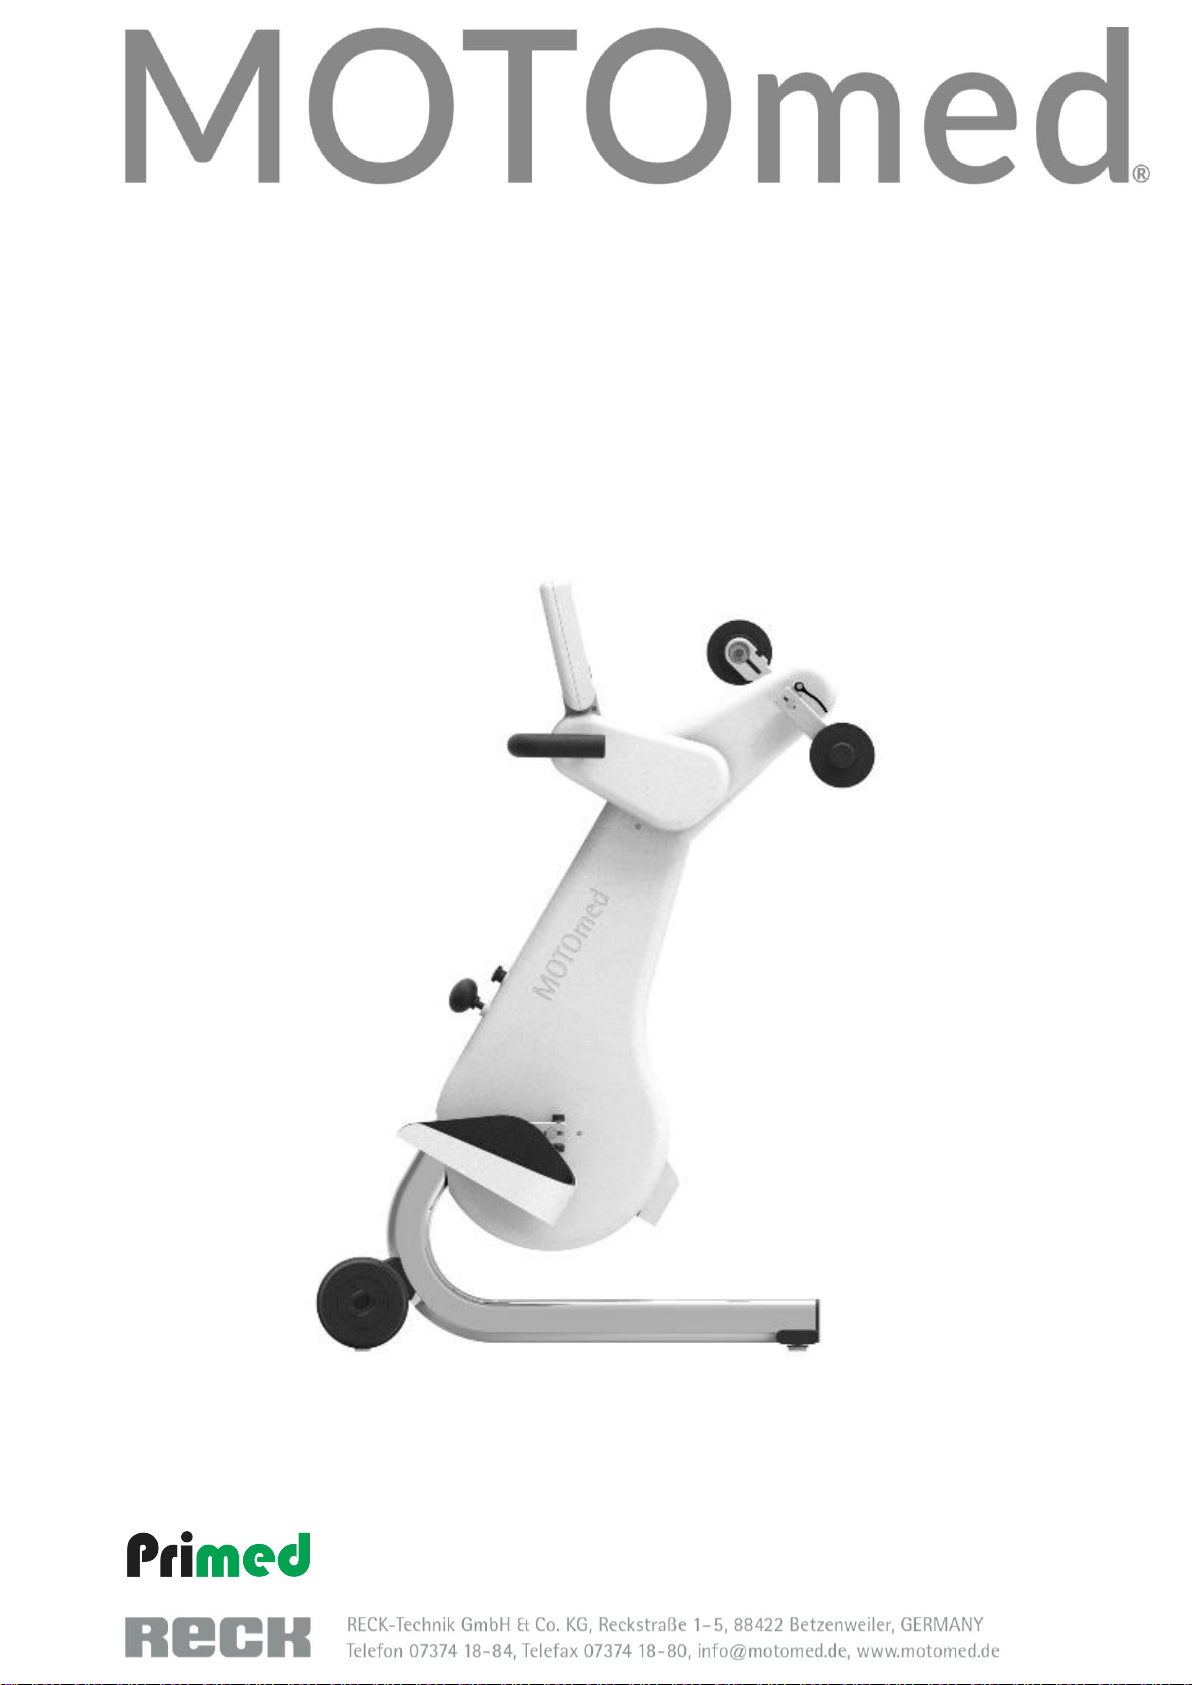
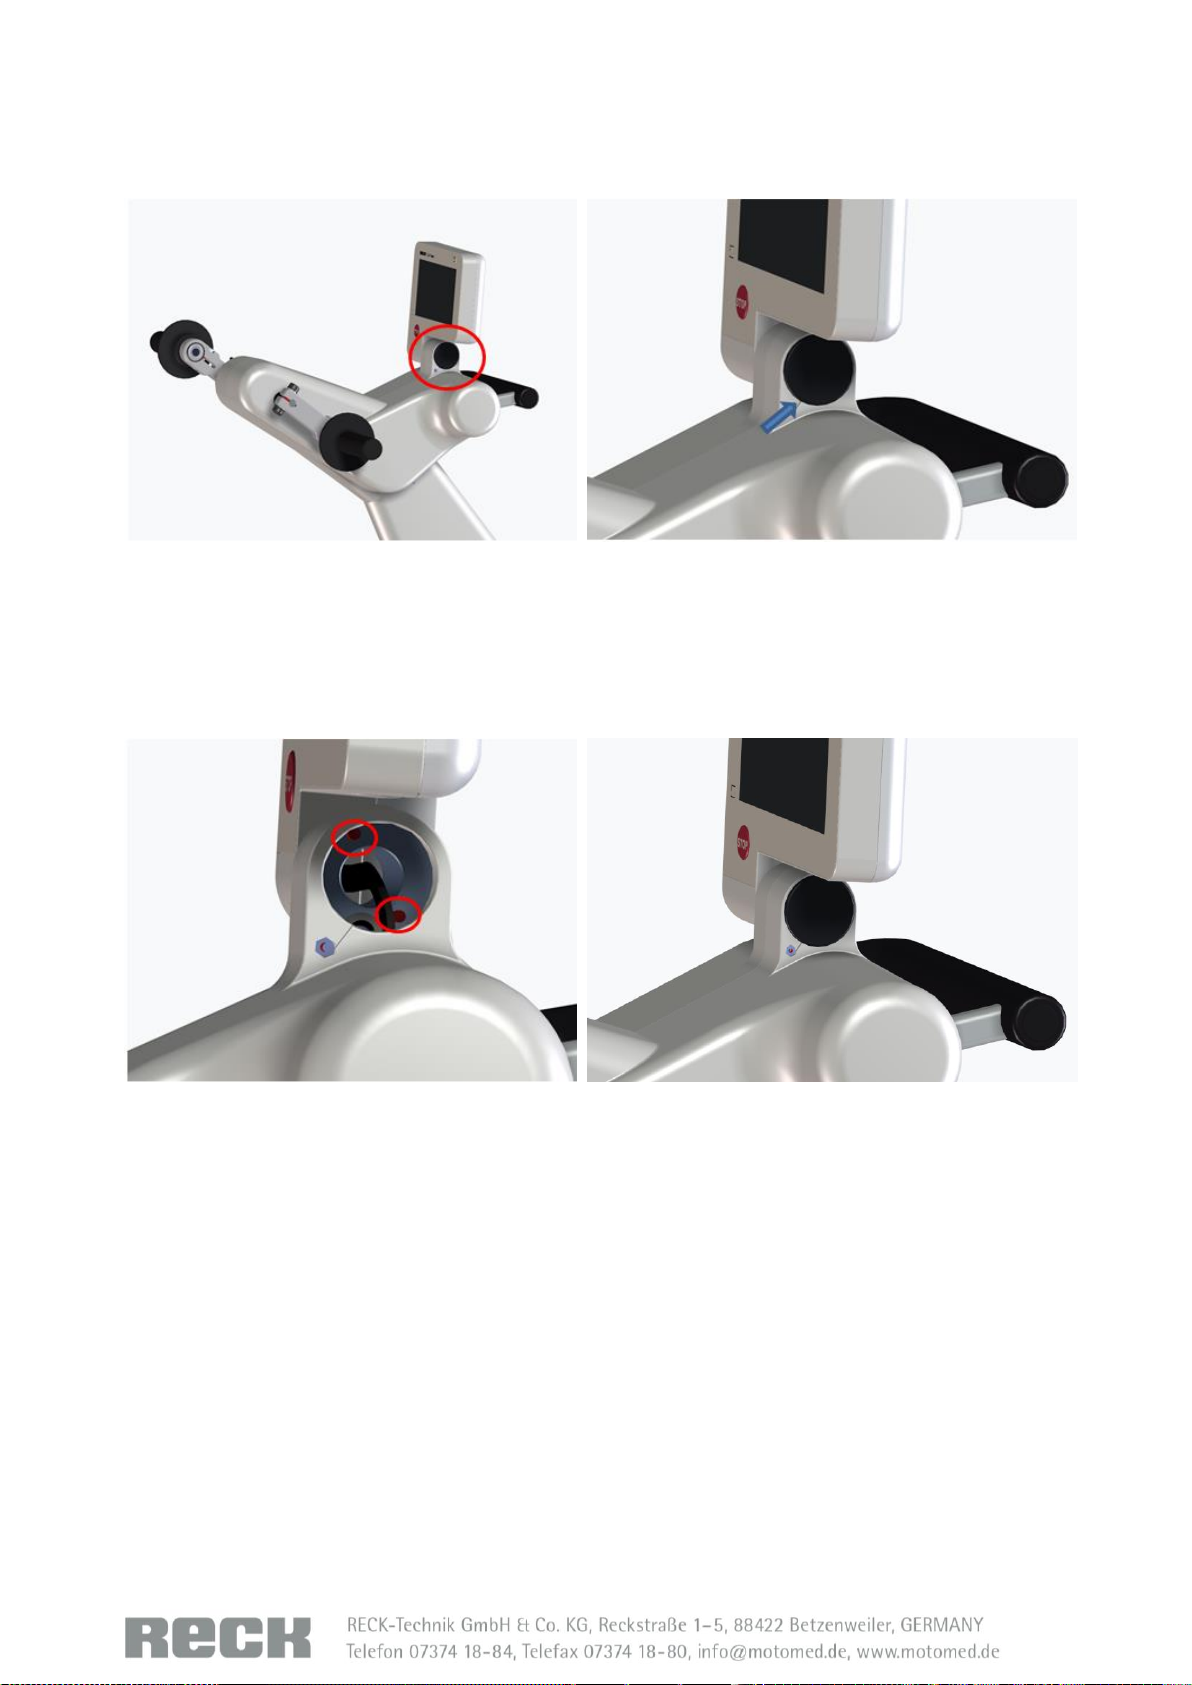
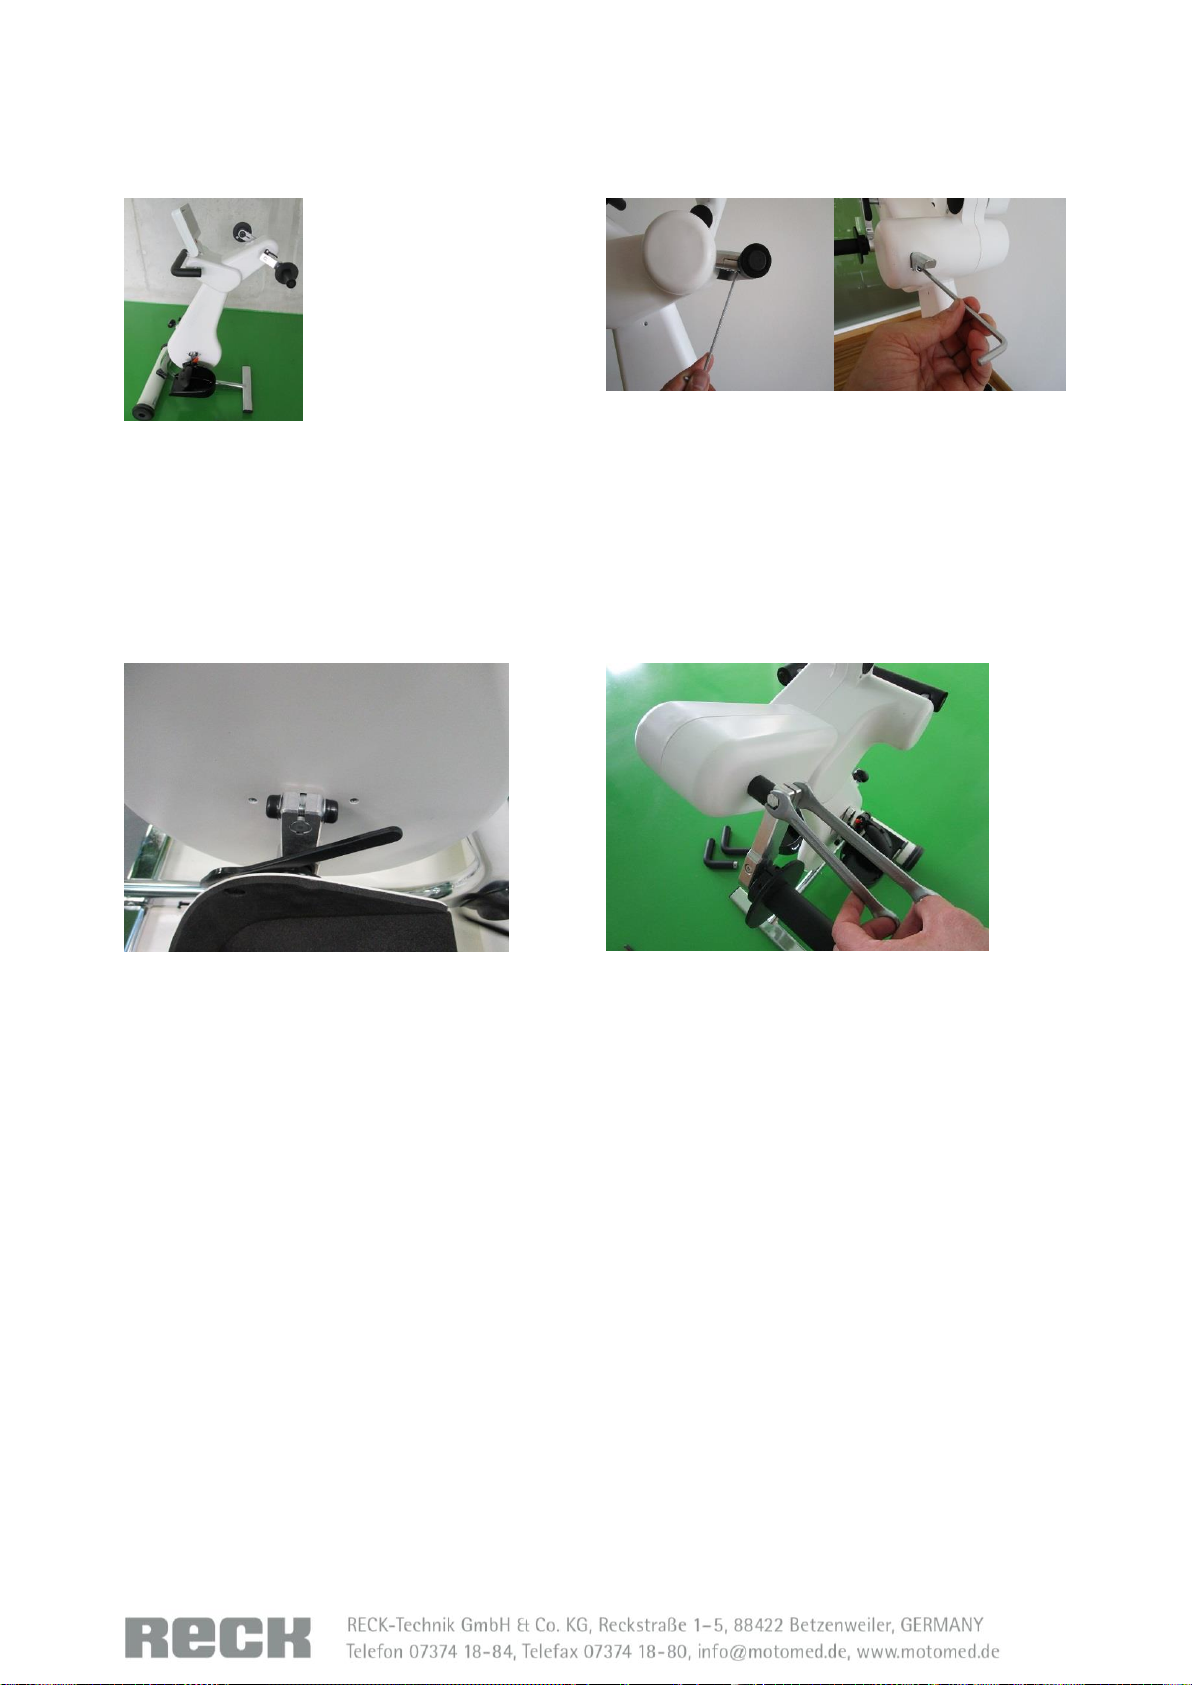
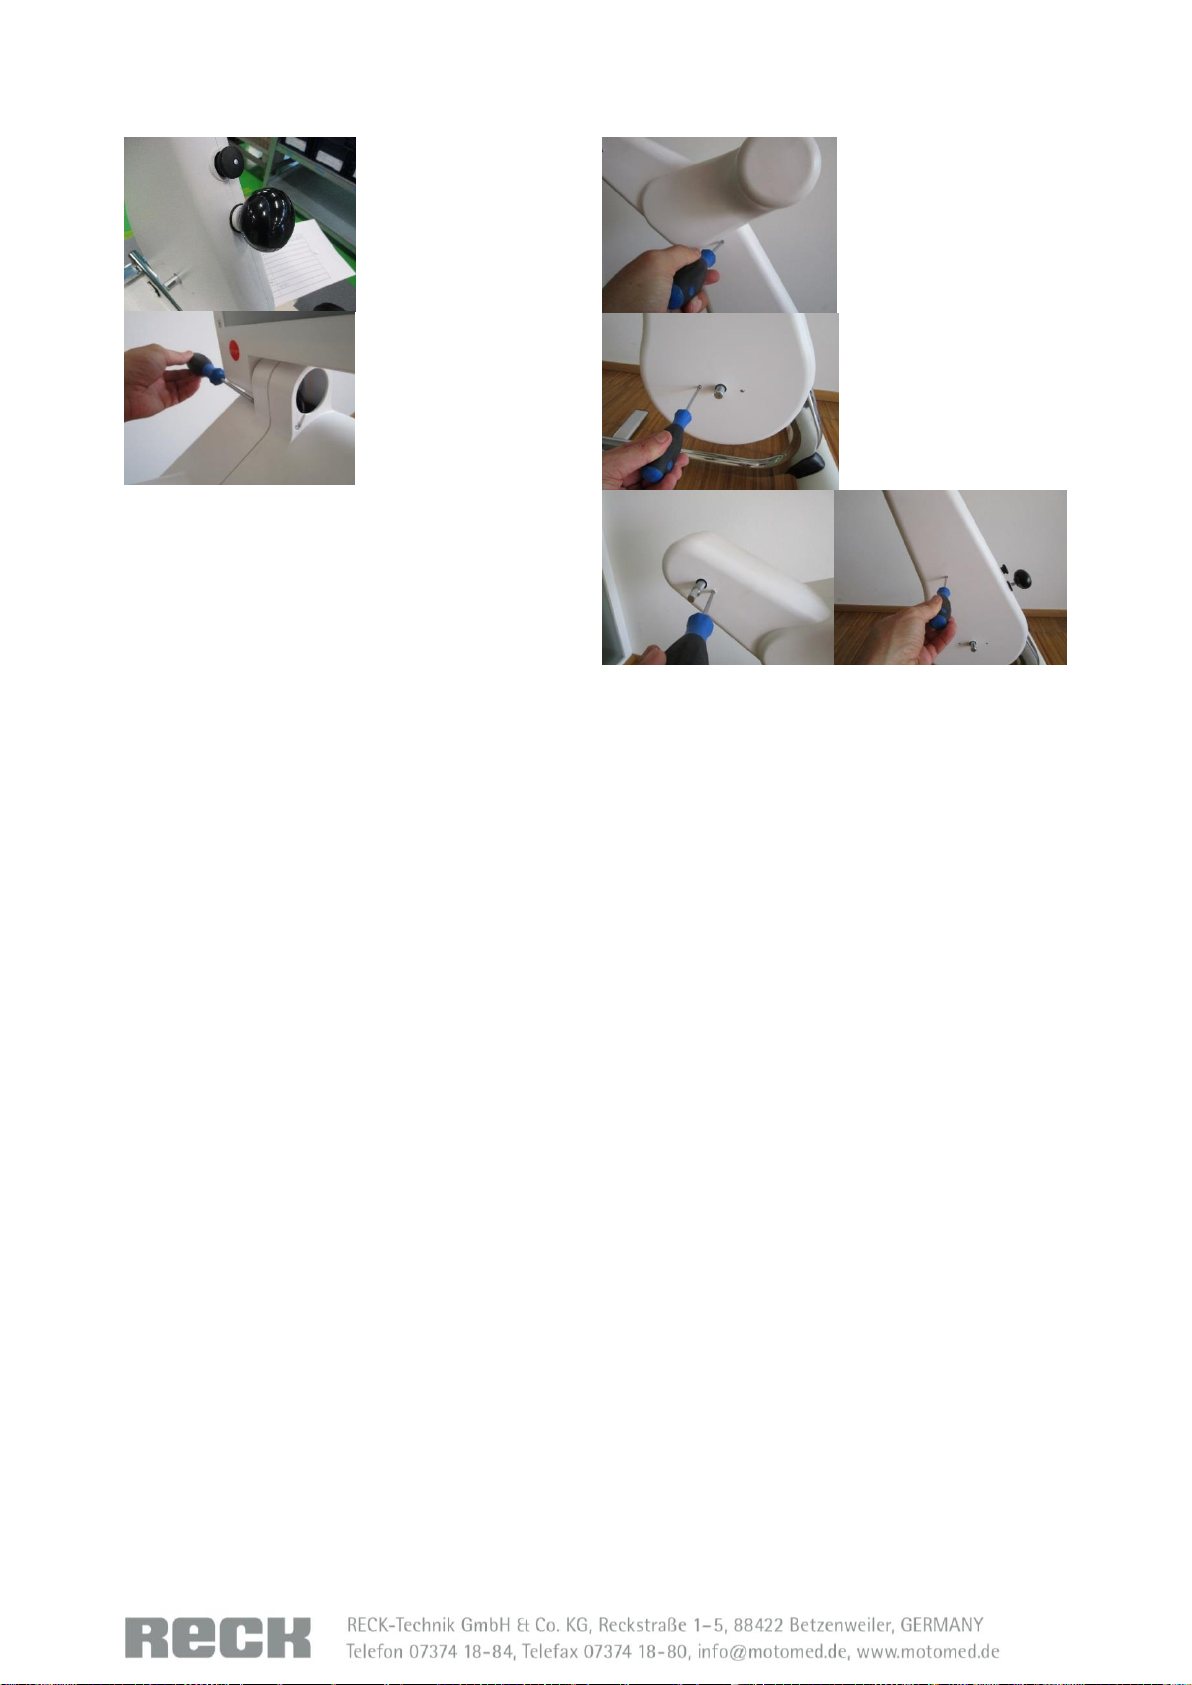
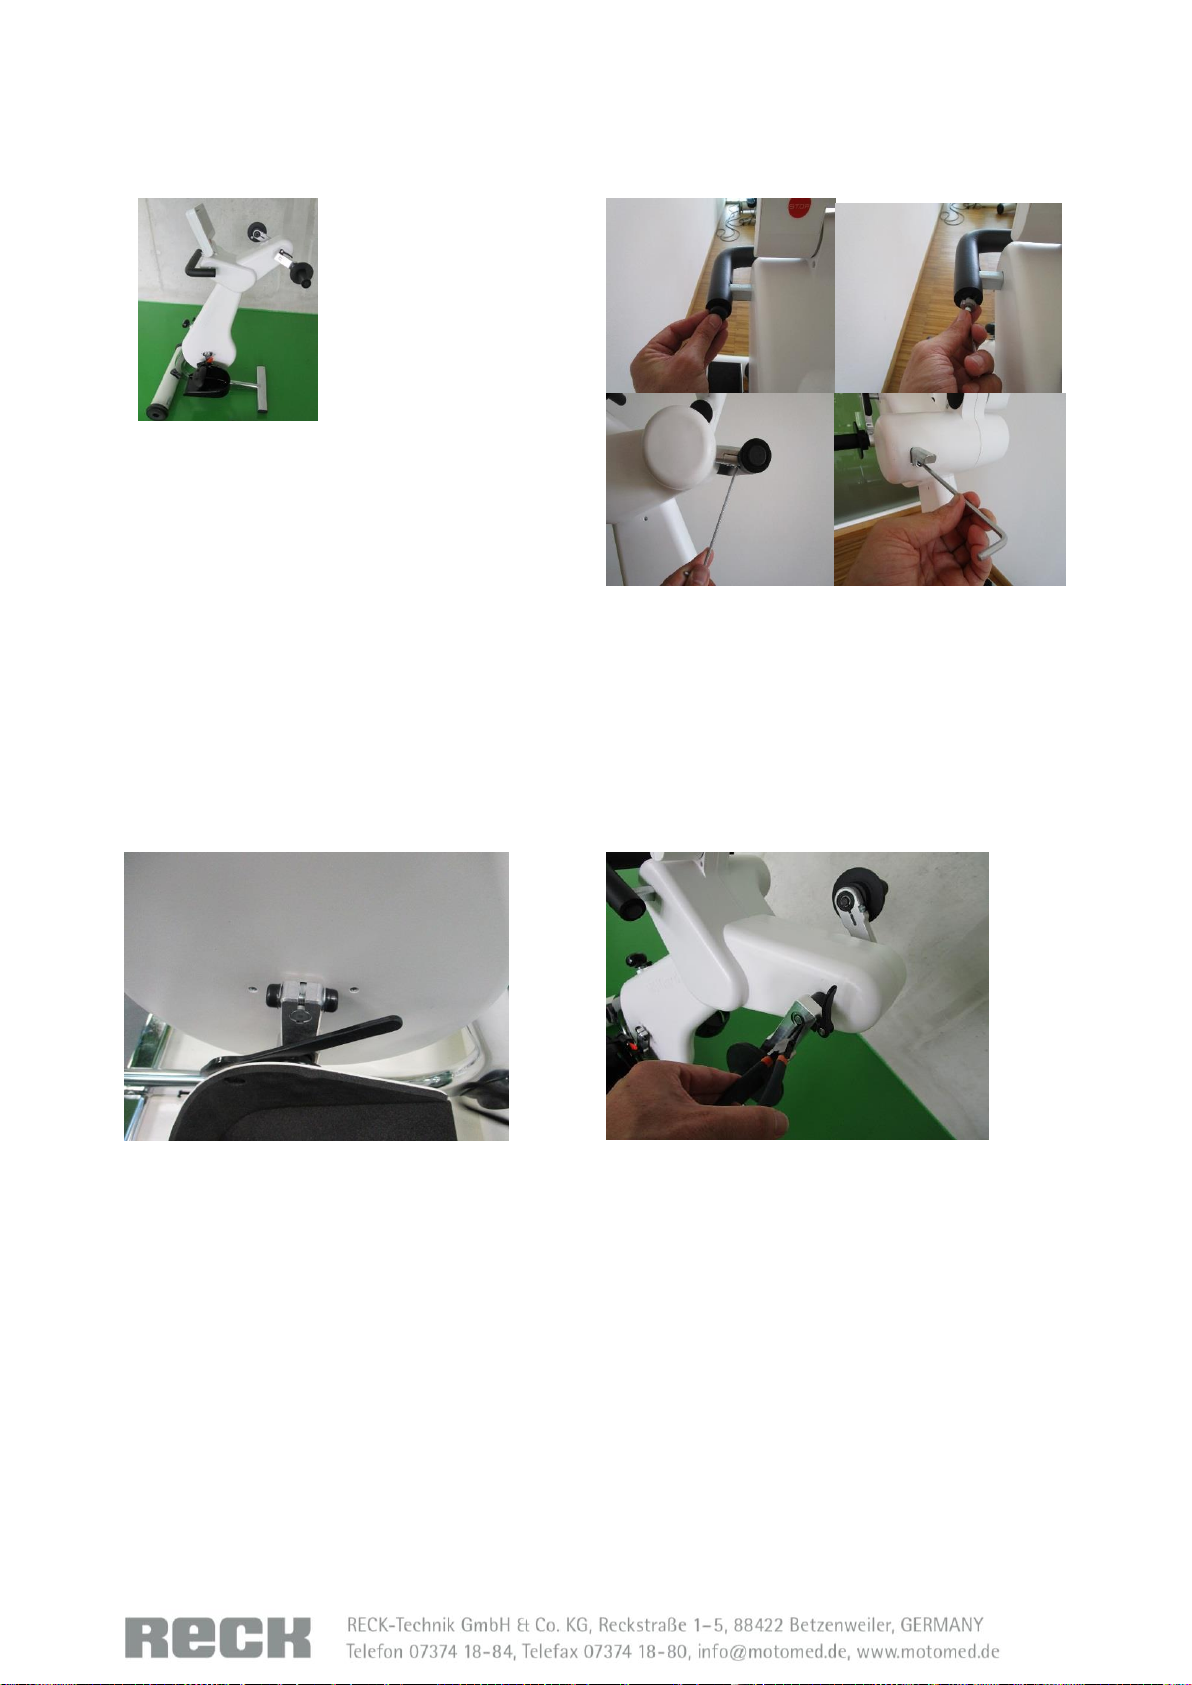
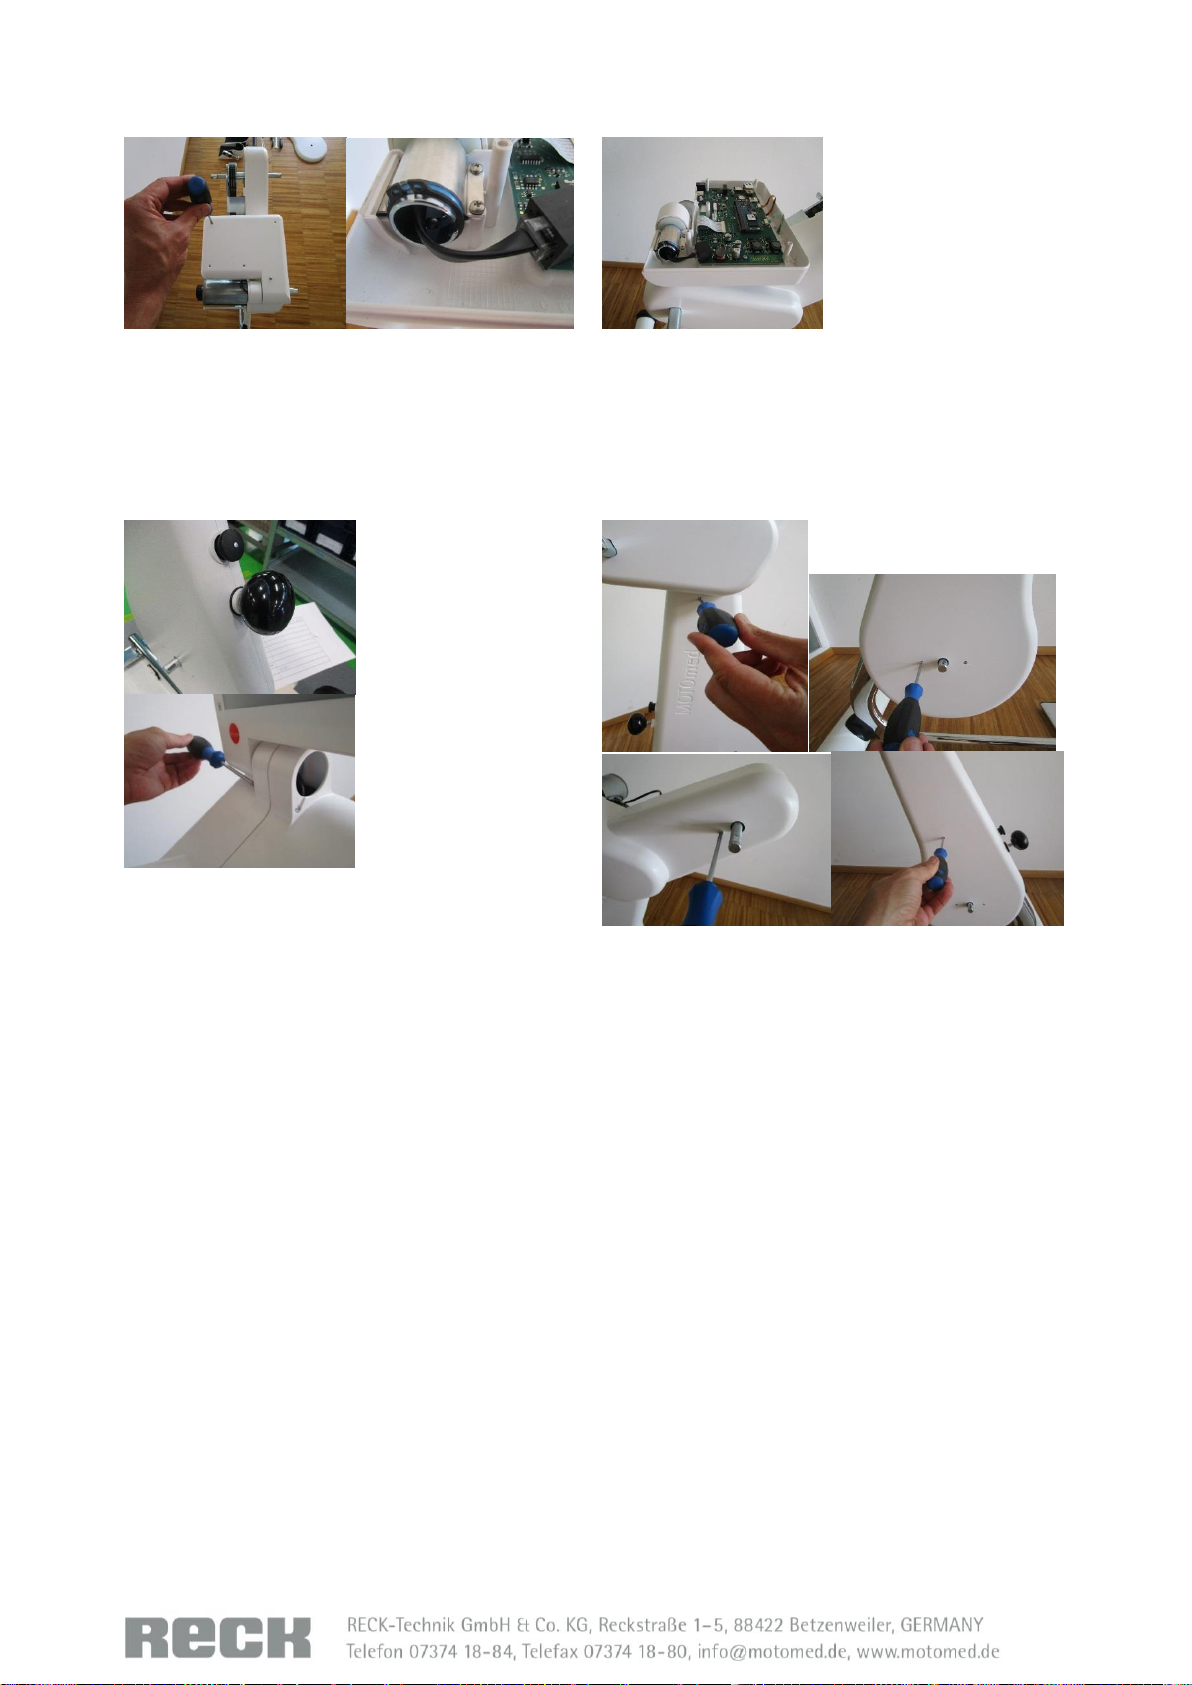
P06F17 de
2019-03-28
Seite 1
Service Manual
MOTOmed loop
Document-Number: 10002525
Version: 1
Stand: 29.05.2019
Primed Fysio & Rehab AB
Svartalundvägen 1 tel. 035-17 82 85
www.primed.se

Seite 2
P06F17 de
2019-03-28

Seite 3
P06F17 de
2019-03-28
Content
Safety Instructions........................................................................................Fehler! Textmarke nicht definiert.
ESD Protective measures................................................................................................................................... 4
Control Panel: Adjusting Retention Force ......................................................................................................... 5
Calibrating the Touch Screen........................................................................Fehler! Textmarke nicht definiert.
Adjustment of Handle Position MOTOmed loop.l............................................................................................. 8
Removing the Right Housing ........................................................................Fehler! Textmarke nicht definiert.
Removing the Left Housing ..........................................................................Fehler! Textmarke nicht definiert.

Seite 4
P06F17 de
2019-03-28
Safety Instructions
Service and maintenance work may only be completed by a trained professional.
Disconnect the power cord from the wall outlet before beginning any work on the unit.
Do not operate the device with the side panels removed.
Folgen Sie den Anweisungen in diesem Service-Handbuch.
Ensure all screws have been tightened prior to operating the device.
Follow all safety instruction in this service manual.
ESD- Protective Measures
Electrostatic discharges can damage electronic components.
Discharges with a potential of 10,000 volts are not uncommon. Electrical components are often damaged
prior to receiving damage from a ESD. In severe cases the damage is not detected until a later date.
When contacting electronic components it is required to wear a wrist-linked grounding band that is
connected to a charge potential equalization device.

Seite 5
P06F17 de
2019-03-28
Control Panel: Adjusting Retention Force
Step 1: Preperation
Step 2: Remove cap cover
Tool required:
Flat-head screwdriver
Allen key SW2
1. Carefully place the flat-head screwdriver under the
cover cap. This is accessible by the recess between the
cap cover and the nut.
2. Gently pull the flat-head screwdriver away from the
device until the cover cap is pushed out.
Step 3: Adjusting retention force
Step 4: Replace the cover cap
3. Alternate between tightening the two screws until
the desired retention force is acheived.
4. Swivel the control panel between the horizontal
position (folded down) and 100° position (folded
up) and check if the control panel maintains its
position. If the control panel moves repeat step 3
until control panel remains stationary.
Attention: Ensure that no wiring is damaged
during adjustment.
5. Carefully reinsert the cover cap until both latching
clamps engage.

Seite 6
P06F17 de
2019-03-28
Calibrating the Touch Screen
If the touch screen no longer responds to pressure from the corresponding controls, recalibrating the touch
screen may be necessary.
Step 1: Device Home Screen
Step 2: Deleting Calibration Data
1. Device shows Home-Screen
2. Press and hold the STOP button
3. Press the on/off button 2x in successionn
4. Release the STOP button
5. Press the STOP button
The previous calibration data has been deleted
Step 3: Restart the Device
Step 4: Touch Calibration
Switch off the device (press and hold the on/off
button)
6. Switch the device on again after deleting
calibration data
7. Wait for the screen (seen in step 4) to
display
8. With a pencil or something
similar, press the cross in the
upper left corner of the
screen as accurately as
possible.
9. An additional 4 crosses appear in the top
right, bottom right, bottom left and in the
middle of the screen and must be pressed
as accurately as possible
10. Wait for the screen from step 5 to display

Seite 7
P06F17 de
2019-03-28
Step 5: Calibration Test
11. Press the check mark in the top left corner
12. An additional 4 screens will follow with a
check mark in the top right, bottom right,
bottom left and center
Note: If an error occurred in step 4, not all check
marks can be activated. If this occurs, press the
STOP key twice. The screen from step 4 will appear
again. Repeat the procedure from step 4.

Seite 8
P06F17 de
2019-03-28
Adjustment of Handle Position MOTOmed loop.l
The handholds must be adjusted from the transport position to the training position before first use.
Step 1: Preparations
Step 2: Loosen Screws
1. Use the supplied allen key SW4. This can be
found on the bottom of the left foot pedal.
2. Loosen the M5x12 screws found on both
sides of the handles (handles pointed down
in transport position).
Step 3: Turning the Handles
3. Turn the handles 180° so that the ends are
pointing up.
4. Tighten the M5x12 screws found on the
opposite side of the handles.
5. Return the allen key to the original location
underneath the left foot pedal.

Seite 9
P06F17 de
2019-03-28
Removing the Right Housing
Step 1: Preperation
Step 2: Removable Transport Handles
Tools:
Phillips screwdriver
Allen keys SW3, SW4
Open-ended SW13 (2x)
1. Unscrew the cyclinder head screw (M4x12 2 Stück)
with the allen key SW3 found on the bottom of the
oft he transport handles.
2. Unscrew the cylinder head screw M5x12 of the
handle holder on the base frame using the allen key
SW4 and remove the handle holder (the transport
handle can remain screwed onto the left half of the
housing).
Step 3: Removing Footshell on Right Side
Step 4: Removing Handles from Right Side
3. Remove protective caps from screw head and nut.
4. Open hexagon head screw M8x32 and nut M8 with
two open ended wrenches (SW13).
5. Remove the foot rest with pedal rod from the leg
trainer shaft and place it on its side together with
the screw, nut and washers.
6. Remove protective caps from screw head and nut.
7. Open hexagon head screw M8x32 and nut M8 with
two open ended wrenches (SW13).
8. Remove the handle with pedal bar from the arm
trainer shaft and place it on its side together with
the screw, nut and washers.
9. Remove the black spacer from the shaft.

Seite 10
P06F17 de
2019-03-28
Step 5: Disassembling the Right Housing I
Step 6: Disassembling the Right Housing II
10. Remove the O-ring from the housing collar on the
height adjustment handle.
11. Unscrew the operating panel with a Phillips
screwdriver until the nut on the opposite side is
open.
12. Using a Phillips screwdriver, unscrew the M3x10
pan-head screws near the collar transition, 2x near
the leg trainer shaft and the arm trainer shaft and
the thermoplastic screw 30x16.
13. The right side of the housing can now be removed.

Seite 11
P06F17 de
2019-03-28
Removing the Left Housing
Step 1: Preperation
Step 2: Removing the Transport Handles
Tools:
Phillips screwdriver
Flat-tip screw driver
Allen keys SW3, SW4
Open-end wrench SW13 (2x)
Spreader pliers
1. Carefully remove the cover plug at the end of the
transport handle using a flat-tip screwdriver.
2. Unscrew positioning screw M4x12 cylinder head
screw with allen key SW3.
3. Unscrew the M4x12 Allen head screw (2 pieces)
with the Allen key SW3 on the underside of the
transport handle and then remove the transport
handle.
Step 3: Removing Footshell on Left Side
Step 4: Removing Handles from Left Side
4. Remove protective caps from screw head and nut.
5. Open hexagon head screw M8x32 and nut M8 with
two wrenches (SW13).
6. Remove the foot rest with pedal rod from the leg
trainer shaft and place it on its side together with
the screw, nut and washers.
7. Open the eccentric lever on the left pedal bar.
8. Open locking ring Ø10 with spreader pliers and
remove handle with pedal bar.
9. Remove the black spacer from the shaft.

Seite 12
P06F17 de
2019-03-28
Step 5: Opening Control Panel
Step 6: Removing the Control Panel
10. Unscrew the thermoplastic screws 30x16 (5 pieces)
with a Phillips screwdriver and remove the bottom
shell of the operating housing.
11. Open locking ring Ø22 with spreader pliers and
remove RJ45 plug from data bus cable.
12. Pivot the control unit as far as it will go and
carefully pull it out of the pivoting shaft (make sure
that the data bus cable is not jammed).
Step 7: Dismanteling the Left Housing I
Step 8: Dismanteling the Left Housing II
13. Remove the O-ring from the housing collar on the
height adjustment handle.
14. Unscrew the M3x45 pan-head screw in the swivel
area of the operating unit using a Phillips
screwdriver until the nut on the opposite side is
open.
15. Use a Phillips screwdriver to unscrew the M3x10
pan-head screws in the area of the collar transition,
2x the leg trainer shaft and the arm trainer shaft
and the thermoplastic screw 30x16.
16. The left side of the housing can now be removed.
Table of contents
Other Primedic Medical Equipment manuals

Primedic
Primedic DefiMonitor XD Series User manual

Primedic
Primedic HeartSave User manual

Primedic
Primedic DefiMonitor XD User manual

Primedic
Primedic Defi-Monitor ECO 1 User manual

Primedic
Primedic HeartSave AED User manual

Primedic
Primedic HeartSave 6 User manual

Primedic
Primedic DefiMonitor XD User manual

Primedic
Primedic HeartSave AED User manual
Popular Medical Equipment manuals by other brands

Orliman
Orliman OCR200 INSTRUCTIONS FOR USE AND PRESERVATION

Drive
Drive Ultra Light Plus Owner's assembly and operating manual

Heyer
Heyer Narkomat + Operator's manual

Nonin
Nonin Avant 9600 quick guide

Precision Medical
Precision Medical EASY PULSE PM4150 SERIES Service manual

Masimo
Masimo O3 Regional Oximeter Operator's manual