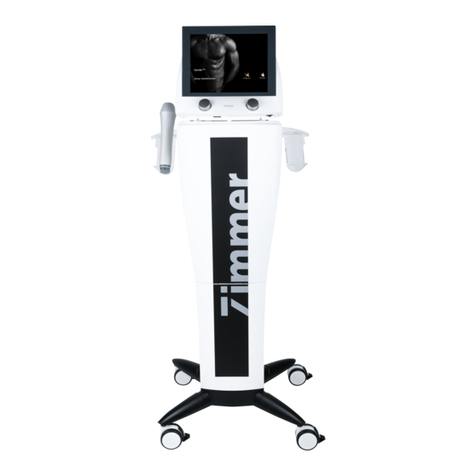
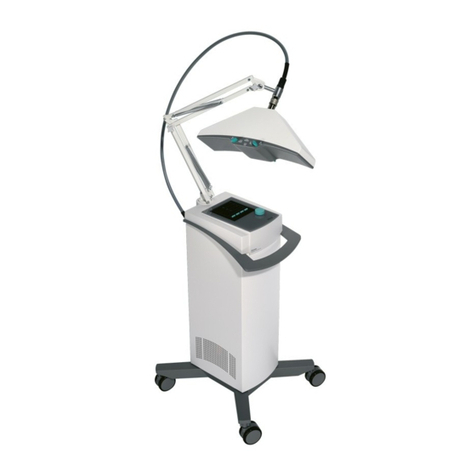
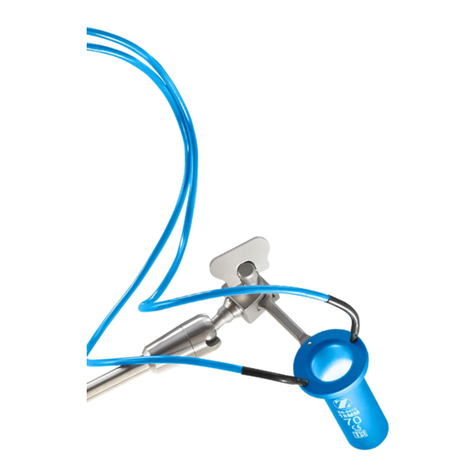
Zimmer Z Lipo User manual

Instructions for Use
ZLipo
EN


Figure
Front panel
Fig. 1
1
Display
2
Applicators
1
2

Figure
Rear panel
Fig. 2
3
Applicator connections
4
Door release
5
Fuses
6
Power switch and socket for power cable
3
4
5
6

Figure
Applicators
Fig. 3
7
Applicator head
8
Applicator hose
9
Applicator connector
Fig. 4 applicators available in 4 sizes
7
9
8

Explanation of symbols
In the operating instructions, this symbol indicates danger.
Warning
!
In the instructions for use, this symbol indicates
"danger" of possible damage to the device.
Applied part type BF
Follow instructions for use.
Products marked with the adjacent symbol must not be disposed of with household
waste.
Serial number
Item number
Manufacturer
- Marking in accordance with EU Low Voltage Directive

Contents
Figures
Front panel
Rear panel
Applicators
Explanation of symbols
Page
1
Application areas/Contraindications/Side effects 1
2
Application information 2
3
Warnings 4
4
ZLipo - in brief 5
5
Device setup
5.1 Preparation of the site
5.2 Setup the device
6
7
6
Basic settings 9
7
Operating instructions 14
8
Technical information 15

Contents
Page
9
Cleaning/disinfection 16
10
Scope of delivery and accessories 18
11
Safety and maintenance
11.1 Safety
11.2 Maintenance
19
20
12
Function test 21
13
Error messages/troubleshooting/disposal 22
14
Certificate of conformity 25
Valid for the ZLipo device.
These operating instructions are an integral part of the device. They must be stored
with the device and be accessible at all times to anyone authorised to operate the
device.
The instruction manual is valid from September 2018.

Application areas/
Contraindications/Side effects
1
Page 1
Application
areas
● Fat deposits on the abdomen
● Fat deposits on the hips ("love handles")
● Fat deposits on the upper and lower back
● Fat deposits on the thighs and knees
● Fat deposits on the upper arm ("bingo wings")
● Fat deposits on male breasts
● Fat deposits on chin
Contraindications
Ensure that your patients visit their doctor prior to treatment.
Treatment is not recommended in case of
•Pregnancy/nursing mothers
•Cardiovascular disease
•Liver disease
•Kidney disease
•Malignant tumours
•Diabetes
•Infections, eczema or acute inflammation in the treatment area
•Hypertrophic scars in the treatment area
•Patients with pacemakers
•Constant intake of anti-inflammatory drugs
•Skin diseases in the treatment area
•Redness
Treatments on the chin are not recommended in case of
• Untreated diseases of the thyroid or parathyroid glands
• laryngeal diseases
• Tumors in the area of the throat
Side effects
•Redness
•Swelling
•Bruises
•Numbness in the treatment area
•Tensions
•Overcooling with burning of the skin

Application information
2
Page 2
General application
notes
ZLipo has been developed in accordance with international safety standards.
Before using ZLipo on the patient, the user/technical personnel should familiarise
themselves with the instructions for use, the individual treatments as well as the
application areas/contraindications, warnings and treatment advice. Additional
sources of information about the treatment should also be observed.
The device may only be used by physicians or qualified personnel. Make sure that
all users are familiar with the use of the equipment and know how to turn the power
off immediately in an emergency.
Warning
!
During use, the device must be located in a position that allows direct access to the
central power supply so that this can be disconnected at any time.
Only personnel who have been informed of the safety procedures should have
access to the treatment room.
Never leave the unit switched on, open or unattended.
Warning
!
Do not use the device if it has been dropped or if has been struck by any other
heavy force. Try to keep shocks and vibrations to a minimum.
Warning
!
Ensure that the handpieces do not come into contact with hard materials which may
damage the handpieces.
Warning
!
Before use, ensure that the device is operated via a properly grounded socket
(electrical installation in accordance with DIN VDE 0100 Part 710). The device may
only be operated with the power cable supplied. The power cable must be protected
against mechanical stress.
Warning
!
ZLipo is not suitable for operation in areas with explosive, flammable or combustive
atmospheres. Corrosive materials can damage the device. Dust and hair should be
reduced to a minimum.
Warning
!
To prevent the risk of electric shock; the device's main plug must be disconnected
from the mains supply before performing any maintenance or cleaning activities.
Warning
!
Only use accessories from Zimmer MedizinSysteme GmbH.
Warning
!
Operation of the device may interfere with the strong electromagnetic fields of other
devices. Please maintain a safe distance of at least 2 metres.
Warning
!
To ensure adequate ventilation, the device must be at least 0.5 metres from other
devices or walls.

Application information
2
Page 3
Treatment with ZLipo
Inspect the device before use. If there is any damage, do not use the device. Ensure
that the handpieces are clean inside and outside. Particular attention must be paid to
the peltier elements and the vacuum hole.
Clean and disinfect the handpieces before each treatment.
The user can customise the programme settings according to the patient's fat and
skin condition. The automatic mode is preset with proven specifications. However,
the user can adjust the settings to the patient's condition.
The treatment parameters can be defined individually. The Auto mode is preset with
treatment recommendations. Depending on the patient's condition, these parameters
can be adjusted.
The treatment results may vary.
The cooling fleece is essential and must be used for each treatment.
Always use a cooling fleece - not only to increase effectiveness, but also to protect
the treated area.
Do not change the temperature during treatment.

Warnings
3
Page 4
ZLipo is a cold fat reduction device for aesthetic treatments. The device emits high
cooling energy that can damage the skin with excessive use.
All cooling units may cause skin injuries with non-proper use. Be aware of the
potential danger at all times and follow the safety instructions as described in this
manual.
Users of the ZLipo must have the required knowledge.
This manual should always be kept with the device and the user needs to know
where it is located.
Treating personnel must be familiar with the knowledge how the device is operated,
what to do in an emergency and how to switch off the device.
A change to the settings or a use of the device other than those described herein
can represent a risk for the user and/or the patient.
Treatment instructions pertaining to the site, duration and intensity of treatment
require medical knowledge and may only be given by licensed physicians, therapists
and members of the medical auxiliary professions or other qualified persons. These
instructions must be followed without fail.
Before plugging in and removing the applicator, the device must be switched off. Do
not touch the handpiece connectors during operation.
The patient must not be left unattended during treatment.
Never leave the appliance switched on, open or unattended.
Use in wet areas is not permitted and this could cause considerable damage and
endanger both the patient and the user. No part may be directly immersed in liquid.
During treatment, the electromagnetic field may affect other devices and computers.
Therefore, place the unit at least two metres away from computers or other electrical
devices.
To maintain the equipment properly during storage and transport, the requirements
from Chapter 8 must be complied with.

ZLipo in brief
4
Page 5
What is ZLipo?
An ultra-modern, innovative cryolipolysisTM device for reducing fat cells.
Since triglycerides are solid in fat at low temperatures, ZLipo uses advanced
cryotechnology to selectively treat fat bulges and thereby initiate the elimination of
fat cells without damaging the surrounding tissue.
What does ZLipo do?
A non-invasive applicator is attached to the desired area, extracting the energy from
the underlying fatty tissue and protecting the skin, nerves, muscles and other
tissues. The cooled fat cells undergo apoptosis (controlled cell death) and the cells
are phased out during normal metabolism within approximately 90 days.
Why use ZLipo?
The simultaneous use of two applicators reduces treatment times.
The use of differently sized applicators enables efficient and effective treatment in
nearly all areas of the body.
The modern, clearly understandable colour display shows all parameters relevant to
the treatment and the modern touchscreen controls ensure enjoyment and
motivation during treatment.
A clear, simple navigation menu offers maximum convenience for the user.
Note:
Before you use the device, users should read these instructions carefully and
familiarise themselves with its safety precautions and operating instructions.
Changes to the unit or an application not described here may present risks to the
user and/or the patient.

Device setup
5.1 Preparation of the site
5
Page 6
Note:
Do not expose the unit to direct sunlight. Operate the device at room temperatures
between 10-24°C and humidity of 30-75%.
Do not place the unit near radiators or air conditioners.
Note:
Make sure that the power switch is set to "0" on the device.
Site preparation
When the device is being started up, the operator should observe the spatial and
electrical requirements and the transport and storage conditions. Before unpacking,
the following requirements must be complied with.
The premises should be equipped with adequate ventilation and free airflow. To
ensure proper ventilation, the housing should be at least 0.5 metres from the wall or
other airflow.
The device may affect your computer or other electrical or medical equipment. It
should be kept at least 2 metres away from such devices.
The device can be plugged into an outlet with protective earth contact. Pay attention
to the data indicated on the label on the power supply. The device should not share
the power line to devices with high power usage such as air conditioners. Ideally, it
should be connected to a separate power line with separate circuit breaker.
The device must be operated in a corrosive free atmosphere. Corrosive materials
such as acid can damage the electrical wiring, electronic components and the
surface of the treatment components. Keep dust and hair particles to a minimum.
Do not place the device in the vicinity of heaters or other appliances that may affect
the temperature.
A level surface is essential for safe operation.

Device setup
5.2 Setup the device
5
Page 7
Pluging in the power
cable
Connect the power cable to the corresponding socket (6) on the device and connect
the cable to the mains.
Note:
The device may only be connected to earthed sockets.
Note:
All cables must be protected against jamming or other mechanical damage.
Connect the
applicators
Insert the applicator into its holder. Then connect to the device by placing the
connector into the socket until you hear a clicking sound twice.
To remove the applicator, press the buttons on both sides of the connector
simultaneously.
Turn off the device and disconnect the power cable before changing the handpiece.
Warning
!
If the applicators are not properly connected to the unit, it may cause water leakage.
Fill with distilled water
Open the door at the back of the unit by moving the black slider to the right. Open
the filler pipe by switching the white “Fill”-cap a left quarter-turn and pull it off.
Connect the filling hose with the filler neck and let the distilled water run slowly until
the red mark is reached.
Warning
!
Warning
!
Do not use tap water, only use distilled or deionised water.
The water should be replaced every 3 months.

Device setup
5.2 Setup the device
5
Page 8
During the first installation, the entire system needs to be filled with distilled water.
Start the unit for 30 seconds (without selecting a treatment) and then fill again up to
the red mark.
Warning
!
This procedure must be repeated for each handpiece when connected for the first
time.
Switch the device on
Turn on the device with the power switch (6).
Finally, perform a function test (see chapter 12).
Note:
Check the following before each use:
•Are the housing and handpieces clean and sanitised?
•Are the unit's wheels secure on the ground?
•Is the power cord plugged into an earthed socket?
Note:
When starting the unit, the handpieces should be connected and in their holders.
Switch off the unit.
The power is turned off via the power switch (6).
Remove the power cord to disconnect the device completely (all poles) from the
mains.
Warning!
If the unit is not used for a long time or is exposed to colder temperatures (e.g.
during transport), it is advisable to remove the water through the drain cock.

Basic settings
6
Page 9
Start-up screen
Self test
After turning it on, the ZLipo performs a self-test. During the test, the current status
of the pre-cooling can be read.
Choice of applicator
If pre-cooling is complete, the left, right or both (dual) applicators can be selected.
Note:
Treatment can, depending on the treatment area, be performed with just one
applicator (left or right) or with two applicators simultaneously.
Note:
The programme specifications and any changes are identical for each of the 3
possible choices, so the steps below are only explained with reference to the
treatment with the left applicator.
The selected applicators (left, right or dual) are displayed in orange.

Basic settings
6
Page 10
Programme screen
(in Auto-mode)
1
8 7 6
11 10 9
(1) Selected applicator
The selected applicator (left, right or both) is displayed in orange. The applicator can
be changed by pressing the corresponding button.
(2) Treatment time
Displays the remaining treatment time.
(3) Temperature
Displays the temperature of the applicator.
(4) Vacuum intensity
Displays vacuum intensity. By pressing the arrow keys, the vacuum can be
increased and decreased.
Vacuum intensity: 1 - 10. The default is an intensity of 5.
(5) Operating mode
The operating mode (Auto or Manual) can be selected by pressing the appropriate
key and will then appear in orange.
(6) Programme
Displays the programme sequences
(7) Phase Setting
Selects the menu for changing the programme sequences
(8) Treatment start
Pressing the start button begins the treatment.
(9) Tones
Turns the beeps on and off when pressed
(10) Colour of Display
Changes the background colour of the display from dark to bright and vice versa.
The device will start again automatically.
(11) Reset Treatment
time
By pressing the reset button the treatment time will be set to the start again.
2
3
4
5

Basic settings
6
Page 11
Adjusting the phases
(in Auto-mode)
By selecting one of the three phases, a selection window opens in which the phases
can be defined.
The structure and first phase setting will be explained below.
The other two phases are constructed analogously.
1 2
(1) Pulsing
The vacuum can be selected unpulsed or with 3 different pulses.
The selected pulsing appears in orange.
(2) Temperature
The applicator temperature can be selected between -10°C and 5°C. By pressing
the arrow keys the temperature can be increased or decreased.
(3) Treatment time
The treatment time is adjusted by pressing the arrow keys.
Note:
The treatment time is limited to a maximum of 60 minutes. This includes the sum of
treatment times of all individual phases.
(4) Reset
The selected parameters will be discarded by pressing the button, upon which the
previous settings will be displayed.
(5) Save
The selected parameters will be used for treatment.
Note:
The selected parameters also remain after being saved using the current treatment
session. When the unit is next powered on, the parameters from the last session are
loaded automatically.
(6) Cancel
The menu is exited without saving.
3
4
5
6

Basic settings
6
Page 12
Programme screen
(in manual mode)
1 2 3 4 5
10 9
(1) Selected applicator
The selected applicator (left, right or both) is displayed in orange. The applicator can
be changed by pressing the corresponding button.
(2) Treatment time
Displays the remaining treatment time
(3) Temperature
Displays the applicator temperature
(4) Vacuum intensity
Displays vacuum intensity. By pressing the arrow keys, the vacuum can be
increased and decreased.
Vacuum intensity: 1 - 10. The default is an intensity of 5.
(5) Operating mode
The operating mode (Auto or Manual) can be selected by pressing the appropriate
key and will then appear in orange.
(6) Parameter
Displays the parameter
(7) Treatment start
Pressing the start button begins the treatment.
(8) Tones
Turns the beeps on and off when pressed
(9) Colour of Display
Changes the background colour of the display from dark to bright and vice versa
(10) Reset Treatment
time
By pressing the reset button the treatment time will be set to the start again.
6
7
8
Table of contents
Other Zimmer Medical Equipment manuals
Zimmer
Zimmer Soleo Sono User manual

Zimmer
Zimmer CITrac User manual

Zimmer
Zimmer ZLipo Med User manual

Zimmer
Zimmer OptonPro User manual

Zimmer
Zimmer Soleo SonoStim User manual
Zimmer
Zimmer PremoPortFour User manual

Zimmer
Zimmer enPulsPro User manual

Zimmer
Zimmer Gentle Pro User manual

Zimmer
Zimmer MicroPro User manual

Zimmer
Zimmer A.T.S. 4000TS User manual

Zimmer
Zimmer Z Wave Pro User manual

Zimmer
Zimmer enPulsPro User manual

Zimmer
Zimmer Sono One User manual

Zimmer
Zimmer OptonPro User manual

Zimmer
Zimmer A.T.S. 3000 User manual

Zimmer
Zimmer ZWave User manual

Zimmer
Zimmer Soleoline Assembly instructions

Zimmer
Zimmer A.T.S. 1200 User manual

Zimmer
Zimmer NexGen User manual

Zimmer
Zimmer PhySys User manual