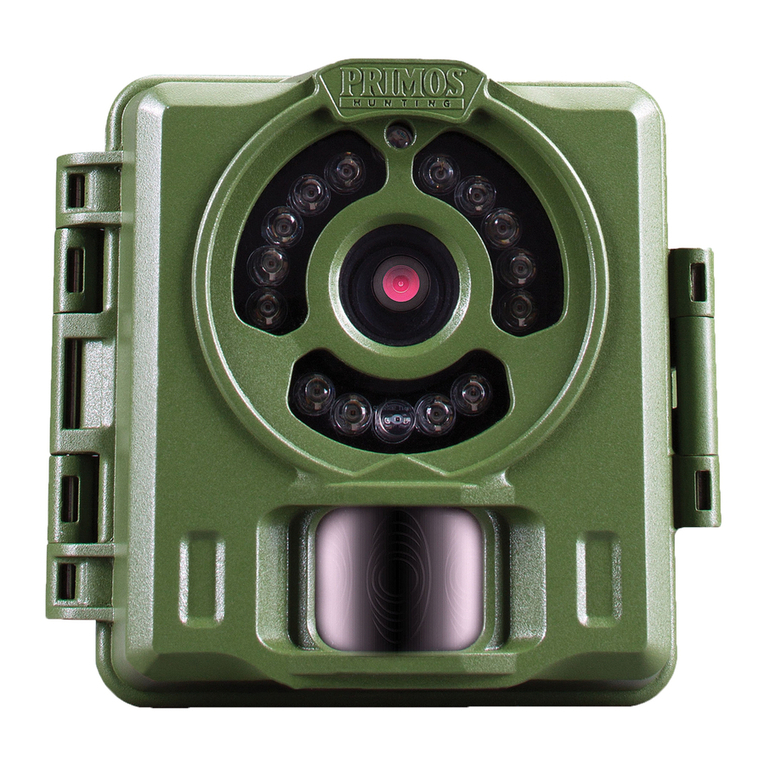
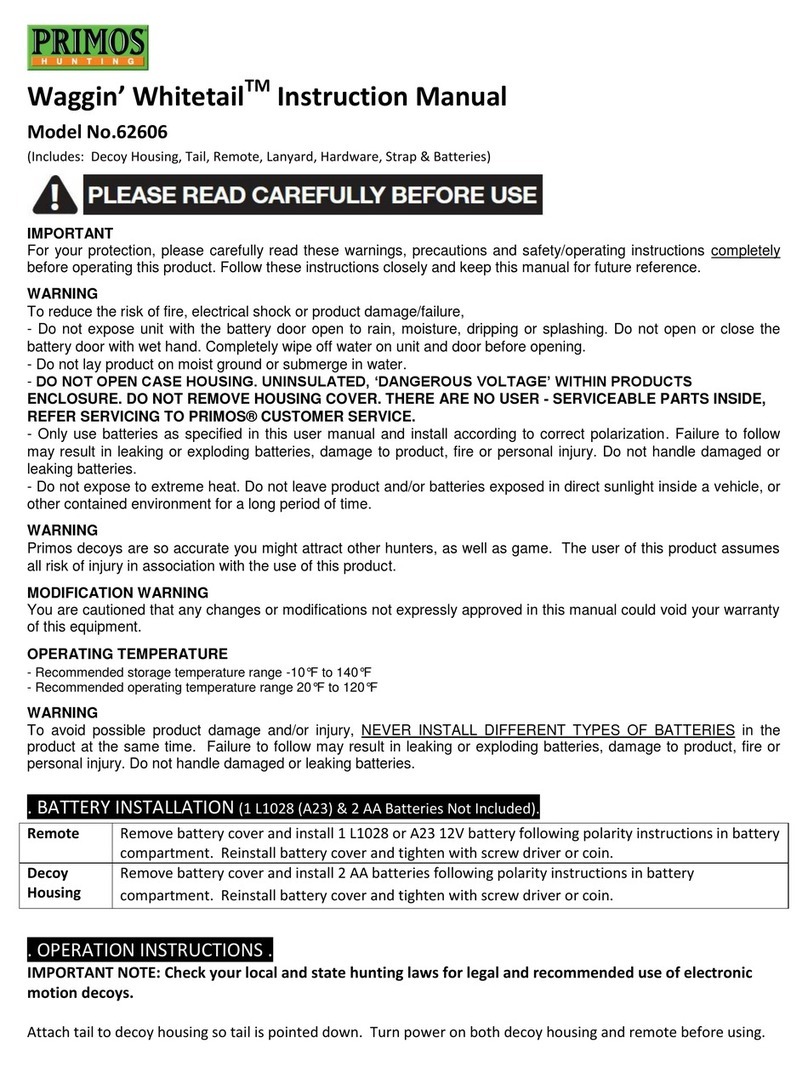
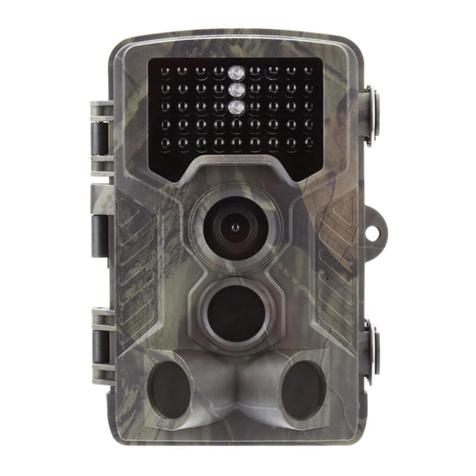
Primos 63053 User manual

12-14Model #: 63053
Instruction Manual
Primos 65053 BulletProof Cam_1LIM.indd 1 12/16/14 11:46 AM

Primos 65053 BulletProof Cam_1LIM.indd 2 12/16/14 11:46 AM

3
CLEANING CAMERA: Do not use window or any chemical cleaner to clean any part of the
camera - especially the LED array as it will remove camo/black coating on the lter. Only
use water dampened cloth and wipe gently.
DO NOT COVER UP PIR LED LIGHT ON THE FRONT OF THE CAMERA HOUSING. This light also
detects light conditions for camera exposure. Use this light to verify PIR sensor activity
after installing on tree. After 3 minutes in active state, the camera will no longer
illuminate this LED for ultimate stealth during operation.
IMPORTANT
For your protection, please carefully read these warnings, precautions and safety/operating
instructions completely before operating this product. Follow these instructions closely and keep
this manual for future reference.
WARNING
To reduce the risk of re, electrical shock or product damage/failure:
• Do not expose unit with the battery door open to rain, moisture, dripping or splashing. Do not
open or close the battery door with wet hand. Completely wipe o water on unit and door
before opening.
• Do not lay product on moist ground or submerge in water (this unit is designed for upright
outdoor use). - DO NOT OPEN CASE HOUSING. UNINSULATED, ‘DANGEROUS VOLTAGE’ WITHIN
PRODUCTS ENCLOSURE. DO NOT REMOVE HOUSING COVER.THERE ARE NO USER - SERVICEABLE
PARTS INSIDE, REFER SERVICING TO PRIMOS® CUSTOMER SERVICE.
• Only use batteries as specied in this user manual and install according to correct polarization.
Failure to follow may result in leaking or exploding batteries, damage to product, re or
personal injury. Do not handle damaged or leaking batteries.
• Do not expose to extreme heat. Do not leave product and/or batteries exposed in direct
sunlight inside a vehicle, or other contained environment for a long period of time.
• Only use accessories as recommended in this manual
• DO NOT install internal batteries and connect an external rechargeable battery at the
same time. Failure to follow this warning may result in premature battery drain, leaking or
exploding batteries, damage to product, re or personal injury. Do not handle damaged or
leaking batteries.
Please check text (from Truth Cam manual)-
some content may not apply to this model.
Primos 65053 BulletProof Cam_1LIM.indd 3 12/16/14 11:46 AM

4
CARE & CAUTION
• Transport and handle with care. Do not strongly shake, bump, hit, drop or otherwise cause
impact to the product – can result in product malfunction or damage to key components.
Additionally, damage to the case could result in imperfections to water-resistant properties.
• Take extra care when handling or using product in places with sand and dust. Sand, dust
and foreign substances exposed to product, especially in extreme proportions, may result in
poor speaker quality, damage to the external jacks or internal components and could cause
malfunction of the product. If exposed to any of these elements, please carefully wipe o
completely before continued use.
MODIFICATION WARNING
You are cautioned that any changes or modications not expressly approved in this manual could
void your warranty of this equipment.
OPERATING TEMPERATURE
• Recommended storage temperature range -10°F to 140°F
• Recommended operating temperature range 20°F to 120°F
WARNING
To avoid possible product damage and/or injury, NEVER INSTALL DIFFERENT TYPES OF BATTERIES in
the product at the same time. Failure to follow may result in leaking or exploding batteries, damage
to product, re or personal injury. Do not handle damaged or leaking batteries.
QUESTIONS??
Feel free to contact Primos® Customer Service Team with any comments, questions, problems or
Primos 65053 BulletProof Cam_1LIM.indd 4 12/16/14 11:46 AM

5
Page Index
Introduction 7
Parts & Controls Guide 8-9
Battery and SD Card Installation 10
Date & Time Imprint Feature 11-12
Power On 12
Set Up 12-13
Viewing the Photos 14
Glossary 15
Technical Specications 16
Troubleshooting/FAQ 17-19
Primos 65053 BulletProof Cam_1LIM.indd 5 12/16/14 11:46 AM

6
IMPORTANT NOTE
Congratulations on your purchase of one of the best Game Cameras on
the market! Primos is very proud of this camera and we are sure you will
be pleased with yours as well. We appreciate your business and want to
earn your trust. Please refer to the notes below and the instructions in
this manual to ensure that you are completely satised with this product.
If your Primos BULLET PROOF Game Camera does not seem to be
functioning properly or if you are having photo/video quality issues,
please check the Troubleshooting/FAQ section on pages 17-19.
Problems are often due to something simple that was overlooked, or
require only changing one setting to solve.
If your problem continues after trying the solutions in the
Troubleshooting/FAQ section, please call Primos Customer Service at
(601) 879-9323.
Primos recommends using 8 Energizer® Lithium AA batteries in this
BULLET PROOF Game Camera to obtain maximum battery life.
Do Not Mix Old and New Batteries
Do not mix battery types-use ALL lithium or ALL alkaline.
Rechargeable batteries are not recommended.
Primos recommends using SanDisk® SD and SDHC Cards
(up to 16GB capacity) in this BULLET PROOF Game Camera.
Primos 65053 BulletProof Cam_1LIM.indd 6 12/16/14 11:46 AM

7
INTRODUCTION
Congratulations on your purchase of a Primos BULLET PROOF Game
Camera. This camera, with its weatherproof, rugged construction, is
designed to record animal activity in the outdoors. Your BULLET PROOF
Game Camera features a compact, portable size and an extra long battery
life.
Main Features:
• 6MP image resolution
• Compact Size
• Trigger Time=1.3 seconds or less
• Automatic IR Filter
• 14 Night Vision LEDs
• Supports up to 16 GB SD Card
• Date, Time & Moon Phase Imprint
• Auto Exposure
• Auto White Balance
• Power Supply: 4 or 8 AA batteries (lithium or alkaline)
• Mounting Strap Supplied
• Weatherproof
Primos 65053 BulletProof Cam_1LIM.indd 7 12/16/14 11:46 AM

8
Parts and Controls Guide
Front of Camera
Camera
Lens
PIR Motion
Sensor
Padlock
Hole
IR LED Array Detail
Light Sensor/
PIR Indicator
Infrared
LED Array
Latch
Primos 65053 BulletProof Cam_1LIM.indd 8 12/16/14 11:46 AM

9
Parts and Controls Guide
Power
Switch
SD Card
Slot
Battery
Compartment
(note orientation for
correct polarity)
+ - - +
- + + -
Primos 65053 BulletProof Cam_1LIM.indd 9 12/16/14 11:46 AM

10
BATTERY INSTALLATION
To maximize battery life, you should install a full set of 8 AA lithium (for
longest life) or alkaline batteries. The camera may also be powered by just
four batteries installed in the rst (starting on the left, near the padlock
hole) slots only. Battery life will be shorter with 4 batteries, but the camera
will operate normally.
NOTE: Always set the power switch to the OFF position when installing or
removing batteries.
Please make sure the batteries are inserted correctly, as indicated inside
the battery compartment. Incorrect voltage or polarity (+/-) will damage
the camera.
Do not mix old and new batteries.
Do not mix battery types-use ALL lithium or ALL alkaline.
Rechargeable batteries are not recommended.
SD CARD INSTALLATION
Memory
Your BULLET PROOF Game Camera has a memory card slot, to accept SD
cards up to 16 GB max. capacity (not included). When the SD card is full,
the camera will stop capturing images.
Inserting an SD card
• Make sure the power switch is in the OFF position whenever adding
or removing memory.
• Insert an SD card into the card slot completely and oriented correctly
as shown by the icon above the slot (label up, contacts facing down
and notched corner on the right).
• To remove the SD memory card, depress the SD card and pull out
the card gently.
Using a new, blank SD card is recommended. If the SD card has been
used in another device, please make sure to format it (FAT16) using your
computer before you set the camera to capture photos. New cards are
ready to use straight from the package.
Primos 65053 BulletProof Cam_1LIM.indd 10 12/16/14 11:46 AM

11
2
4
3
1
DATE AND TIME IMPRINT FEATURE
Your Digital BULLET PROOF Game Camera will automatically imprint the
date, time and moon phase on each photo it captures, based on the initial
date and time data in a text le you can generate and save on the SD
card, as described below. If no text le with date/time is found on the
card when the camera is turned on, only “Primos” will be imprinted on
the photos.
Requirements:
• A PC computer with an internal SD card slot, or an external USB
card reader.
• The “Timetool” application (Windows only), which is provided by
the camera-see details below.
Steps:
1. Switch the BULLET PROOF Game Camera to “ON”.
Insert a new SD card in the camera’s card slot. The
“Timetool.exe” software will
be automatically saved to the
card.
2. Turn o the camera and
remove the SD card. Insert
the card in your computer’s
SD card slot or a compatible
USB connected card reader.
View the SD card contents-
double click to open the le
“timetool.exe”.
3. Click“Update”in the Timetool
window to automatically ll
in the date and time from
your computer’s clock. If this
is not the correct date and
time, click “Edit” and make
changes as needed.
4. Click the “...” button above Cancel and select the SD card location
(drive letter). Or, if you know the drive letter for the SD card (e.g.
Primos 65053 BulletProof Cam_1LIM.indd 11 12/16/14 11:46 AM

12
“D:\”), change the “A” in the white box to the correct letter.
5. Once the date/time data is correct and you’ve selected your SD
card location, click OK to save the text le.
6. Remove the SD card (eject it rst if necessary) and insert it into
your BULLET PROOF Game Camera (label side up as previously
described). The date and time data will be automatically loaded
into the camera, and the text le (txt) will be deleted. It is
important to get the card from computer to camera as soon
as possible to ensure the initial time is still accurate.
Note for Mac (OSX) users: although the Timetool software is Windows
only, you can create a compatible le using any application that supports
plain text les (.txt format). Using this app, type the current date and
time using this format:“TIME”YYYYMMDDHHMM (Include the word “TIME”
with quote marks. Do not add spaces, hyphens or slashes). For example,
“TIME”201407171038 represents July 17th, 2014 at 10:38 AM. Save this as
a .txt le to your SD card, naming the le “TIMESYNC”.
POWER ON
After inserting batteries and an SD card (w/date & time le at your option),
slide the power switch to the On position. The PIR indicator (red LED) is
used to warn of problems with the SD card or battery.
• If the red light ashes rapidly for 10 seconds, there is a problem with
the SD card. Check the card (make sure it’s inserted correctly and
protect switch is not locked) or try a dierent card.
• If the red light stays on for 20 seconds, the battery level is low-insert
fresh batteries.
To capture photos of activity in the area you choose to locate your Primos
BULLET PROOF Game Camera, follow the steps listed below in“SET UP”:
SET UP
1. Mount the Camera
It is recommended that you mount the camera about 3 or 4 feet (0.9~1.2
meters) o the ground, with the camera pointed at a slight downward
angle. It’s best to avoid mounting the camera facing east or west as the
rising and setting of the sun could produce false triggers and overexposed
Primos 65053 BulletProof Cam_1LIM.indd 12 12/16/14 11:46 AM

13
images. Clear branches and other debris away from the front of the
camera so as not to block the camera lens or PIR sensor.
To mount the camera in place, insert the strap through the strap slots on
the rear housing. Wrap the strap around the mounting surface. Secure
the strap and tighten the buckle in order to secure the camera.
Make sure that both of the camera’s latches are securely locked in place,
to ensure proper weather resistance.
2. Power On the Camera
If both SD card and batteries are good, the camera will begin taking
photos 10 seconds after you move the switch to “ON”, whenever it is
triggered by the PIR sensor’s heat/motion detection. Each time the PIR
sensor is triggered, the camera will take a new photo following a 10
second delay. For the rst three minute of operation, the PIR indicator will
glow for about 3 seconds when it senses animal or human activity within
the PIR coverage area. See “Test the Coverage Area” below.
3. Test the Coverage Area
One of the BULLET PROOF Game Camera’s most useful features is the
ability to test the coverage area.
• After mounting the camera, open the front housing and slide the
Power switch to the “ON” position.
• The PIR indicator LED below the lens will glow for 3 seconds when
you trigger the PIR by entering the coverage area.
• Adjust the camera position as needed and repeat the test until the
desired coverage area is achieved.
• After three minutes, the PIR indicator will not glow when you are
in the coverage area (to avoid being seen by animals or potential
thieves. The camera is now“sleeping” and waiting for the PIR sensor
to trigger the an image capture.
• Maximum PIR sensor range is approx. 13 meters (42 ft).
Primos 65053 BulletProof Cam_1LIM.indd 13 12/16/14 11:46 AM

14
4. Secure the Camera
A standard padlock may be used in the camera’s lock hole to secure it and
prevent theft.
VIEWING THE PHOTOS
After your camera has been operating for awhile, you will of course
want to review the photos it has been capturing. This can be done by
either of two methods, according to your preference or the availability of
accessory equipment:
Using an SD Card Reader
1. Push the SD card in slightly to release it, then pull it out of the
camera gently.
2. Put the SD card into a USB connected SD card reader (either a
dedicated SD card reader or “multi-card reader” that features slots
for dierent types of memory cards, including SD) or the SD card
slot on your computer if it has one.
3. The SD card or card reader should appear on your desktop or list of
connected “drives”. Double click it to view or download the photo
les (.jpg) on the SD card.
Primos 65053 BulletProof Cam_1LIM.indd 14 12/16/14 11:46 AM

15
GLOSSARY
PIR (Passive Infrared Sensor): Senses motion like a typical security motion
detector. Requires infrared energy (heat) in addition to motion to trigger
the sensor to help limit detection to live subjects (rather than leaves, etc).
Moon Phase: The BULLET PROOF Game Camera has a feature which
imprints a moon phase stamp on each photo for reference.
IR Flash: Also called IR LED Array. This is a “night vision” feature, which
emits a burst of infrared light, invisible to the human eye. Especially
useful for night photos when a visible ash may be undesirable.
Battery Life: Time that camera will function in the eld. Dependent on
ambient temperature, number of images taken and number of times the
IR ash res. When the battery voltage drops below 4.5v, the IR ash stops
ring. When battery voltage is below 3.5v, the camera stops working.
Mass Storage: Connect the camera with a USB cable to a computer,
press the “SETUP” button, and the computer can access the contents of
the SD card. The camera is automatically recognized as an “external drive”,
without the need to install special drivers. (Win 98 and older operating
systems are not supported. Mac OSX is also compatible-the camera will
appear on your desktop as an external storage device or “disk”).
Primos 65053 BulletProof Cam_1LIM.indd 15 12/16/14 11:46 AM

16
TECHNICAL SPECIFICATIONS
Model Number 63053
Image Sensor Type 1/4 Inch CMOS
Sensor Resolution 1.3 Megapixels
Eective Focal Length 7.6 mm
Lens Aperture f/2.0
IR Filter Automatic IR Filter
PIR Sensor Yes
Trigger Speed <1.3 seconds
Number of IR LED 14 LEDs
Max Night Vision Lighting Distance 30 feet
Storage SD Card, up to 16 GB Capacity
PIR Indicator Yes
Image Resolution 6 MP*
File Format JPEG
Date/Time Imprint Yes (initial data input via text le on SD
card)
Moon Phase Imprint Yes
Exposure Auto
White Balance Auto
Power Supply 4 or 8 AA cell batteries (alkaline or
lithium)
Power Consumption <200ma (<600ma w/LED ash)
Average Continuous Running Time approx 2 mo. (+/- 1 mo. depending on # of
photos using LED ash)
Water Resistant Yes
*6MP resolution via software interpolation
Primos 65053 BulletProof Cam_1LIM.indd 16 12/16/14 11:46 AM

17
Battery life is shorter than expected
1. Battery life will vary with operating temperature and the number
of images taken over time.
2. Check to make sure you have used new alkaline or lithium
batteries. Primos recommends using 8 Energizer® Lithium
AA batteries in this BULLET PROOF Game Camera to obtain
maximum battery life.
3. Make sure that you are using a good quality name brand SD
card in your camera. Primos recommends SanDisk® brand SD
Cards up to 16GB. Our experience indicates that poor quality SD
cards can sometimes reduce your BULLET PROOF Game Camera
battery life.
Camera stops taking images or won’t take images
1. Please make sure that the SD card is not full. If the card is full, the
camera will stop taking images.
2. Check the batteries to make sure that they are new alkaline or
lithium AA batteries. See note above about short battery life.
3. Make sure that the camera power switch is in the “ON” position
and not in the “OFF” position.
4. Make sure that you are using a good quality SD card in your
camera. Primos recommends SanDisk® SD Cards up to 16GB.
5. If the SD card has its write protect switch in the lock position, the
camera will not take images.
6. If you have used an SD card in another device before inserting
it in your BULLET PROOF Game Camera, you might want to try
formatting the card on your computer (make sure you have
backed up any important les rst, as formatting will erase all
previous les). In some cases, other devices may change the
formatting of the SD card so that it will not work properly with
the BULLET PROOF Game Camera.
Troubleshooting / FAQ
Primos 65053 BulletProof Cam_1LIM.indd 17 12/16/14 11:46 AM

18
Camera won’t power up
1. Make sure that you have installed at least 4 batteries in the
battery compartment. Primos recommends using 8 Energizer®
Lithium AA batteries in this BULLET PROOF Game Camera.
2. Make sure that the batteries are installed correctly, observing
proper polarity. Always place the negative (at) end of each
battery in contact with the spring tab side of its slot inside the
camera.
Still Photo and/or Video Quality Problems
1. Night photos appear too dark
a. Try using a set of new batteries. The ash will stop operating
near the end of the battery life.
b. You will get the best results when the subject is within the
ideal ash range, no farther than 30’ from the camera. Subjects
may appear too dark at greater distances.
2. Daytime photos appear too dark
a. Make sure that the camera is not aimed at the sun or other
light sources during the day, as this may cause the auto exposure
to produce darker results.
3. Night photos appear too bright
a. You will get the best results when the subject is within the
ideal ash range, no closer than 10’ (3m) from the camera.
Subjects may appear too light at closer distances.
4. Daytime photos appear too bright
a. Make sure that the camera is not aimed at the sun or other
light sources during the day.
5. Red , green or blue color cast
a. Under certain lighting conditions, the sensor can become
confused resulting in poor color images.
b. If this is seen on a consistent basis, then the sensor may need
servicing. Please contact Primos customer service.
Troubleshooting / FAQ
Do not mix old and new batteries.
Do not mix battery types-use ALL lithium or ALL alkaline.
Rechargeable batteries are not recommended.
Primos 65053 BulletProof Cam_1LIM.indd 18 12/16/14 11:46 AM

19
Photos Do Not Capture Subject of Interest
1. Try to set your camera up in an area where there is not a heat
source in the camera’s line of sight.
2. In some cases, setting the camera near water will make the
camera take images with no subject in them. Try aiming the
camera over ground.
3. Try to avoid setting the camera up on small trees that are prone
to being moved by strong winds.
4. Remove any limbs which are right in front of the camera lens.
PIR Sensor LED Flashes/Doesn’t Flash
1. For the rst three minutes after the camera is switch on, the PIR
Indicator LED on the front of the camera will ash for 3 seconds
whenever it senses motion. This is for setup purposes only and
will help the user aim the camera.
2. During use, the LED will not ash when the camera takes an
image. This is to help keep the camera hidden from game.
Time/Date Imprint is Not Accurate
1. If you let any signicant amount of time elapse between setting
and saving the current time on the SD card using your computer
(following the Timetool directions on pg. 11) and inserting it back
into the camera, the time will be o by that amount. If you don’t
put the card back into the camera until two days after you saved
the text le on it with the time & date, the camera will “think”
the current date is still the same as it was two days ago, and the
imprint on your photos will be o by that much.
Troubleshooting / FAQ
Primos 65053 BulletProof Cam_1LIM.indd 19 12/16/14 11:46 AM

20
WARRANTY
You MUST register your BULLET PROOF® Cam online within (30) days of receipt to receive the 1
Year warranty AND present a “Proof of Purchase” to receive warranty protection. If neither of
these are presentable, we will not replace your item.
Up to 1 YEAR LIMITED WARRANTY
Primos® Hunting (“Primos”) warrants the BULLET PROOF®Cam to be free from defects in workmanship and
materials, under normal use and conditions, for the time periods and terms as set forth below. According
to this Limited Warranty Primos® will, at its discretion, (a) repair the production using new or refurbished
parts or (b) replace the product with a new or refurbished product (product that has been returned to its
original specications). In the event of a defect, these are the exclusive remedies available to the original
consumer purchaser only and is not assignable or transferable.
Terms: You must register your BULLET PROOF® Cam and keep the “Proof of Purchase” to receive warranty
protection on your Camera.
**Go online to www.primos.com/registration and complete the Online Registration. You have 1 month from
date of purchase to register your BULLET PROOF® Cam online.
** visit primos.zendesk.com for FAQ, PDF manuals, camera support or to open a troubleshooting ticket.
Limitations: This warranty is valid only if the product is used for the purpose for which it was designed. It
does not cover: 1) products which have been damaged by negligence/misuse (including, but not limited
to, improper storage, battery leakage and water damage caused by submersion), accident or which have
been modied or repaired by unauthorized persons; 2) cracked or broken housing of units damaged by
excess heat or impact/force; 3) damage caused by wild animals 4) the cost of shipping this product to the
factory for service and its return to you.
Instructions:
In the event warranty service is needed, please contact Primos® Customer Service (service@primos.com)
to obtain a Return Merchandise Authorization (RMA) number. Once you have secured a RMA number, you
will be required to:
1. Write RMA number in large/visible print on outside of package.
2. Remove SD memory card and batteries from product and pack in well-padded or highly
protective box. Primos® Hunting will NOT be responsible for damage incurred in returning
product for repair.
3. Include Return Form and“Proof of Purchase”in with return.
4. Send product prepaid to: Primos Camera Returns/Repairs
9200 Cody
Overland Park, KS 66214
Primos 65053 BulletProof Cam_1LIM.indd 20 12/16/14 11:46 AM
Table of contents
Other Primos Scouting Camera manuals

Primos
Primos Proof Camera Series 63054 User manual

Primos
Primos 65064M User manual

Primos
Primos 63063 User manual

Primos
Primos TRUTH Cam Ultra Series User manual

Primos
Primos Bullet Proof 2 User manual

Primos
Primos Waggin' Whitetail 62606 User manual

Primos
Primos Truth Cam 35 63010 User manual

Primos
Primos 63065 Super Model II User manual