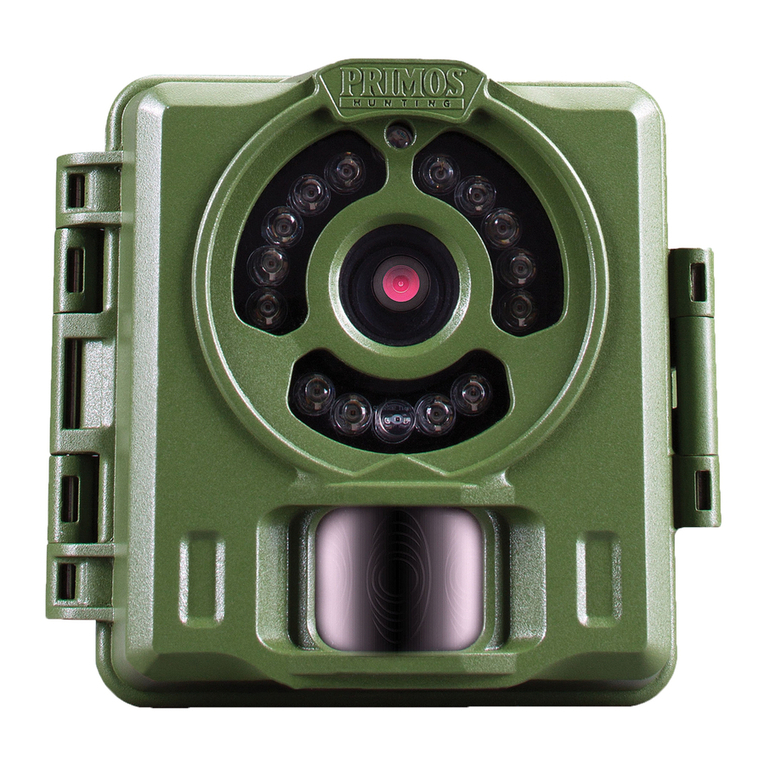
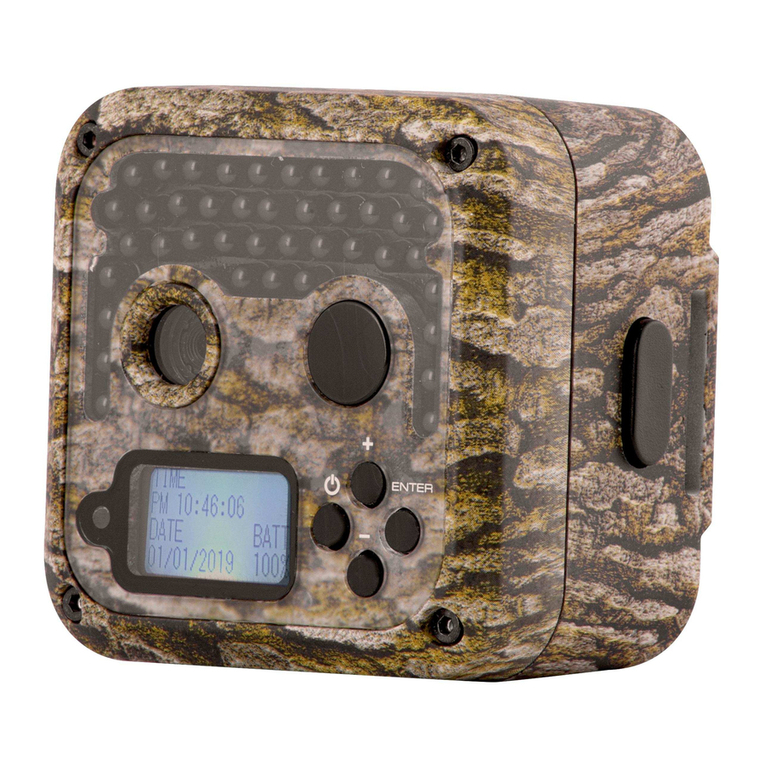
Primos 63065 Super Model II User manual

Before Operation
Quick Start
Initial Camera Setup
Camera Menu Options
(Detailed Description)
Other Features/
Functions
Recommended
Accessories
Operating Tips
Customer Service &
Warranty
© 2012 Primos®Hunting
Additional information on this product and
answers to frequently asked questions
can be found at www.primos.com
!PLEASE READ CAREFULLY BEFORE USE

IMPORTANT
For your protection, please carefully read these warnings, precautions and safety/operating
instructions completely before operating the camera. Follow these instructions closely and
keep this manual for future reference.
WARNING
To reduce the risk of fire, electrical shock or product damage/failure,
- Do not expose unit with the door open to rain, moisture, dripping or splashing. Do not open
or close the camera door with wet hand. Completely wipe off water on camera and camera
door before opening.
- Do not lay product on moist ground or submerge in water (this unit is designed for vertical,
upright outdoor use)
- DO NOT OPEN CASE HOUSING. UNINSULATED, ‘DANGEROUS VOLTAGE’ WITHIN PRODUCTS
ENCLOSURE. DO NOT REMOVE FRONT OR BACK HOUSING COVER. THERE ARE NO USER
- SERVICEABLE PARTS INSIDE, REFER SERVICING TO PRIMOS®CUSTOMER SERVICE.
- Only use batteries as specified in this user manual and install according to correct
polarization. Failure to follow may result in leaking or exploding batteries, damage to camera,
fire or personal injury. Do not handle damaged or leaking batteries.
- Do not expose to extreme heat. Do not leave product and/or batteries exposed in direct
sunlight inside a vehicle, or other contained environment for a long period of time.
- Only use accessories as recommended in this manual
CARE & CAUTION
- Transport and handle with care. Do not strongly shake, bump, hit, drop or otherwise
cause impact to the camera – can result in camera malfunction, damage to lens, sensor,
LCD screen, or other key components. Additionally, damage to the case could result in
imperfections to water-resistant properties.
- Take extra care when handling or using camera in places with sand and dust. Sand, dust and
foreign substances exposed to camera lens, PIR sensor, LED array and/or the internal door
panel components may result in poor picture quality or malfunction of camera. If exposed to
any of these elements, please carefully wipe off completely before continued use.
MODIFICATION WARNING
You are cautioned that any changes or modifications not expressly approved in this manual
could void your warranty of this equipment.
OPERATING TEMPERATURE
- Recommended storage temperature range -100F to 1400F
- Recommended operating temperature range 200F to 1200FVisit primos.zendesk.com for FAQ, PDF
Manuals, Camera Support or to open a
Troubleshooting Ticket.
!PLEASE READ CAREFULLY BEFORE USE

Instructions Video Clips
CARE & CAUTION
- Transport and handle with care. Do not strongly shake, bump, hit, drop or otherwise
cause impact to the camera – can result in camera malfunction, damage to lens, sensor,
LCD screen, or other key components. Additionally, damage to the case could result in
imperfections to water-resistant properties.
- Take extra care when handling or using camera in places with sand and dust. Sand, dust and
foreign substances exposed to camera lens, PIR sensor, LED array and/or the internal door
panel components may result in poor picture quality or malfunction of camera. If exposed to
any of these elements, please carefully wipe off completely before continued use.
MODIFICATION WARNING
You are cautioned that any changes or modifications not expressly approved in this manual
could void your warranty of this equipment.
OPERATING TEMPERATURE
- Recommended storage temperature range -100F to 1400F
- Recommended operating temperature range 200F to 1200F
SUPER COMPACT, HIGH
PERFORMANCE CAMERA....
Yet Incredibly
Simple to Use
ONLINE SUPPORT
Visit primos.zendesk.com for FAQ, PDF
Manuals, Camera Support or to open a
Troubleshooting Ticket.
Visit www.primos.com/ for
Instructional Video Clips.

Table of Contents
Before Operation
Needed to Operate 1
Select SD Card Size 2
Identify Parts 3
Quick Start - Initial Camera Setup
Initial Use/ Before Use 5
Camera Settings Backup Battery 5
Camera Status Lights 6
Camera Menu Options
Button Functions 7
Sliding Switch Settings - Photo Mode 8
Sliding Switch Settings - Video Mode 10
Sliding Switch Settings - Time Lapse 11
Camera Menu (Date, Time, Sensitivity Formatting & Instant Trigger) 13
Handheld Photo Viewer (Reviewing Photos & Videos) 15
Clearing SD Memory Card 18
Active RUN Mode 18
Powering Unit OFF 18
Image Stamp 18
Recommended Accessories
Operating Tips
Important Notes 20
Featured Primos®Camera Accessory 19
Other Accessories 19
Additional Ways to View/Retrieve Images 23

Table of Contents
Before Operation
Needed to Operate 1
Select SD Card Size 2
Identify Parts 3
Quick Start - Initial Camera Setup
Initial Use/ Before Use 5
Camera Settings Backup Battery 5
Camera Status Lights 6
Camera Menu Options
Recommended Accessories
Operating Tips
Customer Service & Warranty
Introduction
Important Notes 20
Contact Info 25
Warranty Protection 25
Featured Primos®Camera Accessory 19
Other Accessories 19
Small in size but big on performance, the highly advanced SUPER MODEL™
II game camera has a lightning fast .3 second trigger, and captures photos, videos
and time lapse sequences with best-in-class 7 MP image clarity and a 50’ extended
night range. The SUPER MODEL™II has up to a year-long battery life! SUPER-
EASY SLIDE-THE-SWITCH SETUP - Full-color sliding switches allow you to
see all active settings on one screen, it’s so quick and simple to understand even
Will and Jimmy can use it! The SUPER MODEL™II is also a Hand-Held Photo
Viewer so you can quickly review, save, delete, and organize your photos or
videos, eliminating the hassle of needing separate viewers and SD cards. Never
before has a trail camera packed this many features into a device this small!
The Primos®SUPER MODEL™II - Game Camera and Photo Viewer
Super Model
Additional Ways to View/Retrieve Images 23

1GB
2GB
4GB
8GB
Photo
5MP
700
1410
2830
5670
Photo
3MP
820
1650
3300
6610
Video
15S High Res
40
90
180
360
Video 15S Low Res 280 570 1140 2280
Video
30S High Res
20
40
90
180
30S Low Res
140
280
570
1140
Video
60S Low Res
70
140
280
570
Video
*Photo/Video SD Card Storage Capacity
*Approximation - photo/video sizes vary based on individual image details
Photo 7MP 540 1090 2180 4370
16GB 32GB
11520
13220
720
4560
360
2280
1140
23040
26440
1440
9120
720
4560
2280
8740 17480
45S Low Res 105 175 315 605
Video 1175 2315
SUPER MODEL™ II
INSTRUCTION MANUAL
12
Included:
1. SUPER MODEL™ II Camera (1)
2. Tree Mounting Bracket (1)
3. 72” Mounting Strap (1)
4. Instruction Manual
5. Warranty Card
1. Eight (8) “AA” size Alkaline, Lithium or
Rechargeable Batteries
2. One or more SD Memory Cards
(Camera will support up to 32GB SD or SDHC Cards)
3. SD Memory Card Reader or other device to download image/video files
from SD Card. (Many computers have a SD Memory Card slot built-in)
BEFORE OPERATION
Needed to Operate:

1GB
2GB
4GB
8GB
Photo
5MP
700
1410
2830
5670
Photo
3MP
820
1650
3300
6610
Video
15S High Res
40
90
180
360
Video 15S Low Res 280 570 1140 2280
Video
30S High Res
20
40
90
180
30S Low Res
140
280
570
1140
Video
60S Low Res
70
140
280
570
Video
*Photo/Video SD Card Storage Capacity
*Approximation - photo/video sizes vary based on individual image details
Photo 7MP 540 1090 2180 4370
16GB 32GB
11520
13220
720
4560
360
2280
1140
23040
26440
1440
9120
720
4560
2280
8740 17480
45S Low Res 105 175 315 605
Video 1175 2315
SUPER MODEL™ II
INSTRUCTION MANUAL
1
**
**
2
1. Eight (8) “AA” size Alkaline, Lithium or
Rechargeable Batteries
2. One or more SD Memory Cards
(Camera will support up to 32GB SD or SDHC Cards)
3. SD Memory Card Reader or other device to download image/video files
from SD Card. (Many computers have a SD Memory Card slot built-in)
BEFORE OPERATION
Select SD Card Size
This chart allows you to see the approximate capacity of 1GB, 2GB, 4GB, 8GB, 16GB &
32GB SD Memory Cards. Check to see what megapixel photos or resolution videos that
will be best for your SD Card.
**Recommended for general use and optimal battery life. (See Operating Tips for
more info.)

43
Identify Parts
PIR Motion Sensor
Bottom View Tree Mounting Bracket
SD Card Slot
“AA” Battery
Compartments External Battery Port
(Optional 6V DC)
Through Housing
Security Cable Hole
Tree Gripping Teeth
Mounting Strap Slots
Brass Inserts
(For optional
Attachment Accessories)
Camera Lens
Infrared LED Lights
Power Button
Menu/Photo Viewer
Button

43
PIR Motion Sensor
Camera Lens
Infrared LED Lights 2.5” Viewing LCD Screen
Power Button
Menu/Photo Viewer
Button
ENTER/RUN Button
Arrow Buttons
Up, Down, Right & Left

65
1. Install Batteries - Uses eight (8) “AA”
size Alkaline, Lithium or Rechargeable
batteries.
2. Install up to 32GB SD Memory
Card (not included) into the card slot
on the bottom of the camera.
3. Secure Camera Bracket to Tree or Pole using included Mounting Strap.
4. Turn On Camera and Slide Switches to desired settings.
QUICK START INITIAL CAMERA SETUP
Initial Use/Before Use
5. Enter MENU to Setup-Time and Date
6. Your camera is ready to use! Hit ‘RUN’ button to begin 15 second
countdown to active mode, the Super Model™II will be armed and ready to
take pictures whenever the Motion Sensor detects motion or movement.
(
NOTE
:TEST camera before placing in field/woods to make sure Photos/Videos are being
saved on SD Card.)
Camera Settings Backup Battery
*** This Camera is equipped with an internal rechargeable backup battery
that is dedicated to saving the date, time and menu settings when the main
“AA” batteries are removed. This internal backup battery can preserve your
settings for up to 6 months when fully charged. (NOTE: With first use or after a
long period of time without camera use, internal battery may initially take up to 30 hours to fully
charge - charges only when “AA” batteries are installed when camera is turned ON.)

65
QUICK START INITIAL CAMERA SETUP
RED LIGHT
Lights up when the camera detects motion. Visibility of this light is indication
that your camera is ON and working.
GREEN LIGHT
Lights up when the camera takes photo or is recording a video. The green light
stays on while the photo/video is being stored on the SD Memory Card.
(NOTE: Do not remove SD Memory Card when the green light is blinking – this could cause
you to lose all data on memory card!)
(NOTE: The LCD menu will not wake up from ON/RUN mode [Power Saving State] while the
Green Status Light is on. Wait until after Green Light turns off to WAKE up LCD screen by pushing
the WAKE button.)
Your Super Model™II Camera is equipped with 2 LED status indication
lights on the back of the camera (located right below the buttons).
Red Light Green Light
Camera Status Lights

87
BUTTON FUNCTIONS
- TURN ON: Press button to turn unit ‘ON’
- WAKE UP: Press to ‘Wake Up’ the camera from
sleep mode (may need to press several times to wake
up - camera cannot be woke up when green status
light is illuminated)
- TURN OFF: First ‘Wake Up’ the camera. With LCD
screen on, press and hold power button for 2 seconds,
screen will turn black and say ‘Powering Down’
- NAVIGATE: Use to navigate around
sliding switch settings and menu options.
- CHANGE SETTINGS: Intuitively use to
change settings.
CAMERA FEATURES & FUNCTIONS
POWER
BUTTON
UP-DOWN-LEFT-
RIGHT ARROW
BUTTONS

87
- ENTER MENU: Press to enter Camera Menu.
- USE PHOTO VIEWER: Press and Hold Button for 2
seconds to quick start the Photo Viewer.
- SELECT & SAVE SETTINGS: When in Camera
Menu, press ENTER Button to select setting. Use
ARROW Buttons to change setting. Press ENTER
again to save setting.
- RUN CAMERA: When on main Sliding Switch
Screen, press RUN to start countdown to camera
active run mode.
SLIDING SWITCH SETTING - PHOTO MODE
**NOTE: Use arrow buttons to move sliding switches.
RUN
ENTER/RUN
BUTTON
MENU/PHOTO
VIEWER BUTTON

109
Burst - Number of pictures taken each triggering event.
Photo Resolution - Mega Pixels (MP) are referring to the number of pixels in
an image, basically the higher the number, the more pixels. This DOES NOT
mean more pixels is always better. Your Super Model™II camera sensor is
optimized to take good, clear images at all mega pixel resolutions. Please
use this guide to help you choose which resolution setting will work best for
your situation.
Best image quality - finer details when
zooming in for a closer look. Use for
chance of capturing photo of a lifetime
if you think the 'big trophy' is in the
area. Great for printing large-scale,
photo quality images.
Better image quality and a balance of
benefits between lower and higher MP.
For good image quality and recording a
large number of images. Faster to save,
transfer and e-mail. Recommended for
standard everyday use.
Usage Guidelines
Resolution
(Image/File Size)
# of
Images
Storage/
Recovery
Speed
Battery
Life
5MP
3MP
Larger
Smaller
Less
More
Slower
Faster
Shorter
Longer
7MP
Delay - The pre-set amount of time you desire between photo recordings.
SLIDING SWITCH SETTING - VIDEO MODE

109
SLIDING SWITCH SETTING - VIDEO MODE
**NOTE: Use arrow buttons to move sliding switches.
Video Resolution - Please use this guide to help you choose which video
resolution setting will work best for your situation.
Resolution
(Video/File Size) Usage Guidelines # of
Videos
Storage/
Recovery
Speed
Battery
Life
30s High Res
15s High Res
60s Low Res
30s Low Res
15s Low Res
Smaller
320 x 240
Larger
640 x 480
Larger size videos, but really large file
size and will fill up the SD Memory
card much faster than low resolution.
Better for expanding/maximizing on
your computer screen so you can see
the important action!
Smaller size videos, but can store 7
times more than high resolution for the
same length! Good for seeing what is
going on in your area, but not great for
expanding/maximizing on your
computer screen.
Less
More
Slower
Faster
Shorter
Longer
45s Low Res
Length - Length of time each video clip will record.
Delay - The pre-set amount of time you desire between video recordings.

1211
SLIDING SWITCH SETTING - TIME LAPSE MODE
Setting - Time Lapse
Captures time lapse photography automatically all day and saves footage in
a video file. This mode has gained popularity for scouting further distances,
such as big open areas (food plots, fields, etc) where you will capture footage
automatically whether there is motion directly in front of the camera or not.
However, with the camera constantly taking pictures all day, the battery life
will be limited (see Battery Life in manual).
Media Saved: All Day AVI Videos
Setting – Time Lapse + Images
Same as Time Lapse above, but ALSO will simultaneously capture photos
(with default photo setting - see below) during the Night and/or Day when
motion is detected. This mode allows the long range surveillance but also
with the convenience of quickly seeing what walking directly in front of the
camera [without having to watch the entire day time lapse video] . However,
with the camera constantly taking pictures all day, the battery life will be
limited.
Default Image Settings: Photo Lo (5MP), 3 Burst, Delay 5 seconds
Media Saved: All Day AVI Video and JPEG Photos

1211
Time Lapse Interval – The pre-set amount of time (seconds or minutes)
you desire between each time lapse photo.
Short intervals offer more constant surveillance but your AVI video file will be
larger. Longer intervals will
reduce the video file size and save battery life.
**If you don’t want your camera taking Time Lapse ALL DAY, then move
the slider switch to ‘CUSTOM’ and press to open the Custom Time Lapse
Settings Menu:
TIME LAPSE CUSTOM SETTINGS
TL Interval: (select interval)
AM Start Time: LIGHT
(LIGHT is default, can be switched to a time between 5:00AM and 10:00AM)
AM Stop Time: 10:00AM
(10:00AM is default, can be switched to a time between 8:00AM and 11:59AM)
PM Start Time: 12:00PM
(12:00PM is default, can be switched to a time between 12:00PM and 5:00PM)
PM Stop Time: DARK
(DARK is default, can be switched to a time between 3:00PM and 10:00PM)

1413
CAMERA MENU
Date - Change to current date. Date in camera will be displayed on pictures
and videos.
Time - Change to current time. Time in camera will be displayed on pictures
and videos.
Camera Sensitivity (Sensing) - Motion Detector Sensitivity. Use ‘Normal’ as default.
TIP: It may not always be best to use ‘high sensitivity’ to see how far away you can capture
images of game. If the game is closer when the camera is triggered, you will end up with better
pictures/videos. You can learn what is best for your situation; here is a summary of the settings:
You can adjust the sensitivity of the Passive Infrared (PIR) Motion Sensor on your camera.
The PIR sensor detects motion AND the difference between body heat and the outdoor
temperature. Therefore, adjusting the sensor affects the DISTANCE and HEAT SENSITIVITY
of the detection.

Format - Formats SD Memory Card installed in camera – this DELETES ALL
PHOTOS OR VIDEO or any other data on memory card!!!
To proceed with formatting:
1. Press ENTER and use UP or DOWN arrow to switch to ‘YES’. Press
ENTER again.
2. Camera will ask: Are you sure you want to format the memory card?
3. Select Yes to continue, No to cancel.
When formatting is complete, camera will take you back to the main screen
and the photo count should read ‘PHOTOS: 0000’.
1413
TIP: It may not always be best to use ‘high sensitivity’ to see how far away you can capture
images of game. If the game is closer when the camera is triggered, you will end up with better
pictures/videos. You can learn what is best for your situation; here is a summary of the settings:
High Sensitivity
• Use when trying to detect game at further distances (in fields or open areas with long-range visibility)
• May use in warmer months or high heat climates so it is easier for sensor to detect difference
between body heat and outdoor temperature.
• May use when trying to capture photos of smaller game.
Normal Sensitivity
• Optimized to work best in most conditions and for normal use
Low Sensitivity
• May use if you have the camera setup in a location that is getting a lot of ‘empty’ photos
(false triggers)
• May use if you are getting a lot of hard-to-see long range photos of game (more likely in colder
temperatures or with larger game) and would like game to get closer before camera captures images.

1615
Handheld Photo Viewer
SCROLL THROUGH STORED MEDIA NAVIGATE:
Scroll from one picture to the next, left or right.
TIP: Hold button down to quickly flip through photos.
ORGANIZING MEDIA OPTIONS
OPTIONS FOR ORGANIZING PHOTOS & VIDEO
•Save-Protect Photo: Allows you to ‘lock’ the current photo/
video so it won’t get deleted with ‘Delete All Photo” option.
• Delete Current Photo: Deletes only one individual photo/video
• Delete All Photos: Deletes all photos/videos on card except
those ‘Save-Protected’.
TIP: Hold Photo Viewer button down for 2 seconds to quick
start Photo Viewer.
LEFT/RIGHT
BUTTONS
RUN
ENTER BUTTON
MENU
BUTTON
This manual suits for next models
2
Table of contents
Other Primos Scouting Camera manuals

Primos
Primos Truth Cam 35 63010 User manual

Primos
Primos 63053 User manual

Primos
Primos Bullet Proof 2 User manual

Primos
Primos 65064M User manual

Primos
Primos Proof Camera Series 63054 User manual

Primos
Primos Waggin' Whitetail 62606 User manual

Primos
Primos TRUTH Cam Ultra Series User manual

Primos
Primos 63063 User manual