Primrose Drop Arm Awning User manual

Primrose Awnings Installation Instructions 1
We recommend that two or more people are
required to lift the awning into place.
The awning and frame may be supplied with a
plastic wrapper. This should be removed prior
to use.
Plastic bags can be dangerous to children and
babies. Keep out of the reach of babies and
children to avoid the risk of suffocation.
Before assembly, check that all parts are
contained within the box. If any parts are found
to be damaged or missing, please telephone
our customer service hotline:
0870 499 0220
www.primrose-awnings.co.uk
**The expansion bolts supplied are for
reinforced concrete or brick walls.
The awnings may be installed on wooden walls
if the wall is sufficiently strong. Use appropriate
screw-threaded or coach bolts.
1.0m - 3.0m Awnings
8 x Expansion bolts (2 per bracket)**
2 x Wall brackets
2 x Bracket plates (Linkers)
1 x Awning
1 x Winder handle
Fixing kit
Bolts M6
Bolts M8
Expansion tubes
Self tap bolts ST6
Suggested Tools
- Hammer drill
- 10mm masonry drill bit
- Chalk or pencil to mark
- Laser level or long spirit level
- Metric socket spanner set
- Adjustable spanner
- Screwdriver
Primrose Awnings - Drop Arm Awning Instructions
Contents
Contents Warning
Wall bracket Bracket plate
(Linkers)

Height of awning:
The recommended height from the ground is 2.5m-3.5m. If you want to install lower than this, determine
whether there is sufficient headroom when the awning is fully extended and that any doors, windows can
open.
Required headroom:
- Allow 20cm above any door/window frame and check that when opened the door will not interfere with the
awning.
Horizontal positioning of brackets:
Using laser, spirit level or other method, mark an accurate horizontal line at the required height.
Fixing must be directly into brick or concrete. Mortar joints between the bricks or blocks will NOT
be secure enough to bolt into.
Installing onto wooden houses and chalets:
You can install 1.5m -3.0m drop arm awnings onto wooden walls and chalets providing that the wall has
adequate strength to support the weight of the awning. Always ensure that the wall brackets are securely
fitted onto the outside of strong wooden wall studs.
The wall bolts provided in the fitting kit will not be suitable for securing to wooden studs; therefore you will
need to purchase Coach Bolts of sufficient length and diameter from your local hardware store to replace
the wall bolts (expansion bolts) provided. If unsure, consult a qualified structural engineer for expert advice.
Primrose Awnings Installation Instructions 2
Step 1: Determine position on the wall and mark up Front view
w
Distance between brackets = W - (100 ~ 200)
Distance between support arms = W - (150 ~ 250)

Primrose Awning Installation Instructions 3
Side viewStep 2: Drill holes
Measure up and mark where to drill your holes for the drop arm awning. Use a hammer drill with 10m
masonary drill bit. Fixing must be directly into brick or concrete. Mortar joints between the bricks
or blocks will NOT be secure enough to bolt into.
You should drill two holes, one above the other (Approx 4cm apart) each end. They must be exaclty
horizonatally level to ensure the awning opens properly and there is no strain on the arms. The distance
between the two pairs of holes is flexible and will depend on the size of the awning you have chosen.
Expansion tubes
10mm Drill bit
Wall
55mm
50mm
Step 3: Attach the brackets
Push the expansion tubes into the holes and screw the two wall brackets into place, the widest end
at the top.
It is important to make sure these brackets cannot be pulled out, as they will be taking the force of
the steel sprung arms. If these are not secure, purchase our R-KEM Resing Kit (AWN73) to secure
the screws.
Wall

Primrose Awning Installation Instructions 4
Note:
When installing 1.5m - 3.5m awning we recommend to use two step ladders with two people.
Slide the top nut boards on the awning to the ends and fasten the smaller wall bracket linkers.
Lift both ends of the awning up and hook from underneath onto the wall bracket. Screw the two together
making sure the awning is now secure on the wall.
Attaching linkersStep 4: Install the awning
Wall
Linker Linker
Slide the Nut board
to the end of the awning
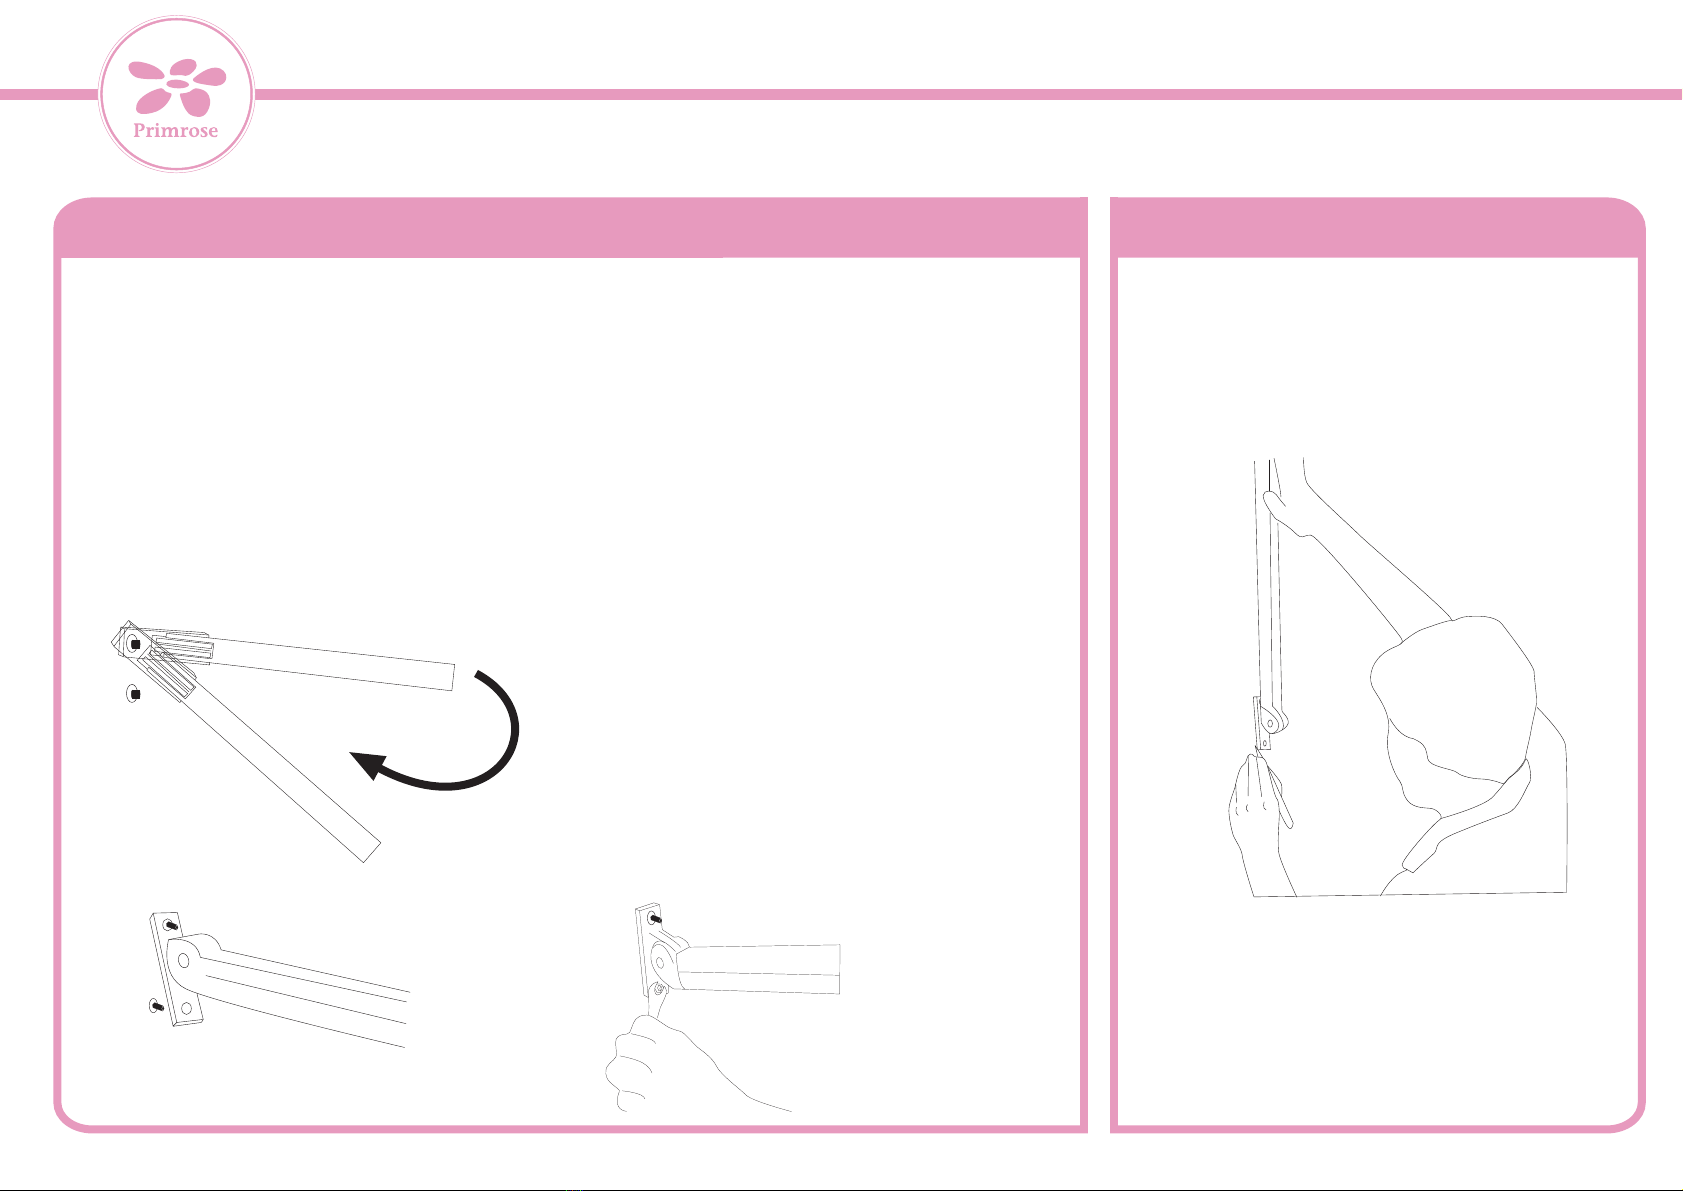
Hold the support arms up to the awning and mark where the screw holes are positioned. Drill the holes and fit
the expansion bolts.
You may need to adjust the position of the nut boards on the underside of the front bar of the awning by sliding
them across.
The arms should hang absolutely horizontally to ensure there is no unnecessary strain on the metal. If the
drilled hole is significantly wider than the expansion bolt, you will need to use our R-KEM resin kit to secure them.
Hook the top hole of the arm onto the top protruding expansion bolt, twist and push the bottom hole down on the
bottom expansion bolt.
One person will need to hold the arm against the wall whilst the other screws the nuts onto the expansion bolt
thread. Take care as the steel sprung hinge is very strong.
Primrose Awning Installation Instructions 5
Support armsStep 5: Attaching support arms
1.
2. 3.

Primrose Awning Installation Instructions 6
Lift the arm up and secure to the awning with the M8 bolts. When these are secure, use
the winder handle to slowly open the awning. Check that all the fixings are secure before
operating fully.
With the manual awnings, you can control the position of the awning by simply winding out as far
you want to go. The awning will hold at whichever position you wind to.
Step 6: How far out can the awning open?
Attaching support arms continued

Primrose Awning Installation Instructions 7
This awning is guaranteed against faulty parts and
workmanship for one year from the date of delivery.
Faulty parts will be replaced or exchanged within that
period. The guarantee covers domestic use only.
5a Stadium Way,
Reading,
RG30 6BX
0870 499 0220
www.primrose-awnings.co.uk
Once the awning is installed, it is important to note how to properly care for the components, to make your
awning work as long and efficiently as it can.The awnings are constructed from weather resistant powder-
coated metal and hard-wearing polyester fabric, and are designed to give many years of service. Stains and
bird droppings etc. can easily be washed or sponged away, and should not be left for prolonged periods. The
awning should always be retracted in severe weather conditions.
The hook shaft, gearbox and joints on awnings should be sprayed with silicone in order to lubricate (4-6
months). WD-40 can also be used instead of silicone.
Framework of the awning should be cleaned at least once every year, with a soft cloth or sponge and warm
water.
Fabric on the awning should be cleaned at the very least once every year. By using a mild detergent with
warm water and a sponge or soft cloth, the fabric can be wiped and marks can be removed making the
awning look like new.
Awning cleaning care products can also be purchased on our website, code: AWNCLPRO
Guarantee
General care & precautions
Table of contents
Other Primrose Accessories manuals


