www.primusaustralia.com.au • Sales: 1300 555 197
Q: Will direct shade affect the power output of the solar panel?
A: Yes, locate the panel in direct sunlight for maximum output.
Q: Will my solar panel work in cloudy conditions?
A: Yes, the solar panel will work in low light conditions however the
power output will be reduced as there is less energy collected.
Q: Should I clean my solar panel?
A: Yes, removing dust, dirt, bird droppings, etc with warm soapy
water will assist with the solar panels energy collecting
performance
Q: How do I clean the power pack?
A: Use a mix of warm soapy water, do not use bleach or harsh
cleaning chemicals and carefully wipe down all surfaces
avoiding water entering the power pack.
Q: Can I replace the LED’s?
A: No, the LED light has a life expectance of 8,000 hours of
continuous operation.
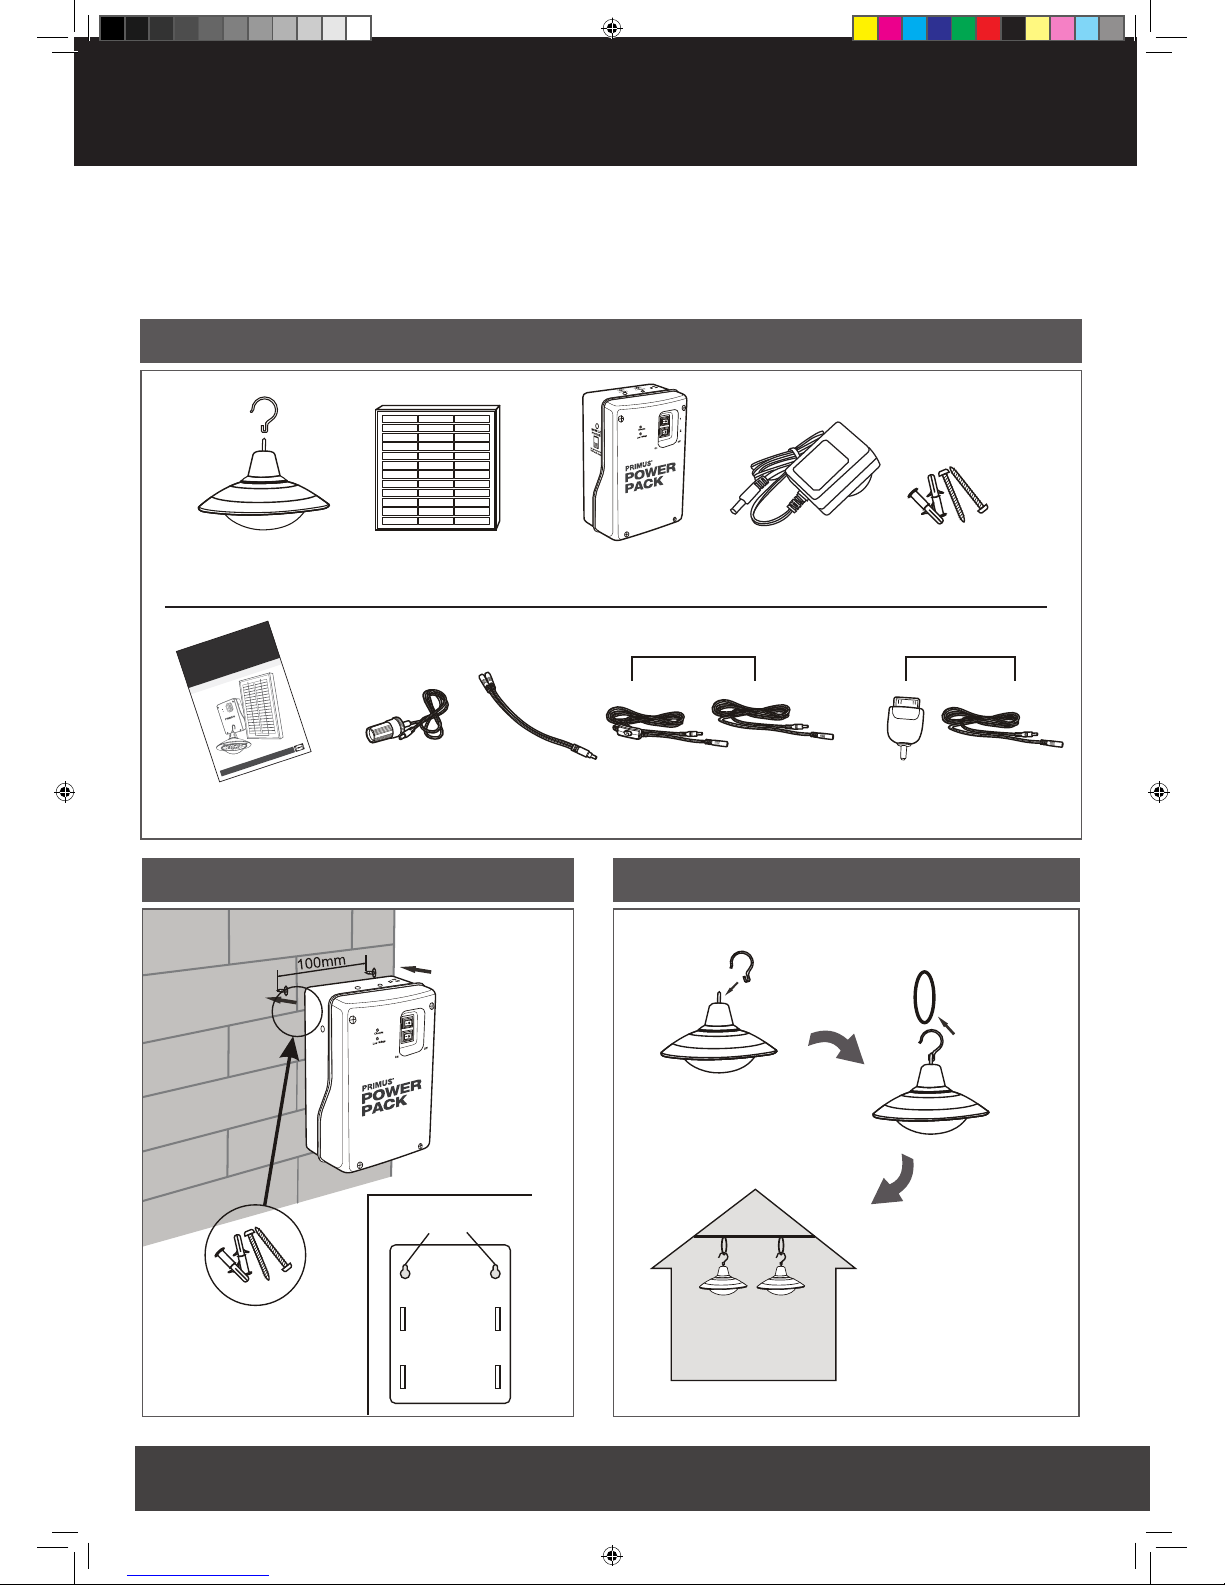
Suggestions for safe and secure use
Failure to follow these complete instructions and the
suggestions below may cause system damage and/
or personal Injury.
• This controller is only designed for 12V solar charging.
• The built-in electronic circuit protector keeps the controller away
from overcharging, overowing, overloading and short-circuit.
• Sealed, maintenance free VLRA batteries are highly
recommended.
• The controller will heat up during use, place in a well-ventilated
location and avoid contact with the controller surface.
• Keep the ventilation holes on the controller free of dust
and debris.
• The battery may produce ammable gases, please keep
away from spark or open ame, ensure the battery is kept in
a well-ventilated location.
• Fully charge the battery at least once a month.
• Do not contact or short circuit the terminals or wires.
• Please use insulated tools during operation, keep both hands
dry and do not stand on the wet ground.
• Please follow the security recommendations from the battery
manufacturer. Contact the distributor or the installation
personnel if there is any doubt.
General Disclaimer
In no event shall the manufacturer be liable for any damage or personal
injury caused by non-compliance to the operating instructions and safety
suggestions in this brochure. The manufacturer will not bear any
responsibility for misuse, damage, injury, incorrect installation and/or
system design as such.
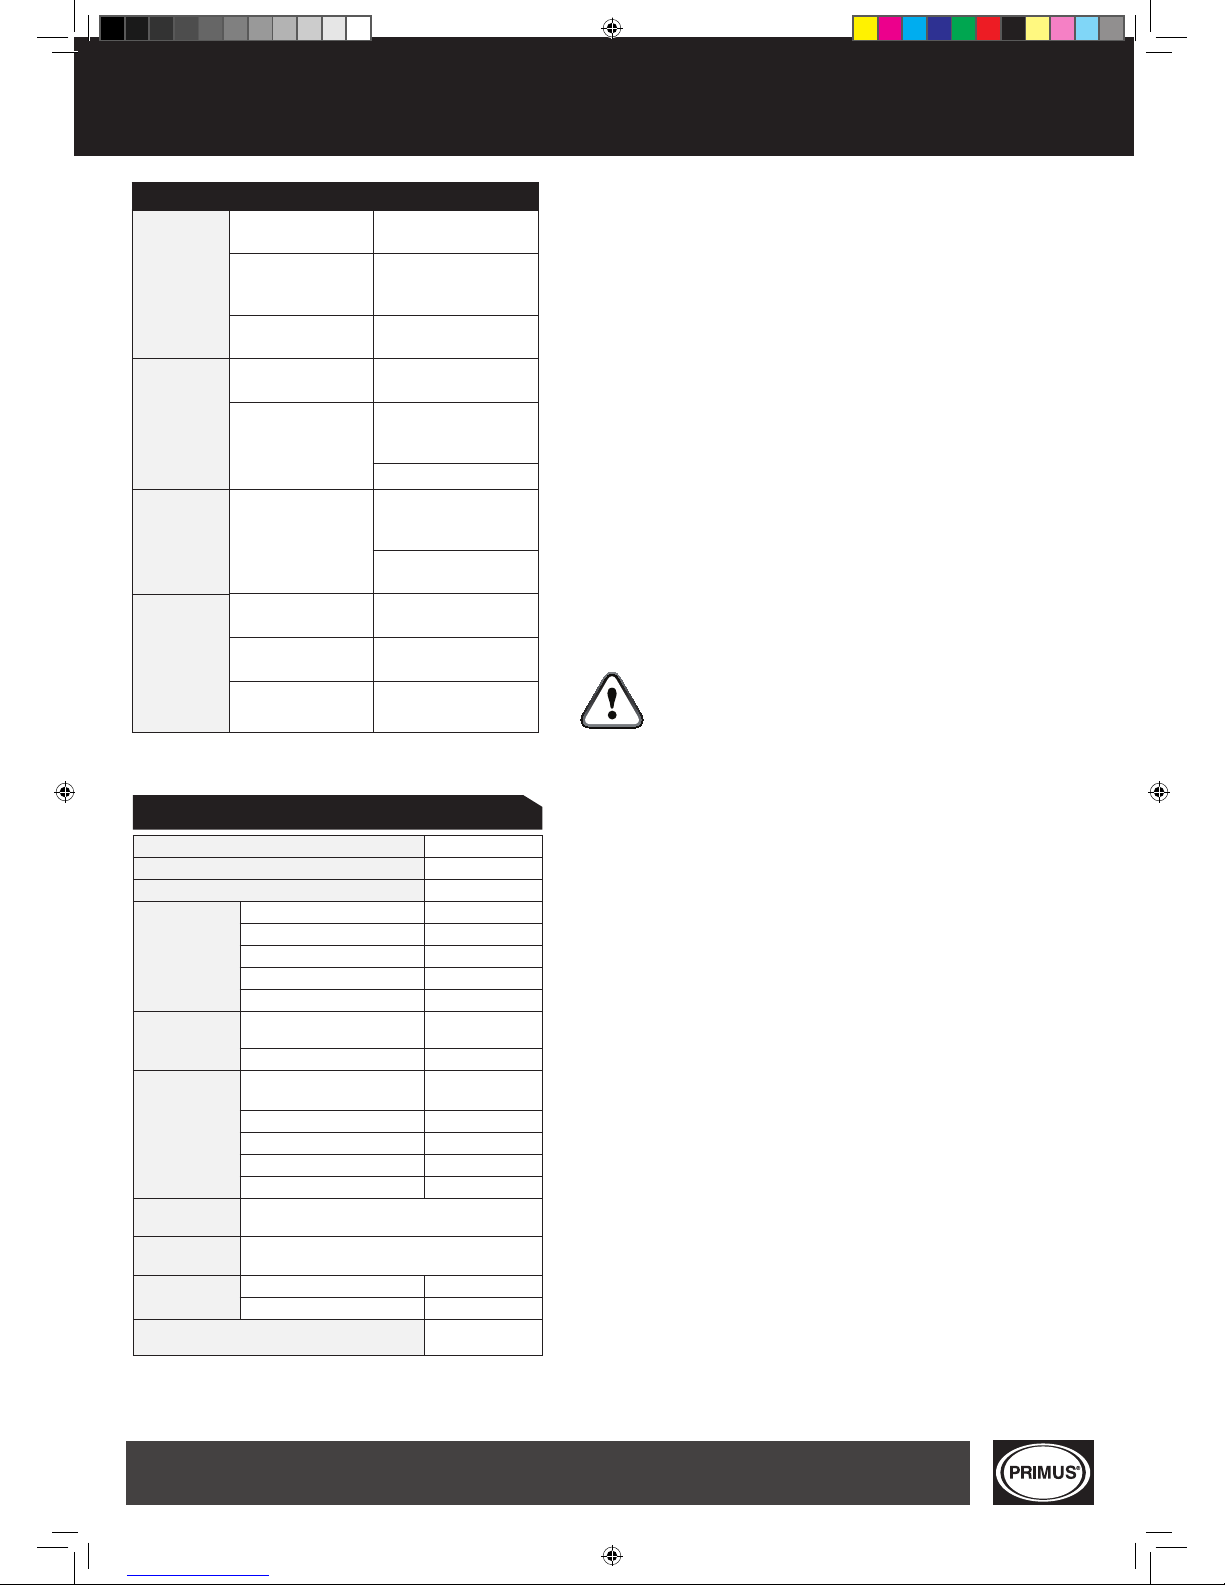
Frequently asked questions
TROUBLES POSSIBLE CAUSES CORRECTIVE MEASURES
ORANGE LED
IS NOT
ILLUMINATED
WHEN SOLAR
PANEL IS
CONNECTED
SAFETY FUSE IS NOT
INSTALLED INSTALL FUSE
SOLAR PANEL IS
NOT CONNECTED
CORRECTLY
CONNECT TO POWER PACK
SOLAR PANEL NOT
EXPOSED TO THE SUN
LOCATE IN DIRECT SUN
LIGHT
LED LIGHTS
WILL NOT
OPERATE
SAFETY FUSE IS NOT
INSTALLED INSTALL FUSE
RED LED IS ON / POWER
PACK IS FLAT
CHECK CONNECTIONS
& SWITCHES ARE IN ON
POSITION
CHARGE POWER PACK
LED LIGHTS
OPERATE FOR
A SHORT TIME
ONLY
RED LED IS ON -
POWER PACK IS LOW IN
VOLTAGE
LOCATE SOLAR PANEL IN
DIRECT SUNLIGHT FOR
MINIMUM OF 8 HOURS
CHECK CONNECTIONS &
SWITCHES
POWER PACK
WILL NOT
CHARGE
SAFETY FUSE IS NOT
INSTALLED INSTALL FUSE
CHECK POWER PACK
CONDITION
IF FAULTY - REPLACE
BATTERY
CHECK SOLAR PANEL
OUTPUT
IF FAULTY - CONTACT
MANUFACTURER
NORMAL VOLTAGE 12V
MAX. CHARGING CURRENT/LOAD CURRENT ≤1A
CURRENT NATURAL LOSS ≤5mA
SOLAR MODULE
STC Power 5W
Operating Voltage (Vmp) 17V
Operating Current (Imp) 0.29A
Open Circuit Voltage (Voc) 21.6V
Short Circuit Voltage (Ics) 0.34A
BATTERY
Battery Type Maintenance Free
Lead - acid battery
Capacity 12V/5.0AH
DC LAMP
Light Source 12 Super
Bright LED
Rate Power 0.6W
Rate Voltage 12V
Rate Current 50mA
Luminosity 50Lum
CHARGING TIME
(SOLAR)
Approx. 8 to 10 hours in full sunlight when the
battery is fully discharged
CHARGING TIME
(AC CHARGER) Approx. 8 hours when the battery is fully discharged
OPERATING TIME 1 lamp 66 Hours
4 lamps 16 Hours
OPERATING TEMPERATURE RANGE -10~60°C
(-40~122°F)
SPECIFICATIONS
Please note: Specications may change without notice
Troubleshooting and maintenance
PRI4826_Solar_Panel_manual.indd 4 14/12/11 3:58 PM