Instruction manual
8
•Setting – Press the setting icon then to adjust the humidity level
between 40% and 80% in 5% intervals.
After operating for a period in an environment where the humidity level is 2
% lower than the selected humidity level, the compressor will stop then the
fan will continue to run for 3 minutes before stopping. When the humidity
of the environment is equal to or higher than the selected humidity by 2%,
the compressor will restart after 3 minutes.
•Timer – To set a time for the appliance to switch on or to standby.
•Timer indicator – Illuminates when the timer is activated.
• The timer can be set between 01-24 hours in 1 hour intervals.
• To set the time for the appliance to switch on, while the appliance is on
standby, press and use the timer icon, the timer indicator will
illuminate. The time in the display will blink for 5 seconds then stop.
The time indicator will remain illuminated until the appliance turns on.
• To set the time for the appliance to switch off, while the appliance is in
operation, press and use the timer icon, the timer indicator will
illuminate. The time in the display will blink for 5 seconds before it
reverts to showing the current room temperature. The time indicator
will remain illuminated until the appliance turns off.
• To cancel the timer programming press and hold the timer icon until
the timer indicator goes out .
Note: The programmed time remains unchanged if the machine stops
operating due to a full tank or during defrosting.
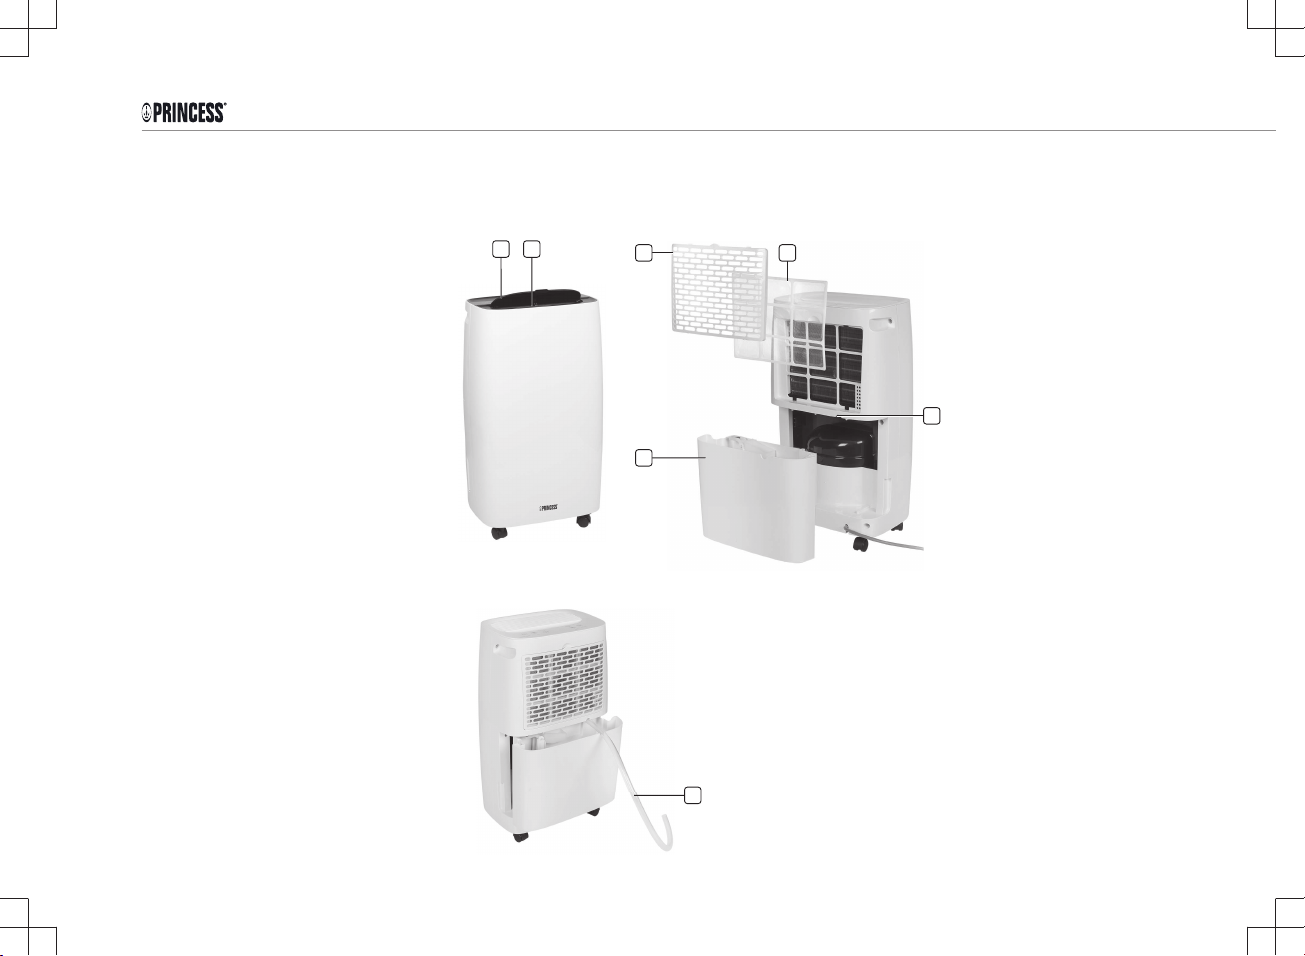
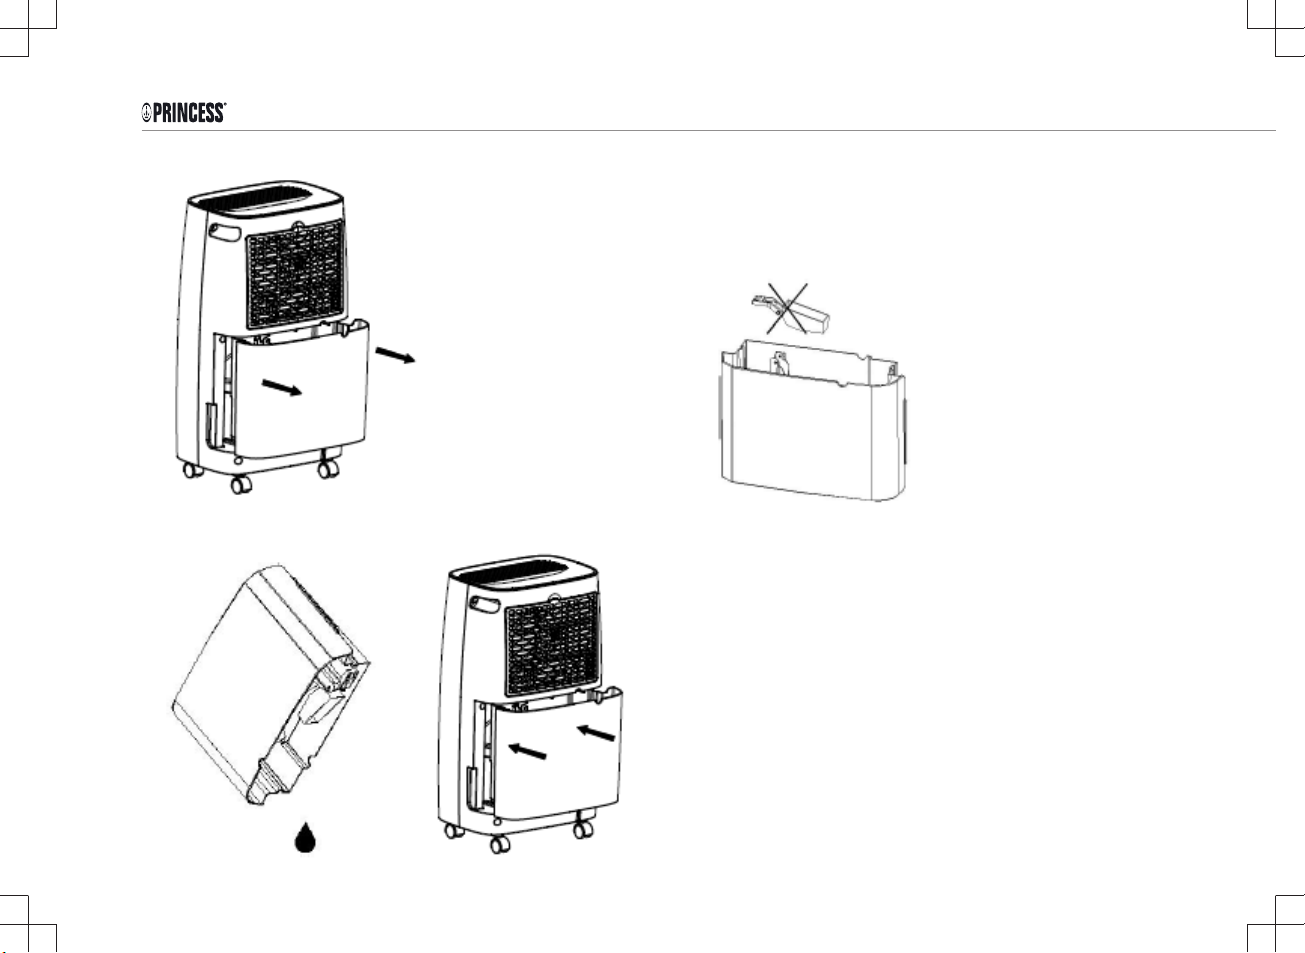
•WATER FULL indicator – When the drainage tank is full, the Water
Full indicator will illuminate, the appliance will stop operating and
beep15 times to alert the user that the water needs to be emptied from
the drainage tank > follow the steps in this manual for “Emptying the
Drainage Tank”.
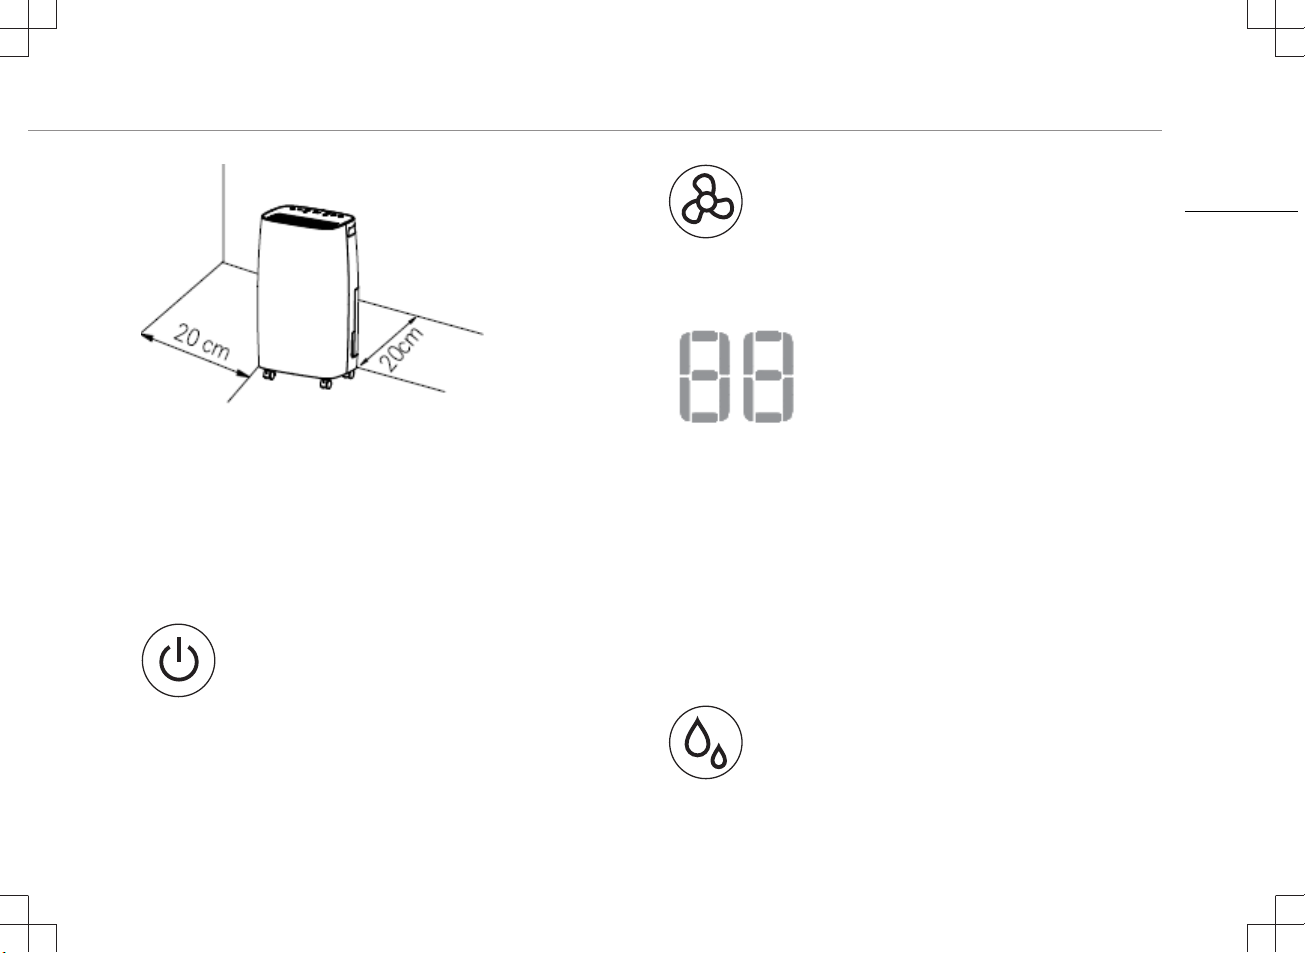
USE
• Plug the appliance in an earthed socket. The appliance will beep once,
the power indicator will illuminate.
• Press the power icon to turn the appliance on, the fans will start
operating and the current temperature and humidity level will be
shown on the display.
• If desired you can follow the steps under – “Using the Control Panel”
to set the timer, adjust the fan speed or the humidity level or use the
swing feature.
• Touch the power icon again to switch the appliance on standby.
• Unplug the appliance when not in use.
Low -Temperature Operation with Automatic Defrost
When the appliance is operating in a room with temp. between 5°C and
12°C it will automatically stop every 30 minutes to defrost.
When the appliance is operating in a room with temp. between 12°C and
20°C, it will stop every 45 minutes to defrost.
After operating for a period in an environment where the humidity level is 2
% lower than the selected humidity level, the compressor will stop then the
fan will continue to run for 3 minutes before stopping. When the humidity
of the environment is equal to or higher than the selected humidity by 2%,
the compressor will restart after 3 minutes.