ProGlove Mark 2 User manual

1
MARK 2
USER MANUAL
Technical document

SAFETY INSTRUCTIONS
Hardware ..................................................................... 5
Wearables .................................................................... 5
SCOPE OF DELIVERY AND
OVERVIEW ........................................................... 6
TECHNICAL PROPERTIES
Hardware ..................................................................... 8
Wearables .................................................................. 13
USING MARK 2 SYSTEM
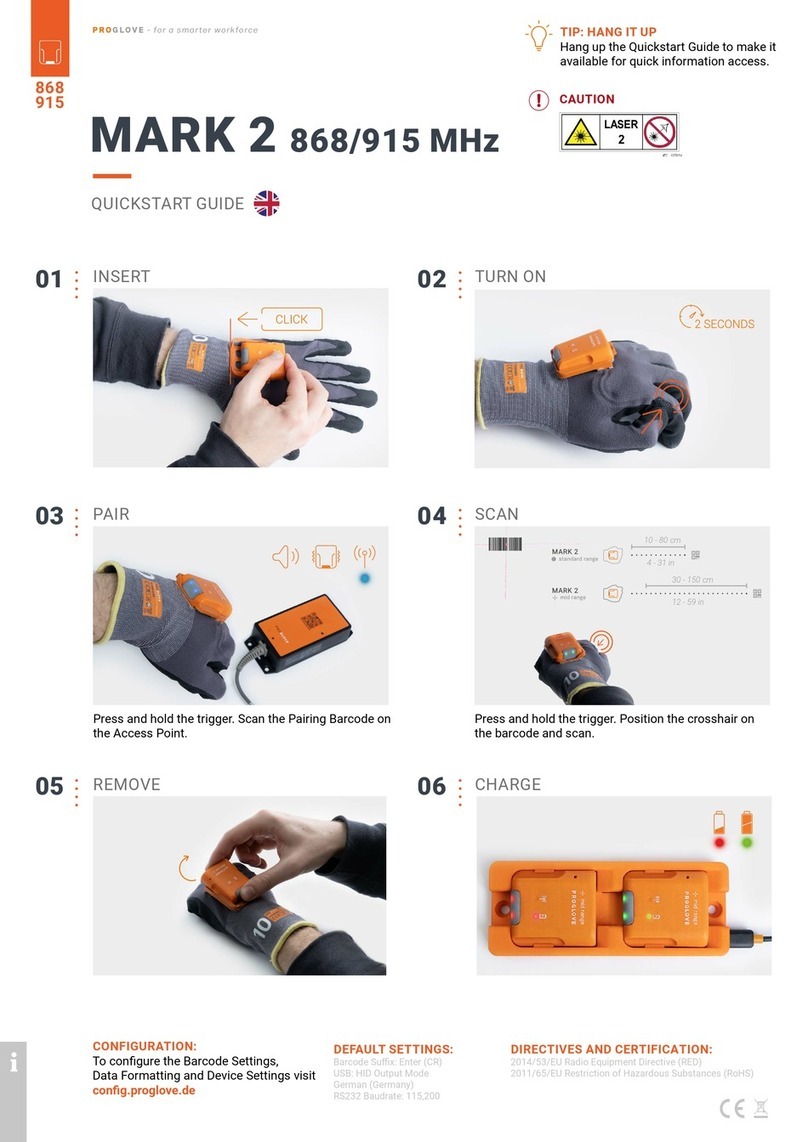
1st step: Charge MARK 2 ..........................................16
2nd step: Connect Access Point One S.................... 16
3rd step: Switch on MARK 2 ..................................... 18
4th step: Connect MARK 2 ........................................ 18
Connection via 868/915 Mhz
Connection via BLE HID
5th step: Scan with MARK 2...................................... 24
6th step: Disconnect MARK 2 system ..................... 25
7th step: Release MARK 2 from Wearables ............ 29
CONFIGURATION TOOL
1st step: Barcode settings ........................................ 30
...........30
3rd step: Data formatting - Advanced
formatting................................................................... 30
4th step: Device setting ............................................ 31
............................. 31
SIGNAL TABLE
General ....................................................................... 32
Connection via 868/915 Mhz ................................... 33
Connection via BLE HID ............................................ 33
STORAGE AND CLEANING
Storage location and temperature ........................... 34
Cleaning the Hardware ............................................. 34
Cleaning Wearables ................................................... 34
MARK 2 USER MANUAL
TABLE OF CONTENTS

TROUBLESHOOTING
MARK 2 ...................................................................... 35
868/915 MHz - Data transfer ................................... 37
BLE HID - Data transfer.............................................. 38
Charging Station S ..................................................... 39
DISPOSAL...........................................................40
SAFETY AND CERTIFICATION
SUPPORT & SERVICE
Technical support contact data ............................... 41
Sales contact data .................................................... 41

DOCUMENT OVERVIEW
This user manual contains a system overview, techni-
cal data about the Hardware and Wearables, detailed
step-by-step instructions for using MARK 2 system and
-
shooting.
maintenance technicians who are using MARK 2 system
can be used safely without prior
knowledge.
ABOUT THESE OPERAT-
ING INSTRUCTIONS
ADDRESS:
Workaround GmbH (ProGlove)
Rupert-Mayer-Straße 44
81379 Munich
DOCUMENT TITLE:
MARK 2 User Manual
DATE OF PUBLICATION:
02/2019
VERSION:
1.0
EXPLANATION OF SYMBOLS
A warning notice is used in these instructions.
Always read and observe this warning notice.
The warning notice is introduced with the word CAUTION
and means the following:
CAUTION
Slight bodily injury or danger of physical damage to MARK
2 system is possible.
In addition, other symbols are used that mean the
following:
NOTE
Additional notices provide more information about the
respective chapter.
TIP
Additional tips facilitate the implementation of a certain
procedure.
RESULT
The result will show the outcome of the prior action.

5
CAUTION
Keep all cables and wires away from high voltage
sources!
This may otherwise lead to damage or faults due
to overvoltage, line noise, electrostatic discharge or
other irregularities.
CAUTION
Do not use damaged cables!
Otherwise the safe functioning of MARK 2 system
cannot be ensured.
CAUTION
Do not unscrew the Hardware housing!
This may otherwise lead to MARK 2 system not func-
tioning properly.
CAUTION
Do not replace the battery of MARK 2!
This may otherwise lead to MARK 2 not functioning
properly.
CAUTION
Keep Wearables away from moving machine parts
and do not use without MARK 2!
Otherwise the Wearables may get stuck on objects.
CAUTION
Use Wearables in the right size!
Otherwise this may cause pain or pressure points on
your hand.
SAFETY INSTRUCTIONS
HARDWARE WEARABLES

6
SCOPE OF DELIVERY
NOTE
The Access Point One S is only delivered if connected via
868/915 MHz.
CAUTION
Do not use any damaged Hardware or Wearables!
Check whether Hardware and Wearables are properly
packaged and undamaged.
MARK 2
...... MARK 2
Standard or mid-range
CHARGING STATION S
..............................
Charging Station S
with power cable
(USB-C) and power
supply
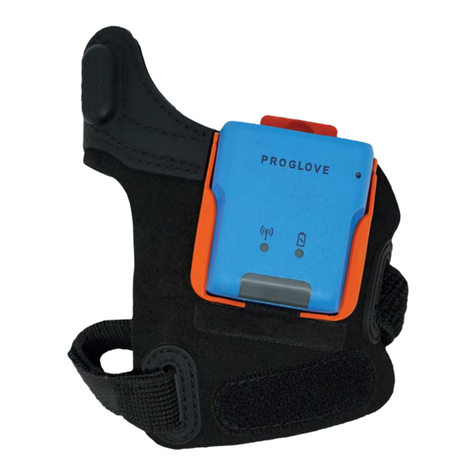
WEARABLES
.............................. Standard Glove
.............................. Longlife/Palm Trigger
..............................
ACCESS POINT ONE S - USB CONNECTION
.......................
Access Point One S
with USB cable
ACCESS POINT ONE S - RS232 CONNECTION
.......................
Access Point One S
with RS232 cable
.......................
Power supply
with power cable

7
MARK 2 SYSTEM
VIA 868/915 MHz OR BLE HID
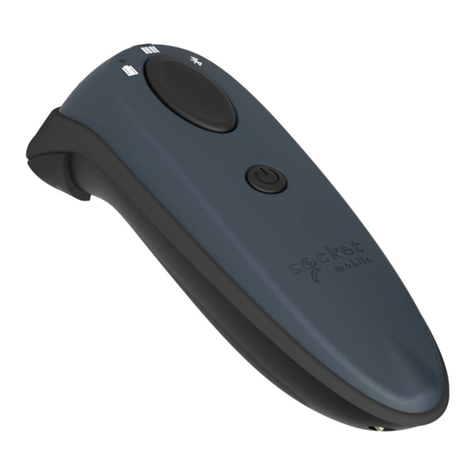
MARK 2 is a barcode scanner that can read 1D and 2D
barcode types. The scanning range is between 10 - 80 cm
(standard range) or 30 - 150 cm (mid-range). There are two
types of transmission:
VIA 868/915 MHz
MARK 2 transmits the barcode data via 868 MHz
(US frequency: 915 MHz) to the Access Point One S. This is
either connected via a USB cable (USB HID mode or USB CDC
mode) or a RS232 cable (standard connection) to the end
device (terminal, IPC, laptop, etc.).
VIA BLE HID
MARK 2 transmits the barcode data to the end device via
Bluetooth Low Energy Human Interface Device (BLE HID)
without Access Point One S.
standard range 10 - 80 cm
mid-range 30 - 150 cm Wireless Connection
Frequency: 868/915 MHz
< 30 m range
1D and 2D barcodes
Wireless Connection
Bluetooth Low Energy (BLE)
< 10 m range
Plug & Play
Connection to terminal,
IPC, tablet, etc.
USB (HID/CDC)
RS232 + power supply (12V)

8
After scanning a barcode, MARK 2 provides feedback
signals haptically by vibrations, acoustically by audio sig-
nals and visually by LEDs. The serial number on the label
standard or mid-range device.
Standard range serial number: M2SR ...
Mid-range serial number: M2MR ...
MARK 2
OVERVIEW TECHNICAL DATA
MECHANICAL PROPERTIES:
Dimensions:............................
Weight:.................................... 40g
ELECTRONIC PROPERTIES:
Battery type: ........................... Lithium polymer
Charge duration:.....................
Number of scans:................... 6000 scans
RADIO TRANSMISSION 868/915 MHz:
European frequency range:.... 863 to 870 MHz on 70 channels
(100 kHZ channel spacing)
USA frequency range: ............ 903 to 926 MHz on 32 channels
(752 kHZ channel spacing)
Transmission power: .............
BLE RADIO TRANSMISSION:
Supported Bluetooth
versions: .................................
Bluetooth Low Energy
4.0, 4.1, 4.2, 5.0
Transmission power: .............
SCAN ENGINE PROPERTIES:
Laser class: ............................ Laser class 2
Reading range: ....................... horizontal, 31°, vertical: 23°
Rotation tolerance:................. + - 60°
Tilt tolerance:.......................... + - 60°
Roll tolerance:......................... 360°
Ambient light: .........................
(direct sunlight)
Fastening rail
Standard range Mid-range
Connection
symbol
Battery
symbol
LEDs

9
ENVIRONMENTAL
CONDITIONS:
Drop test: ................................ > 50 drops from 6ft
(onto concrete)
Protection against dust and
water: ..................................... IP54
Working temperature: ........... -23°F to +122°F
BARCODE TYPES
1D:
Code 128, GS1-128, EAN-128, EAN-13, GTIN-13, EAN-8,
GTIN-8, ISBN-13, ISSN, ISMN, EAN-14, GTIN-14, DUN-14,
SCC-14, ITF-14, EAN-18/NVE, SSCC-18, UPC-A, GTIN-12,
Interleaved, EAN-5, EAN-2, JAN, EAN-99, EAN-Velocity,
ISBN-13 Dual, ISBN-10, Codabar, Code 93, Code 93
128A, Code 128B, Code 128C, MSI Plessey
2D:
POSTAL:
US PostNet, US Planet, UK Postal, Australia Postal,
Japan, Postal, Dutch Postal (KIX)
SMALLEST SYMBOL IN THE
BARCODE:
the mil inch [thousandths of an inch]
(mm) number indicates the size of the
smallest function in the barcode
POSSIBLE DISTANCE:
between MARK 2
and barcode
5 mil (0.127 mm)
Code 128.....................................
7.4 in. (18.8 cm)
to 16.0 in.(40.6 cm)
5 mil (0.127 mm)
PDF417.......................................
8.1 in. (20.6 cm)
to 13.1 in.(33.3 cm)
10 mil (0.254 mm)
..................................
7.0 in. (17.8 cm)
to 17.0 in.(43.2 cm)
100% UPCA ................................
2.3 in. (5.8 cm)
to 38.0 in.(96.5 cm)
20 mil (0.508 mm)
Code 39 ......................................
2.1 in. (5.3 cm)
to 54.0 in.(137.2 cm)
100 mil (2.54 mm)
Code 39 ......................................
11.0 in. (27.9 cm)
to 172.0 in.(436.9 cm)
DECODER READING RANGE

10
The Access Point One S receives the scanned barcode
data from MARK 2 via 868/915 MHz. This barcode data
is transmitted to the end device via USB cable or RS232
cable. In the USB HID mode, the Access Point One S simu-
lates a computer keyboard. A standard connection is em-
ulated in the USB CDC mode. In order to use the USB CDC
mode, under “Device settings - Output
-
ration tool. More detailed information about the conversion can
A RS232 cable establishes a serial connection between
Access Point One S and the end device.
MECHANICAL PROPERTIES:
Dimensions:...........................
Weight:................................... 100g
ELECTRONIC PROPERTIES:
Power supply of Access
Point One S via USB cable: ...
5 VDC (0.5A)
via host computer
Power supply of Access
Point One S via RS232
cable: .....................................
12 VDC (1A)
via power supply PG12-10P55
RADIO TRANSMISSION:
Encryption:............................. AES-128
Transmission range: ............. up to 30m
within a building
ENVIRONMENTAL
CONDITIONS:
Protection against dust and
water: ..................................... IP22
Working temperature: ........... -23°F to +122°F
ACCESS POINT ONE S
OVERVIEW TECHNICAL DATA
LED Label with serial number
Pairing
Barcode
Cable release
opening
RJ45 socket

11
USB CDC CONNECTION:
Baud rate: .............................. All standard baud rates are
supported.
Standard setting: 115.200
Data bits:................................ 8
Stop bits:................................
Parity:..................................... NONE
:............................... OFF
Required Control Signal: DTR
Handshake control:............... OFF
RS232 CONNECTION:
Baud rate: .............................. All standard baud rates are
supported.
Standard setting: 115.200
Data bits:................................ 8
Stop bits:................................
Parity:..................................... NONE
:............................... OFF
Handshake control:............... OFF
USB HID CONNECTION - KEYBOARD LAYOUT:
Croatian, Czech, English (GB), English (US),
French (Belgium), French (Canada), French (France), German
(Germany), German (Switzerland),
Italian, Portuguese (Brazil), Portuguese (Portugal), Spanish,
Slovakian, Slovenian
CONNECTIONS

12
The Charging Station S consists of two charging trays
that charge two MARK 2 devices at the same time. The
charging status is indicated by the LEDs of MARK 2. The
LEDs pulse red while in charging mode. When the battery
is fully charged, the LEDs pulse green constantly. It takes
about 2 hours to charge a MARK 2. The Charging Station S
attachment openings (with M5 screws or cable ties).
MECHANICAL PROPERTIES:
Dimensions: .............................
Weight:...................................... 110g
ELECTRONIC PROPERTIES:
Power supply:........................... 5 VDC (1.2 A)
via power supply SAW-0501200
ENVIRONMENTAL CONDI-
TIONS:
Protection against dust and
water: .......................................
IP20
Working temperature: ............ -23°F to +122°F
CHARGING STATION S
OVERVIEW TECHNICAL DATA
USB-C
Charging tray
Attachment
opening
for M5
screws
Pins
Label with serial numberAttachment opening for
cable ties

13
attached to the right or left glove.
NOTE
The Standard Glove is available in four different sizes (stan-
dard industry sizes 7,8,9,10).
GENERAL:
Packaging unit:......................... 5 gloves per package
Coating:..................................... Nitrile/PU coating
SAFETY & CERTIFICATION:
Standards: ................................ EN388 (2131)
EN420
:............................. RoHS
CE mark
according to EN 420 and EN
388: ..........................................
Abrasion resistance 2
Cut resistance 1
Tear strength 3
Penetration force 1
STANDARD GLOVE
OVERVIEW PROPERTIES
Nitrile/PU coatingFastening rail
Label with size indication

14
is attached to the right or left glove. The Longlife / Palm
are needed or can be worn over other gloves.
NOTE
The Longlife/Palm Trigger is available in three different
sizes (S,M,L).
GENERAL:
Packaging unit:...................... 3 gloves per package
SAFETY & CERTIFICATION:
:.......................... RoHS
CE mark
LONGLIFE/PALM TRIGGER
OVERVIEW PROPERTIES
Fastening rail
Variable
Velcro connection

15
needed or can be worn over other gloves.
NOTE
(S,M,L).
GENERAL:
Packaging unit:...................... 3 or 10 gloves per package
SAFETY & CERTIFICATION:
:.......................... RoHS
CE mark
INDEX TRIGGER
OVERVIEW PROPERTIES
Fastening rail
Variable
Velcro connection

16
CAUTION
Only use MARK 2 in a dry Charging Station S and
only touch with dry hands!
This may otherwise lead to the Charging Station S
not functioning properly.
The pins face down.
Insert MARK 2
in the Charging Station S.
RESULT
MARK 2 pulses red and charges in the Charging
Station S.
NOTE
The LEDs pulse red while in charging mode. When
the battery is fully charged, the LEDs pulse green. It
takes about 2 hours to charge MARK 2.
CAUTION
Only touch the Access Point One S with dry hands!
This may otherwise lead to the Access Point One S system not
functioning properly.
NOTE
The following steps are only needed when connecting via
868/915 MHz.
For a connection via BLE HID; see p. 18
CONNECTION WITH USB CABLE IN USB HID MODE:
1. Connect the USB cable with the
end device.
2. Plug the other end of the USB
cable into the RJ45 socket of the
Access Point One S.
the correct fastening.
RESULT
The LED of the Access Point One S lights up green. The
Access Point One S is connected to the end device.
SETUP OF MARK 2 SYSTEM
1ST STEP: CHARGE MARK 2 2ND STEP: CONNECT THE ACCESS
POINT ONE S (868/915 MHZ)

17
CONNECTION WITH USB CABLE IN USB CDC MODE:
1. Connect the USB cable to the
end device.
2. Plug the other end of the USB
cable into the RJ45 socket of
the Access Point One S. A clear
correct fastening.
under “Device
settings - USB output mode,”
select USB CDC. More detailed
information about this can be found
4. Connect with the COM port
on the end device.
RESULT
The LED of the Access Point One S lights up green.
The Access Point One S is connected to the end device.
CONNECTION WITH RS232 CABLE:
1. Connect the RS232 with the
end device. Connect the power supply
power source.
2. Plug the other end of the cable into
the RJ45 socket of the Access Point
One S. A clear clicking sound con-
3. Check which baud rate must be
set. The baud rate is set to 115,200 as
a standard. At a different baud rate,
tool . More detailed
information about this can be found in
.
4. Select the COM port on the end
device and set the appropriate baud
rate.
RESULT
The LED of the Access Point One S lights up green.
The Access Point One S is connected to the end device.
868
(915)
MHz

18
1. Position MARK 2 on the
fastening rail of the glove.
The pins face down.
2. Push MARK 2 down. A
the correct fastening.
on the glove for about 2
seconds.
RESULT
MARK 2 lights up with all LEDs. You can hear a beeping
sound and feel a short vibration.
MARK 2 is switched on.
NOTE
MARK 2 switches off automatically after 15 minutes
without being used.
CONNECT VIA 868/915 MHz:
on the glove in order to acti-
vate the red crosshairs.
2. Aim MARK 2 crosshairs
on the Access Point One
S and scan the pairing
barcode.
RESULT
MARK 2 lights up twice. You can hear a beeping
sound and feel a short vibration.
MARK 2 is connected to the Access Point One S.
NOTE
Several MARK 2 can be connected to an Access Point
One S.
3RD STEP: SWITCH ON MARK 2 4TH STEP: CONNECT MARK 2 (868/915 MHZ)

19
4TH STEP: CONNECT MARK 2 (868/915 MHZ)
CONNECT VIA BLE HID:
MARK 2 can be used to establish a connection via
Bluetooth Low Energy Human Interface Device (BLE HID)
to an end device. Possible operating systems are: Apple iOS,
Google Android, Microsoft Windows.
The individual steps for connecting to the respective
following. More detailed information about using MARK 2 sys-
support.proglove.com.
PREREQUISITES:
the end device supports at least Bluetooth 4.0 stan-
dard
no interference or physical obstacles (e.g. metal
shelves) interfere with the connection between MARK 2
and the end device
the range between MARK 2 and the end device is
< 10 meters
TIP
Visually label the connected devices (MARK 2 with the end
device) , e.g. using numbering or a color code. This will
TIP
Adhere the pairing barcode to the end device. In this way, the
On a battery-operated end device, the power-saving mode
can lock the end device and MARK 2 simultaneously.
Permanently disable the power-saving mode of the
end device.
The last 5 digits of the serial number attached to the
back side identify MARK 2 among the available Bluetooth
devices.
Read the serial number of MARK 2.
RESULT
To make MARK 2 visible for the end device, the
MARK 2 must be put into pairing mode.
glove in order to activate the
red crosshairs.
2nd Aim MARK 2
crosshairs at the pair-
ing barcode and scan.
RESULT
MARK 2 pulses blue and beeping sounds can be heard.
MARK 2 searches for an end device in pairing mode.
4TH STEP: CONNECT MARK 2 (BLE HID)

20
CONNECT WITH APPLE iOS 11 OR HIGHER:
Under: "Settings - Bluetooth”
activate the Bluetooth option.
Select “MARK 2 - 00000.”
Request.”
you will hear two beeps. MARK 2
will be shown as connected under
“My devices” and is ready for use.
01 02 03
Settings
MARK 2 - 00000
MARK 2 - 00000
RESULT
Other manuals for Mark 2
2
This manual suits for next models
1
Table of contents
Other ProGlove Barcode Reader manuals
