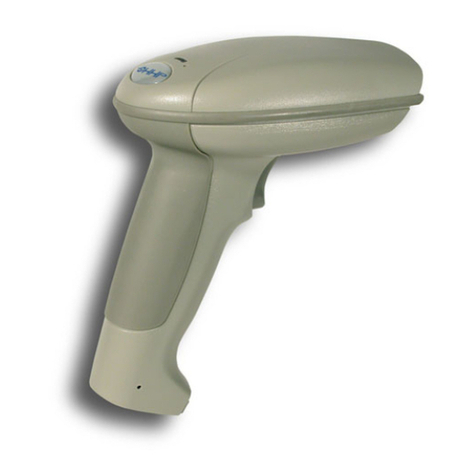
ASP SlimScan Installation instructions

SlimScan™
Full Manual
ASP Microcomputers
456 North Road,
Ormond, Victoria, 3204
Australia
Telephone: (03) 9578-7600
FAX: (03) 9578-7727
World Wide Web: http://www.asp.com.au
ASP Microcomputers is a division of Grayline Holdings Pty Ltd, ACN 004 940 729
SlimScan and SlimScan are trademarks of ASP Microcomputers
Bluetooth is a trademark of the Bluetooth SIG Inc
Version 1a – October 31st, 2007 Copyright © 2007 by ASP Microcomputers


Contents
General information................................................................................1
Quick installation for busy people..........................................................2
Scanning.................................................................................................3
Hands-free stand.....................................................................................4
Changing the interface cable ..................................................................4
Scanner and cradle indicators and beeps ................................................5
Maintenance ...........................................................................................6
Configuration and Programming Guide .................................................7
Basic options.......................................................................................8
Stand options.......................................................................................9
Mode options ....................................................................................10
Beeper settings..................................................................................10
Interface options ...............................................................................11
Barcode symbology Options.............................................................16
Code 39 options ................................................................................17
Codabar options................................................................................19
Code 93 options ................................................................................21
Code 128 and EAN-128 options.......................................................22
MSI/Plessey options..........................................................................23
ITF options........................................................................................24
IATA options....................................................................................25
UPC/EAN options.............................................................................26
Data Editing......................................................................................29
Prefix and Suffix...............................................................................29
Full ASCII Code 39 Table....................................................................30
Copyright, License, and Limited Warranty ..........................................34

Package contents
When you first unpack your SlimScan, please check the contents of the
package against the list below. If any of the items are damaged or
missing, please contact ASP or your dealer immediately.
The SlimScan package contains:
1 ea. Laser Scanner
1 ea. Cradle
1 ea. Cradle mounting bracket
1 ea. Interface Cable (fits between the scanner and the PC)
1 ea. User’s Manual (this document)
Laser Safety
The laser scanner in this product complies with safety standard IEC 60825-1 for a
Class 1 Laser Product. It also complies with CDRH as applicable to a Class 11a
Laser Product. Avoid long term viewing of the laser beam.
Radiant Energy: The laser scanner uses one low-power visible laser diode
operating at 650nm in an opto-mechanical scanner, resulting in less than 3.9μW
radiated power as observed through a 7mm aperture and averaged over 10
seconds.
Do not remove or attempt to remove the protective housing of the scanner -
unprotected laser light with a peak output power of 0.8mW may be accessible
inside.
Laser Light Viewing: The scanning window is the only aperture through which
laser light may be observed from this product. A failure of the scanner motor,
while the laser diode continues to emit a laser beam, may cause emission levels
to exceed those of safe operation. The scanner has safeguards to prevent this
occurrence. If, however, a stationary laser beam is emitted, the scanner should
be disconnected from its power source immediately.
Adjustments: Do not attempt to make any adjustments or alterations to this
product. Do not remove the protective housing of the scanner. There are no
user-serviceable parts inside this unit.
Caution: Use of controls or adjustments or performing procedures other than
those specified in this manual may result in hazardous laser light exposure.
Optical: The use of optical instruments with this product will increase the eye
hazard. Optical instruments include binoculars, magnifying glasses and
microscopes, but do not include normal eye glasses worn by the operator.

SlimScan Full Manual 1
General information
Introduction
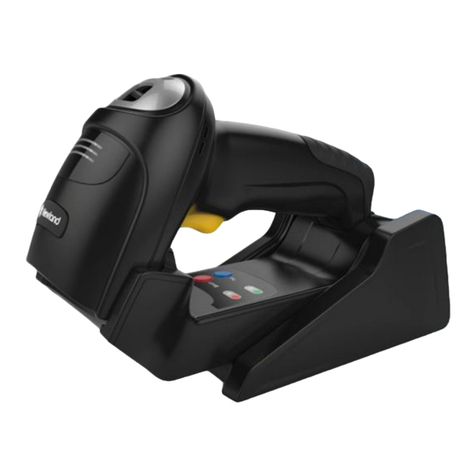
Meet the SlimScan - ASP’s latest high performance laser scanner.
While ruggedly built, the ergonomically designed SlimScan is still
slender and lightweight.
The SlimScan contains a high-speed single line laser engine that
provides real-time scanning and hardware decoding capability, ensuring
an unbeatable first-read success rate. Efficiency is enhanced through
built-in Z- SCAN decoding technology, providing an impressive, fast
and accurate scanner.
The SlimScan automatically reads and interprets the world’s most
popular 1D barcodes, bringing efficiency to any retail, office or
warehouse environment.
The SlimScan is designed with multiple interfaces, each of which can
be selected by changing the interface cable and scanning the relevant
configuration barcodes. The standard SlimScan unit is supplied with a
USB interface cable, since that’s the most popular method of
connection. On special order, PC keyboard wedge or RS-232 interfaces
can be supplied.
The SlimScan is available in black (or beige on special order), and also
as a cordless (Bluetooth) model.

2
SlimScan Full Manual
Quick installation for busy people
Your SlimScan is almost ready-to-go straight out of the box. USB is
the most common interface type, so follow these simple steps to
connect the scanner to your PC.
1. Plug the USB interface cable into the socket at the bottom of the
SlimScan unit. Look into the socket to make sure you have the
orientation correct, then push the connector in until it clicks. It’s
designed to be a tight fit.
2. Plug the other end of the USB cable into a free USB port on your
PC. The red, green and blue LEDs will flash, then after a few
seconds, the SlimScan will sound its power-on beeps.
3. Wait a few seconds more for your PC to detect the new USB
connection and load the built-in Windows drivers.
4. Your SlimScan is now ready to scan!

SlimScan Full Manual 3
Scanning
There are two ways to operate the SlimScan scanner.
Hand-held mode
Out from its cradle, the SlimScan operates in hand-held mode. To scan
a barcode, just aim the scanner at the label and press the trigger.
The SlimScan is designed to read standard size UPC/EAN labels from
approximately 5cm to 20cm from the scan window. If you can’t read a
barcode, try moving the scanner closer to or further away from the
label.
Also, best scanning results are usually obtained by tilting the scanner up
or down a little – reflections can affect the scanning performance.
When barcode decoding is successful, the scanner will beep and the
blue and green LEDs will flash.
Scanning in the cradle
When fitted into its cradle, the SlimScan becomes a hands-free scanner.
The blue LEDs continually flash to show that the scanner is in cradle
mode.
Whenever a barcode is moved into the scanning field, the laser beam
will automatically turn on and the barcode will be scanned - there’s no
need to press the trigger while the scanner is in the cradle.

4
SlimScan Full Manual
Hands-free stand
As described earlier in this manual, when the SlimScan is fitted into its
cradle, it becomes a hands-free scanner, automatically turning on the
laser beam when a barcode is brought into the scanning field. No
trigger operation is needed.
As shown in the diagram on the left below, the scanner can be tilted
through a range of 60 degrees to allow it to be angled to best suit your
application.
To fit the scanner into the cradle, just slide the front lip of the scanner
into the hook at the front of the stand, as shown in the diagram on the
right above.
Changing the interface cable
Before removing the cable from the scanner, you must disconnect the
scanner from your PC, and (with the RS-232 model) make sure that
power is removed.
1. Locate the small pin hole at the bottom of the scanner (see the
diagram above).
2. Insert a pin or unbent paper clip into the hole.
3. Gently pull the strain relief of the cable once a faint “click” is
heard.

SlimScan Full Manual 5
Scanner and cradle indicators and beeps
There are three blue LED indicator bars, and a red and a green LED
indicator on top of the scanner. These LEDs indicate the operational
status of the scanner.
Scanner indicators
LED Status Indication
Red, Green and
Blue LEDs all off
All LEDs will be off if the scanner is not plugged in or is
not powered on.
When the scanner is in stand-by mode, the trigger is
enabled. Present a barcode to the scanner and the red
led will turn on when the scanner is turned on.
Steady Red, Green
and Blue
The scanner is in Boot Load mode (ready for firmware
upgrade).
Steady Red When the laser beam is active, the red LED is on. The
red LED will remain lit until the laser beam turns off.
Single Green and
Blue flash A barcode has been successfully decoded.
Steady Green
A barcode has been successfully decoded, but the
object has not been removed from the scan window.
The scanner is in programming mode.
Steady Red/Green
This indicates that the scanner has a motor or laser
failure. A beep will also be heard if a motor failure
occurs.
The scanner is faulty and must be returned for repair.
Constant Blue
Flashes
When the scanner is on its stand, the laser beam (and
the red LED) will turn on when a barcode is moved into
the scan field. The barcode will be automatically
decoded and transmitted.
Alternate Red and
Green flashes
The scanner detected a power failure. Check that the
scanner is properly connected and powered on.
Scanner beeps
When the scanner is in operation, it provides audible feedback via an
in-built beeper. The beeps indicate the status of the scanner.
Beep Sound Indication
Single beep A barcode has been successfully decoded.
Three short beeps This indicates that the scanner has passed the self-test
and is operating properly (when first turned on).
Two short beeps The scanner is in programming mode.
Continuous beeping The scanner is faulty and must be returned for repair.

6
SlimScan Full Manual
Maintenance
The SlimScan provides reliable and efficient operation with a minimum
of care. Although specific maintenance is not required, to prolong the
operating life of the unit, the following information should be taken into
consideration.
Cleaning the scanning window and housing
Any visible dirt, dust or scratches on the scanner window will degrade
the reading performance. When the scanner is not operating, use a soft
cloth or lens tissue and gently wipe the scanning window lens. Do not
use abrasive wipes or tissues on the window.
Do not, under any circumstances, spread liquid on the unit or submerge
it into liquid.
Never use solvents (acetone, benzene, ether, phenol-based agents, etc)
on the housing or window - solvents will damage the housing finish or
the window.
Inspect interface cables
Regularly inspect the interface cables and connectors - a badly worn or
damaged cable or connecters may affect scanning. Contact your
distributor if you think your cable may need replacing.

SlimScan Full Manual 7
Configuration and Programming Guide
The SlimScan is designed so that the configuration can be changed by
scanning a series of special bar code labels. The configuration will not
be lost when the power is removed from the scanner.
Configuration
To change a parameter, scan the “Start Configuration” barcode at the
top of any page, followed by the desired configuration barcodes, and
finally the “End Configuration” barcode at the bottom of any page to
save the new settings and return to normal operation.
Default settings are highlighted in bold with an arrow.
STOP!
You probably don’t need to
scan any of these barcodes!
These configuration barcodes can dramatically change the way your
SlimScan works. It’s quite possible for you to end up with a scanner
that doesn’t work if you scan the wrong configuration barcodes, or
change many of these options.
If you get yourself into this situation, the easiest way to recover is to
scan these barcodes from the next page:
1. Start Configuration
2. Return scanner to factory defaults
3. End Configuration
Once you’ve scanned these four barcodes, your SlimScan should be
working again.

8
SlimScan Full Manual
Basic options
Start Configuration
Return scanner to factory defaults
Display firmware version
USB defaults
RS232 defaults
IBM PC/AT/PS/2 Keyboard emulation defaults
Abort
(Exit programming mode without any changes)
End Configuration

SlimScan Full Manual 9
Stand options
Start Configuration
Stand options
ÎBlue LED flashes with scanner on stand
Blue LED does not flash with scanner on stand
End Configuration

10
SlimScan Full Manual
Mode options
Beeper settings
Start Configuration
Good read beeper tone selection
Medium beeper tone
ÎHigh beeper tone
Low beeper tone
Beeper disable
Beeper sound selection
Long beep
ÎLoud
volume
ÎMedium
beep Medium
volume
Short beep Soft volume
Ultra short
beep
Ultra long
beep
Good read indication
LED/beep before transmission
Indicate “good read” after the barcode has been
decoded, before transmission to host.
ÎLED/beep after transmission
Indicate “good read” after transmitting the barcode data
to the host.
End Configuration

SlimScan Full Manual 11
Interface options
USB options
Start Configuration
USB interface
International Keyboard mode.(ALT method)
ÎKeyboard language support — USA
Keyboard language support — GERMANY
Keyboard language support — FRENCH send scan
code
Keyboard language support — SPANISH send scan
code
Keyboard language support — Japanese
USB Message Terminator
ÎKeyboard terminator — Enter
Keyboard terminator —Tab
Keyboard terminator — none
End Configuration

12
SlimScan Full Manual
Keyboard wedge options
Start Configuration
Caps lock on
ÎCaps lock off
Enable function key emulation
ÎDisable function key emulation
ÎSend numbers as normal data
Send numbers as keypad data
Keyboard Wedge Output Terminator
ÎKeyboard terminator — Enter
Keyboard terminator — Tab
Keyboard terminator — None
End Configuration

SlimScan Full Manual 13
RS-232C options
Start Configuration
RS-232 Baud Rate
115200
19200
Î9600
4800
2400
1200
RS-232 Parity Bits
ÎNo parity
Even parity
Odd parity
Mark parity
Space parity
RS-232 Stop Bits
Î1 stop bit
2 stop bits
End Configuration

14
SlimScan Full Manual
Start Configuration
RS-232 Data Bits
Î8 data bits
7 data bits
RS-232 Handshaking Protocol
ÎNo handshaking
XON/XOFF
RTS/CTS
End Configuration

SlimScan Full Manual 15
Start Configuration
Enable Beeper on <BEL> character
ÎIgnore Beeper on <BEL> character
RS-232 Message Terminator
ÎRS-232 message terminator — CR/LF
RS-232 message terminator — CR
RS-232 message terminator — LF
RS-232 message terminator — Tab
RS-232 message terminator — STX/ETX
RS-232 message terminator — EOT
RS-232 message terminator — none
End Configuration

16
SlimScan Full Manual
Barcode symbology Options
The configuration barcodes in the following section allow you to set
various options for individual barcode symbologies. Most options
should be clear, but a few need further explanation.
Setting min and max barcode length
The minimum and maximum length options can only be set
individually for each barcode symbology.
1. Scan the Start Configuration barcode at the top of the page.
2. Scan the Set minimum length or Set maximum length barcode
from the page for the required symbology.
3. Use the ASCII digits 0 to 9 from the Full ASCII Code 39 Table on
page 31 (in the right column) to set the length. For example, to set a
length of 6, just scan the ASCII 6 (hex code 36) barcode. To set a
length of 14, scan the ASCII 1 (hex code 31) then the ASCII 4 (hex
code 34) barcodes.
4. Scan the Save minimum/maximum length setting barcode.
5. Scan the End Configuration barcode at the bottom of the page.
Note: If you set the minimum and maximum lengths to the same value,
the scanner will only read barcodes of that length for that symbology
and no others.
Setting prefix and/or suffix characters
A common requirement is to add a prefix or a suffix to each barcode
scanned. Note that prefix and suffix characters are global – that is, they
affect all barcode symbologies at once.
1. Scan the Start Configuration barcode at the top of the page.
2. Scan the Set prefix or Set suffix barcode (on page 29).
3. Use the Full ASCII Code 39 Table on page 31 to set the prefix or
suffix char. For example, to set a tilde ~, scan the ASCII ~ (hex
code 7E) barcode from the end of the right column on page 33. Or,
to set a tab, scan the HT Function key “TAB” (hex code 09)
barcode from the left column on page 30.
4. Scan the Save prefix/suffix settings barcode (on page 29).
5. Scan the End Configuration barcode at the bottom of the page.
Table of contents
Other ASP Barcode Reader manuals

ASP
ASP Zapper Z22000 User manual

ASP
ASP LaserTraq User manual

ASP
ASP Zapper Tornado 2D User manual

ASP
ASP LongReach User manual

ASP
ASP zapper User manual

ASP
ASP Z4 DataTraq User manual

ASP
ASP Portable BCR User manual

ASP
ASP Zapper Tornado BT User manual

ASP
ASP Barcode Zapper User manual

ASP
ASP Zapper Tornado 2D User manual