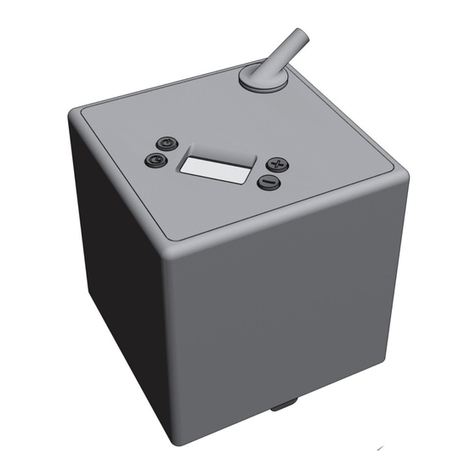
Prolitec Air/Q 310 User manual

Air/Q™310
User Guide
Revised 15 Jan. 2013
Original Instructions

©2010 Prolitec, Inc.

Table of Contents
About Air/Q™310................................................................................................................. 2
Unpacking ........................................................................................................................... 3
Installation ........................................................................................................................... 5
General............................................................................................................................ 5
Estimating Cartridge Life ................................................................................................ 6
Room-Size Table............................................................................................................. 7
Appliance Location ......................................................................................................... 7
Wall-Mounting Air/Q 310 ................................................................................................ 8
Starting Up ........................................................................................................................ 15
Features and Controls .................................................................................................. 15
Setting Up the Cartridge............................................................................................... 16
Programming the Appliance ......................................................................................... 18
Setting Scent Intensity.................................................................................................. 19
Scent Control................................................................................................................ 20
The Last Step................................................................................................................ 20
Maintenance...................................................................................................................... 20
Cartridge Change.......................................................................................................... 20
Cartridge Change Maintenance Checklist Items .......................................................... 21
Changing an Appliance................................................................................................. 22
General Care................................................................................................................. 22
Applications....................................................................................................................... 23
Ambient Settings .......................................................................................................... 23
Scent Media.................................................................................................................. 24
Odor Control ................................................................................................................. 25
Aromatherapy and Performance Scenting ................................................................... 26
Precautions ....................................................................................................................... 27
Appliance Precautions .................................................................................................. 27
Frequently Asked Questions (FAQs).................................................................................. 28
Specifications.................................................................................................................... 31

About Air/Q™310
Welcome to a whole new world of air treatment from Prolitec, the technology leader
in air care with scent. The Air/Q 310 appliance is the most advanced commercial
air-treatment system on the market today. It is the world’s first fully adjustable
commercial air-treatment system engineered to serve indoor spaces ranging in
size from 200 to 30,000 cubic feet (10 to 850 cubic meters).
Air/Q 310 is a patented, computer-controlled, always-on system capable of main-
taining a constant, uniform and controlled level of scent or odor neutralizer. The basic
technology of Air/Q 310 has been tested and proven in demanding commercial
environments such as retail stores, malls, hotel lobbies and other public spaces
where scent is used to enhance the environment, market a product, or erase an odor.
Air/Q 310 uses a single board computer to make fine adjustments to scent intensity
and tailor performance to room size and conditions. A quick-change disposable
and recyclable fragrance cartridge changes out in a matter of seconds rather
than minutes.
The classic design blends well into any environment. Air/Q 310 comes standard in
Textured True Black or Eggshell White. On special order, Air/Q 310 can be supplied
in any color. Air/Q 310 can also be concealed in a fixture, cabinet or behind a wall-
mounted shroud to match any interior design.
Air/Q 310 can use 100V to 240V power sources and comes complete with power
plugs for every country. Air/Q 310 is designed to be mounted on a wall with a
flush-mounted power source behind it or, on special order, it can be configured for
attachment to ceiling track-lighting systems, which act as both a source of power
and a method of attachment.
Air/Q 310 is simple to install and program for specific room size, airflow conditions,
and desired scent intensity. Minimal maintenance is required beyond the periodic
change of the disposable fragrance cartridge, inspection and annual replacement of
two o-rings, and a simple wipe down or dusting of exterior surfaces. Once installed
in the right location, Air/Q 310 will outperform any other system, providing
completely uniform scent distribution.
2

About Air/Q™310
Air/Q 310 is green and eco-friendly. Air/Q 310’s advanced technology creates a
scent effect with a smaller quantity of fragrance ingredients than any other method.
The chemicals employed in making Air/Q 310 fragrances are fully compliant with
the most restrictive air-quality and inhalation standards. Air/Q 310 generates no
harmful VOCs and uses no ethanol or propellants. Quite simply, used as directed,
Air/Q 310 is the greenest, most eco-friendly way to introduce scent into an interior
space with no negative impact on indoor air quality. This is not an accident. The
scientists and engineers at Prolitec are committed to the highest ecological and
human safety standards.
This User Guide is easy to read. It is also important to read. Air/Q 310 is a
high-performance appliance that, installed and used correctly, will meet the
most demanding requirements.
Unpacking
Remove Air/Q 310 from the container. The following items should be included:
1. Air/Q 310 Appliance
2. Power Supply
3. Two Keys
4. Wall-mounting kit containing dry-wall anchors and screws (4 each) and a
mounting bracket
5. Cartridge Removal Tool
6. One plastic output-extension tube – clear for white
appliance, blue for black appliance
3

Unpacking
1
2
3
4
5
6
4

Installation
General
1. Location: Air/Q™310 is designed for permanent installation on wall surfaces
over a 110 to 240V plug or hard-wired power source and located well above
and out of human reach. Air/Q 310 is NOT a portable or table or shelf-top unit.
2. Service Area: The service area range of Air/Q 310 is from 200 to 30,000 cubic
(10 to 850 cubic meters). Of course this can vary significantly depending on
airflow, number of fresh air changes per hour, temperature and humidity.
Air/Q 310 can be adjusted from 1 to 50 to accommodate these variations.
3. Configuration: Air/Q 310 is available in a wall-mount configuration, which has
a 110-240V power source and plug in the back of the appliance, and must be
placed over the power source. Special power supply adapters and plugs are
provided.
4. Colors: Air/Q 310 comes standard in black or white, and can be special
ordered in any color.
5

Installation
Estimating Cartridge Life
Estimating how long a cartridge will last and the number of days between services
is critical to performing an installation that can be serviced efficiently. This includes
determining the number of Air/Q™310s needed for a space. Here is the formula
and table for making this determination.
The variables are as follows:
L = Cartridge Life in Days
C = Cartridge Size in milliliters
S = Intensity Setting
H = Operating Hours per Day
D = Days between services
Q = Number of Air/Q 310s
Days Life for Air/Q 310
L = C / ((S/50) * (H))
You can vary any of these values except L.
For example: a 265 ml cartridge in an Air/Q 310 operating for 12 hours a day on
setting 35 would last for 31 days.
The Intensity Setting for one Air/Q 310 can be roughly estimated using this
Room-Size Table (see following page).
6

Installation
Room-Size Table
Output
Level Range
Room Volume
Range in CFT
Room Volume
Range in m3
1 thru 5 200 – 800 6 – 23
6 thru 10 1,000 – 1,700 28 – 48
11 thru 15 1,900 – 2,800 54 – 79
16 thru 20 3,000 – 4,000 85 – 113
21 thru 25 4,200 – 5,300 119 – 150
26 thru 30 5,600 – 6,800 159 – 193
31 thru 35 7,200 – 8,600 204 – 244
36 thru 40 8,900 – 10,500 252 – 297
41 thru 45 10,900 – 12,600 309 – 357
46 thru 50 13,100 – 15,000 371 – 425
These settings are suggested as a starting point. Start on the lower end of the
range and adjust after 15 minutes. Room size, number of fresh air changes per
hour, temperature, humidity and user preference will determine the final setting.
Appliance Location
1. Placement of Air/Q™310 appliance is the KEY TO OPTIMAL PERFORMANCE.
It is important to identify a wall or track-light location where the output of
Air/Q 310 can use, rather than fight, the natural air currents in a room.
2. Air currents in a room are determined by using a SMOKE TEST KIT available
from Prolitec or any source of smoke or vapor, such as a candle or match.
3. To conduct a smoke test, stand at the entrance of the room in front of the door
and observe the direction of the smoke or vapor. If the smoke drifts into the
room Air/Q 310 appliance should be installed somewhere near the door.
7

Installation
See Figure 1. If the smoke drifts out of the room,the Air/Q™310 appliance should
be placed on the wall furthest from the door. See Figure 2. If there is no clear
direction that the smoke travels or it travels upward into the air-conditioning return
grill, find a position near the air-conditioning supply grill. See Figure 3.
NOTE: The location of Air/Q 310 MUST NOT be near an HVAC return grill, exhaust
fan or vent, or an open door or window through which air is leaving the space.
Remember, you want to work with the natural air flow, not against it.
Wall-Mounting Air/Q 310
Step 1 – The Electrical Source
Before the Air/Q 310 appliance can be mounted, a qualified electrician must
install an electrical outlet at the position you have decided to place Air/Q 310.
The appliance is then mounted over the outlet and plugged in.
Figure 1
Smoke flows
away from door
Smoke Tube Smoke Tube
Smoke Tube
Figure 2
Smoke flows
back toward door
Figure 3
Smoke travels
toward grill
8

Installation
In some locations local codes or rules require that the main power source be
located beside the appliance. This will require an Air/Q™310 hardwiring kit. If the
appliance is PERMANENTLY CONNECTED in this way, a readily accessible
disconnect device must be used. Consult with your electrician.
If it makes sense to plug the appliance into an outlet that is near but not behind the
appliance, a rectangular, plastic wire-concealment conduit should be used.
Step 2 – Mounting Kit, Parts and Tools
The mounting kit provided with Air/Q 310
(see details on pages 3-4) includes a mounting
plate, which holds the appliance to the wall,
and 4 screws and wall anchors suitable for
plastered drywall — 2 short flat-head screws
and 2 longer round-head screws. If you have
another surface you will need to get anchors
suitable for the wall material and screws that
work with these anchors. The screws need
to be the same length as the ones provided —
2 long round-head screws and 2 short flat-
head screws. You will need the following tools:
1. A good level to help you make the mounting plate exactly horizontal.
2. A hammer.
3. A Phillips screwdriver to match the screws provided or whatever screwdriver
matches the screws needed to attach to the anchors you have chosen.
4. A pointy tool like a small screwdriver to insert through the holes on the
appliance to mark the right spot for the anchors.
5. A Drill.
9

Installation
Step 3 – Position the Mounting Bracket
Place the mounting bracket directly over the power outlet (if hardwired or plugged
elsewhere, position the mounting bracket to the side of the power source). Use the
level to make sure the mounting bracket is horizontal. While holding the bracket
level, use a pointy tool, screw or screwdriver to mark the location of the top two
wall anchors. Check again with the level to ensure the bracket is horizontal.
10

Installation
Step 4 – Installing the Top Anchors
Set the mounting bracket aside. Use an electric drill to make a 1
/8" hole at the exact
location you marked. This will serve as a guide for the anchors. Use a hammer
to tap the anchors in far enough so they stay well in position. Then screw them
straight into the drywall. Avoid screwing them in at an angle.
Hint: If you use an electric drill with a Phillips driver head, make sure that the head
fits the anchor perfectly, as the anchor strips easily. Set the drill to a slow rotation.
Step 5 – Marking the Bottom Anchor Holes
Now you can mark the holes for the bottom anchors using the mounting bracket
as a template. Hold the mounting bracket in place and screw the flat-head screws
half way into the top anchors. This will prevent the bracket from moving. Now use
the pointy tool to mark the location for the two bottom anchors. Unscrew the top
screws and set the bracket aside.
11

Installation
Step 6 – Drilling the Bottom Anchor Holes
Drill a 1
/8" hole as the guide for the anchors at the exact spot you have marked.
Hammer the anchors in just enough to set them in place, then screw them
in straight.
Step 7 – Hanging the Mounting Bracket
Hang the mounting bracket by holding the bracket so the top holes match up with
the anchors, then screw the 2 flat-head screws through the hole in the bracket into
the anchors. Tighten the screws firmly, but do not crack the bracket.
Step 8 – Positioning the Appliance
Now take the appliance and pull out the yellow tab at the bottom.
Take the power supply and plug the round plug into the hole that is located in the
recess on the back of the appliance. The power-supply block can accommodate
several different plugs for every county. Install the correct one and plug it into the
wall receptacle.
12

Installation
NOTE: Remember that the standard installation is to position the appliance right
over the power source, storing the power-supply block and the power cord in the
recess in the back of the appliance (US version only). To make this easy, do not
untie the power cord and take just enough wire to make the connection.
Step 9 – Fitting the Appliance in Place
Place the appliance so that the big holes in the top of the back cover fit over the
rounded locking posts. In doing this, make sure the appliance is flush with the wall
and the posts are in the holes of the appliance. Slide the appliance downward to
lock on the posts. Sometimes this slide requires a slight tap on the top of the
appliance with your hand.
Plug
Location
Cord Channel
Outlet
13

Installation
Step 10 – Mounting the Appliance in Place
Now unlock and open the door and insert the long round-head screws into the
holes in the lower corners and into the anchors. Tighten the screws firmly.
14

Starting Up
Features and Controls
Output
Ports
Lock
Air Stem
Fragrance
Cartridge
Programming
Panel
15

Starting Up
Setting Up the Cartridge
1. Use the key to unlock and open the door.
2. Prepare the cartridge.
•Removethebigplugfromtheair-intakeport(a)ontheatsurface(backside)
of the top of the cartridge.
•Removetheplugfromthetopport(b)ofthecartridge.
•NOTE: FRONT Output Port must remain plugged for the cartridge to operate.
(a) Air
Intake Port
16
(b) Top
Output
Port
(c) Front
Output
Port

Starting Up
3. Insert the cartridge into the recess so that the air-intake port fits over the white
air stem.
4. After inserting the cartridge, insert the 1-inch plastic tube into the cartridge
through the port on the top of the appliance. (Remove tube when changing
cartridge.)
17

Starting Up
5. If the appliance has been previously programmed (see Programming the
Appliance below), simply press the power button, close and lock the door.
Programming the Appliance
1. Unlock and open the door.
2. Turn on the power by pressing the ON/OFF button in the upper left corner of the
control panel.
3. Set the Clock.
•TurnthedialtoSetClock.Thetimewillblink.
•Adjustthetimeforwardorbackwardusingthe+/– buttons on the right side
of the control panel. AM or PM is indicated on the lower right side of the
time digits.
4. 24/7 Mode.
•IfyouwantAir/Q™310 to run continuously — 7 days a week, 24 hours
a day — turn the dial to 24/7. If not, skip to Step 5.
5. Set specific Start/Stop Times.
•TurnthedialtoStart.
•Adjusttheclocktothetimeyouwanttheappliancetostarteachdayusing
the +/– keys.
•TurnthedialtoStop.
•Adjusttheclocktothetimeyouwanttheappliancetostopeachdayusing
the +/– keys.
•TurnthedialtoProgram.
Setting Scent Intensity
1. Determine the approximate size of the room in cubic feet or cubic meters by
multiplying length x width x ceiling height.
18
Table of contents
Other Prolitec Air Cleaner manuals
