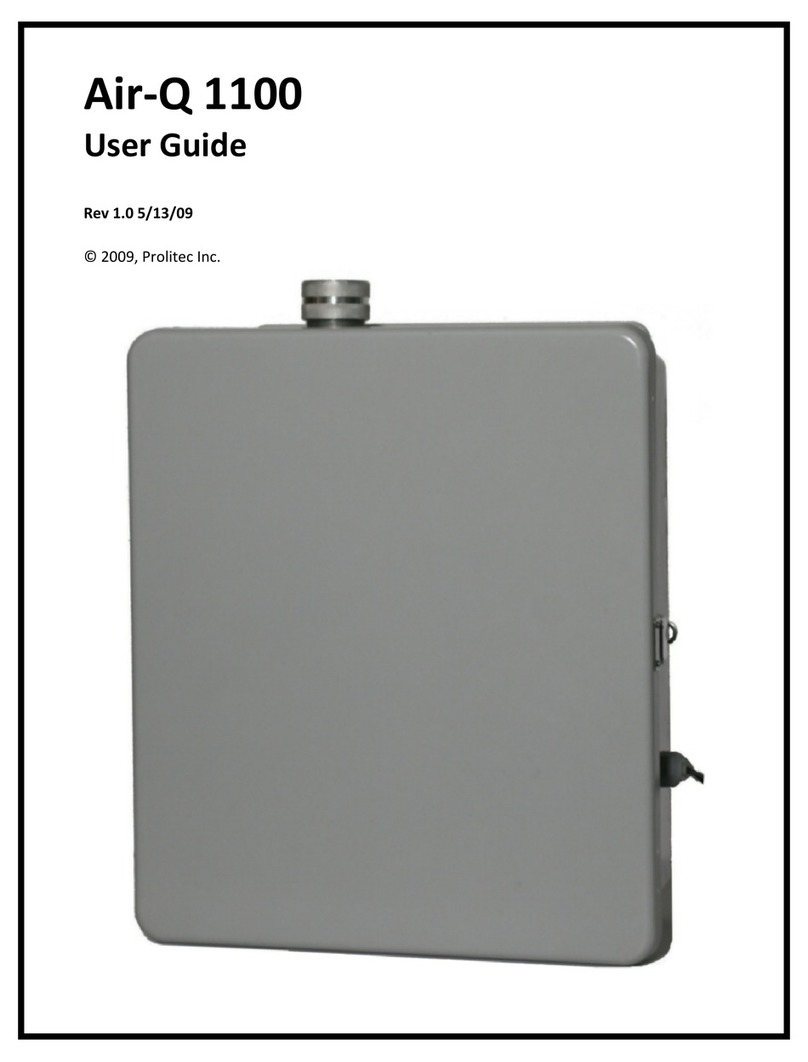
Prolitec Air/Q 1100-Avian User manual


Table of Contents Air/Q 1100-Avian User Guide
© 2010 Prolitec, Inc.
I. Introducon to Air/Q 1100-Avian ......................................................................................................... 1
II. Safety Precauons ................................................................................................................................ 2
A. Appliance Precauons
B. Avian Plus Fragrance Precauons
III. Appliance and Controls ....................................................................................................................... 3
IV. General Maintenance .......................................................................................................................... 4
A. Changing the Cartridge
B. O-ring Replacement
C. Air Filter Replacement
C. Baery Replacement
V. Commissioning the Air/Q 1100-Avian ...................................................................................................6
A. Geng Started
B. Seng the Clock
C. Using the Program Mode
D. Using the 24/7 Mode
E. O Cycle
VI. Bird Control General Consideraons .................................................................................................. 7
A. It’s the Scent
B. Installaon Objecve
C. How Many Machines?
D. Posioning Consideraons
E. Programming
VII. Installaon: Fragrance Director Aachment ...................................................................................... 9
VII. Installaon: Direct Indoor Fan ......................................................................................................... 10
A. Installaon Kit
B. Pre-Installaon Checklist
C. Appliance Posioning
D. Appliance Installaon
E. Diusion Fan Installaon
IX. Installaon: Diusion Director ........................................................................................................... 15
A. Installaon Kit
B. Pre-Installaon Checklist
C. Appliance Posioning
D. Appliance Installaon
E. Diusion Director Installaon
VIII. Installaon: HVAC System Diusion ............................................................................................... 22
A. Installaon Kit
B. Pre-Installaon Checklist
C. Appliance Posioning
D. Appliance Installaon
E. Injector Tube Installaon
X. Troubleshoong ................................................................................................................................. 27
XI. General Care and Customer Support ............................................................................................... 28
XII. Specicaons .................................................................................................................................... 30

Air/Q 1100-Avian User Guide
© 2010 Prolitec, Inc.
I. Introducon
Avian Plus™ is an advanced air treatment system designed to maintain a uniform and ultra-low concentraon
of scent in interior spaces where birds may roost. Avian Plus™ has three principal components – (1) recyclable
cartridge of Avian Plus™ fragrance lasng a month or more; (2) the Air/Q 1100 Avian delivery system and; (3)
an Air/Q fragrance director suitable for the situaon.
System operaon is straighorward and requires no aenon. The wall-mounted Air/Q 1100 Avian delivery
system converts the liquid fragrances into ultra-ne droplets which are transported by the fragrance director as
a dry and invisible fog to the areas to be treated. The dry droplets are 1/50th the diameter and 1/1,000,000th
the weight of a mist droplet insuring uniform distribuon of scent without leaving residues on exposed sur-
faces. The Air/Q 1100 Avian is computer-controlled and programmable to automacally maintain a constant
scent concentraon and to precisely match the size of the space to be treated.
There is no praccal limit on the size of spaces that can be treated. Avian Plus™ is a modular system. Depend-
ing on air ow condions, each unit will handle up to 150,000 cubic feet. Mulple units can be employed to
serve larger spaces.
There are four Avian Plus™ fragrances to choose from: Linen (SKU: 2001), Fruit (SKU: 2002), Rain (SKU: 2003) &
Citrus (SKU: 2004). Each is designed to cancel odors and create an ambient environment which is pleasant only
to humans.
System maintenance is minimal and limited to periodic fragrance cartridge replacement and surface cleaning.
1 This is calculated using the formula for the volume of a sphere where V is the volume or weight and r is the
radius of the droplet.
1
Introducon

Safety Precauons
Air/Q 1100-Avian User Guide © 2010 Prolitec, Inc.
II. Safety Precauons
A. Air/Q 1100-Avian Appliance Precauons:
1. DO NOT posion Air/Q within the reach of young children or pets.
2. The appliance must be operated in an upright or vercal posion and rmly aached to a vercal
surface such as a wall or a duct.
3. The appliance should NOT be used with the door in the open posion. The door is opened only to
perform a cartridge or program change.
4. NEVER put your nose to the output of Air/Q 1100. Within 12 inches of the output, the fragrance is
highly concentrated. The improper inhalaon of high concentraons of fragrance may cause irritaon
including watery eyes, headache, cough and upper respiratory discomfort.
5. The appliance is built to be plugged into an 110VAC or 220VAC power outlet. Must be used only with
the approved and included power supply. The UL and CE compliant power supply converts power to
12V DC to power the appliance.
6. Unplug before cleaning.
Foronlinesafetyinstrucons,visitwww.prolitec.com/manuals/manuals.htm
B. Avian Plus Fragrance Cartridge Precauons
1. Read the Consumer Product Safety Informaon Sheet and the Material Safety Data Sheet enclosed
provided with each shipment of Cartridges. Insure that these informaon sheets are available for
review by employees.
2. Use latex gloves to handle a Cartridge to avoid the liquid geng on hands. The fragrances are
formulated so as to not be harmful in contact with the skin, but the concentrated nature of the Avian
Plus fragrances may make the scent dicult to remove from hands and skin.
3. Wash your hands aer all contact with Cartridges or fragrance and air treatment Avian Plus fragrances.
If there is contact with the eyes, irrigate the eye with fresh water for 5 minutes. If there is any eye irrita-
on, consult a physician immediately.
4. Cartridges must be provided by and contain formulaons which have been cered by Prolitec.
2


Air/Q 1100-Avian User Guide
© 2010 Prolitec, Inc.
B. O-Ring Replacement – each year or as needed
1. Replace the air nozzle’s 3 amber O-rings (Part number 8211) if worn down or swollen. A parally full
cartridge may indicate an air leak between the air nozzle and the cartridge, reducing plume output.
Replace as needed and/or each year for preventave maintenance.
2. If there is any Avian Plus fragrance that leaks during the cartridge installaon, clean it carefully with a
paper towel and some ethanol or another alcohol.
C. Air Filter – every 6 months or as needed
Replace air lter (part number 10417) if dirty. If any dust has gathered inside the unit, remove it with a
damp paper towel.
D. Baery Replacement – approx. every 2 years:
(requires3VoltCR2032LithiumBaery,partnumber8111)
1. Unlatch and open the door to access the enclosure.
2. Using a pair of tweezers or needle-nose pliers, remove
baery from the center opening of the oval grommet.
The grommet is located on the front of the blue bracket
below the operang buons.
3. Insert the new CR2032 baery. The posive side of the
baery should face your right while looking at the front
of the appliance. The baery will have a + or – marking
on a side.
5
General Maintenance

Air/Q 1100-Avian User Guide © 2010 Prolitec, Inc.
V. Commissioning the Air/Q 1100-Avian
A. Geng Started
1. Open the door and unlock if needed.
2. Turn on the power by pressing the ON/OFF buon in the upper le corner of the control panel. (Make
sure the appliance is plugged in to the AC power outlet.) The power buon will light blue.
B. Seng the Clock
1. Turn the dial to Set Clock. The me will blink.
2. Adjust the me forward or backward using the +/– buons on the right side of the control panel. AM or
PM is indicated on the lower right side of the me digits. Hold + to fast forward.
C. Using the 24/7 Mode (recommended)
If you want the Air/Q™ 1100 to run connuously — 7 days a week, 24 hours a day — turn the dial to 24/7.
24/7 Mode is recommended because it is assumed that the openings which allow the entry of birds remain
even when the structure is not operaonal. If this is not the case, you can program AvianPlus™ to start and
stop at specic mes of day, describe below in UsingtheProgramMode.
D. Using the Program Mode
1. Seng specic Start/Stop Times.
• Turn the dial to Start.
• Adjust the clock to the me you want the appliance to start each day using the +/– keys.
• Turn the dial to Stop.
• Adjust the clock to the me you want the appliance to stop each day using the +/– keys.
2. Turn the dial to Program to operate with the specied start/stop mes.
E. O Cycle
For intensity level sengs 1-49, there will be a 7-minute o cycle at various intervals based on the seng.
Level 50 will be always on while in 24/7 mode or within the programmed operaonal period.
6
Commissioning the Air/Q 1100-Avian

Air/Q 1100-Avian User Guide
© 2010 Prolitec, Inc.
VI. Bird Control General Consideraons
A. It’s the scent
Bird control with the Avian Plus system is simple. The magic is in the Avian Plus fragrances which have
been designed to be pleasant only for humans.
B. Installaon Objecve
The objecve of any Avian Plus bird control installaon is also simple – deliver the scent to those places
where birds are likely to congregate.
C. How many machines?
The number of machines and the amount of scent (concentraon) needed to clear the birds will depend on
two main variables.
1. Size of the space in cubic feet. That’s the enre enclosed space not just the area frequented by birds.
Step it o length x width gives you square feet x ceiling height for cubic feet.
2. Quanty of fresh air ow in the space because fresh air dilutes the scent concentraon in the air. This
is an important variable but oen very dicult to esmate accurately.
The rule of thumb is that one (1) Air/Q 1100-Avian will service UP TO 150,000 cubic feet. So you will need
at least one appliance for every 150,000 cubic feet. If the air ows are unusually strong with a lot of fresh
air, you may need more machines.
D. Posioning of the appliances for wall mounng must consider the following:
1. Direcon of air currents in the space. It is important to not ght the natural air currents in a space.
The rule: always posion the appliance(s) upwind so the natural ow of air helps to move the scent to
where the birds are.
2. Determining air ow takes a lile me. Usually spaces, even quite large ones, have a natural ow of
air either into or out of the portals or openings. A space with “posive pressure” pushes the air to
the outside. A space with “negave pressure” pulls the air in. Make a rough map of the space on a
piece of paper. Stand near the door, light a candle and then snu it out and watch the direcon of the
smoke. Do this all over again in dierent locaons drawing arrows to indicate the direcon of air ow
unl you can conrm a general direcons. Keeping in mind where the birds are, this map will tell you
where to posion the wall mounted appliances for opmal ow of scent to the birds.
3. Ceiling fans can help or hurt. If the birds are above ceiling fans pushing the air down, then there are
only 2 choices:
a) Reverse the fan direcon so they are pulling the air up; or
b) Use the oponal Diusion Director so the output end is above the fans. (Seep.12)
7
Bird Control General Consideraons

Air/Q 1100-Avian User Guide © 2010 Prolitec, Inc.
E. Programming the Air/Q 1100-Avian
Programming is simple from instrucons on the machine itself. Basically, you can program start and stop
mes and the intensity level.
1. Scent intensity can be adjusted from 1 to 50. Turn the power on and use the +- keys to change inten-
sity. For spaces smaller than 150,000 cubic feet consult the Sengs Table below. It is only a guide and
subject enrely to condions in the space.
Sengs Table
Output Level Range Sengs Space to be treated
(in Cubic Feet)
Space to be treated
(in Cubic Meters)
1 thru 5 1,800-8,000 50-230
6 thru 10 8,000-17,000 230-480
11 thru 15 17,000-28,000 480-790
16 thru 20 28,000-40,000 790-1,130
21 thru 25 40,000-53,000 1,130-1,500
26 thru 30 53,000-69,000 1,500-1,900
31 thru 35 69,000-86,000 1,900-2,400
36 thru 40 86,000-104,000 2,400-3,000
41thru 45 104,000-126,000 3,000-3,600
46 thru 50 126,000-150,000 3,600-4,200
2. Start mes can be set by turning the dial to start and then using the +- keys to set the start me. The
Stop me is set the same way.
Hint: There are many variables involved in nding the right sengs
for Avian Plus. The installer should experiment to determine the
lowest seng level that is eecve in controlling birds. Start low
and move it up as needed unl the birds scram.
F. The Last Step
1. Set the dial to either 24/7 (recommended) or Program if you have programmed a start/stop me (see
CommissioningtheAir/QAvian on page 6 for details).
2. Make sure the power is on. The blue light will show through the buon.
3. Close and lock the door, storing the key in a known place.
8
Bird Control General Consideraons

Air/Q 1100 Avian User Guide
© 2010 Prolitec, Inc.
Installaon: Fragrance Director Aachment
VII. Choosing a Fragrance Director
Each Air/Q 1100 Avian must be installed with a fragrance director to transport the dry
fragrance vapor to the desired locaon1. There are two fragrance directors to choose
from: (a) the Direct Indoor Fan (KIT1100FAN), suitable for ceiling heights less than 20’
and (b) the Diusion Director (KIT1100DD), an extendable director which starts at 6.5’
and is extendable by addional 5’ secons (KIT1100DUCT), up to any height that is
needed to reach the areas frequented by birds.
There are two main consideraons in choosing a fragrance director: (1) the height of
the ceiling and (2) convenience of machine access for servicing. It is usually best for the
Air/Q 1100 Avian to be within easy reach with a manageable ladder to change fragrance
cartridges and service the machine. In most case the unit is mounted no higher than 12’
o the oor. If the ceiling height is more than 20’ then you probably want an Extend-
able Director with sucient extensions to come within 5’ to 10’ of the ceiling.
For example, if the ceiling height is 50’ and the raers range from 40’ to 50’ o the oor
area, then you need to get the fragrance output to around 35’ to 40’. Start by mounng
the Air/Q 1100 Avian at an accessible 10’ o the oor. The extendable director will give
you 6.5’ plus the machine itself is 18”, for a total of 8’, so you are 22 feet from the birds.
You need about 20 more feet, or four 5’ extender secons. This gets you within range at
38’. The result is a highly eecve system delivering scent to just the right area from a
machine which is easy to access and service.
NOTE:Besuretomountthemachineupwindofthenaturalairowinthespace.This
meansthenaturalairowwillworkwithyouinmovingtheinvisibledryfogofscentto
areaswherethebirdsarelocated.
1The Air/Q 1100 Avian may also be installed to diuse via an HVAC system. This is an uncommon installa-
on for reaching bird roosng areas, but for those situaons, installaon instrucons for HVAC diusion
are provided at the end of this manual.
A. Direct Indoor Fan B. Diusion Director
9

Air/Q 1100 Avian User Guide © 2010 Prolitec, Inc.
Installaon: Direct Indoor Fan
VIII. Installaon: Direct Indoor Fan
A. Installaon Kits
• Installaon Kit for Appliance (included)
1. One (1) Air/Q 1100-Avian appliance (not pictured) with:
2. Four (4) dry wall anchors for mounng in drywall
3. Four (4) lead anchors for mounng in concrete
4. Four (4) screws and (4) washers for mounng in drywall and concrete
5. Four (4) #10 self-tapping sheet metal screws for mounng in sheet metal
6. Five (5) feet of large cable raceway for power cable
7. Hose connector and hose clamp (for cartridge aachment)
10
6
7
2
5
3
4


Air/Q 1100 Avian User Guide
© 2010 Prolitec, Inc.
Installaon: Direct Indoor Fan
6. Lube the inside of the grommet if needed to allow the Injector hose to easily slide through. Leave
approximately 2 inches of hose length inside the appliance to provide enough play when replacing the
cartridge. Tighten aluminum cap of waterproof collar to ensure a waterght seal.
7. Connect the power cord to a juncon box or connect AC plug to a nearby outlet.
E. Diusion Fan Installaon
Fig.3Fig.4Fig.5Fig.6
1. The Diusion Fan is posioned directly above the
appliance hose output port located on the top le of the
appliance but no more than 4-1/2 feet above it. (Fig.3)
2. Use the Diusion Fan assembly as a template to
mark the locaon of the mounng holes. (Fig.4)
3. For installaon on drywall, drill the 3 anchors into drywall
and install the 3 screws to secure the Diusion Director
fan to the wall. Use the metal screws provided for
installaon on sheet metal or appropriate fastening
hardware for other wall surfaces.(Figs.5&6)
4. Verify cable connecon with Diusion Fan. (Fig.7)
5. Measure the length of cable raceway needed and
cut to length using a pair of scissors or a cung blade.
(Fig.8) Fold into an “L” shape and peel o liner. (Fig.9)
Fasten adhesive side to the wall between appliance
and Diusion Fan assembly.
13
Fig.7

Air/Q 1100 Avian User Guide © 2010 Prolitec, Inc.
Installaon: Direct Indoor Fan
Fig.8Fig.9Fig.10Fig.11
6. Run Diusion Fan cable inside the raceway, (Fig.10) fold the raceway into a square and snap the race-
way cover closed.(Fig.11) If needed, use a at-head screw driver to push in the side wall of the cable
raceway.
Fig.12Fig.13Fig.14
7. Insert cable connector into jack located on the right side of the appliance.(Fig.12)
8. Extend the hose from appliance toward the Diusion Fan hose barb, cut to proper length (Fig.13) and
secure to the hose barb of the Diusion Fan assembly. (Fig.14)
9. Turn the APPLIANCE on and verify that a plume is produced.
14


Air/Q 1100 Avian User Guide
© 2010 Prolitec, Inc.
Installaon: Diusion Director
*Addional ve-foot duct secons with mounng hardware can be ordered under part number KIT1100DUCT.
B. Diusion Director Pre-installaon Checklist
1. Conrm the area to be targeted for air treatment.
2. Find and mark the exact locaon for the appliance. Verify that there is sucient clearance above the
appliance to install the diusion director.
3. The power cord for the appliance is 6’ long, and the cord for the control box is 8’ long. The height at
which the appliance and the control box are mounted should be planned so they can be plugged in to a
local wall outlet. The appliance requires 110/220 VAC.
C. Appliance Posioning
It is important to nd a locaon that can be serviced and yet as close as possible to the roosng area. The
closer you get to the roosng area, the less Avian Plus will be required per cubic foot.
D. Appliance Installaon
1. The appliance is wall-mounted. Place the appliance onto the desired locaon on the wall and ensure
that it is level.
2. Fasten the appliance to the wall using necessary screws.
3. Connect the power cord to a juncon box or aach an AC plug to the cord and connect to a nearby
outlet. Open the enclosure door and unscrew the aluminum cap of the waterproof collar located on top
of the appliance enclosure. Remove and set aside the grommet (Fig.1onp.11).
4. Assemble hose and hose connector together (Fig.2onp.11). Be sure to leave approximately 1/8 of an
inch clearance between the top of the cartridge hose connector and the end of the hose. Then secure
with clamp, ensuring that the hose connector is sll free to rotate.
5. From the inside of the enclosure, slide hose assembly upward through to the waterproof collar (Fig.1
onp.11).
6. Lube the inside of the grommet if needed to allow the Injector hose to easily slide through. Leave ap-
proximately 2 inches of hose length inside the appliance to provide enough play when replacing the
cartridge. Tighten aluminum cap of waterproof collar to ensure a waterght seal.
17

Table of contents
Other Prolitec Air Cleaner manuals
Popular Air Cleaner manuals by other brands
Dyson
Dyson Pure Cool me BP01 user guide
AtmosAir
AtmosAir RIA SafeGuard Installation, operation and maintenance guide
ELIXAIR
ELIXAIR E 2100 manual

AirMaid
AirMaid 2000V Installation, operation and maintenance guide
EnviroAire
EnviroAire IAQ 1" Polarized Media Air Cleaner Replacement manual
Trion
Trion Air Boss MP600M Specification sheet
Sharp
Sharp IG-15TX1 Operation manual

PowAir
PowAir Misting Dome operating instructions
Aerservice Equipments
Aerservice Equipments RECARM Installation and use manual
Panasonic
Panasonic HEPA Logic EH3020 operating instructions
Nero
Nero 5G Ozone Machine owner's manual
Rabbit Air
Rabbit Air BioGP SPA-421A user guide
