manuals.online logo
Brands
  1. Home
  2. •
  3. Brands
  4. •
  5. Prorack
  6. •
  7. Automobile Accessories
  8. •
  9. Prorack PR3104 User manual

Prorack PR3104 User manual

Page 1 of 3
PR3104 AWNING & UNIVERSAL KIT INSTRUCTIONS
FIRST TIME INSTALLATION
• Please read instructions carefully before installation.
• Check the contents of kit. Contact your Prorack dealer if any parts appear to be missing or damaged.
• Clean your roof racks prior to tting the Prorack S-Wing Awning & Universal Kit.
IMPORTANT WARNING!
IT IS CRITICAL THAT ALL PRORACK RACKS AND ACCESSORIES BE PROPERLY AND SECURELY ATTACHED
TO YOUR VEHICLE. IMPROPER ATTACHMENT COULD RESULT IN AN AUTOMOBILE ACCIDENT, AND
COULD CAUSE SERIOUS BODILY INJURY OR DEATH TO YOU OR TO OTHERS.YOU ARE RESPONSIBLE
FOR SECURING THE RACKS AND ACCESSORIES TO YOUR CAR, CHECKING THE ATTACHMENTS PRIOR
TO USE, AND PERIODICALLY INSPECTING THE PRODUCTS FOR ADJUSTMENT, WEAR, AND DAMAGE.
THEREFORE, YOU MUST READ AND UNDERSTAND ALL OF THE INSTRUCTIONS AND CAUTIONS SUPPLIED
WITH YOUR PRORACK PRODUCT PRIOR TO INSTALLATION OR USE. IF YOU DO NOT UNDERSTAND ALL
OF THE INSTRUCTIONS AND CAUTIONS, OR IF YOU HAVE NO MECHANICAL EXPERIENCE AND ARE NOT
THOROUGHLY FAMILIAR WITH THE INSTALLATION PROCEDURES, YOU SHOULD HAVE THE PRODUCT
INSTALLED BY A PROFESSIONAL INSTALLER SUCH AS A ROOF RACK SPECIALIST.
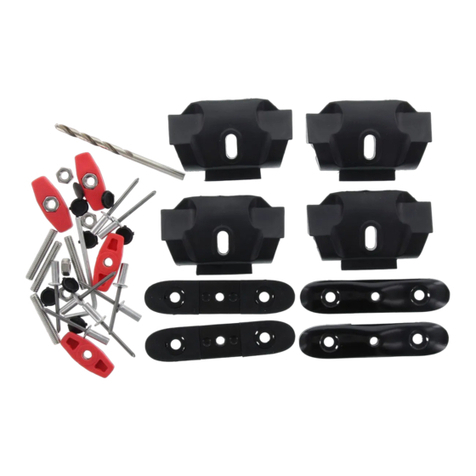
KIT CONTENTS
Item Component Qty
1 M6 x 16mm Capscrew 4
2 M6 x 20mm Capscrew 4
3M6 Spring Washer 4
4M6 Washer 4
5 M6 Sliding Nut 4
6 M6 Spring Nut 4
09-13-554 Rev 1
2
3
4
5 6
1
INSTALLATION WITH PRORACK S-WING AND INTERNATIONAL
T-SLOT CROSSBARS
1Push down rubber inll and slide M6 sliding nut into each
crossbar channel. Position where you want the accessory to be.
Using two shorter M6 x 16mm capscrews, two M6 spring
washers and two M6 washers, assemble awning bracket or
other accessory mount as shown.
Page 2 of 3
MAINTENANCE
• Check accessory is securely attached whenever you ret it to the vehicle. If the unit feels
loose, refer to the tting instructions and readjust.
• Regularly check all fasteners. This includes all attached accessories and roof racks.
CAUTION
• Ensure that all loads are distributed evenly across the roof racks and are fastened securely.
• A loaded roof rack system can alter the performance of your vehicle. Be especially aware
of the effects of side winds, changing of direction, and braking performance. Avoid rapid
acceleration and deceleration. Drive Carefully.
• Make sure all loads are securely fastened with non-elastic straps. Check regularly during
longer journeys.
• Never drive into a car wash with the roof rack system tted.
• Do not exceed the vehicle manufacturer’s roof load rating. Total load equals weight of roof
racks + accessories + cargo/equipment.
INSTALLATION WITH PRORACK HD, TRADESMAN AND OTHER
HEAVY DUTY CROSSBARS
2Place M6 spring nut into each crossbar channel. Position where you want the
accessory to be. Push down and twist spring nut to lock into place.
Using two longer M6 x 20mm capscrews, two M6 spring washers and two M6
washers, assemble awning bracket or other accessory mount as shown.
Page 3 of 3
ADDITIONAL INFORMATION ( AUSTRALIA )
This information should be read in conjunction with clauses (a) and (b).
IMPORTANT LEGAL NOTICE
Our goods come with guarantees that cannot be excluded under the Australian Consumer Law. You are entitled to a
replacement or refund for a major failure and for compensation for any other reasonably foreseeable loss or damage.
You are also entitled to have the goods repaired or replaced if the goods fail to be of acceptable quality and the failure
does not amount to a major failure.
This warranty does not change or take away your rights under the Australian Consumer Law. Your right to claim under
this policy for the benefits covered is in addition to other rights and remedies you have under the law in relation to the
product.
Where you become aware of defects in materials or of workmanship, and wish to make a claim under this warranty you
must do the following for the warranty to be honoured by your Prorack dealer or Yakima Australia Pty Ltd ABN 58 154
440 221 (Yakima):
1. Make a claim as soon as practicable by contacting the Prorack dealer from whom you purchased the product, who
will give you instructions on how to proceed.
2. If you are unable to contact the Prorack dealer, or the dealer is not able to remedy the defect, you should contact
Yakima as soon as practicable at:
Call: 0800 4776 722 (NZ) or 1800 143 548 (AU)
Email: warranty@yakima.co.nz or warranty@yakima.com.au
Alternately, you can write to Yakima at 17 Hinkler Court, Brendale QLD Australia 4500 in order to make a claim
under your warranty.
3. Upon contacting Yakima directly, you should explain as fully as possible the defect. A Yakima representative will
provide you with appropriate instructions for returning the product together with a copy of the original purchase
invoice or receipt to Yakima.
4. The costs and expenses associated with making a claim under your warranty including the costs of complying with
those instructions and of returning the product to Yakima or the Prorack dealer will be borne by you.
Following receipt of the product and purchase invoice or receipt, Yakima or the Prorack dealer must inspect the product
to determine whether the claim falls within the warranty. If:
4.1 the claim falls within the warranty, Yakima will remedy any defects in materials or workmanship becoming
apparent during the warranty period, by replacing or repairing any defective product or component (at its
option) free of charge to the purchaser in respect of replacement parts or labour.
4.2 the claim does not fall within the warranty, Yakima will return the product to you at your expense.
Yakima Australia Pty Ltd
17 Hinkler Court, Brendale
QLD 4500, Australia
Freephone
AU: 1800 143 548
NZ: 0800 4776 722
Yakima Australia Pty Ltd ABN 58 154 440 221
17 Hinkler Court, Brendale QLD 4500
Tel: 0800 4776 722 (NZ) or 1800 143 548 (AU)
Email: warranty@yakima.co.nz or warranty@yakima.com.au
1. Where the product is supplied to the customer for other than business purposes within the meaning of section 43 of the
New Zealand Consumer Guarantees Act 1993, the provisions of that Act shall apply. It is important that anyone who fits or
uses this product does so in accordance with the manufacturer’s instructions.
2. Where the product is supplied to the customer for business purposes within the meaning of section 43 of the New Zealand
Consumer Guarantees Act 1993, the provisions of that Act and all other representations or terms (including any conditions
or warranty expressed or implied by law, statute or otherwise) not expressly included in this leaflet are hereby expressly
excluded shall have no effect and the clauses (a) and (b) shall apply.
3. Subject to the Additional Information (Australia), where the product is supplied and purchased in Australia, the following
shall apply:
(a). THE SUPPLIER WARRANTS the product to be free from defects in materials and/or workmanship for a period of three (3)
years from the date of original purchase (the warranty period). Proof of purchase is required. Subject to the limitations
and exclusions set out below, the Supplier hereby agrees to remedy any defects in materials or workmanship becoming
apparent during the warranty period, by replacing or repairing any defective product or component (at its option) free of
charge to the purchaser in respect of replacement parts or labour. Any defective product or component must be notified
and where practicable, returned at the purchaser’s expense to the Supplier immediately upon discovery of the alleged
defect and no attempt made on the part of the purchaser to repair it.
(b). EXCEPTIONS, EXCLUSIONS AND LIMITATIONS TO WARRANTY. The product and/or its components must be fitted/
assembled and loaded in accordance with the Supplier’s written instructions and any requirements set out in the car’s
owner manual. This warranty does not cover defects, loss or damage resulting from circumstances beyond the Supplier’s
control including, but not limited to misuse, overloading, or failure to assemble and/or fit the product or component in
accordance with the Supplier’s written instructions. Nor does the warranty cover defects, loss or damage resulting from
accidents, unlawful use of the vehicle or defects/inconsistencies in the vehicle on which the product or component is
fitted. Liability for direct, indirect, special, punitive, incidental, exemplary, contractual or consequential damage or loss
arising from defects, faulty materials or design omissions or negligence or workmanship in the product or its components
is hereby expressly excluded subject to the following. Certain Commonwealth legislation, including the Competition
and Consumer Act 2010 (Cth), and other State and Territorial legislation confers upon purchasers rights which cannot
be excluded from or be restricted or modified by contract. Any conditions, guarantees and/or warranties implied by law
and incapable of exclusion are deemed to be expressly incorporated herein. Nothing herein contained is intended nor
shall be permitted to be inconsistent with any such conditions, guarantees and/or warranties. To the extent permitted by
legislation all conditions, guarantees and/or warranties such as implied warranties which are capable of exclusion are
hereby expressly excluded and negatived.
WARRANTY & DISCLAIMER
Other Prorack Automobile Accessories manuals

Prorack T84HALF User manual

Prorack

Prorack T84HALF User manual

Prorack K991 User manual

Prorack

Prorack K991 User manual

Prorack K716 User manual

Prorack

Prorack K716 User manual

Prorack K046 User manual

Prorack

Prorack K046 User manual

Prorack K567 User manual

Prorack

Prorack K567 User manual

Prorack K373 User manual

Prorack

Prorack K373 User manual

Prorack K504 User manual

Prorack

Prorack K504 User manual

Prorack K319 User manual

Prorack

Prorack K319 User manual

Prorack K890 User manual

Prorack

Prorack K890 User manual

Prorack K145 User manual

Prorack

Prorack K145 User manual

Prorack K707 User manual

Prorack

Prorack K707 User manual

Prorack K629 User manual

Prorack

Prorack K629 User manual

Prorack K431 User manual

Prorack

Prorack K431 User manual

Prorack K004 User manual

Prorack

Prorack K004 User manual

Prorack K802 User manual

Prorack

Prorack K802 User manual

Prorack K322 Operation and installation manual

Prorack

Prorack K322 Operation and installation manual

Prorack K731 User manual

Prorack

Prorack K731 User manual

Prorack K600 User manual

Prorack

Prorack K600 User manual

Prorack K1008 User manual

Prorack

Prorack K1008 User manual

Prorack K372 Operation and installation manual

Prorack

Prorack K372 Operation and installation manual

Prorack K694 User manual

Prorack

Prorack K694 User manual

Prorack K511 User manual

Prorack

Prorack K511 User manual

Prorack K381W User manual

Prorack

Prorack K381W User manual

Prorack K843 User manual

Prorack

Prorack K843 User manual

Popular Automobile Accessories manuals by other brands

Thule PORTAGE 819 installation instructions

Thule

Thule PORTAGE 819 installation instructions

PNEUMATIC KU-SE-LE12-00 Installation instruction

PNEUMATIC

PNEUMATIC KU-SE-LE12-00 Installation instruction

SSS Siedle AHF 870-0 operating instructions

SSS Siedle

SSS Siedle AHF 870-0 operating instructions

Axxess AXDSPX-CH5 installation instructions

Axxess

Axxess AXDSPX-CH5 installation instructions

Toyota PORTABLE TYRE PUMP owner's manual

Toyota

Toyota PORTABLE TYRE PUMP owner's manual

Cruz Evo Rack Pro P28-140 Assembly instructions

Cruz

Cruz Evo Rack Pro P28-140 Assembly instructions

Witter FT74AU Fitting instructions

Witter

Witter FT74AU Fitting instructions

Holley EFI 553-133 instructions

Holley

Holley EFI 553-133 instructions

Toyota VIP owner's manual

Toyota

Toyota VIP owner's manual

Metra Electronics 99-3030B installation instructions

Metra Electronics

Metra Electronics 99-3030B installation instructions

DV8 OFFROAD LPBR-04 installation manual

DV8 OFFROAD

DV8 OFFROAD LPBR-04 installation manual

MacNeil WeatherTech No-Drill MudFlap installation instructions

MacNeil

MacNeil WeatherTech No-Drill MudFlap installation instructions

Rola PMX164 Fitting instructions

Rola

Rola PMX164 Fitting instructions

Leviton EVB22 installation instructions

Leviton

Leviton EVB22 installation instructions

Kuda 291010 Installation instruction

Kuda

Kuda 291010 Installation instruction

Connects2 CT23AU13/L manual

Connects2

Connects2 CT23AU13/L manual

Flo CN-IC2-15 Technical guide

Flo

Flo CN-IC2-15 Technical guide

Adaptivlite ADVL-AU5 FITTING & USER GUIDE

Adaptivlite

Adaptivlite ADVL-AU5 FITTING & USER GUIDE

manuals.online logo
manuals.online logoBrands
  • About & Mission
  • Contact us
  • Privacy Policy
  • Terms and Conditions

Copyright 2025 Manuals.Online. All Rights Reserved.