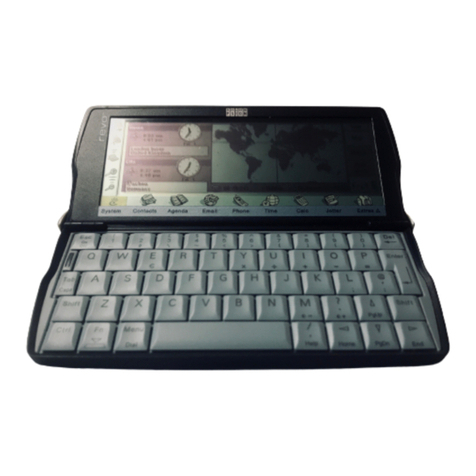
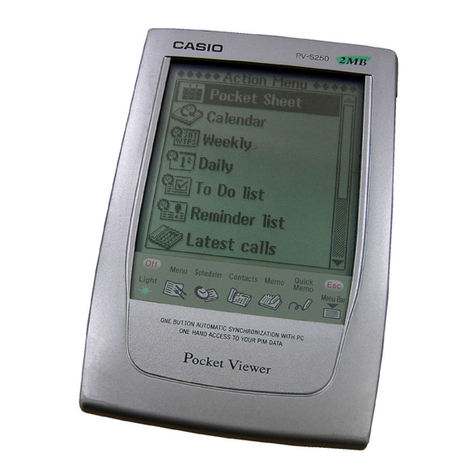
Psion 3a Series User manual

User
Guide
S
E
R
I
E
S
f>CL
NOTE:
If
magnetic
materials
are
placed
close
to
the
underside
of
the
Series
3a
they
may
be
affected
by
the
speaker
magnet.
For
this
reason
it
is
best
not
to
keep
your
Series
3a
in
the
same
pocket
as
credit
cards
and/or
travel
passes
with
magnetic
strips.
WARNING:
This
equipment
has
been
certified
to
comply
with
the
limits
for
a
Class
B
computing
device,
pursuant
to
Subpart
J
of
Part
15
of
FCC
Rules.
See
the
instructions
overleaf
if
interference
to
Radio
or
Television
is
suspected.

©
Copyright
Psion
PLC
1991-1993
All
rights
reserved.
This
manual
and
the
programs
referred
to
herein
are
copyrighted
works
of
Psion
PLC,
London,
England. Reproduction
in
whole
or
in
part,
including
utilisation
in
machines
capable
of
reproduction
or
retrieval,
without
the
express
written
permission
of
Psion
PLC
is
prohibited.
Reverse
engineering
is
also
prohibited.
The information
in
this
document
is
subject
to
change
without
notice.
Psion
and
the Psion
logo
are
registered
trademarks,
and
Psion
Series
3a.
Series
3,
SSD
and
Solid
State
Disk
are
trademarks
of
Psion
PLC.
Psion
PLC
acknowledges
that
some
names
referred
to
are
registered
trademarks.
vl.O
Jul
93
English
Part
no.
6103-0044-01

FCC
Information
for
the
USA
Radio
and
Television
Interference
This
equipment
generates
and
uses
radio
frequency
energy
and
if
not
used
properly
—
that
is,
in
strict
accordance
with
the
instructions
in
this
manual
-
may
cause
interference
to
Radio
and
Television
reception.
It
has
been
tested
and
found
to
comply
with
the
limits
for
a
Class
B
computing
device
in
accordance
with
the
specifications
in
Subpart
J
of
Part
15
of
FCC
Rules.
These
are
designed
to
provide
reasonable
protection
against
such
interference
in
a
residential
installation.
However,
there
is
no
guarantee
that
interference
will
not
occur
in
a
particular installation.
If
this
equipment
does
cause
interference
to
Radio
or
Television
reception,
which
can be
determined
by
turning
the
equipment
off
and
on,
try
to
correct
the
interference
by
one
or
more
of
the
following
measures:
•
Reposition
the
Radio
or
TV
antenna
•
Relocate
the
Series
3a
Computer
with
respect
to
the
Radio
or
TV
•
Move
the
Series
3a
Computer
farther away
from
the
Radio
or
TV
•
If
you
are
using
the
Series
3a
Computer
with
a
Mains
Adapter,
plug
it
into
an
outlet
which
is
on
a
different
circuit
from
that
of
the
Radio
or
TV.
If
necessary,
consult
an
authorised Psion
dealer
or
an
experienced
radioAelevision
technician
for
additional
suggestions.
Important
This
equipment
was tested
for
FCC
compliance
under
conditions
that
included
the
use
of
shielded
cables
and
connectors
between
it
and
the peripherals.
It
is
important
that
you
use
shielded
cables
and
connectors
to
reduce
the
possibility
of
causing
Radio
and
Television
interference.
Shielded
cables, suitable
for
the
Series
3a
Computer
range,
can
be
obtained
from
an
authorised
Psion
Dealer.
If
the
user
modifies
the
Series
3a
Computer
or
its
Expansion
Modules
in
any
way,
and
these
modifications
are
not
approved,
by
Psion,
the
FCC
may
withdraw
the
user's
right
to
operate
the
equipment.
The
following
booklet
prepared
by
the
Federal
Communications
Commission
may
be
of
help:
"How
to
Identify
and
Resolve
Radio-TV
Interference
Problems".
This
booklet
is
available
from
the
US
Government
Printing
Office,
Washington,
DC
20402
Stock
No
004-000-00345-4.


Table
of
Contents
1
Getting
started
1
Where
things
are
2
Powering
the
SERIES
3a
2
Fitting
the
batteries
-
the
first
time
3
Screen
and
keyboard
5
Setting
the
Home
City
and
Time
7
Moving
the
cursor
and
editing
text
11
Help
information
12
Notes
on
menus
and
dialogs
12
How
information
is
stored
15
Displaying
a
status
window
16
Changing
the
batteries
17
2
World
21
Changing
the
displayed
city
or
country
23
Summer
times
24
Adding
and
changing
information
25
3
The
Calculator
27
Calculator
memories
32
Percentages
33
Very
large
and
very
small
numbers
33
Decimal
places
and
number
formats
34
Other
functions
35
Using
your
own
OPL
procedures
36
4
Time
and
alarms
37
Alarms
39
5
The
Database
43
The
structure
of
a
database
44
Typing
in
entries
45
Finding
an
entry
47
Changing
the
way
an
entry
is
displayed
50
Managing
your
entries
51
Labels
52
Database
files
53
Customising
the
•
list
56

6
The
Agenda
57
Day
entries
-
appointments
and
notes
59
Birthdays
and
other
anniversaries
62
To-do
lists
and
other
lists
64
Alarms
in
the
Agenda
67
Changing
an
entry
69
Memos
70
Repeating
an
entry
72
The
Week
view
74
The
List
view
75
The
Year
view
76
Managing
your
Agenda
78
Defaults
for
new
entries
79
Display
functions
80
Entry
management
functions
81
Agenda
files
83
Customising
your
Agenda
85
Example
setups
87
Other
editing
features
88
Using
the
To-do
view
as
a
document
manager
89
More
about
repeating
entries
89
Basic
use
92
Editing
text
92
Using
Bold,
Italic
and
Underlined
text
97
The
saved
file
on
the
disk
97
Working
with
document
files
98
Altering a
paragraph's
appearance
101
Example
uses
of
the
Word
Processor
106
Advanced
use
112
Paragraph
styles
112
Managing
styles
113
Managing
emphases
116
Advanced
editing
119
Outlining
121
Template
files
123
Other
file
formats
125
Plain
text
files
125
Editing
Rich
Text
Format
(RTF)
files
126
7
The
Word
Processor.
91

8
The
Spreadsheet
127
Quick
start
for
experienced
spreadsheet
users
128
What
are
spreadsheets
and
worksheets?
130
Moving
around
and
entering
data
132
Types
of
data
-
text,
number,
formula
132
Editing
data
in
cells
133
Formulae
133
Cell
ranges
135
Functions
in
formulae
136
More
ways
to
move
around
136
Operators
137
Error
messages
when
entering
data
138
Deleting
and
moving
data
138
Relative
and
absolute
references
139
Recalculation
140
Circular
references
-
the
indicator
141
Moving
data
with
'Bring'
141
The
file
saved
on
the
disk
142
Opening
or
closing
a
gap
143
The
display
of
data
144
More
operations
on
the
worksheet
147
More
operations
on
data
149
Graphs
150
Adding
a
new
range
to
the
current
graph
151
Adding
text
to
a
graph
151
Changing
the
graph
type
153
Other
display
options
154
Multiple
graphs
155
Entering
a
database
156
Tables
159
Date
and
time
functions
160
Financial
functions
161
Mathematical
and
logical
functions
164
Range
functions
166
String
functions
167
Statistical
and
database
functions
169
Worksheet
size
170

9
The
sound
recorder
171
10
Dialling
175
Setting
up
for
dialling
176
Dialling
from
a
Database
or
Agenda
file
179
11
Printing
181
Setting
up
the
connection
182
Choosing
the
printer
driver
183
Choosing
the
font
184
Character
sets
184
Setting
the
page
layout
185
Printing
from
the
Word
Processor
187
Printing
from
the
Agenda
190
Printing
from
the
Database
192
Printing
from
the
Spreadsheet
193
Advanced
worksheet
printing
194
Print
preview
195
Other
printing
information
196
12
Open
files
197
Internal
memory
and
open
files
198
Why
open
more
than
one
file?
198
Exiting
open
files
200
13
Moving
information
with
'Bring'
201
How
'Bring'
options
work
202
Alternatives
to
'Bring'
203
14
Files
and
disks
205
Solid
State
Disks
206
Understanding
files
and
disks
208
File
lists
in
the
System
screen
208
File
management
209
Using
disks
210
Advanced
use
of
Files
and
disks
213
Directories
and
file
extensions
213
The
file
selector
214
File
specifications
216
Copying
a
disk
218
Other
advanced
options
219

15
Security
and
backups
221
Passwords
222
Setting
the
system
password
222
Passwords
on
Spreadsheet
/
Word
Processor
files
223
Precautionary
measures
224
Backups
225
Incremental
backup
226
16
The
System
screen
227
Icons
in
the
System
screen
228
New
applications
228
Rearranging
and
grouping
icons
229
Customising
the
System
screen
234
System-wide
settings
234
17
Troubleshooting
237
General
problems
238
'Memory
full',
'No
system
memory'
or
'Disk
full'
239
Everyday
use
240
The
built-in
applications
242
Resetting
the
SERIES
3a
244
A
Character
set
245
B
Specification
249
C
For
Series
3
users
251
General
changes
252
The
built-in
applications
253
D
Serial
3
Link
257
Remote
Link
258
The
Comms
application
258
The
Script
application
259


Getting
started
You
should
read
this
chapter
first.
It
shows
you
how
to
start
using
your
Series
3a.
It
also
describes
basic
information
on
operating
the
Series
3a,
which
you
need
to
know
before
you
read
the
other
chapters
in
this
manual.
Wherever
there
are
things
for
you
to
do,
the
instruction(s)
are
indicated
with
numbers.
Extra
notes,
which
you
may
find
useful,
are
indicated
with
a
car
symbol.
The
different
applications
-
Agenda.
Database
and
so
on
-
are
described
from
chapter
2
onwards.
The
simpler
applications
are
described
first.
Each
chapter
begins
with
the
important
information
you
will
need
for
everyday
use,
before
covering
more
detailed
information.
You
can
read
as
much
as
you
like
of
these
chapters,
and
read
them
in
any
order.
The
second
half
of
the
manual
covers
more
general
topics,
including
printing,
tone
dialling
and
security.
If
you
have
any
problems,
try
looking
up
suitable
entries
in
the
index,
or
refer
to
the
'Troubleshooting'
chapter.
(Experienced
Series
3
users
may
wish
instead
to
read
Appendix
C,
which lists
the
main
differences
between
the
two
computers.
3
Link
users
should
read
Appendix
D
also.)
1:
Getting
started
1

Where
things
are
screen
application
buttons
reset
hole
expansion
-
socket
••••••••••••L
]••••••••••[
!••••••••••[
]••[ ]••[
mains
power
light
I
mains
socket
Powering
the
SERIES
3a
The
Series
3a
is
powered
by
two
ordinary
AA
batteries.
It
is
best
to
use
alkaline
batteries
-
they
should
last
for
several
months
of
normal
use.
A
backup
battery
is
also
supplied
with
your
Series
3a.
This
has
the
sole
job
of
preserving
your
information
when
the
time
comes
for
you
to
replace
the
main
batteries.
A
mains
adaptor
for
the
Series
3a
is
also
available.
This
may
be
useful
if
you
use
your
Series
3a
heavily
in
one
particular
location.
Don't
worry
about
leaving
your
Series
3a
turned
on
by
mistake,
as
it
will
turn
itself
off
after
a
few
minutes
to
conserve
power.
2
1:
Getting
started

Fitting
the
batteries
-
the
first
time
You
can
fit
the
main
batteries
and
the
backup
battery
in
any
order.
Fitting
the
main
batteries
1.
Make
sure
that
the
Series
3a
is
closed,
then
turn
it
over.
2.
Unclip
the
main
battery
cover
at
the
top
and
fit
the
main batteries.
Be
sure
to
insert
them
the
right
way
round,
as
marked
on
the
case.
(Note:
one
battery
has
its
positive
end
on
a
"pushable"
contact.)
]'C
main
batteries
/
3.
Replace
the
main
battery
cover.
Fitting
the
backup
battery
1.
You
will
see
two
doors
on
the
underside
of
the
Series
3a
which
swing
open;
the
backup
battery
fits
under
the
door
on
the
left.
Open
the
left-hand
door:
2.
The
backup
battery
slides
in
from left
to
right.
Insert
it
with
the
flat
side,
usually
marked
with
a
+
symbol,
facing
upwards.
3.
Close
the
door
again,
and
turn
the
Series
3a
over.
1:
Getting
started
3

Turning
On
The
ON
key,
also
marked
'Esc',
is
at
the
top
left
of
the
keyboard.
It
is
referred
to
as
either
'Esc'
or
'ON/Esc'.
1.
Press
the
ON/Esc
key.
The
Series
3a
starts
by
displaying
an
introductory/copyright
screen.
If
this
does
not
happen,
check
that
you
have
inserted
the
main
batteries
correctly.
You
will
now
see
the
System
screen,
which
initially
looks
like
this:
•
.JDCIQ
^JUUU'_IJJ3JJDDr
•jananaajnJDL
zjaai
!••••
ON/Esc
key
Turning
Off
1.
Hold
down
the
Psion
key,
marked
s
,
at
the
bottom
left
of
the
keyboard.
While
holding
it
down,
press
the
OFF/1
key
(next
to
ON/Esc).
The
Psion
key
(the
-
symbol
is
part
of
the
Psion
logo)
does
nothing
on its
own.
It
is
used
in
conjunction
with
other
keys
for
extra
characters
and
special
functions. Such
keypresses
are
usually
written
with
a
dash
joining
the
keynames,
such
as
Psion-1
for
the
OFF
keypress.
Other
notes
•
You
can
use
the
standard
mains
adaptor
for
the
Series
3a
at
any
time.
•
'Changing
the
batteries'
is
described
towards
the
end
of
this
chapter.
•
JJ
Jl
•JJ
PSION-1
=OFF
key
4
1:
Getting
started

Screen
and
keyboard
The
screen
To
change
the
screen
contrast:
•
Hold
down
the
Psion
key,
and
while
doing
so,
press
the
>
(Contrast
+)
key
or
the
<
(Contrast
-)
key,
until
you
're
happy
with
the
screen
contrast.
If
you
ever
need
to
clean
the
screen,
use
a
dry
cloth.
Keypresses
The
Series
3a
keyboard
is
similar
to
that
of
a
typewriter
or
desktop
computer.
If
you
hold
down
either
Shift
key
you
get
the
symbols
above
the
numbers
on
the
number
keys,
and
the
alphabetic
keys
produce
upper
case
(capital)
letters
-
A
instead
of
a
,
and
so
on.
Most
keys
"auto-repeat"
(keep
producing
keypresses)
if
you
hold
them
down.
•••••••••••La
•
•••••••••••IT
i
.
••
•
!••••
PSION->
PSION-<
contrast
keys
••••••••••••LJ
ocjjuuuuauauut
i
•••••••••••••
Shift
keys
The
•
(diamond)
key
Most
of
the
applications
have
different
screens
or
views.
You
can
move
between
these
screens
or
views
by
pressing
the
•
key.
You
will
see
this
referred
to
in
the
chapters
which
follow.
••••••••••••••
I
••••••••••••!•
i
••••••••••••LI
t
!_•)••••••••••:•
•••
!••••
Diamond
key
Keyboard
markings
The
yellow
markings
above
certain keys
are
extra
characters
which
the
key
can
produce
(or
special
functions
the
key
can
perform).
To
get
one
of
these
characters
or
functions,
hold
the
Psion
key
down
while
pressing
the
key.
For
example,
Psion-6
gives
the
@
character.
!£§=•
Although
the
ON
key
is
also
marked
in
yellow
for
consistency,
you
don't
need
to
use
the
Psion
key
when
turning
the
Series
3a
on.
The
application
button
pad
The
touchpad
of
eight
latge
buttons
between
the
screen
and
keyboard
allows
you
to
move
between
the
different
applications
on
your
Series
3a
-
the
Database,
Word
Processor
and
so
on.
For
example,
if
you
want
to
check
your
daily agenda,
press
the
Agenda
button;
you
can
then
look
at
your
agenda,
or
enter
new
appointments.
•
System
takes you
to
the
System
screen
-
the
screen
shown
when
you
first
turned
the
Series
3a
on.
The
System
screen
displays
an
icon
(picture)
for
each
application
on
the
application
button
pad,
and
for
some
built-in
applications
which
do
not
have
their
own
application
buttons.
There
are
more
icons
than
can be
shown
on
the
screen
1:
Getting
started
5

at
one
time.
You
can
press
the
->
and
<-
arrow
keys
to
move
between
the
icons
on
the
screen.
•
Data
takes
you
to
the
Database,
which
you
can
use
as
a
phone/address
book.
•
Word
takes
you
to
the
Word
Processor,
which
you
can
use
for
typing
notes,
letters,
memos
and
so
on.
•
Agenda
takes
you
to
the
Agenda,
which
you
can
use
as
a
diary/appointment
manager.
•
Time
takes
you
to
the
screen
where
everything
to
do
with
time
is
managed,
including
alarms.
•
World
takes
you
to
a
screen
that
displays
various
information,
including dialling
codes,
for
hundreds
of
cities
and
countries.
•
Calc
takes
you
to
a
programmable
scientific
calculator.
•
Sheet
takes
you
to
the
Spreadsheet
where
you
can
enter
your
own
worksheets
full
of
calculations.
[£g=
The
Program
and
Record
applications
do
not
have
application
buttons.
You
can
access
them
from
their
icons
on
the
System
screen.
You
can
use
'Program'
to
write
your
own
programs
in
the
OPL
language
to
add
new
features
to
your
Series
3a.
See
the
Programming
manual
for
more
details
of
OPL.
You
can
ase
"Record"
to
record
your
own
alarm
sounds
and
voice
messages.
'Record'
is
described
in
a
later
chapter
of
this
manual.
You
can
turn
on
the
Series
3a
by
pressing
any
application
button.
You
are
then
taken
to
the
relevant
application.
You
may
wish
to
practise
using
the
application
buttons
and
special
functions
for
keys
by
trying
the
following
example:
1.
Press
the
Word
button to
move
to
the
Word
Processor.
2.
Type
some
text.
3.
Press
Psion-^
to
use
the
special
function
for
the
•
key
-
the
Caps
Lock
keypress.
Type
some
more
text.
As
you
can
see
the
alphabetic
keys
are
now
producing
upper
case
letters
on
their
own.
Press
Psion-^
again
to
revert
to
lower
case
letters.
4.
Press
the
System
button
to
return
to
the
System
screen.
pgf"
You
don't
have
to
finish
with
one
application
before
moving
to
another.
As
in
the
above
example,
you
can
press
the
Word
button
and
begin
typing
some
text,
then
press
the
System
button
to
move
back
to
the
System
screen,
and
then
press
Word
again
to
continue
with
your
document.
CJjapnannnuLJL
:
:
ujjaaaoa
Caps
Lock
6
1:
Getting
started

Setting
the
Home
City
and
Time
There
are
two
things
you
should
set
before
you
enter
any
of
your
information:
your
home
city,
and
the
current
time.
You
have to
set
these
before
you
can
make
effective
use
of
world
dialling,
alarms,
the
Agenda
and
so
on.
In
setting
these,
you
will
see
how some
important
keys work,
and
how
things
are
displayed
on
the
screen.
Setting
the
home
city
You
should
set
vour
home
city
before
you
set
the
current
time.
The
home
city
affects
the
current
time
displayed
by
the
Series
3a
clock
because
the
Series
3a
knows
about
time
zones.
You
can
set
the
home
city
with
either
the
World
application
or
the
Time
application.
1.
Press
ON/Esc,
if
necessary,
to
turn
the
Series
3a
on.
2.
Press
the
Time
button to
move
to
the
Time
application.
The
'Time
screen'
initially
looks
something
like
this:
No
alarm
set
No
alarm
set
No
alarm
set
No
alarm
set
No
alarm
set
No
alarm
set
Home:
London
Inner,
United
Kingdom
|[
Fri
23
Jul
1
The
central
area
of
the
screen
shows
any
alarms
that
have
been
set
on
your
Series
3a.
There
are
six
lines
for
alarm
details.
Initially,
they
all
say
'No
alarm
set'.
Your
current
home
city
is
shown
on
the
top
line.
3.
Press
the
Menu
key.
The
screen
will
now
look
like
this:
••••••••••••a
_JB
Menu
key
'"r
"
Si
ininirr
times
«S
Home
city
«H
Start
of
week
-B
Workdays
*41
Formats
*<F
no
aiarm
set
Si
ininirr
times
«S
Home
city
«H
Start
of
week
-B
Workdays
*41
Formats
*<F
no
aiarm
set
Si
ininirr
times
«S
Home
city
«H
Start
of
week
-B
Workdays
*41
Formats
*<F
no
aiarm
set
Si
ininirr
times
«S
Home
city
«H
Start
of
week
-B
Workdays
*41
Formats
*<F
no
aiarm
set
3:01:42
pm
A
menu
has
appeared
on
top
of
the
previous
display.
The
top
line,
'Settings',
is
the
title
of
this
menu.
(To
the
right
of
'Settings'
is
the
word
'Alarm'.
This
is
the
title
of
a
second
menu,
which
allows
you
to
manage
the
alarms).
Each
line
below
the
menu
title
is
a
separate
option.
There
is
currently
a
highlight
on
the
first
option
on
the
'Settings'
menu.
•••••••••••ucn
!_!•••••••••••
I
L
I
JJ
•
agar
"
:••••
arrow
keys
1:
Getting
started
7

You
can
move
the
highlight
up
and
down
the
menu
with
the
ti
keys,
and
between
the
different
menus
with
the
<—»keys.
4.
Move
the
highlight
onto
the
'Home
city'
option
on
the
'Settings'
menu,
and
press
the
Enter
key.
Enter
is
the
"do
it"
key.
Whenever
you
want
to
perform
a
highlighted
option,
press
Enter.
You
also
use
it
like
the
Carriage
Return
on
typewriters
when
you
want
to
start
typing
a
new
line.
The
Time
screen
now
looks
something
like
this:
••••••••••••a
•
••••:
1
I
ILUJLXJUOUULIDCJ
!
!••••
Enter
key
Home:
London
Inner,
United
Kingdom
3:01:53
pm
•
No
alarm
set
/i
11
Set
home
city
If
1
•
IKltTl
*•
London
Inner
•
•Country
United
Kingdom
J
3
)
-
No
alarm
set
T"—f
'
[
Frl
23
Jul
|
A
dialog
is
now
displayed
on
the
screen.
Dialogs
appear
whenever
the
Series
3a
has
to
ask
you
for
information.
Most dialogs
have
a
title
at
the
top
-
in
this
case
it
is
'Set
home
city'
-
and
a
number
of
lines
in
which
you
enter
infonnation.
The
Ti
keys
move
the
cursor
from
line
to
line.
This
dialog
has
two
lines:
'City'and
'Country'.
The
'City'
line
iscurrendy
highlighted
and
the
name
of
a
city
or
area
is
shown.
There
is
a
flashing
cursor
on
its
first
letter;
you
can
now
type
the
name
of
a
new
home
city.
Sometimes,
as
in
this
case, information
in
one
line
of
a
dialog
affects
the
information
displayed
in
other
lines.
The
reason
is
usually
obvious
-
in
this
dialog
as
the
'City'
line
changes,
the
'Country'
line
changes
as
well.
5.
Type
in
the
name
of
your
city,
or
the
one
nearest
to
you.
As
you
press
each
key,
the
cursor
moves
to
die
right
and
the
Series
3a
tries
to
find
a
city
to
match
the
letters
you've
typed.
Stop
typing
as
soon
as
it
has
found
the
correct
city.
[Eg3
Because
the
Series
3a
also
stores
dialling
codes,
some
cities
may
be
named
a
little
strangely
-
London
Inner
and
London
Outer,
for
example.
If
you
make
a
mistake
while
ty
ping
in
the
city
name,
you
can
use
the
Delete
key
to
delete
the
last
letter
typed,
moving
the
cursor
back
to
the
left.
(The
Series
3a
again
shows
the
first
city
which
matches
the
letters
to
the
left
of
the
cursor.)
If
at
any
point
the
Series
3a
can't
find
a
city
to
match
the
letters
you've
typed,
it
will
beep.
If
you're
sure
you
have
spelt
the
city
correctly,
the
Series
3a
doesn't
know
about
that
city.
If
this
is
the
case
you
will
need
to
press
Delete
a
few
times
to
remove
the
letters
you
typed
and
then
type
in
a
different
city
name.
Once
you
are
used
to
the
Series
3a,
you
can
move
to
the
World
applicadon
and add
your
own
city,
then
move
back
to
Time
to
set
it
as
your home
city
(described
under
"Adding
or
Changing
Information'
in
the
'World'
chapter).
6.
When
the
city
you
want
is
displayed,
press
Enter
and
it
will
be
set
as
your
home
city.
You
will
now
be
able
to
use
the
World
application
to
find
dialling
codes
for
other
cities
around
the
world.
When
you
have
set
the
current
time,
you
can
also
use
the
World
application
to
find
the
times
in
other
cities.
jcicmaac*
IJLCUODUIlDOr
_
JOJDJ••••••!_
•••••••••••a
•••'
unapa
Delete
key
8
1:
Getting
started

insf
If
you
travel,
you
should
change
the
'Home
city'
to
your
current
location.
The
current
time
will
change
automatically,
and
international
dialling
codes
will
then
be
given
based
on
your
new
location.
Setting
the
time
and date
Experienced
computer
users-
select the
'Time and
date'
option
on
the
'Settings'
menu
in
the
Time
application
to
set
the
time
and
date
for
the
Series
3a.
New
computer
users
may
wish
to
use
the
following
step-by-step
instructions
to
set
the
time
and
date:
1.
Press
the
Time
button,
if
necessary,
to
go
to
the
Time
application.
2.
Press
the
Menu
key
and
select
the
'Time
and
date'
option
on
the
'Settings'
menu
(move
the
highlight
onto
'Time
and
date',
and
press
Enter).
A
dialog
will
appear, like
this:
Home:
London
Inner.
United
Kingdom
No
alarm
set
No
alarm
set
3:82:09
pm
II
•J
<
y
|
Fri
23
Jul
|
3.
Press
i
to
move
the
highlight
to
the
'Date'
line.
4.
Type
the
correct
day,
month
and
year,
in
numbers.
The
highlight
will
move
automatically.
You
can
move
the
highlight
manually
to
the
next
part
of
the
date
by
pressing
-•
(or
the
Space
key),
if
the
day
or
month
is
only
one
digit.
035=
If
you
type
in
incorrect
or
unsuitable
numbers,
the
day
and
month
numbers
are
corrected
to
the
largest
values
allowed.
For example,
if
you
typed
88888888
the
numbers
would
be
corrected
to
31st
December
2049
(the
last
date
allowed
by
the
Series
3a).
5.
Press
T
to
move
to
the
'Time'
line.
The
time
is
shown
as
hours,
minutes
and
seconds.
The
highlight
moves
onto
the
hours.
6.
Type
the
time,
in
the
same
way
as
the
date.
For
example,
to
set
the
time
to
twenty
five
minutes
past
nine
in
the
morning
you
would
type:
0
9
2
5
0
0.
For
"am-pm"
clocks
you
can
press
A
or
P
to
change
between
"am"
and
"pm".
|Eg*
In
"am-pm"
format,
midnight
is
written
with
a
12
,
not
00
.
For
example,
half
past
midnight
is
12:30
ram.
7.
Press
Enter
and
the
time
and
date
are
set.
The
Series
3a
is
accurate
to
within
a
few
seconds
a
week.
Use
the
'Time
and
Date'
option
again
if
you
ever
need
to
correct
the
time.
Changing
the
way
time
and
date
is
displayed
If
you're
used
to
menus
and
dialogs
on
other
computers:
use
the
'Formats'
option
on
the
'Settings'
menu
in
Time
-
perhaps
by
pressing
its
hot-key
Psion-F
-
to
set
the
time
and
date
formats
you
prefer.
If
you
are
unsure
of
menus
and
dialogs: follow
the instructions
below.
Even
if
you
do
not
wish
to
change
the
date
and
time
formats,
the
example
shows
you
more
about
menus
and
dialogs
along
the
way.
1:
Getting
started
9

Changing
the
time
and
date
formats:
1.
Press
the
Time
button,
if
necessary,
to
move
to
the
Time
application.
2.
Select
the
'Formats'
menu
option
on
the
'Settings'
menu
-
either
press
the
Menu
key
and
select
it
as
you
have
selected
options
from
menus
before,
or
press
Psion-F.
The
keypress
Psion-F
is
the
hot-key
for
the
'Formats'
option.
Egf
Every
option
on
a
menu
ends
with
u
(tfie
Psion
key
symbol),
or
Shift-v
followed
by
a
letter.
These
are
the
hot-keys
-
shortcuts
for
selecting
the
options.
Hot-keys
can
be
used
with
or
without
the
menu
on
the
screen
-you
would
normally
use them
without
displaying
the
menu
as
it
is
quicker.
While
you're
learning
to
use
the
Series
3a,
you'll
find
it
easiest
to
use
the
Menu
key
to
find
the
option
you
want,
but
you'll
soon
start
to
remember
the
hot-keys
of
the
options
you
use
most.
The
'Set
date
and
time
formats'
dialog
will
appear.
It
looks
like
this:
Home:
London
Inner.
United
Kingdom
Set
date
and
time
formats
•
Day
month
year*
tor
/
am-pm
tor
:
•Date
separa
•Time
format
/Time
separa
•
Day
month
year*
tor
/
am-pm
tor
:
3:02:16
pm
3.
The
highlight
is
initially
on
the
'Date
format'
line.
If
you
press
the
<-
and
-»
keys
you
will
see
the
setting
on the
line
change.
Leave
it
set
to
your
preferred
date
format.
Whenever
you
see
little
arrows
around
a
setting
in
a
dialog,
you
can
use«—>
to
change
it.
4.
Press
i
to
move
to
the
'Date
separator'
line.
If
you
wish
to
change
it,
just
type
the
character
that
you
want
to
use
as
the
date
separator,
for
when
dates
are
displayed
in
dialogs.
5.
Press
the
i
key
to
move
to
the
'Time
format'
line.
You
can
set
this
line
to
either
'24
hour'
or
'am-pm'.
Leave
it
set
to
your
preferred
format.
6.
Press
the
I
key
to
move
to
the
'Time
separator'
line.
If
you
wish
to
change the
character
used
to
separate
the
numbers
for
times,
just
type
a
new
character.
7.
Press
Enter,
to
say
you
have
finished.
If
you
bring
up
a
menu
or
dialog
which
you
didn't
want,
you
can remove
it
by
pressing
the
Esc
("Escape")
key.
The
Esc
key
performs
the
opposite
action
to
the
Enter
key,
as
it
will
almost
always
gel
you
out
of
anything
-
it
means
"no,
forget
this
thing
I've
just
chosen".
Here,
you
would
use
it
to
make
the
menu
go
away.
•
]••••(
IIIIIIIIIIII
L-LJUUUJJJUUUUI
I
••••••••nnaza
i
aaai
igpan
Esc
key
10
1:
Getting
started
Table of contents
Other Psion PDA manuals
