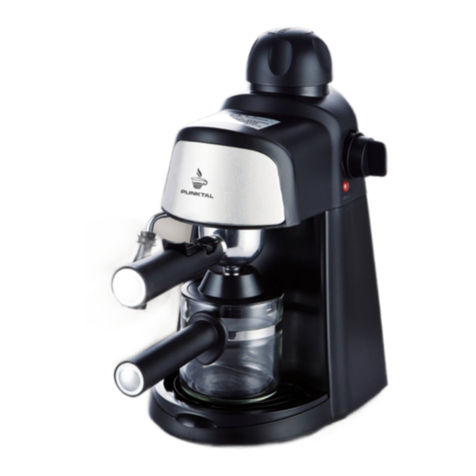
Punktal PK-C212 User manual

Instruction Manual
MODEL: PK-C212
A9R2CB5.pdf 1 2014-07-02 11:12:20
Manual de Instrucciónes

2
Por favor lea este instructivo antes de usar el producto.
MEDIDAS IMPORTANTES
DE SEGURIDAD
Al utilizar aparatos eléctricos, se deben seguir precauciones básicas,
incluyendo lo siguiente:
!" Lea todas las instrucciones.
!"Asegúrese de que la salida de voltaje que utilice corresponda al
voltaje que aparece en la etiqueta de clasificación de la cafetera.
!"Para protección contra incendios, descargas eléctricas y lesiones a
personas, no sumerja el cable, ni el enchufe en agua o en ningún
otro líquido.
!"Supervisión cercana es necesaria cuando cualquier aparato esté
en uso por niños o cerca de ellos.
!"Desenchufe la unidad del tomacorriente cuando no esté en uso
y antes de limpiarla. Permita que se enfríe antes de colocarle o
retirarle piezas, al igual que antes de limpiar el aparato.
!"No permita que el aparato funcione con un cable o enchufe
dañado o después que el aparato falle, o se dañe de alguna
manera. Devuelva el aparato a una local de servicio autorizado
para examen, reparo o ajuste. También puede llamar al número
gratuito apropiado que aparece en la portada de este manual.
!"El uso de accesorios no recomendados por el fabricante del
aparato puede resultar en incendio, descarga eléctrica o lesiones
a personas.
!"No utilice en exteriores.
!"No permita que el cable cuelgue del borde de una mesa o
mostrador de cocina, ni que toque las superficies calientes.
!"No coloque esta unidad encima, ni cerca de una hornilla de gas o
eléctrica que esté caliente, ni dentro de un horno caliente.
!"No utilice el aparato para ningún otro uso que para el que fue
diseñado.
!"Para desconectar, gire cualquier control a la posición OFF (O),
retire el enchufe del tomacorriente. Siempre sostenga el enchufe y
no hale por el cable.

3
!"No permita que la cafetera funcione sin agua.
!"No lave el recipiente con limpiadores, estropajos de metal o
ningún otro material abrasivo.
!"Algunas partes de éste aparato se calientan durante su
funcionamiento, no la toque con la mano. Use las asas y lo
botones solamente.
!"Este aparato no está diseñado para ser usado por personas
(incluído niños) con capacidad limitada fisica, mental o
sensoriales disminuidas y falta de experiencia o conocimiento
que les impida utilizar el aparato con toda seguridad sin
supervisión o instrucción.
!"Se debe asegurar la supervisión de los niños deben para evitar
que usen el aparato como juguete.
CONSERVE ESTAS
INSTRUCCIONES.
Este producto es para uso doméstico solamente.
ESPAÑOL

4
ENCHUFE POLARIZADO (Modelos 120V solamente)
Este aparato tiene un enchufe polarizado (una hoja es más ancha que la otra).
Para reducir el riesgo de descarga eléctrica, éste enchufe está diseñado para
encajar en un tomacorriente polarizado de una sola forma. Si el enchufe no
entra del todo en el tomacorriente, colóquelo al revés. Si aun no encaja, llame a
un electricista calificado. No trate de modificar el enchufe de ninguna forma.
TORNILLO RESISTENTE A MANIPULACION
Advertencia: Este aparato está equipado con un tornillo resistente a manipulación
para evitar que le retiren la cubierta exterior. Para reducir el riesgo el riesgo de
incendio o de descarga eléctrica, no trate de retirar la cubierta exterior. Adentro no
hay piezas reparables por el usuario. Cualquier reparación se debe llevar a cabo
por personal de servicio autorizado.
CABLE ELÉCTRICO
a) Se proporciona un cable eléctrico corto para reducir el riesgo de enredarse o
tropezarse con un cable largo.
b) Hay cables de extensión disponibles que se pueden utilizar si se tiene cuidado al
hacerlo.
c) Si se utiliza un cable de extensión,
1) La clasificación eléctrica del juego de cable o de la extensión eléctrica debe
ser tan alta como la clasificación del aparato y
2) El cable se debe colocar de forma que no cuelgue sobre un mostrador o de
una mesa donde pueda ser halado por niños o se puedan tropezar sin querer.
Si el aparato está a tierra, la extensión eléctrica debe tener in cable a tierra de 3
alambres.
Nota: Si el cable eléctrico está dañado, debe reemplazarlo personal calificado
de servicio o en Latinoamérica por un centro de servicio autorizado.

5
ESPAÑOL
Este producto puede variar ligeramente del que aparece ilustrado.
1. Dosificador de vapor
2. Cubierta del tanque de agua
3. Interruptor de café
4. Interruptor de vapor
5. Interruptor ON/OFF
(ENCENDER/APAGAR)
† 6. Tanque de agua removible
(pieza no. EM200-01)
7. Boquilla
† 8. Accesorio para espuma
(pieza no. EM200-02)
† 9. Bandeja de goteo removible
(pieza no. EM200-03)
†10. Portafiltros (pieza no. EM200-04)
†11. Filtro (pieza no. EM200-05)
†12. Cuchara de medir
(pieza no. EM200-06)
†13. Mango del portafiltros
(pieza no. EM200-07)
14. Luz roja de funcionamiento
15. Luz verde/indicador de cafeé listo
Nota: † indica las piezas extraíbles o
reemplazables por parte del consumidor
m
j
k
l

6
Como usar
Este producto es para uso doméstico solamente.
ANTES DEL PRIMER USO
Para asegurar que la primera taza de café tenga excelente sabor, debe enjuagar la
cafetera con agua tibia de la siguiente forma:
1. Vierta agua dentro del tanque de agua separable; el agua no debe exceder el nivel
“MAX” del tanque.
2. Coloque la tapa del tanque de agua nuevamente.
Nota: Esta cafetera tiene un tanque de agua removible para una limpieza fácil; usted
puede llenar el tanque de agua y luego colocarlo en el aparato.
3. Coloque el filtro en el portafiltros (sin café). Hay una presilla dentro del portafiltros
que evita que el filtro se salga al vaciarlo, corra la presilla hacia atrás, donde no
obstruya. Luego alinee el asa del filtro con la flecha en la posición “Insert” (Insertar) y
colóquelo dentro del aparato.
4. Para que cierre en su sitio, gírelo en dirección contraria a las manecillas del reloj
hasta que esté en la posición “Lock” (Cerrar).
5. Coloque una taza o jarra sobre la bandeja de goteo. Asegurese que el dosificador de
vapor esté ajustado a la posición mínima.
Nota: El aparato no está equipado con una taza o jarra, pero usted puede utilizar cualquier
taza u otro recipiente que quepa sobre la bandeja de goteo con facilidad.
6. Enchufe la cafetera.
7. Coloque el interruptor de ENCENDER/APAGAR a la posición “I”; la luz roja se
encenderá.
8. Coloque el interruptor de café a la posición “I”; la bomba comienza a bombear agua.
9. Cuando haya agua saliendo, coloque el interruptor de café a la posición “O”.
Asegúrese de que el interruptor de vapor esté en la posición “O”. El aparato comienza
a calentar hasta que se prende la luz verde de “listo”.
10. Coloque el interruptor de café a la posición “I” otra vez y el agua comenzará a salir.
11. Luego de que el agua deje de salir, deséchela, limpie bien todas las piezas y ya está
listo para comenzar a colar café.
Nota: Puede haber ruido cuando el agua bombea por el sistema por primera vez; esto es
normal, ya que el aparato está dejando salir el aire que tiene dentro. Luego de alrededor
de 20 segundos, el ruido debe desaparecer.
PRECALENTAMIENTO
Consejo: Para hacer una buena taza de café espresso caliente, le recomendamos
precalentar el aparato antes de hacer café, incluyendo el portafiltros, el filtro y la taza.
Esto evita que el gusto del café se afecte por las piezas frías.
1. Retire el tanque de agua removible y abra la tapa para llenarlo con el agua deseada; el
nivel de agua no debe exceder el nivel “MAX” en el taque.
2. Coloque el tanque de forma firme dentro del aparato.
3. Coloque el filtro dentro del portafiltros (sin café), luego inserte el portafiltros dentro del
aparato en la posición “Insert” (Insertar). Recuerde de echar la presilla del portafiltros
hacia atrás para que no obstruya.
4. Para asegurarlo bien, gírelo en dirección contraria a las manecillas del reloj hasta que
esté en la posición “Lock” (Cerrar).

7
ESPAÑOL
5. Coloque una taza para espresso o una jarra sobre la cubierta de la bandeja de
goteo.
6. Enchufe la cafetera.
7. Asegurese que el dosificador de vapor esté en la posición mínima.
8. Coloque el interruptor de ENCENDER/APAGAR a la posición “I”; la luz roja de
funcionamiento se prende.
9. Asegúrese de que el interruptor de vapor esté en la “O”.
10. Coloque el interruptor de café a la posición “I”; cuando salga agua, coloque el
interruptor de café a la posición “O” inmediatamente. El propósito de este paso es
para preparar la bomba.
11. Cuando la luz verde de “listo” se prende, coloque el interruptor de café a la
posición “I” nuevamente; el agua caliente comenzará a salir.
12. Cuando la luz verde de “listo” se apaga, coloque el interruptor de café a la posición
“O”. Ahora está usted listo para hacer café.
PARA HACER CAFÉ ESPRESSO
1. Retire el portafiltros girándolo en dirección de las manecillas del reloj.
2. Coloque el filtro dentro del portafiltros.
3. Añada café molido al filtro con la cuchar de medir.
Consejo: Una cucharada de café molido puede lograr alrededor de una taza de café de
buena calidad.
4. Presione el café molido de forma firme con la cuchara. El café debe presionarse
hacia abajo pero no hasta el punto de estar totalmente compacto.
5. Coloque el portafiltros dentro de la cafetera en la posición “Insert” (Insertar).
6. Para asegurarlo en su lugar, gírelo contrario a las manecillas del reloj hasta que
esté en la posición “Lock” (Cerrar) (ver B).
7. Eche agua caliente dentro de la taza para precalentarla. Luego coloque la taza tibia
sobre la bandeja de goteo debajo del portafiltros. Para hacer una taza, colóquela
debajo de ambas boquillas; para dos tazas, coloque una taza debajo de cada
boquilla.
8. Espere a que se prenda la luz verde de “listo”, coloque el interruptor de café a la
posición “I”. Luego de un momento, comenzará a salir café.
Nota: Es normal que la luz verde de “listo” se encienda y se apague cíclicamente
al colar café o hacer vapor, en lo que el termostato trabaja para mantener la
temperatura adecuada.
9. Coloque el interruptor de café a la posición “O” manualmente cuando tenga la
cantidad de café que desea en su taza (30 - 35 ml por cada colada) o cuando note
que el color de su café cambia y comienza a lucir claro.
Advertencia: ¡No deje la cafetera desatendida al hacer café, ya que usted necesita
manejarla manualmente!
10. Después que termine de hacer café, coloque el interruptor de ENCENDER/
APAGAR a la posición “O”; las luces de funcionamiento y “listo” se apagan. Usted
puede retirar el portafiltros girándolo en dirección de las manecillas del reloj.
Deseche los residuos de café con la presilla hacia abajo de forma que evite que el
filtro se salga.
11. Deje que ambas piezas se enfríen por completo, luego enjuáguelas dejándole
correr agua por encima.

8
PARA HACER CAPUCHINO
Nota: Usted obtiene una taza de capuchino al echar leche con espuma encima de una taza
de café expresso.
Nota: Al hacer vapor, el portafiltros debe estar armado y asegurado en posición.
1. Prepare el café expreso primero, dejando suficiente espacio para la taza de leche con
espuma.
2. Asegúrese de que el dosificador de vapor de espuma esté en la posición mínima.
3. Coloque el interruptor de vapor a la posición “I” y espere que se prenda la luz verde.
4. Llene la mitad de una jarra vacía con leche fría.
Consejo: Se recomienda que use leche baja en grasa a temperatura del refrigerador (no
caliente).
Nota: Al escoger el tamaño de su jarra, se recomienda que sea larga y estrecha. También
recuerde que la leche dobla en volumen, así que asegúrese de que el tamaño de la jarra
sea suficiente.
5. Inserte el accesorio para espuma dentro de la leche alrededor de 2 cm. (¾ pulgada).
6. Mientras gira el dosificador de vapor lentamente contrario a las manecillas del reloj, el
vapor saldrá por el accesorio para hacer espuma. Mueva la jarra ligeramente de arriba
hacia abajo mientras le hace espuma a la leche.
Precaución: Nunca gire el botón de control del vapor rápido, ya que el vapor se
acumulará rápido en corto tiempo, lo que puede causar riesgo de explosión.
7. Cuando obtenga la cantidad de espuma que desee, gire el dosificador de vapor a la
posición mínima.
Nota: La vara para vapor y el accesorio para espuma siempre deben lavarse después de
hacerle espuma a la leche para prevenir que los depósitos de leche bloqueen el conducto
de vapor y la boquilla. Retire el accesorio para espuma, enjuáguelo debajo del agua tibia
del grifo y limpie el conducto y la boquilla de vapor con una esponja mojada.
8. Vierta la leche con espuma encima de cada expreso ya preparado para obtener su
capuchino. Endúlcelo a su gusto y si lo desea, polvoree la espuma con polvo de cacao.
9. Coloque el interruptor de vapor y el interruptor de ENCENDER/APAGAR a la posición
“O” y desenchufe la cafetera.
Nota: Después de usar la función de vapor, le recomendamos que deje la cafetera
enfriarse al menos por 5 minutos antes de hacer café de nuevo. Si no, un olor a quemado
puede ocurrir si hace espreso mientras la maquina aun está caliente.
CÓMO PRODUCIR VAPOR PARA CALENTAR LIQUIDOS O HACERLE ESPUMA
A LA LECHE
Consejo: La vara de vapor se puede usar para bebidas calientes cómo el chocolate
caliente, te o agua.
1. Abra la tapa del tanque de agua, retire el tanque y llénelo con la cantidad de agua que
desee.
Nota: El nivel de agua nuca debe exceder el nivel “MAX” en el tanque.
2. Coloque el tanque nuevamente de forma firme en su lugar y colóquele la tapa.
3. Enchufe la cafetera.
4. Coloque el interruptor de ENCENDER/APAGAR a la posición “I”; la luz roja de
funcionamiento se prende.
5. Coloque el interruptor de vapor a la posición “I” y permita que se caliente hasta que la
luz verde de “listo” se prenda.

9
ESPAÑOL
6. Coloque la vara de vapor dentro del liquido que desee calentar o la leche que desee
hacerle espuma. Déle vuelta al dosificador de vapor lentamente en contrario a las
manecillas del reloj para comenzar a producir vapor.
7. Cuando se alcance la temperatura requerida o se obtenga la espuma en la leche,
puede girar el dosificador de vapor a la posición mínima.
8. Coloque el interruptor de vapor y el interruptor de ENCENDER/APAGAR a la
posición “O” y desenchufe la cafetera.
Cuidado y limpieza
Este aparato no contiene piezas reparables por el usuario. Para cualquier servicio,
consulte a personal de servicio calificado.
LIMPIEZA
1. Desenchufe el aparato y permita que la cafetera se enfríe completamente antes de
limpiarla.
2. Limpie la armadura de la cafetera con un paño húmedo.
3. Lave y enjuague el tanque de agua y la bandeja de goteo removible, luego séquelas
bien antes de volver a colocarlas en su lugar.
Importante: No limpie la unidad con alcohol o ningún limpiador solvente. Nunca
sumerja la armadura en agua para limpiarla.
4. Déle vueltas al portafiltros en sentido de las manecillas del reloj para retirarlo
de la cafetera y vacié el residuo de café. Puede limpiar el filtro con una esponja
mojada y jabonada, pero siempre enjuáguelo bien con agua.
5. Limpie la cabeza del poltrafiltros con un paño húmedo para remover cualquier
residuo de café.
6. Enjuague todos los accesorios y séquelos bien.
LIMPIEZA DE LOS DEPOSITOS MINERALES
Nota: Para asegurarse de que su cafetera esté funcionando eficientemente y
asegurara el mejor sabor en su café, le recomendamos una limpieza completa cada
2 – 3 meses.
1. Llene el tanque de agua separable con agua y desincrustante químico hasta el
nivel MAX.
Nota: La proporción de agua a desincrustante químico es 4:1. Por favor utilice
desincrustante químico doméstico. También puede utilizar acido cítrico en lugar de
desincrustante químico con una proporción de 100 partes de agua a 3 partes de acido
cítrico.
1. Siguiendo las instrucciones en CÓMO USAR, coloque el filtro vacío en el portafiltros
y una jarra sobre la bandeja de goteo separable.
2. Cuele agua de acuerdo a las direcciones de PRECALENTAMIENTO.
3. Coloque el interruptor de ENCENDER/APAGAR a la posición “I” posición; la luz roja
de funcionamiento se prende.
4. Coloque el interruptor de café a la posición “I” y asegúrese de que el interruptor
de vapor esté en la posición “O”.
5. Cuando comience a salir agua, coloque el interruptor de café a la posición “O”.
6. Cuando se prenda la luz verde de “listo”, coloque el interruptor de café a la
posición “I” y permita que salga suficiente agua como para llenar dos tazas
(alrededor de 2 oz. de agua).
7. Coloque el interruptor de café a la posición “O” y espere 5 segundos.

10
8. Coloque el interruptor de vapor a la posición “I” y espere a que la luz indicadora de
“listo” se prenda.
9. Produzca vapor alrededor de 2 minutos, luego gire el dosificador de vapor a la
posición mínima para parar el vapor.
10. Coloque el interruptor de ENCENDER/APAGAR a la posición “O” para parar la unidad
inmediatamente y deje el desincrustante químico descansar en el aparato por lo
menos 15 minutes.
11. Encienda la cafetera de nuevo y repita los pasos 4 – 7 por lo menos 3 veces.
12. Coloque el interruptor de vapor a la posición “O”.
13. Cuando se prenda la luz verde de “listo”, coloque el interruptor de café a la posición
“I” y cuele hasta que no quede desincrustante químico.
14. Una vez que termine, cuele otra vez sin café, usando agua corriente hasta el nivel
MAX de llenado y repita los pasos 4 – 7 por lo menos 3 veces (no es necesario esperar
15 minutos), luego cuele hasta que no quede agua en el tanque.
15. Repita los pasos 8 y 9 por lo menos 3 veces para asegurar que los conductos estén
limpios.

14
Please Read and Save this Use and Care Book.
IMPORTANT SAFEGUARDS
When using electrical appliances, basic precautions should always
be followed, including the following:
#
Read all instructions.
#
Make sure that your outlet voltage corresponds to the voltage
stated on the rating label of the coffee maker.
#
To protect against fire, electric shock and injury to persons do not
immerse cord, plug or in water or other liquid.
#
Close supervision is necessary when any appliance is used by or
near children.
#
Unplug from outlet when not in use and before cleaning. Allow to
cool before putting on or taking off parts, and before cleaning the
appliance.
#
Do not operate any appliance with a damaged cord or plug or
after the appliance malfunctions, or has been damaged in any
manner. Return appliance to an authorized service facility for
examination, repair or adjustment. Or, call the appropriate toll-
free number on the cover of this manual.
#
The use of accessory not recommended by the appliance
manufacturer may result in fire, electric shock or injury to
persons.
#
Do not use outdoors.
#
Do not let cord hang over edge of table or counter, or touch hot
surfaces.
#
Do not place on or near a hot gas or electric burner, or in a
heated oven.
#
Do not use appliance for other than intended use.
#
To disconnect, turn any control to OFF (O), remove plug from wall
outlet. Always hold the plug; never pull the cord.
#
Do not let the coffeemaker operate without water.
#
Do not clean container with cleansers, steel wool pads, or other
abrasive material.

15
#
Some parts of appliance are hot when operated, so do not
touch with hand. Use handles or knobs only.
#
This appliance is not intended for use by persons (including
children) with reduced physical, sensory or mental
capabilities, or lack of experience and knowledge, unless they
have been given supervision or instruction concerning use of
the appliance by a person responsible for their safety.
#
Children should be supervised to ensure that they do not play
with the appliance.
SAVE THESE INSTRUCTIONS.
This product is for household use only.
POLARIZED PLUG (120V Models Only)
This appliance has a polarized plug (one blade is wider than the other). To
reduce the risk of electric shock, this plug is intended to fit into a polarized
outlet only one way. If the plug does not fit fully into the outlet, reverse the
plug. If it still does not fit, contact a qualified electrician. Do not attempt to
modify the plug in any way.
TAMPER-RESISTANT SCREW
Warning: This appliance is equipped with a tamper-resistant screw to
prevent removal of the outer cover. To reduce the risk of fire or electric
shock, do not attempt to remove the outer cover. There are no user-
serviceable parts inside. Repair should be done only by authorized service
personnel.
ELECTRICAL CORD
a) A short power-supply cord is to be provided to reduce the risk resulting
from becoming entangled in or tripping over a longer cord.
b) Longer extension cords are available and may be used if care is exercised
in their use.
c) If an extension cord is used,
1) The marked electrical rating of the cord set or extension cord should
be at least as great as the electrical rating of the appliance, and
2) The cord should be arranged so that it will not drape over the
countertop or tabletop where it can be pulled on by children or tripped
over unintentionally.
If the appliance is of the grounded type, the extension cord should be a
grounding-type 3-wire cord.
Note: If the power supply cord is damaged, it should be replaced by qualified
personnel or in Latin America by an authorized service center.
ENGLISH

16
Product may vary slightly from what is illustrated.
1. Steam control knob
2. Water tank cover
3. Coffee switch
4. Steam switch
5. ON/OFF switch
† 6. Removable water tank
(Part # EM200-01)
7. Steam wand
† 8. Froth attachment (Part # EM200-02)
† 9. Removable drip tray
(Part # EM200-03)
†10. Filter holder (Part # EM200-04)
†11. Filter(Part # EM200-05)
†12. Measuring spoon and tamper
(Part # EM200-06)
†13. Filter holder clip (Part # EM200-07)
15. Red power light
16. Green ready light
Note: † indicates consumer replaceable/
removable parts
m
j
k
l

17
How to Use
This product is for household use only.
BEFORE FIRST USE
To ensure the first cup of coffee tastes excellent, you should rinse the coffee maker
with warm water as follows:
1. Pour water into removable water tank; the water level should not exceed the
“MAX” mark in the tank.
2. Replace the water tank cover.
Note: The appliance is supplied with a removable tank for easy cleaning; you can fill
the tank with water, then put the tank into the appliance.
3. Put the filter into the filter holder (with no coffee). There is a clip on the filter
holder to prevent the filter from coming out when you empty it, flip the clip back,
out of the way. Then align the filter holder handle with the arrow at the “Insert”
position and insert into the appliance.
4. To lock in place, turn counterclockwise until it is in the “Lock” position.
5. Place a cup or jug on the removable drip tray. Make sure the steam control knob
is set to the minimum position.
Note: The appliance is not equipped with a cup or jug, but you may use any jug, cup or
other vessel that fits comfortably on the drip tray.
6. Plug in the coffeemaker.
7. Turn the ON/OFF switch to the “I” position; the red power light turns on.
8. Turn the coffee switch to the “I” position; the pump begins pump water.
9. When there is water flowing out, turn the coffee switch to the “O” position. Make
sure the steam switch is in the “O” position. The appliance begins heating. Allow
to heat until the green ready light turns on.
10. Turn the coffee switch to “I” position again and water will begin to flow out.
11. After the water stops flowing, pour the water out, clean all parts thoroughly, and
you are now ready to start brewing.
Note: There may be noise when the water pumps through the system the first time;
this is normal, as the appliance is releasing the air in the appliance. After about 20
seconds, the noise should disappear.
PREHEATING
Tip: To make a cup of good, hot espresso coffee, we recommend preheating the
appliance before making coffee, including the filter holder, filter and cup. This
prevents the coffee flavor from being affected by cold parts.
1. Remove the removable tank and open the tank cover to fill it with desired water;
the water level should not exceed the “MAX” mark in the tank.
2. Place the tank firmly into the appliance.
3. Put the filter into the filter holder (with no coffee), then insert the filter holder
into the appliance at the “Insert” position. Remember to flip the clip on the filter
holder back out of the way.
4. To lock in place, turn counterclockwise until it is in the “Lock” position.
5. Place an espresso cup or jug on the drip tray cover.
6. Plug in the coffeemaker.
7. Make sure the steam control knob is on the minimum position.
8. Turn the ON/OFF switch to the “I” position; the red power light turns on.
ENGLISH

18
9. Make sure the steam switch is in the “O” position.
10. Turn the coffee switch to the “I” position; when there is water flowing out, turn the
coffee switch to the “O” position immediately. The purpose of this step is to prime the
pump.
11. When the green ready light turns on, turn the coffee switch to the “I” position again;
there will be hot water flowing out.
12. When the green ready light goes out, turn the coffee switch to the “O” position. You
are now ready to make coffee.
MAKING ESPRESSO COFFEE
1. Remove the filter holder by turning it clockwise.
2. Put the filter into the filter holder.
3. Add ground coffee to filter with the measuring spoon.
Tip: A tablespoon of ground coffee can make about a cup of top-grade coffee.
4. Press the ground coffee firmly with the tamper. It needs to be firmly tamped down, but
not compacted.
5. Insert the filter holder into the coffeemaker in the “Insert” position.
6. To lock in place, turn counterclockwise until it is in the “Lock” position.
7. Pour hot water into the cup to preheat the cup. Then place the warm cup on the drip
tray cover under the filter holder. For one cup, put it under both nozzles; for two cups,
put one cup under each nozzle.
8. At this time, wait for the green ready light to turn on; once the ready light turns on,
turn the coffee switch to the “I” position. After a moment, coffee will begin flowing
out.
Note: During brewing coffee or making steam, it is normal for the green ready light cycle
on and off as the thermostat operates to maintain the proper temperature.
9. Turn the coffee switch to “O” position manually when you have the desired amount of
coffee in your cup (30 - 35 ml per shot) or when you note that the color of the coffee
changes and begins to look weak.
Warning: Do not leave the coffee maker unattended while making coffee, as you need TO
operate it manually!
10. After you finish making your coffee, turn the ON/OFF switch to the “O” position;
the power and ready lights turn off. You can take the filter holder out by turning it
clockwise. Pour the coffee residue out with the filter pressed by the clip on the filter
holder to prevent the filter from coming out.
11. Let both parts cool down completely, then rinse under running water.
MAKING CAPPUCCINO
Note: You get a cup of cappuccino when you top off a cup of espresso with frothing milk.
Note: While making steam, the filter holder must be assembled and locked
in position.
1. Prepare espresso first, leaving enough room in the cup for the frothed milk.
2. Make sure that the steam control knob is on the minimum position.
3. Turn the steam switch to the “I” position and wait for the green ready light
to turn on.
4. Fill an empty jug about ½ full with cold milk.

19
Tip: It is recommended to use semi-skimmed milk at refrigerator temperature (not
hot).
Note: In choosing the size of your jug, it is recommended for the mug to be tall and
narrow. Also, keep in mind that the milk doubles the volume, so make sure the height
of jug is enough to allow for the increase.
5. Insert the frothing device into the milk about 2 cm (¾ inch).
6. As you turn the steam control knob slowly counterclockwise; the steam will come
out from the frothing wand. As you froth the milk, move the jug around and up-to-
down slightly.
Caution: Never turn the steam control knob rapidly, as the steam will accumulate
rapidly in short time, which can cause a risk of explosion.
7. When the desired amount of froth is reached, turn the steam control knob to the
minimum position.
Note: The steam wand and froth attachment should always be cleaned immediately
after frothing milk, to prevent the milk deposits from blocking the steam pipe and
nozzle. Remove the froth attachment, rinse it under warm water and wipe the steam
wand with a wet sponge.
8. Pour the frothed milk on top of each prepared espresso to you’re your cappuccino.
Sweeten to taste and, if desired, sprinkle the froth with a little cocoa powder.
9. Turn the steam switch and the ON/OFF switch to the “O” position and unplug the
coffeemaker
Note: After using the steam function, we recommend you allow the coffeemaker to
cool down at least for 5 minutes before making coffee again.
If not, a burnt aroma may occur in the espresso coffee made while the machine is still
not.
PRODUCING STEAM TO HEAT LIQUIDS OR FROTH MILK
Tip: The steam wand can be used to make hot beverages like hot chocolate, water or
tea.
1. Open the water tank cover, remove the removable tank and fill it with desired
amount water.
Note: The water level should not exceed the “MAX” mark in the tank.
2. Place the tank firmly back in place and replace the tank cover.
3. Plug in the coffeemaker
4. Turn the ON/OFF switch to the “I” position; the red power light turns on.
5. Turn the steam switch to the “I” position and allow the heat until the green ready
light turns on.
6. Dip the steam wand into the liquid to be heated or the prepared frothing milk. Turn
the steam control knob slowly counterclockwise to start making steam.
7. When the required temperature is reached or the frothing milk is obtained, you can
turn the steam control knob to the minimum position.
8. Turn the steam switch and the ON/OFF switch to the “O” position and unplug the
coffeemaker.
Care and Cleaning
ENGLISH

20
This appliance contains no user-serviceable parts. Refer service to qualified service
personnel.
CLEANING
1. Unplug the appliance and let the coffeemaker cool down completely before cleaning.
2. Clean housing of coffeemaker with a damp cloth.
3. Wash and rinse the water tank and removable drip tray, then dry thoroughly before
reattaching.
Important: Do not clean with alcohol or solvent cleanser. Never immerse the housing in
water for cleaning.
4. Turn the filter holder clockwise to detach from the coffeemaker and empty the coffee
residue inside. You can clean the filter with a wet, soapy sponge, but always rinse
thoroughly with water.
5. Clean the brewing head with a damp cloth to remove any residual coffee growing.
6. Rinse all attachments in the water and dry thoroughly.
CLEANING MINERAL DEPOSITS
Note: To make sure your coffeemaker operating efficiently and ensure peak flavor in your
coffee, we recommend a thorough cleaning every 2 – 3 months.
1. Fill the removable water tank with water and descaler to the MAX level
Note: The ratio of water to descaler is 4:1. Please use “household descaler”. You can also
use the citric acid instead of the descaler with a ratio of 100 part of water to 3 parts of
citric acid.
1. Following the instructions in HOW TO USE, place the empty filter holder and a jug in
place on the removable drip tray.
2. Brewing water according to the directions in PREHEATING.
3. Turn the ON/OFF switch to “I” position; the red power light turns on.
4. Turn the coffee switch to the “I” position and make sure the steam switch to the“O”
position.
5. When there is water flowing out, turn the coffee switch to the “O” position.
6. When the green ready light turns on, turn the coffee switch to the “I” position and
allow the water to flow enough to fill about two cups (around 2 oz. of water).
7. Turn the coffee switch to the “O” position and wait for 5 seconds.
8. Turn the steam switch to the “I” position and wait for the ready indicator to turn on.
9. Make steam for 2 minutes, then turn the steam control knob to the minimum position
to stop making steam.
10. Turn the ON/OFF switch to the “O” position to stop the unit immediately and leave the
descaler mixture resting in the appliance at least
15 minutes.
11. Restart the coffeemaker and repeat steps 4 – 7 at least 3 times.
12. Turn the steam switch to “O” position.
13. When the green ready light turns on, turn the coffee switch to the “I” position and brew
until no descaler is left.
14. Once finished brew again with no coffee using clean tap water filled to the
MAX level and repeat steps 4 – 7 at least 3 times (it is not necessary to wait for 15
minutes), then brew until no water is left in the tank.
15. Repeat steps 8 and 9 at least 3 times to make sure the pipes are clean.
PK-C212: 220V~ 50Hz 850Wwww.punktal.com


Table of contents
Languages:
Other Punktal Coffee Maker manuals