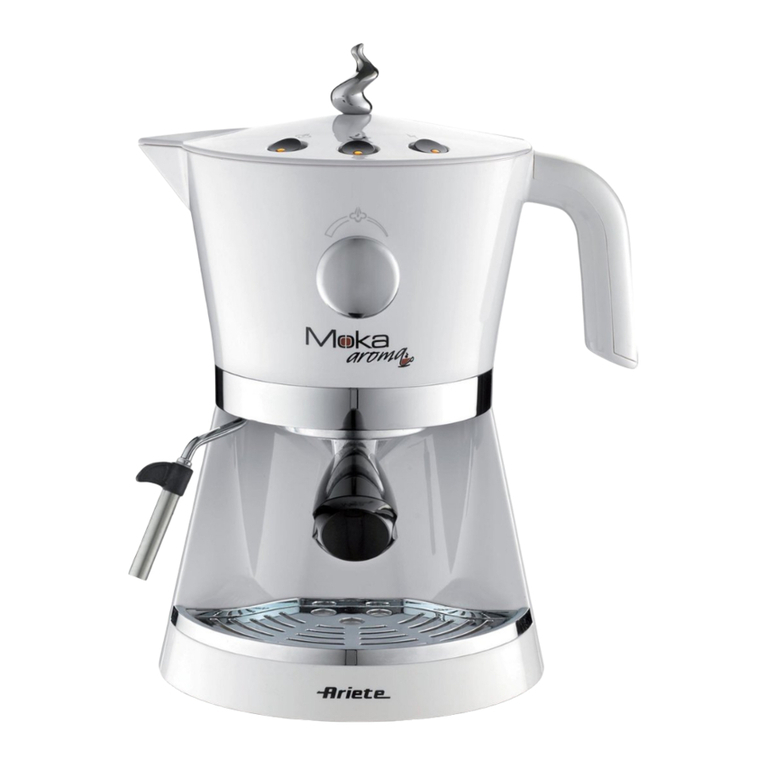
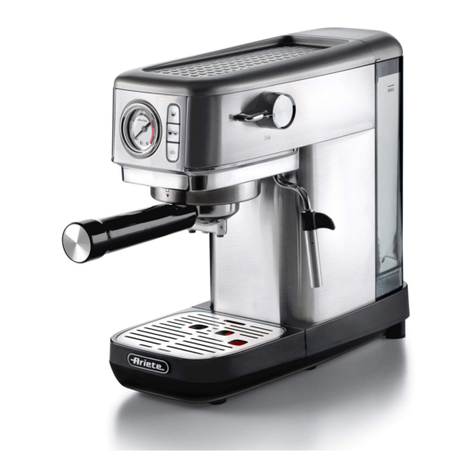
ARIETE Miro 1339B User manual

COD. 4035101500 REV. 0 del 14/05/2015
827070
De’ Longhi Appliances Srl
Divisione Commerciale Ariete
Via San Quirico, 300
50013 Campi Bisenzio (FI)
E-Mail: [email protected]
Internet: www.ariete.net

Fig. 6
Fig. 3 Fig. 4
Fig. 10
Fig. 9
Fig. 5
Fig. 8
Fig. 2
Fig. 12 Fig. 13
Fig. 15 Fig. 16
Fig. 20
Fig. 19Fig. 17 Fig. 18
Fig. 11
Fig. 1
H
R
PQ
G
K
N
J
O
D
C
B
A
E
F
M
L
Fig. 14
I
Fig. 7

3
Anche se gli apparecchi sono stati realizzati in conformità con le speciche Normative europee vigenti e sono pertanto
protetti in tutte le parti potenzialmente pericolose, leggete con attenzione queste avvertenze e usate l’apparecchio solo per
l’uso cui è stato destinato per evitare infortuni e danni. Tenete a portata di mano questo libretto per future consultazioni.
Qualora vogliate cedere questo apparecchio ad altre persone ricordatevi di includere anche queste istruzioni.
Le informazioni riportate in questo manuale sono marcate dai seguenti simboli che indicano:
Pericolo per i bambini
Pericolo dovuto a elettricità
Pericolo di danni derivanti da altre cause
Avvertenza relativa a ustioni
Attenzione - danni materiali
Potete usare l'apparecchio per preparare caffè e cappuccino. Questo apparecchio è stato concepito solo per un uso privato
ed è quindi da considerarsi inadeguato l’uso per scopi commerciali o industriali. Ogni altro utilizzo della macchina non è
previsto dal Costruttore che si esime da qualsiasi responsabilità per danni di ogni natura, generati da un impiego improprio
della macchina stessa. L’uso improprio determina inoltre l’annullamento di ogni forma di garanzia.
Le caratteristiche costruttive dell’apparecchio, oggetto della presente pubblicazione, non consentono di proteggere l’utiliz-
zatore dal getto diretto di vapore o acqua calda.
Pericolo di ustioni - Nell’erogazione di acqua calda e di vapore, non dirigere i getti verso terzi o verso se stessi.
Impugnare il tubo esclusivamente sulla parte in plastica.
Utilizzare solo contenitori che siano realizzati in materiale “per alimenti”.
• L’apparecchio è destinato solo ad uso domestico, e non deve essere adibito ad
uso commerciale o industriale.
• Non si assumono responsabilità per uso errato o per impieghi diversi da quelli
previsti dal presente libretto.
• Si consiglia di conservare gli imballi originali, poiché l’assistenza gratuita non è
prevista per i guasti causati da imballo non adeguato del prodotto al momento
della spedizione ad un Centro di Assistenza autorizzato.
• L’apparecchio è conforme al regolamento (EC) No 1935/2004 del 27/10/2004 sui
materiali in contatto con alimenti.
•
L’apparecchio può essere usato dai bambini con un età superiore a 8 anni solo se
sono seguiti da una persona responsabile o se hanno ricevuto le istruzioni riguar-
danti l’utilizzo dell’apparecchio in sicurezza ed hanno compreso i pericoli presenti
durante l’uso.

4
• Le operazioni di pulizia e di manutenzione da parte dell’utilizzatore non devono
essere effettuate dai bambini a meno che non abbiano un’età superiore a 8 anni
e operino sotto sorveglianza. Assicurarsi che i bambini non giochino con l’appa-
recchio.
• Tenere sempre l’apparecchio e il cavo di alimentazione fuori dalla portata di bam-
bini con età inferiore a 8 anni.
• Gli elementi dell’imballaggio non devono essere lasciati alla portata dei bambini
in quanto potenziali fonti di pericolo.
• Allorché si decida di smaltire come riuto questo apparecchio, si raccomanda di
renderlo inoperante tagliandone il cavo di alimentazione. Si raccomanda inoltre
di rendere innocue quelle parti dell’apparecchio suscettibili di costituire un peri-
colo, specialmente per i bambini che potrebbero servirsi dell’apparecchio per i
propri giochi.
• L’apparecchio può essere usato da persone che hanno capacità siche, senso-
riali o mentali ridotte, oppure con mancanza di esperienza o di conoscenza, solo
se sono seguiti da una persona responsabile o se hanno ricevuto e compreso le
istruzioni riguardanti l’utilizzo dell’apparecchio in sicurezza ed hanno compreso i
pericoli presenti durante l’uso.
• Non lasciar pendere il cavo in un luogo dove potrebbe essere afferrato da un
bambino.
• Prima di collegare l’apparecchio alla rete di alimentazione controllare che la ten-
sione indicata sulla targhetta posta al di sotto della macchina corrisponda a quel-
la della rete locale.
• L’uso di prolunghe elettriche non autorizzate dal fabbricante dell’apparecchio può
provocare danni e incidenti.
• Prima di procedere all’operazione di riempimento del serbatoio dell’acqua,
scollegare l’apparecchio dalla presa di corrente.
• Se il cavo di alimentazione è danneggiato, esso deve essere sostituito dal
costruttore o dal suo servizio Assistenza Tecnica o comunque da una persona
con qualica similare, in modo da prevenire ogni rischio.
• Non mettere mai le parti sotto tensione a contatto con l’acqua: può generarsi un
cortocircuito!
• Togliere la spina dalla presa prima di ogni intervento di pulizia o di manutenzione.
• Non immergere l’apparecchio in acqua o altri liquidi.
• Non sollevare l’apparecchio afferrandolo per il serbatoio dell’acqua o per la
vaschetta, ma afferrarlo per il corpo.
• Scegliere un ambiente sufcientemente illuminato, pulito e con la presa di corren-
te facilmente accessibile.

5
• Evitare di immettere nel serbatoio una quantità eccessiva di acqua.
• Non lasciare incustodito l’apparecchio mentre è collegato alla rete elettrica.
• L’apparecchio deve essere utilizzato e lasciato a riposo su una supercie stabile.
• L’apparecchio non deve essere utilizzato se è stato fatto cadere, se vi sono segni
di danni visibili o se ha perdite di acqua. Non usare l’apparecchio se il cavo elet-
trico o la spina risultano danneggiati, o se l’apparecchio stesso risulta difettoso.
Tutte le riparazioni, compresa la sostituzione del cavo di alimentazione, devono
essere eseguite solamente dal Centro Assistenza Ariete o da tecnici autorizzati
Ariete, in modo da prevenire ogni rischio.
• Non dirigere mai il getto di vapore o acqua calda verso parti del corpo; manipola-
re con precauzione il tubo vapore: pericolo ustioni!
• Le parti metalliche esterne dell’apparecchio e del portaltro non devono essere
toccate con l’apparecchio in funzione, in quanto potrebbero causare delle scotta-
ture.
• Collocare la macchina su un piano stabile dove non possa essere rovesciata.
• Non usare la macchina senza acqua, poiché in tale caso la pompa si brucerebbe.
• Non riempire mai il serbatoio dell’acqua con acqua calda o bollente.
• Non posizionare la macchina su superci molto calde o nelle vicinanze di amme
libere per evitare che la carrozzeria possa essere danneggiata.
• Il cavo non deve toccare le parti calde della macchina.
• Non utilizzare acqua gassata (addizionata di anidride carbonica).
• Usare solo cialde che riportano il marchio standard E.S.E.
• Non introdurre mai nel ltro (A) sostanze diverse dal caffè in polvere. Si potreb-
bero causare gravi danni all’apparecchio.
• Non lasciare la macchina a temperatura ambiente inferiore a 0°C, in quanto il
residuo d’acqua nella caldaia potrebbe ghiacciare e provocare dei danni.
• Non usare l’apparecchio all’aperto.
• Non lasciare l’apparecchio esposto ad agenti atmosferici (pioggia, sole, ecc...).
• Dopo aver staccato la spina di alimentazione e dopo che le parti calde si saranno
freddate, l’apparecchio dovrà essere pulito esclusivamente con un panno non
abrasivo appena inumidito aggiungendo poche gocce di detergenti neutri non
aggressivi (non usare mai solventi che danneggiano la plastica).

6
A - Filtro caffè in polvere J - Coperchio serbatoio
B - Disco forato in silicone (Thermocream®) K - Pulsante di erogazione vapore
C - Gocciolatore per polvere L - Interruttore di erogazione caffè/ spia temperatura caldaia
D - Portaltro M - Interruttore funzione vapore/ spia temperatura caldaia
E - Filtro per cialda N - Pulsante di accensione / spia ON-OFF
F - Gocciolatore per cialda O - Serbatoio acqua estraibile
G - Dispositivo Maxi Cappuccino e stilo erogatore di
acqua e vapore
P - Griglia appoggiatazze
H - Cavo alimentazione + spina Q - Misurino/pressino per caffè
I - Corpo macchina R - Vasca raccogligocce
Nella targhetta posta sotto la base di appoggio della macchina sono riportati i seguenti dati d’identicazione della macchina:
• costruttore e marcatura CE
• modello (Mod)
• n° di matricola (SN)
• tensione elettrica di alimentazione (V) e frequenza (Hz)
• potenza elettrica assorbita (W)
• numero verde assistenza
Nelle eventuali richieste ai Centri Assistenza Autorizzati, indicare modello e numero di matricola.
Controllare che la tensione della rete domestica sia uguale a quella indicata sulla targhetta dati tecnici dell’apparecchio.
Posizionare poi la macchina su una supercie piana.
Lavare il serbatoio (O) al primo utilizzo e riempirlo con acqua naturale fresca (Fig. 2) no al livello indicato “MAX”, avendo
poi cura di inserirlo bene nella sua sede (Fig. 3).
Inserire la spina nella presa di corrente elettrica, che deve essere dotata di messa a terra.
Dopo aver riempito il serbatoio con acqua naturale fresca, mettere in funzione la macchina premendo il pulsante (N) Fig. 4.
Posizionare un recipiente sotto alla angia di aggancio del portaltro. Premere e mantenere premuto il pulsante di erogazione
vapore (K). Attendere la fuoriuscita di acqua dalla sede del portaltro (Fig. 5). Rilasciare il pulsante di erogazione vapore per
interrompere la fuoriuscita di acqua.
Inserire nel portaltro (D), il gocciolatore per polvere (C), il disco forato in silicone (B) e il ltro caffè in polvere (A) nell’ordine
indicato (Fig. 6). Dosare il caffè nel ltro e pressare leggermente con l’apposito pressino: per due caffè riempire completa-
mente due misurini, mentre per un caffè riempirne uno solo. Innestare il portaltro nell’apposita sede.
Se viene inserita una quantità eccessiva di polvere di caffè all’interno del ltro, la rotazione del portaltro può risul-
tare difcoltosa e/o durante l’erogazione del caffè si possono avere perdite dal portaltro.
Per avere anche il primo caffè ben caldo è consigliabile lasciar riscaldare il portaltro tenendolo inserito nella sua sede per
qualche minuto prima di fare il caffè. Questo non sarà necessario per i successivi caffè.
Posizionare una o due tazze sotto i beccucci del portaltro (Fig. 8). All'accensione della spia temperatura caldaia dell'interrutto-
re (L) la macchina sarà pronta per fare il caffè. Per avviare l’erogazione premere l'interruttore (L): inizierà la fuoriuscita del caffè
dai beccucci del portaltro. Per interromperla ripremere l'interruttore (L). La dose massima per un caffè espresso è di 50 ml.
Come nelle macchine da caffè professionali, non togliere il portaltro quando l’erogazione è in corso; pericolo di

7
ustioni!
Al termine dell’erogazione del caffè attendere una decina di secondi prima di disinserire il portaltro; per rimuovere
il portaltro ruotarlo lentamente da destra verso sinistra onde evitare spruzzi o schizzi di acqua o caffè.
Quando la macchina è in posizione di standby, la spia temperatura caldaia dell'interruttore (L) si spegnerà e accenderà
periodicamente, mostrando l’intervento del termostato della caldaia, che serve a mantenere ottimale la temperatura dell’ac-
qua. È opportuno, sia per il primo caffè che per i successivi, avviare l’erogazione del caffè solo quando tale spia è accesa.
Per fare il caffè con cialda occorre rimuovere dal portaltro (D), il ltro (A), il disco in silicone (B) ed il gocciolatore per caffè
in polvere (C).
1 Inserire nel portaltro (D), il gocciolatore per cialde (F) ed il ltro per cialde (E) (Fig. 17).
2 Posizionare la cialda nel portaltro (Fig. 18).
3 Spingere la cialda con le dita verso l’interno (Fig. 19).
4 La cialda deve essere ben centrata e collocata all’interno del portaltro.
5 Adesso è possibile inserire il portaltro nella sua sede. Serrare bene il portaltro assicurandosi di averlo ben agganciato
alla angia (Fig. 7).
6 Dopo aver preparato il caffè, nel togliere il portaltro, la cialda potrebbe rimanere incastrata nella parte superiore della
macchina. Per toglierla, inclinare il portaltro (Fig. 20), lasciando che la cialda ricada sullo stesso.
Per avere un caffè sempre ottimo occorre acquistare la cialda che presenta il marchio di compatibilità E.S.E.
Si raccomanda di riempire il serbatoio prima che l’acqua sia completamente esaurita.
Spegnere la macchina. Staccare la spina dalla presa di corrente. Estrarre il serbatoio. Riempire il serbatoio no al livello
indicato “MAX” con acqua naturale fresca. Posizionare il serbatoio sulla macchina assicurandosi di averlo ben inserito e
riaccendere.
Nel caso in cui il serbatoio sia rimasto completamente senza acqua può accadere che l’aria entri nel circuito impedendo
l’erogazione del caffè. Per riattivare la macchina occorrerà pertanto spegnerla e lasciarla raffreddare. Posizionare un re-
cipiente sotto la sede di aggancio del portaltro ed accendere la macchina.
Premere e mantenere premuto il pulsante di
erogazione vapore (K). Attendere la fuoriuscita di acqua dalla sede del portaltro (Fig. 5).
Far fuoriuscire almeno una tazza
d’acqua dalla sede di aggancio del portaltro per riattivare il circuito idraulico.
Rilasciare il pulsante di erogazione vapore per
interrompere la fuoriuscita di acqua.
A questo punto la macchina ricomincerà a funzionare regolarmente.
Se la macchina è accesa ma non viene utilizzata, dopo circa 30 minuti interviene la funzione di autospegnimento. Questa
funzione mette in stand-by la macchina. La spia (N) si spegne. Per riaccendere la macchina premere il pulsante di accen-
sione (N) per riportarlo nella posizione 0 e successivamente premerlo per portarlo in posizione 1 (Fig. 4). A questo punto la
spia di accensione (N) si accende e la macchina sarà nuovamente in funzione.
Per preparare un caffè subito dopo aver fatto il cappuccino sarà necessario riportare la caldaia alla temperatura di prepara-
zione caffè compiendo queste operazioni: premere l’interruttore funzione vapore (M). Si potrà notare che la spia è accesa.
Questa segnalazione luminosa serve ad informare che la temperatura in caldaia è ancora alta, cioè è ancora quella per il
vapore; occorre pertanto attendere alcuni secondi afnché la spia si spenga. Volendo affrettare il raffreddamento della cal-
daia, posizionare un recipiente sotto al cappuccinatore, premere l’interruttore (L) e contemporaneamente mantenere aperto
il rubinetto (K); far uscire acqua dal dispositivo Maxi Cappuccino no a quando la spia luminosa si accenderà di nuovo;
richiudere quindi il rubinetto (K) e disinserire l’interruttore (O). Attendere che la spia (L) si spenga per fare un nuovo caffè.
Premere l'interruttore funzione vapore (M).
Posizionare un bicchiere sotto al il dispositivo Maxi Cappuccino (G), Fig. 12.
Attendere l'accensione della spia temperatura caldaia dell'interruttore (M).

8
Premere e mantenere premuto il pulsante di erogazione vapore (K)
: dapprima uscirà un po’ d’acqua e subito dopo un getto
di vapore la cui intensità aumenterà entro qualche secondo.
Rilasciare il pulsante di erogazione vapore per interrompere
la fuoriuscita di vapore.
Porre sotto al dispositivo Maxi Cappuccino (G) il contenitore del latte da montare (o del liquido da
scaldare). Immergere a fondo lo stilo nel bricco del latte (Fig. 13) e premere nuovamente il pulsante (K) no ad ottenere
il risultato voluto. Durante queste operazioni si potrà notare che la spia temperatura caldaia dell'interruttore (M) si spegne
e riaccende periodicamente, indicando gli interventi del termostato che mantiene la giusta temperatura della caldaia per
l’erogazione del vapore.
Rilasciare il pulsante di erogazione vapore per interrompere la fuoriuscita di vapore
.
Il caffè macinato nel portaltro dovrà essere pressato leggermente. Un caffè più forte o meno forte dipende dal grado di
macinatura del caffè, dalla quantità di esso immessa nel portaltro, e dalla pressatura. Pochi secondi sono il tempo suf-
ciente perché il caffè scenda nelle tazzine. Se il tempo di erogazione è superiore signica che la macinatura è troppo ne o
che la polvere immessa nel portaltro è stata pressata eccessivamente.
Dopo aver effettuato le operazioni descritte nel capitolo “Fasi preliminari per l’uso”, posizionare una tazza sotto lo stilo Maxi
Cappuccino (G). Premere l'interruttore erogazione caffè (L).
Premere e mantenere premuto il pulsante di erogazione vapore
(K);
così facendo uscirà acqua calda dal dispositivo Maxi Cappuccino. La dose massima per due tazze è di 200 ml.
Tutte le operazioni di pulizia sotto indicate devono essere effettuate a macchina spenta e con la spina elettrica
scollegata dalla presa di corrente.
Una manutenzione ed una pulizia regolari mantengono efciente la macchina per un periodo maggiore. Non lavare
mai i componenti della macchina in lavastoviglie. Non utilizzare getti di acqua diretta.
Ogni intervento va eseguito a macchina fredda.
Vericare che i forellini sottostanti non si otturino e nel caso ripulirli con uno spazzolino (Fig. 14). Far erogare acqua bollente
dal portaltro con il ltro inserito senza la polvere, per sciogliere o rimuovere eventuali residui di caffè o impurità.
Rimuovere e disinserire lentamente il portaltro perché l’eventuale pressione residua potrebbe provocare spruzzi
o schizzi.
Si consiglia di pulire accuratamente il ltro (A) ogni circa 3 mesi, utilizzando le pastiglie detergenti COFFEE CLEAN di
Ariete reperibili presso i punti vendita ed i Centri Assistenza Autorizzati seguendo le istruzioni contenute nella confezione
oppure, in alternativa, utilizzando una pastiglia di detersivo semplice (senza aggiunta di brillantante o altri additivi chimici)
per lavastoviglie nel seguente modo:
• Inserire una pastiglia di detersivo da lavastoviglie nel ltro (senza caffè) quando la macchina è ben calda (dopo almeno 5
minuti di riscaldamento).
• Agganciare il portaltro alla macchina e mettere un recipiente sotto il portaltro.
•
Premere e mantenere premuto il pulsante di erogazione vapore (K). Attendere la fuoriuscita di acqua dalla sede del portaltro
(Fig. 5).
Erogare acqua per 15-20 secondi.
• Rilasciare il pulsante di erogazione vapore per interrompere la fuoriuscita di acqua. Lasciare agire la pastiglia per almeno 15
minuti mantenendo il portaltro inserito sulla macchina.
• Ripetere l’operazione di erogazione dell’acqua facendo funzionare la pompa per circa 15-20 secondi e poi lasciando
riposare per altri 15-20 secondi no ad esaurire due serbatoi di acqua.
• Rimuovere il portaltro dalla macchina, estrarre il ltro e sciacquarlo bene sotto l’acqua corrente del rubinetto.

9
• Spegnere la macchina, scollegare il cavo di alimentazione dalla presa di corrente e pulire con una spugnetta la sede di
aggancio del portaltro per rimuovere eventuali residui di detersivo dalla doccia.
• Riaccendere la macchina, agganciare nuovamente il portaltro ed erogare ancora almeno 2 tazze di acqua per comple-
tare il risciacquo.
Se la macchina da caffè viene utilizzata quotidianamente si consiglia di effettuare l’operazione di pulizia almeno ogni tre mesi.
Inserire nel portaltro (D) il gocciolatore (F) e il ltro per cialde (E). Con il portaltro agganciato, senza la cialda inserita, av-
viare l’erogazione premendo l'interruttore (L) dopo aver posizionato un bicchiere sotto il portaltro. In questo modo eventuali
residui di caffè o impurità presenti nel portaltro si scioglieranno e verranno rimossi.
Lavare il disco in silicone (B) sotto l’acqua corrente piegandolo leggermente ai lati in modo da liberare il foro centrale da
eventuali residui di polvere di caffè che potrebbero ostruirlo (Fig. 15).
Con l’uso si può vericare nella sede di aggancio del portaltro una sedimentazione di fondi di caffè, che possono essere ri-
mossi con uno stuzzicadenti, con una spugnetta (Fig. 16), oppure lasciando scorrere acqua senza portaltro inserito (Fig. 5).
Eseguire l’operazione quando il tubo cromato è freddo per evitare scottature.
Svitare il dispositivo (G) dal tubetto, e lavarlo con acqua corrente. Il tubetto può essere pulito con un panno non abrasivo.
Riavvitare il cappuccinatore no alla ne della corsa. Se necessario ripulire con uno spillo il forellino di uscita del vapore.
Dopo ogni utilizzo erogare il vapore per alcuni secondi per liberare il foro da eventuali residui.
Si consiglia di pulire periodicamente l’interno del serbatoio con una spugna o un panno umido.
Togliere la griglia (P) e lavarla sotto l’acqua corrente; slare la vasca raccogligocce (R) dalla macchina, svuotarla e lavarla
sotto l’acqua corrente.
Pulire le parti sse della macchina usando un panno umido non abrasivo per non danneggiare la carrozzeria.
Una buona manutenzione ed una regolare pulizia preservano e mantengono efciente la macchina per un periodo maggiore
limitando notevolmente i rischi di formazione di depositi calcarei nell’apparecchio. Se nonostante ciò, dopo qualche tempo,
la funzione dell’apparecchio dovesse essere compromessa, in seguito all’uso frequente di acqua dura e molto calcarea, si
può procedere alla decalcicazione della macchina per eliminare il malfunzionamento. Utilizzate per questo scopo esclu-
sivamente il prodotto decalcicante NOCAL di Ariete a base di acido citrico. Questo prodotto si può reperire facilmente
nei centri di assistenza tecnica Ariete. Ariete non si assume alcuna responsabilità per danni ai componenti interni della
macchina da caffè arrecati dall’uso di prodotti non conformi a causa della presenza di additivi chimici. In caso di necessità
di una decalcicazione, osservate le indicazioni sul foglio di istruzioni del prodotto decalcicante.
In caso di messa fuori servizio della macchina occorre sconnetterla elettricamente, svuotare il serbatoio dell’acqua e la
vaschetta raccogligocce e ripulirla (vedi paragrafo “Pulizia dell’apparecchio”). In caso di rottamazione si dovrà provvedere
alla separazione dei vari materiali utilizzati nella costruzione della macchina e provvedere al loro smaltimento in base alla
loro composizione e alle disposizioni di legge vigenti nel Paese di utilizzo.

10
In caso di anomalie di funzionamento, spegnere immediatamente la macchina e slare la spina dalla presa elettrica.
C’è poca acqua e la pompa non
aspira. Vericare che il serbatoio sia ben inserito e controllare che il
livello dell’acqua nel serbatoio sia regolare.
Riempire con acqua naturale fresca no al livello indicato
“MAX”.
Foro di uscita vapore dello stilo
erogatore ostruito Stasare con uno spillo eventuali incrostazioni formatosi nel foro
dello stilo erogatore.
Probabilmente nel portaltro è
stata immessa una quantità ec-
cessiva di caffè macinato che ha
impedito di stringere a fondo il
portaltro nella sua sede.
Rimuovere e disinserire lentamente il portaltro perché l’even-
tuale pressione residua potrebbe provocare spruzzi o schizzi.
Ripulire la sede di aggancio con una spugnetta (Fig. 16). Ri-
petere l’operazione, immettendo nel ltro la giusta quantità di
caffè.
Sulla guarnizione della sede di ag-
gancio del portaltro sono rimasti
residui di caffè macinato.
Provvedere a ripulire la guarnizione con uno stuzzicadenti o
con una spugnetta (Fig. 14).
Il foro del disco in silicone è ottu-
rato. Lavare il disco in silicone (B) sotto l’acqua corrente piegandolo
leggermente ai lati in modo da liberare il foro centrale da even-
tuali residui di polvere di caffè che potrebbero ostruirlo (Fig. 15).
Il ltro contenente macinato ha i
forellini di uscita ostruiti. Rimuovere e disinserire lentamente il portaltro perché l’even-
tuale pressione residua potrebbe provocare spruzzi o schizzi.
Ripulire con uno spazzolino o uno spillo i forellini otturati del
ltro. Detergere il ltro utilizzando le pastiglie COFFEE CLEAN
di Ariete seguendo le istruzioni riportate nella confezione.
Cialda difettosa. Sostituire la cialda nel portaltro.
Il disco forato presente nella sede
di aggancio del portaltro ha i fori
ostruiti.
Azionare la macchina senza portaltro facendo deuire l’ac-
qua. Se l’acqua continua a non uscire uniformemente da tutti i
fori, eseguire la pulizia anticalcare utilizzando il prodotto Ariete
NOCAL reperibile nei centri di assistenza Ariete seguendo le
istruzioni riportate nella confezione.
Il ltro contenente macinato ha i
forellini di uscita ostruiti. Rimuovere e disinserire lentamente il portaltro perché l’even-
tuale pressione residua potrebbe provocare spruzzi o schizzi.
Ripulire con uno spazzolino o uno spillo i forellini otturati del
ltro. Detergere il ltro utilizzando le pastiglie COFFEE CLEAN
di Ariete seguendo le istruzioni riportate nella confezione.
Miscela di caffè macinata troppo
ne. Provare ad utilizzare miscele di caffè a grana più grossa.
Miscela di caffè troppo pressata. Pressare il caffè nel ltro con minor pressione.
Il serbatoio non è ben inserito. Inserire bene il serbatoio spingendolo a fondo.
Il foro del disco in silicone è ottu-
rato. Lavare il disco in silicone (B) sotto l’acqua corrente piegandolo
leggermente ai lati in modo da liberare il foro centrale da even-
tuali residui di polvere di caffè che potrebbero ostruirlo (Fig. 15).
C’è poca acqua e la pompa non
aspira. Vericare che il serbatoio sia ben inserito e controllare che il li-
vello dell’acqua nel serbatoio sia regolare. Riempire con acqua
naturale fresca no al livello indicato “MAX”.
Cialda difettosa. Sostituire la cialda nel portaltro.
Rottura della cialda. Togliere il portaltro, pulire la sede con una spugnetta e reinse-
rire una nuova cialda.
La miscela è stata macinata trop-
po grossa. Per ottenere un caffè più concentrato e più caldo, si deve usa-
re una miscela più nemente macinata. In ogni caso questo
problema si elimina grazie al Sistema Thermocream®, che as-
sicura sempre un caffè bollente ed una ricca crema, anche con
caffè macinato grosso.
11
Even if the appliances are made in conformity with the European regulatory specications in force and therefore all poten-
tially hazardous parts are protected. Carefully read these warnings and use the appliance only for the use it is designed for
in order to prevent accidents and damage. Keep this manual close by for future consultation. If you should decide to give
this appliance to other people, remember to also include these instructions.
The information provided in this manual is marked with the following symbols indicating:
Danger for children
Danger due to electricity
Danger of damage originating from other causes
Warning of burns
Warning – material damage
You can use the appliance for preparing coffee and cappuccino. This appliance is designed only for private use, and is
therefore to be considered unsuitable for commercial or industrial purposes. No other use of the machine is contemplated
by the manufacturer, which is exempt from any liability for all types of damages caused by improper use of the machine.
Improper use also results in any form of warranty being forfeited.
The construction characteristics of the appliance this publication refers to do not allow the user to be protected from a direct
jet of steam or hot water.
Danger of burns – When dispensing hot water and steam, do not direct the jets towards others or yourself. Hold
only the plastic part of the tube.
Use only containers made of material “for foods”.
• This appliance is designed only for private use, and is therefore to be considered
unsuitable for commercial or industrial purposes.
• We decline any responsibility resulting from misuse or any use other than those
covered in this booklet.
• We suggest you keep the original box and packaging, as our free-of-charge ser-
vice does not cover any damage resulting from inadequate packaging of the pro-
duct when this is sent back to an Authorised Service Centre.
• The appliance complies with Regulation (EC) No 1935/2004 of 27/10/2004 on the
materials in contact with food.
• The appliance can be used by children aged 8 years and up only if they are
monitored by a responsible person or if they have received instructions regarding
the appliance safe use and if they have understood the dangers which may arise
during the appliance use.

12
•
Cleaning and maintenance by the user must not be carried out by children unless
they are older than 8 years and are monitored during the operation. Children must
be supervised at all times to ensure they do not play with the appliance.
•
Always keep the appliance and the power cord out of the reach of children under
the age of 8 years.
• Do not leave the packaging near children because it is potentially dangerous.
• In the event that this appliance is to be disposed of, it is suggested that the power
chord is cut off. It is also recommended that all potentially dangerous components
are rendered harmless to prevent children hurting themselves when playing with
the apparatus.
• This appliance can be used by persons who have reduced physical sensory or
mental capabilities, or lack of experience and knowledge, only if they are moni-
tored by a responsible person or if they have received and understood instruc-
tions regarding the appliance safe use and if they have understood the dangers
which may arise during the appliance use.
• Do not let the power cord hang in a place where it could be grasped by a child.
• Before connecting the appliance to the power supply, make sure that the voltage
indicated on the plate on the bottom of the machine corresponds to the local
mains voltage.
• The use of extension leads, which have not been authorised by the appliance
manufacturer, may cause damage and accidents.
• Before lling the tank with water, remember to always disconnect the appliance at
the socket.
• If the electric cable is damaged it must be replaced by the manufacturer or its
Technical Assistance Service, or in any case by a person with similar qualica-
tions, in order to avoid any risk.
• Never let the live parts come into contact with water: this may cause a short cir-
cuit
• Unplug before any cleaning or maintenance operations.
• Do not immerse the appliance in water or other liquids.
• Always turn off the appliance and remove the power cable plug from the socket-
outlet before lling the tank with water.
• Do not lift the appliance by grasping its water tank or its tray, but only by grasping
its body.
• Choose a sufciently well lit and clean environment, with an easily accessible
electric socket.
• Avoid putting excessive quantities of water into the tank.
• Never leave the appliance unattended when it is connected to the power supply.

13
• The appliance must be used and rested on a stable surface.
• The appliance is not to be used if it has been dropped, if there are visible sign of
damage or if it is leaking. Do not use the appliance if the power cord or the plug
are damaged, or if the appliance is faulty. To prevent any accident, all repairs, in-
cluding the replacement of the power cord, must be carried out by an Authorised
Service Centre or, in any case, by qualied personnel.
• Never direct the steam or hot water jet towards parts of the body; handle the
steam spout with care: risk of scalding!
• The outer metallic parts of the appliance and of the lter holder must not be tou-
ched with the appliance in operation, because it could cause burns.
• If water does not come out of the lter holder, it may be because the lter is clog-
ged. In this case, remove and disconnect the lter slowly because any remaining
pressure can cause spillage or splashing. Then clean as explained in the relevant
paragraph.
• Place the machine on a stable surface where it cannot be knocked over.
• Never use the machine without water because the pump will burn out.
• Never ll the water tank with hot or boiling water.
• Do not place the machine on very hot surfaces or near open ames in order to
prevent damage to the body.
• The cable must not touch any hot parts of the machine.
• Do not use sparkling (carbonated) water.
• Use only pods that show the E.S.E. standard brand.
• Never put substances other than coffee powder in the lter (A). They could cause
serious damage to the appliance.
• Do not leave the machine at a room temperature below 0°C because the water
remaining in the boiler could freeze and cause damage.
• Never use the appliance outdoors.
• Do not expose the appliance to atmospheric agents (rain, sun …).
• Before cleaning the appliance always unplug it and allow it cool down. Clean only
with a non-abrasive cloth that has been slightly dampened with water, adding a
few drops of mild, non-aggressive detergent (never use solvents that damage
plastic).

14
A - Coffee powder lter J - Tank cover
B - Perforated silicone disc (Thermocream ®) K - Steam dispensing button
C - Powder dripper L - Coffee brewing switch / boiler temperature
indicator light
D - Filter holder M - Steam function switch / boiler temperature
indicator light
E - Pod lter N - On/Off button / ON-OFF indicator light
F - Pod dripper O - Removable water tank
G - Maxi Cappuccino attachment and wand for water and
steam supply
P - Cup-resting grill
H - Power cord + Plug Q - Coffee measure/presser
I - Machine body R - Drip tray
The following machine identication data are shown on the plate placed underneath the machine’s standing base:
• manufacturer and CE mark
• model (Mod.)
• serial number (SN)
• electrical supply voltage (V) and frequency (Hz)
• absorbed electric power (W)
• assistance toll-free number
Always give the model and serial number to the Authorised Service Centres when requesting assistance.
Check that the voltage of the domestic network is the same as that indicated on the technical information plate of the ap-
pliance. Place the appliance on a stable surface.
Wash the tank (O) on rst use and ll it with cool tap water (Fig. 2) to the level marked "MAX", taking care to push it into
place (Fig. 3).
Insert the plug into the socket, which must be earthed.
After lling the tank with cool tap water, start the machine by pressing the button (N) Fig. 4.
Place a container under the
hooking ange of the lter holder. Press and hold the steam dispensing button (K). Wait until water ows out of the lter holder
seat (Fig. 5). Release the steam dispensing button to stop the ow of water.
Insert in the lter holder (D), the dripper for powder (C), the perforated silicone disc (B) and the coffee powder lter (A) in
the order shown (Fig. 6).
Measure out the coffee in the lter and lightly press with the specially provided presser: completely ll two measures for two
cups of coffee, and ll only one for one cup. Insert the lter holder into its seat.
If an excessive amount of coffee powder is inserted inside the lter, the rotation of the lter holder can be difcult
and/or during the coffee brewing there may be leaks from the lter holder.
To have also the rst coffee very hot is advisable to let the lter holder heat into its housing it for a few minutes before making
coffee. This will not be necessary for the cups of coffee that follow.
Place one or two cups under the lter holder spouts (Fig. 8). When the indicator light of the boiler temperature switch (L)
turns on, the machine is ready to make coffee. To start the brewing, press the switch (L): the coffee will start coming out of
the spouts of the lter holder. To stop the brewing press the switch (L). The maximum dose for one cup of espresso is 50 ml.

15
As in professional coffee machines, do not remove the lter holder when the brewing is in progress; danger of burns!
Wait about ten seconds after the coffee has been dispensed before removing the lter holder; To remove it, turn it
slowly from right to left so as to prevent splashes or spurts of water or coffee.
When the machine is in standby mode, the indicator light of the boiler temperature switch (L) will turn off and turn on a
regular basis, showing the operation of the boiler thermostat, which is needed to maintain the best water temperature. It is
appropriate, for the rst coffee for the next ones, to start the coffee brewing, only when this indicator light is on.
To make the coffee with a pod it is necessary to remove the lter (A), the silicone disc (B) and the powder coffee dripper
(C) from the lter holder (A).
1 In the lter holder (A) insert the pods dripper (F) and the pod lter (E) (Fig. 17).
2 Place the pod in the lter ring (Fig. 18).
3 Push the pod towards the bottom of the lter with your ngers (Fig. 19).
4 The pod must be well centred and placed inside the lter.
5 Now it is possible to put the lter holder in its seat. Tighten the lter holder while making sure you have hooked it properly
onto the ange (Fig. 7).
6 The pod could remain stuck in the upper part of the machine after making the coffee and when removing lter holder. To
remove it, tilt the lter holder (Fig. 20) so the pod can fall onto it.
To always have a good coffee, you must purchase pods that show the E.S.E. compatibility mark.
It is recommended to ll the water tank before it is completely empty.
Turn off the machine. Unplug it from the socket-outlet. Remove the tank. Fill the tank up to the "MAX" mark with cool tap
water. Place the tank on the machine making sure it is securely inserted in and turn it on again.
In the event that the tank remained completely without water, it can happen that air enters the circuit preventing the ow
of coffee. To reactivate the machine it will be necessary to turn it off and let it cool. Place a container under the lter holder
hooking seat and turn on the machine.
Press and hold the steam dispensing button (K). Wait until water ows out of the lter
holder seat (Fig. 5).
Drain at least a cup of water from the coupling seat of the lter holder to reactivate the hydraulic circuit.
Release the steam dispensing button to stop the ow of water.
At this point the machine will resume normal operation.
If the machine is turned on but not in use, the auto-off function operates after about 30 minutes. This function puts the
machine in standby. The indicator light (N) turns off. To turn on the machine again, press the ON/OFF button (N) to return it
in position 0 and then press it to set it in position 1 (Fig 4). At this point the indicator light (N) turns on and the machine will
be in operation again.
To prepare a cup of coffee right after making cappuccino, it is necessary to bring the boiler back to the coffee preparation
temperature by performing these operations: press the steam function switch (M). You may notice that the indicator lamp
is on. This luminous indication serves to tell you that the temperature in the boiler is still high, i.e. it is still that for steam;
you must therefore wait a few seconds until the lamp turns off. If you want to cool down the boiler faster, place a container
underneath the cappuccino maker, press switch (L) and at the same time keep the cock (K) open; Make water come out of
the Maxi Cappuccino device until when the indicator lamp turns back on; Now close the cock (K) and turn the switch (O) off.
Wait for the lamp (L) to turn off before making another cup of coffee.
Press the steam function switch (M).
Place a glass under the Maxi Cappuccino device (G), Fig. 12. Wait until the boiler
temperature indicator light of the switch (M) turns on.

16
Press and hold the steam dispensing button (K)
: rst a bit of water will come out and immediately after a steam jet whose
intensity increases within a few seconds.
Release the steam dispensing button to stop the steam spurt.
Place the milk contai-
ner to mount (or liquid to be heated) under the Maxi Cappuccino device (G). Immerse deeply the stylus into the milk jug (Fig.
13) and press again the button (K) until you obtain the desired result. During these operations, you will see that the boiler
temperature indicator light of the switch (M) turns on and off periodically, indicating the action of the thermostat which main-
tains the proper temperature of the boiler for steam dispensing.
Release the steam dispensing button to stop the steam spurt
.
The ground coffee in the lter holder has to be pressed lightly. Whether the coffee is stronger or weaker depends on the
degree the coffee is ground, the quantity put into the lter holder and the pressing. Just a few seconds are needed for the
coffee to ow down into the cups. If the dispensing time is longer, this means that the coffee is ground too ne or that the
coffee put into the lter holder has been pressed too much.
After performing the operations described in the "Preliminary steps for use" chapter, place a cup underneath the Maxi Cap-
puccino wand (G). Press the coffee brew button (L).
Press and hold the steam dispensing button (K);
in this way hot water
will come out of the Maxi Cappuccino device. The maximum quantity for two cups is 200 ml.
All cleaning operations described below must be performed with the machine off and with the electric plug discon-
nected from the socket-outlet.
Regular maintenance and cleaning preserve and keep the machine efcient for a longer amount of time. Never
wash machine components in the dishwasher. Do not use direct jets of water.
All operations must be performed when the machine is cold.
Check that the holes are not clogged and if so, clean them with a small brush (Fig. 14). Dispense boiling water from the lter
holder with the lter inside, without coffee grounds, after placing a glass underneath the dispenser in order to dissolve or
remove any coffee residue or impurities.
Slowly remove and disconnect the lter holder because any remaining pressure could cause splashes or squirts.
It is advisable to thoroughly clean the lter (A) about every 3 months using Ariete COFFEE CLEAN detergent tabs, which
can be found at retail stores and the Authorised Service Centres, following the instructions inside the package. As an
alternative, you:
• Put a dishwasher detergent tab into the lter (without coffee) when the machine is hot (after heating for at least ve minu-
tes).
• Couple the lter holder to the machine and put a container underneath the lter holder.
•
Press and hold the steam dispensing button (K). Wait until water ows out of the lter holder seat (Fig. 5).
Dispense water
for 15-20 seconds.
• Release the steam dispensing button to stop the ow of water. Let the tablet work for at least 15 minutes, keeping the lter
holder inserted on the machine.
• Repeat the water dispensing operation by operating the pump for about 15-20 seconds, and then letting it rest for another
15-20 seconds, until two tanks of water are used up.
• Remove the lter holder from the machine, remove the lter and rinse it well under running tap water.
• Turn off the machine, disconnect the power cable from the socket-outlet and clean the coupling seat of the lter holder
with a sponge in order to remove any detergent residue from the shower disc.

17
• Turn the machine back on, couple the lter holder once again and dispense at least 2 cups of water again to complete the
rinsing.
If the coffee machine is used daily, it is advisable to carry out the cleaning operation at least every three months.
Put the pods dripper (F) and pod lter (E) inside the lter holder (D). With the lter holder hooked, without the pod inserted,
start the dispensing by pressing the switch (L) after placing a glass under the lter holder. In this way any coffee residue or
impurities present in the lter holder will dissolve and be removed.
Wash the silicone disc (B) under running water, bending it slightly on the sides in order to free the centre hole of any residue
of coffee grounds that could clog it (Fig. 15).
With time, coffee residue may accumulate on the lter holder seat. It can be removed with a toothpick, a sponge (Fig. 16), or
by letting water run through without tting the lter holder (Fig. 5).
Perform this operation when the chrome-plated pipe is cold so as to prevent burns.
Unscrew the device (G) from the small pipe and wash it with running water. The small pipe can be cleaned with a non-
abrasive cloth. Screw the cappuccino maker back on as far as it will go. If necessary, clean the small steam outlet hole
again with a pin. After use, always let the steam nozzle run for a few seconds so to free the outlet from any possible residue.
Periodically clean the inside of the tank with a sponge or damp cloth.
Remove the grill (P) and wash it under running water; remove the drip tray (R) from the machine, empty it and wash it under
running water.
Clean the xed parts of the machine using only a damp, non-abrasive cloth so as to not damage the body.
Good maintenance and regular cleaning preserve and keep the machine efcient for a longer amount of time, considerably
limiting the risks of lime deposits forming inside the appliance. However, should your coffee machine fail to work properly
as a result of the frequent use of hard, high calcium content water, you may perform a decalcication procedure to restore
its operational efciency. For this purpose you must use only Ariete’s NOCAL, citric acid-based decalcifying products. This
product is easily found at the Ariete technical service centres. Ariete does not assume any responsibility whatsoever for
damage to components inside the coffee machine caused by the use of non-compliant products containing chemical addi-
tives. Should you need to decalcify your appliance, please follow the instructions which come with the decalcifying product.
If you want to put the machine out of service, you must disconnect it electrically, empty the water tank and drip tray and
clean it (see the paragraph on “Cleaning the appliance”). In the case of scrapping, you must separate the various materials
used in making the machine and dispose of them based on their composition and on the legal provisions in force in the
country of use.

18
If there are problems with operation, immediately turn off the machine and unplug it from the socket-outlet.
There is little water and the pump
does not suck it up. Make sure the tank is rmly attached and check that the water
level in the tank is normal.
Fill with cool tap water up to the "MAX" level mark.
The steam exit hole on the dispen-
ser wand is clogged Unclog any deposits that may have formed in the hole of the
dispenser wand with a pin.
Probably an excess amount of
ground coffee has been placed in
the lter ring preventing the lter
ring from being correctly tightened
into its housing.
Slowly remove and disconnect the lter holder because any
remaining pressure could cause splashes or squirts. Clean the
coupling seat with a sponge (Fig. 16). Repeat the operation pla-
cing the correct quantity of coffee in the lter.
Residues of ground coffee have
remained on the gasket of the l-
ter holder coupling seat.
Clean the seal with a toothpick or a sponge (Fig. 14).
The hole of the silicone disc is
clogged. Wash the silicone disc (B) under running water, bending it
slightly on the sides in order to free the centre hole of any resi-
due of coffee grounds that could clog it (Fig. 15).
The exit holes of the lter contai-
ning coffee grounds are clogged. Slowly remove and disconnect the lter holder because any
remaining pressure could cause splashes or squirts. Clean the
clogged lter holes with a small brush or a pin. Clean the lter
using Ariete COFFEE CLEAN tabs, following the instructions
provided in the package.
Faulty pod. Replace the pod in the lter holder.
The perforated disc located in the
coupling seat of the lter holder
has clogged holes.
Turn on the machine without the lter holder, making the water
run. Turn on the machine without the lter holder, making the
water run. If the water still does not come out from all the ho-
les evenly, carry out the descaling cleaning operation using the
Ariete NOCAL product found at Ariete service centres, following
the instructions provided in the package.
The exit holes of the lter contai-
ning coffee grounds are clogged. Slowly remove and disconnect the lter holder because any
remaining pressure could cause splashes or squirts. Clean the
clogged lter holes with a small brush or a pin. Clean the lter
using Ariete COFFEE CLEAN tabs, following the instructions
provided in the package.
The coffee blend is ground too
ne. Try using coarser coffee blends.
The coffee blend is pressed down
too much. amper coffee inside the lter using less pressure.
The tanks is not inserted well. Fit the tank securely by pushing it as far as it will go.
The hole of the silicone disc is
clogged. Wash the silicone disc (B) under running water, bending it
slightly on the sides in order to free the centre hole of any resi-
due of coffee grounds that could clog it (Fig. 15).
There is little water and the pump
does not suck it up. Make sure the tank is rmly attached and check that the water
level in the tank is normal. Fill with cool tap water up to the
"MAX" level mark.
Faulty pod. Replace the pod in the lter holder.
Broken pod. Remove the lter holder, clean the seat with a sponge and in-
sert a new pod.
The blend has been ground too
coarsely. A more nely ground blend must be used to obtain a more
concentrated and hotter coffee. Anyhow, this problem is easily
solved thanks to the Thermocream® System, which always
guarantees hot coffee accompanied by a reach cream, even
with coarsely ground beans.

19
Même si les appareils ont été réalisés en conformité avec les Normes européennes spéciques en vigueur, et que toutes
les pièces potentiellement dangereuses sont protégées, lisez avec attention ces avertissements et n’utiliser l’appareil que
pour ce que il a été conçu, an d’éviter les blessures et les dommages. Garder ce livret à porté de main pour les futures
consultations. Si vous désirez ensuite céder cet appareil à d’autres personnes, rappelez-vous d’inclure ces instructions.
Les informations reportées dans ce manuel sont marquées des symboles suivants qui indiquent:
Danger pour les enfants Avertissements sur les brûlures
Danger électrique Attention - dégâts matériels
Dangers provenant d’autres causes
L'appareil peut être utilisé pour préparer le café et le cappuccino. L’appareil est destiné seulement à un usage domestique
et ne doit en aucun cas servir à des ns commerciales ou industrielles. Le constructeur n’a prévu aucun autre usage de
l’appareil et il se dégage de toute responsabilité pour les dégâts de toute nature, générés d’une utilisation inappropriée. Un
usage inapproprié déterminerait également l’annulation de toute forme de garantie.
Les caractéristiques de construction de l’appareil, qui sont l’objet de cette publication, ne permettent pas de protéger l’utili-
sateur du jet direct de vapeur ou d’eau chaude.
Danger de brûlure – Pendant l’écoulement de l’eau chaude et de la vapeur, ne pas diriger le jet vers un tiers ou vers
soi. N’empoigner le tuyau que sur la partie en plastique.
Utiliser exclusivement des conteneurs en matériau “pour aliments".
• L’appareil est destiné seulement à une utilisation domestique et ne doit en aucun
cas être servir à des ns commerciales ou industrielles.
• Le constructeur décline toute responsabilité pour une utilisation erronée ou pour
des emplois autres que ceux prévus par ce livret.
• Il est conseillé de conserver l’emballage d’origine vu que l’assistance gratuite ne
joue pas pour les dommages causés par un emballage du produit non adéquat
lors de l’expédition à un service après-vente agréé.
• L’appareil est conforme au règlement (EC) N° 1935/2004 du 27/10/2004 sur les
matériaux en contact avec les aliments.
•
L’appareil peut être utilisé par les enfants de plus de 8 ans à condition qu’ils soient
suivis par un adulte responsable ou qu’ils aient été informés du fonctionnement de
l’appareil pour l’utiliser en toute sécurité et en toute conscience face aux dangers
pouvant découler de son utilisation.
• Le nettoyage et l’entretien effectués par l’utilisateur ne doivent pas être délégués
aux enfants, à moins qu’ils aient plus de 8 ans et soient surveillés par un adulte.
Il faut surveiller les enfants pour être certain qu’ils ne jouent pas avec l’appareil.

20
• Toujours conserver l’appareil et le cordon d’alimentation hors de la portée des
enfants de moins de 8 ans.
• Les éléments de l’emballage ne doivent pas être laissés à la portée des enfants
car ils représentent une source de danger.
• Lorsqu’on décidera de jeter cet appareil, il est recommandé de le mettre hors
d’usage en coupant le câble d’alimentation. Il est également recommandé de
protéger les parties susceptibles de constituer un danger spécialement pour les
enfants qui pourraient se servir de l’appareil pour jouer.
• L’appareil peut être utilisé par des personnes ayant des capacités physiques,
sensorielles ou mentales réduites, ou dépourvues d’expérience, de connaissan-
ce, à condition qu’elles soient suivies par un adulte responsable ou qu’elles aient
compris les instructions fournies concernant l’utilisation en toute sécurité et des
dangers pouvant découler de l’utilisation.
• Ne pas laisser le cordon pendre dans un endroit où il pourrait être saisi par un
enfant.
• Avant de brancher l’appareil au réseau d’alimentation, contrôler que la tension
indiquée sur la plaquette placée sous la machine corresponde bien à celle du
réseau local.
• L’utilisation de rallonges électriques non autorisées par le fabricant de l’appareil
peut causer des dommages et provoquer également des accidents.
• Avant d’effectuer l’opération de remplissage du réservoir d’eau, débrancher l’ap-
pareil de la prise de courant.
• Le cordon d’alimentation endommagé doit être remplacé par le constructeur ou
par son service Après-vente ou dans tous les cas par une personne ayant une
qualication équivalente, de manière à éviter tous les risques.
• Ne jamais mettre les parties sous tension en contact avec l’eau: cela pourrait
engendrer un court-circuit!
• Débrancher la prise de courant avant chaque intervention de nettoyage ou d’en-
tretien.
• Ne trempez pas l’appareil dans l’eau ni dans tout autre liquide.
• Toujours éteindre l’appareil et débrancher la prise du cordon d’alimentation élec-
trique avant de remplir le réservoir d’eau.
• Ne pas soulever l'appareil en le prenant par le réservoir d'eau ou par la cuvette
mais en le prenant par le corps.
• Choisir un endroit assez éclairé, propre et avec une prise de courant facilement
accessible.
• Eviter de verser dans le réservoir une quantité excessive d’eau.
• Ne laissez pas l’appareil sans surveillance lorsqu’il est branché.
Table of contents
Languages:
Other ARIETE Coffee Maker manuals

ARIETE
ARIETE cafe retro User manual

ARIETE
ARIETE Miro 1338 User manual

ARIETE
ARIETE AR1319 User manual

ARIETE
ARIETE Moka Aroma Espresso 1337 User manual

ARIETE
ARIETE 1313 User manual

ARIETE
ARIETE 1389A User manual

ARIETE
ARIETE 1388A User manual

ARIETE
ARIETE 1387A User manual

ARIETE
ARIETE You&Me User manual

ARIETE
ARIETE Caffe Novecento 1387 User manual

ARIETE
ARIETE 1380 User manual

ARIETE
ARIETE 1387A User manual

ARIETE
ARIETE 1342 User manual

ARIETE
ARIETE CAFFE NOVECENTO User manual

ARIETE
ARIETE Cafe User manual

ARIETE
ARIETE Cafe Chic User manual

ARIETE
ARIETE Picasso 1365 User manual

ARIETE
ARIETE 1389A User manual

ARIETE
ARIETE Mokita User manual

ARIETE
ARIETE Cafe Roma De Luxe User manual