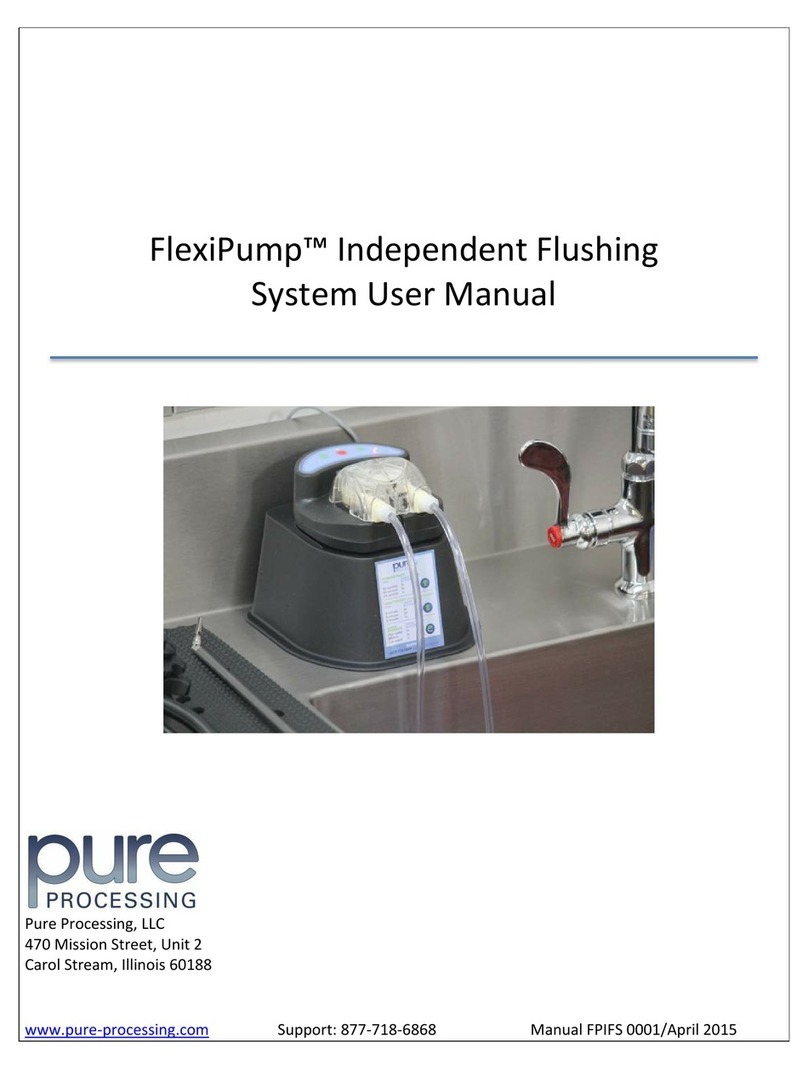
Pure Processing FlexiPump User manual

FlexiPump™ Independent Flushing System
User Manual
Pure Processing, LLC
130 East St. Charles Road, Unit C
Carol Stream, Illinois 60188
www.pure-processing.com
Support 877-718-6868 Manual FPIFS 0001/February 2023

OVERVIEW: FlexiPump™ Independent Flushing System
INSTALLATION
OPERATION
Keypad Settings
Connecting Devices
Tube Sets
MAINTENANCE
Disinfecting surfaces
Disinfecting tube sets
Changing tube sets
Conducting flow validation tests
TROUBLESHOOTING
REPLACEMENT ITEMS, ACCESSORIES
3
4
6
6
8
10
10
10
11
12
14
15
20
TABLE OF CONTENTS
FlexiPump™ Independent Flushing System User Manual © Pure Processing, LLC. 2023. All rights reserved.
2

The FlexiPump system is designed for use in a medical reprocessing area, and has been fully tested
for use with a wide variety of reusable lumened devices, including rigid and flexible endoscopes,
minimally invasive surgical devices, ocular and robotic devices, and suction tips.
Accessories are available from Pure Processing to adapt the system to multiple additional uses. The
FlexiPump tube sets connect to most devices, with or without luer locks and/or ports. A pressure
relief feature is included to help protect scopes during flushing. The FlexiPump system can be used
alone or can augment existing pumps.
OVERVIEW
FlexiPump™ Independent Flushing System
DESCRIPTION
Components
Removable cap with side tabs
Electric cord
Pump housing
Internal Components
Supply Tube (connects to medical devices)
Rotor
Squeeze Tube
Key Pad
Forward Flush button
Stop Cycle button
Speed Control button
Impact Cycle button
FlexiPump™ Independent Flushing System User Manual © Pure Processing, LLC. 2023. All rights reserved.
3

INSTALLATION
Set-up: on Multi-Pump Bracket
FlexiPump™ Independent Flushing System User Manual © Pure Processing, LLC. 2023. All rights reserved.
4
To install your multi-pump bracket on your wall, insert the anchor in the bracket holes. Line up
the pegboard holes and the anchor, and screw in the steel bracket securely.
To install on solid walls, position the bracket onto the wall, and note where the drilling will be
located. Pre-drill a 1/4” hole will into the area. Line up the bracket holes to the pegboard holes,
and screw in steel bracket securely.
The FlexiPump system can be inserted into the corner well of the PureStation Sink Insert, or along
the side ridges molded into the sink.
Set-up: on Pure Station™ Sink Insert
The FlexiPump unit is not
meant to be submerged; use
caution when installing near
water.

FlexiPump™ Independent Flushing System User Manual © Pure Processing, LLC. 2023. All rights reserved.
5
Once your FlexiPump system has been installed in its preferred place, remove the black power cord
from your FlexiPump box. Take the barrel end of the gray cord found at the back of the FlexiPump
and insert the barrel end of the black power supply to the gray cord. Make sure there are no frays in
the wires.
Once both barrel cords have been tightly secured, plug the power supply into your wall outlet. Run
the forward flush on your FlexiPump to make sure that the power has been installed correctly.
Set-up: Power Supply
Do not submerge the power or
barrel cords. Please use caution
when installing near water.

Speeds
Low speed
This setting is designed for small channels, 1 to 3 millimeters (mm) in size. This
setting will flush a total of 200 mL of fluid in 30 seconds. Do not turn up the
speed when you hear the motor slowing down. The smaller channels cannot
accommodate any higher flow volume. Trying to force it to go faster will cause a
back-up in the motor and will make the pressure release valve drain fluid.
Medium speed
This setting is designed for channels that are 2 to 3 mm in diameter. This setting
will flush a total of 375 mL of fluid in 30 seconds. Do not turn up the speed if you
hear the motor slowing down. However, if there is fluid draining from the pressure
relief valve, you can consider slowing the pump speed.
High Speed
This setting will flush a total of 500 mL of fluid in 30 seconds. This is used for
channels larger than 4 mm in diameter.
FlexiPump™ Independent Flushing System User Manual © Pure Processing, LLC. 2023. All rights reserved.
6
Too much pressure and speed
for small devices can result in
tube set damage.
Because fluid will take the path of least resistance, it is important that instrument channels attached to a FlexiPump
system are approximately the same diameter, to assure consistent flushing into all the devices. For this reason, do
not attach a large-diameter lumen to one lead and a small-diameter lumen to another on the same pump system.
OPERATION
Keypad Settings
Key Pad Operation
Speed Control
Push the button ONCE for low (500 ml per minute), TWICE for
medium (750 ml per minute), and THREE TIMES for high speed
(1,000 ml per minute).
Forward Flush
Press the button ONCE for 30 seconds, TWICE for 60 seconds
and THREE TIMES for 90 seconds.
Stop
Press to stop all pump action and cancel any cycle.
Impact
Press for clogged devices. Press the button ONCE for two (2)
minutes, TWICE for four (4) minutes, and THREE TIMES for six
(6) minutes.
For a video demonstration, visit our
YouTube page at:
youtube.com/user/pureprocessing

FlexiPump™ Independent Flushing System User Manual © Pure Processing, LLC. 2023. All rights reserved.
7
The Impact cycle is used ONLY for devices that are clogged. The
FlexiPump tube set must be decontaminated after each Impact Cycle run.
OPERATION
FlexiPump Cycles and Keypad Settings
Most frequently used button; time controlled:
• 1 LED light- 30 seconds
• 2 LED lights- 60 seconds
• 3 LED lights- 90 seconds
Stops the flushing
It’s important to control the volume without too much pressure:
• 1 LED light- Low- for small devices 1-2 mm diameter, such as suction tips
and eye instruments (500 ml** per min.)
• 2 LED lights- Medium- medium devices 2-3 mm diameter (750 ml** per min.)
• 3 LED lights- High- large devices, 4 mm and larger diameter, such as
laparoscopic, robotic, or orthopedic lumens (1000 ml** per min.)
**Milliliters flushed is the total volume. Example: if three devices are flushed at
the same time on high speed – each device flushes 333 ml per minute.
Used on devices that have material clog or impact. The impact cycle will create a push and
pull pressure- moving in a forward direction, and then stopping to reverse and create
suction. This feature will allow the clog to soften up and allow you to push a brush through.
Time controlled:
• 1 LED light: 2 minutes
• 2 LED lights: 4 minutes
• 3 LED lights: 6 minutes
Forward Flush
Speed/Volume
Impact Cycle
Stop
KEY PAD FUNCTIONS

Many lumened/channeled devices can be properly connected and flushed with the FlexiPump system.
OPERATION
Connecting Devices
For devices with luer locks:
Twist the FlexiPump tube collar onto the
device with a luer, until locked.
Flush the device following manufacturer’s
recommendations.
FlexiPump™ Independent Flushing System User Manual © Pure Processing, LLC. 2023. All rights reserved.
8
For devices with luer ports:
Pull the tube collar back.
Insert the slip tip into the device.
Flush according to manufacturer’s
recommendations.
For devices without luer locks or ports:
Use a cup adaptor to create a tight seal.
Flush according to manufacturer’s
recommendations.
For devices with female luer locks:
Use a female-to-female luer lock adapter.
Flush according to manufacturer’s
recommendations.

It is important to follow the manufacturer’s instructions for use (IFU) for each flexible endoscope. The
FlexiPump system replaces the syringe flushing method in the pre-cleaning sections of these IFU.*
The injector tube (or suction channel tube in this example)
is used to inject reprocessing fluids into the instrument
channel, suction channel, and air/water channels of the
endoscope. It is also used to flush air through these chan-
nels to expel fluids.
Follow the device manufacturer’s IFU to attach the injector
tube to the scope.
FlexiPump™ Independent Flushing System User Manual © Pure Processing, LLC. 2023. All rights reserved.
9
Attach the FlexiPump tube set luer locks to the suction channel port
and air/water port of the injector tube. Directions may vary depending
on the scope and the manufacturer.
Cap off all unused tubes on the FlexiPump Tube Set. If there are two
channels on the endoscope, place a FlexiPump end cap on the end
of the third FlexiPump tube lead. If you are flushing only one channel
or lumen, cap off the other two FlexiPump tube leads with luer end
caps.
IMPORTANT
Most endoscope manufacturers specify how much cleaning solution to flush through
the device. Follow IFU’s to prepare the cleaning solution. Carefully monitor all device
exit points for flushing cleaning solution to ensure copious flushing.
Be sure to rinse devices per manufacturer’s IFU.

OPERATION
Tube Sets
FlexiPump™ Independent Flushing System User Manual © Pure Processing, LLC. 2023. All rights reserved.
10
If the pump sounds or looks stressed,
turn the speed setting down to avoid
unnecessary wear on the motor.
PSI Settings
Please refer to the manufacturer’s IFU for each instrument’s pressure requirements. The FlexiPump
system can be used with a low-pressure tube set or a higher-pressure tube set. In general, smaller
flexible devices (urology scopes and ocular instruments, for example) require lower pressure.
There are multiple leads on any FlexiPump tube set. If any tubes are not in use, be sure they are
secured with end caps provided in the tube set.
PLEASE NOTE: The FlexiPump Independent Flushing System is intended for manual and flushing of lumened
devices. It is not for final treatment and does not replace manual brushing and rinsing. Refer to each medical device
manufacturer’s instructions for use for complete cleaning requirements.
MAINTENANCE
Disinfecting surfaces
The surfaces of the system should be cleaned daily and whenever there is visible soil.
Step 1 Wipe all external surfaces with a ready to use disinfectant, including the tubing, and allow
them to air-dry.
MAINTENANCE
Set-up: tube sets
The drop-down tube on each new tube set is 30 inches long.
If the tube is too long for your sink, it can be cut to shorten it.
Each FlexiPump tube set comes with two, three, or five leads,
each of which can be attached to an instrument. You can use
them all at once. If you have fewer than three devices to flush,
you can cap off the unused lead(s) to ensure appropriate pres-
sure into the lead(s) with attached devices. Use the end cap
provided with your tube set. You may also re-use end caps from
other FlexiPump tube sets.
For a video demonstration, visit our website.

MAINTENANCE
Disinfecting the tube sets
FlexiPump™ Independent Flushing System User Manual © Pure Processing, LLC. 2023. All rights reserved.
11
For a video demonstration, visit our website.
Disinfecting Tube Sets
FlexiPump™ Independent Flushing System
Size Quan�ty Product ID
24 ounces 15 bo�les per case PSC240-1
1 gallon 4 bo�les per case PSC128-1
STEP 1 Pour 500mL of your ready to use disinfectant into an open, clean container.
STEP 2 Place the drop down tube into the container with disinfectant, assuring it's fully submerged.
STEP 3 Press the forward flush button to begin filling tube set with disinfectant. Run at least 100mL of
disinfectant through the tube leads. Press STOP.
STEP 4 Attach end caps onto all the tube leads and set the speed control on Low. Position your pressure
relief valves over a container or sink bay. Run a Forward Flush until disinfect is expelled through the pressure
relief valves. Press STOP. Your tubes are now completely filled with disinfectant.
STEP 5 The disinfectant should remain inside tubing for the contact time of the disinfectant.
STEP 6 After the contact time has elapsed, in a empty sink basin, point the tube leads downward. Slowly
take off the end caps. Some pressure will have built up inside, so use caution.
STEP 7 Run the remainder of the disinfectant through the tube sets.
STEP 8 Fill a container with 500 mL of clean water and place the drop down tube inside. Rinse at least
500mL through the tube leads to ensure a proper rinse.
For more information,
call 877.718.6868 or
www.pure-processing.com
Bleach or alcohol
based disinfectants
are not compatible
with the FlexiPump
Irrigation Tube Sets.

MAINTENANCE
Changing tube sets
FlexiPump™ Independent Flushing System User Manual © Pure Processing, LLC. 2023. All rights reserved.
12
Tube Set Instructions
1. Infection Prevention
Hard water deposits could potentially build up on the inside surface of the tube set.
2. Reduced Flow Rate
The squeeze tube can lose its elasticity with time and frequent use.
3. Reduced Pump Life
The factory-applied tube set lubricant eventually wears away, resulting in more resistance
and more work for the pump. This can reduce the pump’s overall useful lifetime.
PHONE 877.718.6868 WEB www.pure-processing.com
The Importance of Changing Tube Sets
Each tube set will include a 30 day timestrip®attached.
Best Practice Solution
Whenever you change a tube set, write your initials and expiration date on the back
of the timestrip®label.
Inititals:
Expiration Date:

MAINTENANCE
Step-by-Step Instructions for Replacing a Tube Set
FlexiPump™ Independent Flushing System User Manual © Pure Processing, LLC. 2023. All rights reserved.
13
Step-by-Step Instructions for Replacing a Tube Set
PHONE 877.718.6868 WEB www.pure-processing.com
Thread your new tube set
around the Tube Rotor (as
pictured above). It is important
that the red tube component is
on the right side in this step.
STEP 4
Place the new tube set and rotor
inside the pump cap. Properly
align the tube set fittings so that
they are properly situated in the
cap fittings.
STEP 5
Flip the Cap right-side up.
Notice the red component is on
the left side now.
STEP 6
TUBE SET/CAP FITTINGS
Remove the Pump Cap by
pressing on both side tabs and
pulling gently.
STEP 1
Flip the Pump Cap upside down
(as pictured above) and unthread
the tubing from the Tube Rotor.
STEP 2
Now that the old set has been
taken out, remove the Tube
Rotor from the Pump Cap.
STEP 3
PUMP CAP TUBE ROTOR
Press on both sides of the
Pump Cap and place it back
onto the base, making sure
that it snaps down fully.
FINAL STEP
If you experience difficulty
snapping the cap into place, try
activating the “forward flush”
button and then proceed to
push the cap down until it
fastens into place properly.
TIP
FORWARD FLUSH

MAINTENANCE
Conducting a Flow Validation Test
FlexiPump™ Independent Flushing System User Manual © Pure Processing, LLC. 2023. All rights reserved.
14
The flow validation will test every speed on the FlexiPump: low, medium, and high for 30 seconds each
to assure your FlexiPump is dispensing the right amount of liquid. We recommend running the flow
validation test at least once a day. You may use the log provided in the back of this manual to keep
track of your flow validation tests.
Step 1 Place the down tube into a container of water that contains at least 1000mL of water. Remove
all the end caps from the 3 tube leads.
Step 2 Run an initial Forward Flush for at least 30 seconds on high speed, ensuring water is dispensed
from each tube lead (indicating the tubing is properly primed).
Step 3 Place the 3 tube leads into the solution caddy container. Make sure to hold the 3 tube leads
into the container while the pump is running. This will measure how much liquid is dispensed
during the flush cycles.
Step 4 Make sure your Speed button is on the low setting, showing 1 LED light. Press the Forward
Flush button once to run the FlexiPump for 30 seconds on Low. Verify that at least 250mL of
water was dispensed.
Step 5 Empty the solution container and refill your container of water, assuring that you have at least
1000mL of water. Place the tube leads back into the solution container.
Step 6 Set your Speed button to medium, showing 2 LED lights. Press the Forward Flush button once
for a 30 second cycle. Verify that at least 375mL of water was dispensed.
Step 7 Empty the solution container and refill your container of water, assuring that you have at least
1000mL of water. Place the tube leads back into the solution container.
Step 8 Set your Speed button to high, showing 3 LED lights.
Press the Forward Flush button once for a 30 second
cycle. Verify that at least 500mL of water was dispensed.
If the pump does not pass the flow
validation test, please see page 16
for troubleshooting assistance.
Time Speed Water Dispensed (includes up
to 10% approved variance)
30 seconds Low 225-250mL allotted
30 seconds Medium 337.5-375mL allotted
30 seconds High 450-500mL allotted

TROUBLESHOOTING
FlexiPump™ Independent Flushing System User Manual © Pure Processing, LLC. 2023. All rights reserved.
15
Problem Recommendation Notes
Power to the unit, but
buttons don’t work
Disconnect the black and gray cords at the barrel connector. Reconnect
making sure they are tight. If there is no power to the unit, slightly turn
the adapter to engage the two and tighten. Repeat as necessary. Leave
the unit to cool for thirty minutes.
Contact Pure Pro-
cessing Support for
more help resolving
this issue.
Rotor is spinning but
no solution is coming
out of the end of the
device
Make sure your drop-down tube is fully submerged, and the correct end
of the tubing is in the solution. Check for kinks in the tube set, and that it
is properly installed.
Contact Pure Pro-
cessing Support for
more help resolving
this issue.
My devices don’t seem
to be clean
Check the device manufacturer’s cleaning recommendations. Check
the disinfectant IFU, and confirm that all directions have been properly
followed.
The Impact Cycle isn’t
working for my clogs
The Impact Cycle works in conjunction with your detergent. Assure that
you’re using the right detergent for the soil clog.
I’m not flushing the
same amount of liquid in
my cycles
Conduct a flow validation test per page 15 in this user manual. Replace
your tube set.
Contact Pure Pro-
cessing Support for
more help resolving
this issue.
Water is leaking from
under the cap
Check your tube set for cracks, and that your tube set is installed
properly.
Contact Pure Pro-
cessing Support for
more help resolving
this issue, or consult
your warranty sheet
for tube set replace-
ments.
One or more
components on the
tube set are broken
Replace your tube set. Contact Pure Processing to discuss replacing
your tube set according to the warranty replacement policy.
System makes a lot of
noise
Use a surface liner to cushion vibrations, or install on a back wall to
remove countertop noise.
Unit randomly stopped
while flushing
The FlexiPump uses timed cycles; assure that the pump stopped before
the timed cycle elapsed. Unplug your unit and assure barrel connectors
are fully engaged. Run a new cycle.
Contact Pure Pro-
cessing Support for
more help resolving
this issue.
Pump cap will not stay
locked in the base Replace your cap and assure your tubing is fully installed in the cap.
Contact Pure Pro-
cessing Support for
more help resolving
this issue.
Facilities that have high volume should consult with
their representatives on the appropriate amount of
FlexiPumps for their department.

TROUBLESHOOTING
FlexiPump™ Independent Flushing System User Manual © Pure Processing, LLC. 2023. All rights reserved.
16
Issue: My FlexiPump is failing its daily flow validation test.
Are the results from your flow validation test within
a 10% variance range of the stated volumes on
page 14 of your flow validation test?
YES
The FlexiPump flow validation test allows for up to
a 10% variance in the stated test results due to age,
general use, electrical amperage, and other factors.
NO
My results are lower than what’s stated
in the variance range.
Do you disinfect your tubing on a
daily basis with a pre-approved disin-
fectant, such as ProSpray?
Do you change your tube sets
monthly?
YES NO
Tube sets that are disinfected with the
wrong disinfectant can result in damage
and incorrect flow validation testing.
Begin disinfection with ProSpray, and
change your tube sets. Re-run your test.
Tubing that is not changed monthly can
result in less elastic tube sets, which
can cause variances in flow validation
results. Change your tube sets monthly
and test a new tube set. Re-run your test.
Is your drop-down tube fully submerged?
Is your tubing with in its 30-days use?
Is your tubing leaking, torn, or damaged?
Are you using a three-prong rotor?
Did you fully prime your tube set by running an
initial Forward Flush on High speed for 30 seconds?
YES
Call your Pure Processing representative
for next steps in troubleshooting.
NO
Reconduct your test results with tubing that is
primed, fully submerged under water, with the
correct rotor. Discard any damaged tubing.

TROUBLESHOOTING
FlexiPump™ Independent Flushing System User Manual © Pure Processing, LLC. 2023. All rights reserved.
17
Issue: No fluid is coming from my tube sets/ my tube sets are leaking.
Do you change your tube sets on a monthly basis?
Do you disinfect your tube sets?
Is your drop down tube fully submerged?
YES
Are your tube sets leaking?
NO
Make sure your drop down tube is fully
submerged. Replace your tube sets.
YES, at the valve
Replace your tube sets, and
ship them to Pure Processing.
If there is a defect found, it is a
warranty tube set.
YES, at the base
of the pump
Are your tube sets installed
properly?
Are the cap fittings secure?
Do you still see zip ties on
the tube sets at the cap
fittings?
YES, at the tube leads
Replace your tube sets, and
ship them to Pure Processing.
If there is a defect found, it is a
warranty tube set.
TUBE SET RIP
Replace your tube set. Lower
your speed, watch your pres-
sure, and make sure your tube
sets are well lubricated.
INSTALLATION ERROR
Fix the install error until
leaking is resolved.

TROUBLESHOOTING
FlexiPump™ Independent Flushing System User Manual © Pure Processing, LLC. 2023. All rights reserved.
18
Issue: My pump has a red blinking light.
Walk through resetting the FlexiPump
unit. Remove the pump cap from the base,
and use the pump rotor to manually turn
the rotor in any given direction.
Did the unit reset properly? Is the red
blinking light error gone?
NO
Power cord assessment:
Is there any white residue on your power cord (hard
water deposits interfering with the connection)?
Is there kinking or fraying on your power cord?
Does your power cord have a desk or countertop box?
YES
The pump has been properly reset.
Continue using the pump as intended.
Monitor the power cords, pressure, cap
leads, and water with added precaution.
NO apparent issues with
the power cord
Leave unit overnight to cool.
Is there still a red blinking light?
YES
Call Pure Processing to learn
more about resolving this issue.
NO
The pump has been properly reset.
Continue using the pump as intended.
Monitor the power cords, pressure, cap
leads, and water with added precaution.
YES
Replace your power cord.

TROUBLESHOOTING
FlexiPump™ Independent Flushing System User Manual © Pure Processing, LLC. 2023. All rights reserved.
19
Issue: No power to my FlexiPump system
Is there any white residue on your power cord (hard wa-
ter deposits interfering with the connection)?
Is there kinking or fraying on your power cord?
Does your power cord have a desk or countertop box?
NO apparent issues with the
power cord
How is your FlexiPump installed?
YES, issues as mentioned above
Replace your power cord
WALL
Call Pure Processing customer
service. You will be prompted
with questions to learn how your
FlexiPump System is being used.
PURESTATION
Do you hear any water when you
shake your FlexiPump?
Did you ever experience a red blinking
light, or did your pump immediately lose
its source of power?
Call Pure Processing customer service. You
will be prompted with questions to learn how
your FlexiPump System is being used.

REPLACEMENT ITEMS, ACCESSORIES
FlexiPump™ Independent Flushing System User Manual © Pure Processing, LLC. 2023. All rights reserved.
20
Product Product Code
FlexiPump™ Irrigation Tube Set Two-Lead, 15 psi or 30 psi; box of 6
FlexiPump™ Irrigation Tube Set Two-Lead, 15 psi or 30psi; single
FXITS-0215psi6-PH
FXITS-0230psi6-PH
FXITS-0215psi-PH-01
FXITS-0230psi-PH-01
FlexiPump™ Irrigation Tube Set Three-Lead, 15 psi or 30 psi; box of 6
FlexiPump™ Irrigation Tube Set Three-Lead, 15 psi or 30psi; single
FXITS-0315psi6-PH
FXITS-0330psi6-PH
FXITS-0315psi-PH-01
FXITS-0330psi-PH-01
FlexiPump™ Irrigation Tube Set Five-Lead, 15psi; box of 6
FlexiPump™ Irrigation Tube Set Five-Lead, 15psi; single
FXITS-0515psi6-PH
FXITS-0515psi-PH-01
FlexiPump™ Power Supply FPPS-01
FlexiPump™ Pump Cap (1 pack of 10 caps) FLX-CAP-PH
FlexiPump™ Pump Rotor (1 pack of 10 caps) FLX-ROTOR-PH
Other manuals for FlexiPump
1
Table of contents
Other Pure Processing Medical Equipment manuals